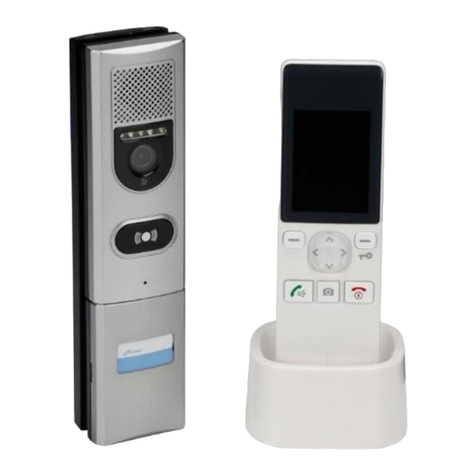
Perel SCAMSETW5 User manual

SCAMSETW5
WIRELESS COLOUR VIDEO DOOR PHONE
DRAADLOZE VIDEO-INTERCOM MET LCD-KLEURENSCHERM
INTERPHONE VIDÉO COULEUR SANS FIL
VIDEOPORTERO INALÁMBRICO CON PANTALLA LCD A COLOR
FUNK-VIDEO-TÜRSPRECHANLAGE MIT LCD-FARBDISPLAY
BEZPRZEWODOWY WIDEOFON Z KOLOROWYM EKRANEM LCD
SISTEMA DE VÍDEO PORTEIRO A CORES SEM FIOS
USER MANUAL 3
HANDLEIDING 12
MODE D'EMPLOI 21
MANUAL DEL USUARIO 30
BEDIENUNGSANLEITUNG 39
INSTRUKCJA OBSŁUGI 48
MANUAL DO UTILIZADOR 57

SCAMSETW5
V. 03 –04/04/2018 2 ©Velleman nv

SCAMSETW5
V. 03 –04/04/2018 3 ©Velleman nv
USER MANUAL
1. Introduction
To all residents of the European Union
Important environmental information about this product
This symbol on the device or the package indicates that disposal of the device after its lifecycle
could harm the environment. Do not dispose of the unit (or batteries) as unsorted municipal
waste; it should be taken to a specialized company for recycling. This device should be
returned to your distributor or to a local recycling service. Respect the local environmental
rules.
If in doubt, contact your local waste disposal authorities.
Thank you for choosing Perel! Please read the manual thoroughly before bringing this device into service.
If the device was damaged in transit, do not install or use it and contact your dealer.
2. Safety Instructions
Read and understand this manual and all safety signs before using this appliance.
This device can be used by children aged from 8 years and above, and persons with reduced
physical, sensory or mental capabilities or lack of experience and knowledge if they have been
given supervision or instruction concerning the use of the device in a safe way and understand
the hazards involved. Children shall not play with the device. Cleaning and user maintenance
shall not be made by children without supervision.
Always disconnect mains power when the device is not in use or when servicing or maintenance
activities are performed. Handle the power cord by the plug only.
3. General Guidelines
Refer to the Velleman® Service and Quality Warranty on the last pages of this manual.
Keep this device away from dust and extreme temperatures.
Protect this device from shocks and abuse. Avoid brute force when operating the device.
Familiarise yourself with the functions of the device before actually using it.
All modifications of the device are forbidden for safety reasons. Damage caused by user modifications
to the device is not covered by the warranty.
Only use the device for its intended purpose. Using the device in an unauthorised way will void the
warranty.
Damage caused by disregard of certain guidelines in this manual is not covered by the warranty and
the dealer will not accept responsibility for any ensuing defects or problems.
Do not use this product to violate privacy laws or perform other illegal activities.
Keep this manual for future reference.
4. Features
Wireless video door phone system. The outdoor camera module can be powered with an external power
supply or with the included battery pack if no mains is available.
The unique design allows you to install the outdoor camera module in any position.
The wireless indoor handheld module can be charged with the docking station
camera with white LEDs for night vision
two-way audio intercom
door can be opened through the handheld with optional electrical door lock: HAA272
recording function: image snapshot on the handheld device

SCAMSETW5
V. 03 –04/04/2018 4 ©Velleman nv
5. Overview
Refer to the illustrations on page 2 of this manual.
Outdoor Station
1
speaker
5
call key
2
LED
6
microphone
3
camera
7
battery pack
4
sensor light
Receiver
8
menu key
14
monitor key
9
accept key
15
microphone
10
LCD display
16
speaker
11
navigation key
17
battery compartment
12
unlock key
18
antenna
13
power/end key
19
antenna locking switch
LCD Display
a
battery level
e
signal strength
b
call ongoing
f
reject call
c
zoom
g
outdoor station 12 V power supply
d
low battery
h
outdoor station number
6. Batteries
CAUTION
Danger of explosion if battery is incorrectly installed or replaced. Replace only
with the same or equivalent type. Batteries (battery pack or batteries
installed) shall not be exposed to excessive heat such as sunshine, fire or the
like. Where the mains plug is used as the disconnect device, the disconnect
device shall remain readily operable.
Do not puncture batteries or throw them in fire as they may explode. Do not
attempt to recharge non-rechargeable batteries (alkaline). Dispose of batteries
in accordance with local regulations. Keep batteries away from children.
6.1 Receiver
CAUTION
Use rechargeable batteries only.
1. Open the battery compartment and install 3 x HR3/AAA batteries according to the polarity markings.
2. Close the battery compartment and connect the receiver to the charger to maintain the batteries
fully charged.
REMARK
Time and date must be reset whenever batteries are replaced.
6.2 Outdoor Station Battery Pack
CAUTION
Use alkaline batteries only.
1. Open the battery compartment and install 4 x LR6/AA batteries according to the polarity markings.
2. Close the battery compartment.
3. Remove the rubber gasket on the outdoor station and connect the battery pack.

SCAMSETW5
V. 03 –04/04/2018 5 ©Velleman nv
7. Installation
REMARK
Carefully choose your installation spot. Do not install near metal objects or
electrical appliances. Avoid objects between transmitter and receiver. Ideal
location is a central place with minimal obstructions.
Test the system before mounting.
7.1 Receiver
1. Connect the power cord to the charging dock. Connect the charging dock to a mains outlet.
2. The receiver can then be placed in the charging dock.
7.2 Outdoor Station
1. Choose a proper location considering the average height of visitors.
2. Choose whether to use the outdoor station with or without its battery pack. Choose the mounting
harness accordingly.
3. Mount the harness, either straight or at an angle.
4. Electrically connect the outdoor station if desired (recommended). Install the outdoor station in the
harness and fix.

SCAMSETW5
V. 03 –04/04/2018 6 ©Velleman nv
8. Lock Installation –Connection Diagrams
REMARK
Due to the outdoor station’s power consumption, it is recommended to use a
permanent power supply instead of using batteries. Do not use the wired
power supply and batteries simultaneously.
8.1 Normally Open
a
power supply –12 VDC
c
DC power for lock
b
power supply –GND
d
N.O. lock
8.2 Normally Closed
a
power supply –12 VDC
c
DC power for lock
b
power supply –GND
d
N.C. lock
9. Basic Operation
9.1 Switching the Receiver On/Off
Hold the power/end key pressed to switch the receiver on or off.

SCAMSETW5
V. 03 –04/04/2018 7 ©Velleman nv
9.2 Registering a New Outdoor Station
REMARK
The outdoor station and receiver have been synchronized at the factory. Below
instructions are for adding up to 3 more outdoor stations.
register
1. Press the menu key on the receiver, then select the register icon.
2. Press the call key on the outdoor station. Hold the register key pressed until the LED blinks.
3. When a tone is heard, the outdoor station has been successfully registered to the receiver.
The receiver can support up to 4 outdoor stations and display the registration (left: outdoor station n° 2
registered, right: 4 outdoor stations registered).

SCAMSETW5
V. 03 –04/04/2018 8 ©Velleman nv
9.3 Deleting a Registered Outdoor Station
1. In stand-by mode, simultaneously hold the accept and unlock keys pressed for 5 seconds.
2. The outdoor station has been deleted.
9.4 Changing the Unlocking Time
1. In stand-by mode, simultaneously hold the accept and menu keys pressed for 5 seconds.
2. Select the outdoor station with the navigation key.
3. Select the unlocking time with the up and down navigation keys.
4. Press the menu key to confirm.
9.5 Monitor Function
Press the monitor key to activate the camera on the outdoor station. Select the synchronized outdoor
station with the navigation key and confirm with the menu key.
9.6 Video Function
When the call button is pressed, the receiver will display the image picked up by the camera.
Press the power/end key to cancel the video feed or to end the conversation.
Press the accept key to conduct a video conversation.
Press and hold the monitor key to zoom in on the video feed.
REMARK
Video conversation will automatically end after 2 minutes.
Video feed will automatically end after 5 minutes.
9.7 Unlocking the Door
Press the unlock key to unlock the door.

SCAMSETW5
V. 03 –04/04/2018 9 ©Velleman nv
9.8 Disturb Mode
Hold the power/end key pressed for 3 seconds to disconnect the receiver from the outdoor station.
Connection will automatically resume after 5 minutes.
10. Menu Functions
10.1 Setting Date and Time
date and time
1. Press the menu key to enter the menu.
2. Select the date and time icon and press the menu key to confirm.
3. Select hour and minute, and adjust with the navigation key.
4. Press the menu key to confirm.
5. Set the date similarly.
10.2 Setting the Volume
volume
No Video Call Active
Press the left or right navigation key to decrease or increase the volume level.
During a Video Call
1. Press the menu key to enter the menu.
2. Select the volume icon and press the menu key to confirm.
3. Adjust the volume level with the navigation key.
4. Press the menu key to confirm.
10.3 Setting the Brightness
brightness
No Video Call Active
Press the up or down navigation key to decrease or increase the volume level.
During a Video Call
1. Press the menu key to enter the menu.
2. Select the brightness icon and press the menu key to confirm.
3. Adjust the brightness level with the navigation key.
4. Press the menu key to confirm.

SCAMSETW5
V. 03 –04/04/2018 10 ©Velleman nv
10.4 Activating or Deactivating the Key Tones
tone
1. Press the menu key to enter the menu.
2. Select the tone icon and press the menu key to confirm.
3. Activate or deactivate the key tones with the navigation key.
4. Press the menu key to confirm.
10.5 Activating or Deactivating the Snapshot Function
snapshot
The snapshot function will automatically take a snapshot whenever a visitor pushes the call button on the
outdoor station. Up to 50 snapshot can be saved into the memory. At full memory, the oldest snapshot
will be overwritten. Manually take a snapshot by pressing the monitor key.
1. Press the menu key to enter the menu.
2. Select the snapshot icon and press the menu key to confirm.
3. Activate or deactivate the snapshot function with the navigation key.
4. Press the menu key to confirm.
5. The unlock key will be lit if you have unreviewed snapshots.
10.6 Reviewing your Snapshots
review
This function allows you to save/delete the recorded snapshots.
1. Press the menu key to enter the menu.
2. Select the review icon and press the menu key to confirm.
3. Browse the snapshots with the navigation key.
4. To delete, select the snapshot with the menu key and confirm with the unlock key.
10.7 Resetting to Factory Settings
default setting
1. Press the menu key to enter the menu.
2. Select the default icon and press the menu key to confirm.
3. Select yes or no with the navigation key.
4. Press the menu key to confirm.
REMARK
Resetting to factory settings will delete all previously made settings.

SCAMSETW5
V. 03 –04/04/2018 11 ©Velleman nv
11. Cleaning and Maintenance
Unplug from the mains before cleaning.
Occasionally wipe with a damp cloth to keep it looking new. Do not use harsh chemicals, cleaning
solvents or strong detergents.
12. Technical Specifications
outdoor camera module
camera ............................................................................. 1/4" colour CMOS sensor
video resolution ............................................................................. 320 x 240 pixels
frame rate................................................................................................... 25 fps
viewing angle ................................................................................................ 135°
lens ................................................................................................f2.6 mm / F2.1
white balance ................................................................................................. auto
night view .......................................................................................... 6 white LEDs
transmitting range................................................................... up to 50 m (building)
power supply
adapter ................................................................................. 12 VDC (not incl.)
battery pack................................................. 4 x LR6/AA battery (LR6C, not incl.)
operating temperature ................................................................... -20 °C to +40 °C
dimensions
125 x 38 x 48 mm (without battery pack)
198 x 38 x 48 mm (with battery pack)
integrated microphone and speaker
wireless handheld
monitor.......................................................................................... 2.4" colour LCD
recording .................................................................................. snapshot recording
battery............................................................ 3 x HR3/AAA battery (HR3C/11, incl.)
docking station ............................................................... 7.5 V power adapter (incl.)
dimensions ................................................................................. 165 x 50 x 26 mm
integrated microphone and speaker
RED Declaration of Conformity
Hereby, Velleman NV declares that the radio equipment type [SCAMSETW5] is in compliance with
Directive 2014/53/EU.
The full text of the EU declaration of conformity is available at the following internet address:
www.velleman.eu.
Use this device with original accessories only. Velleman nv cannot be held responsible in the
event of damage or injury resulting from (incorrect) use of this device. For more info
concerning this product and the latest version of this manual, please visit our website
www.perel.eu. The information in this manual is subject to change without prior notice.
© COPYRIGHT NOTICE
The copyright to this manual is owned by Velleman nv. All worldwide rights reserved. No part
of this manual may be copied, reproduced, translated or reduced to any electronic medium or otherwise
without the prior written consent of the copyright holder.

SCAMSETW5
V. 03 –04/04/2018 12 ©Velleman nv
HANDLEIDING
1. Inleiding
Aan alle ingezetenen van de Europese Unie
Belangrijke milieu-informatie betreffende dit product
Dit symbool op het toestel of de verpakking geeft aan dat, als het na zijn levenscyclus wordt
weggeworpen, dit toestel schade kan toebrengen aan het milieu. Gooi dit toestel (en eventuele
batterijen) niet bij het gewone huishoudelijke afval; het moet bij een gespecialiseerd bedrijf
terechtkomen voor recyclage. U moet dit toestel naar uw verdeler of naar een lokaal
recyclagepunt brengen. Respecteer de plaatselijke milieuwetgeving.
Hebt u vragen, contacteer dan de plaatselijke autoriteiten betreffende de verwijdering.
Bedankt voor uw aankoop! Lees deze handleiding grondig door voor u het toestel in gebruik neemt. Werd
het toestel beschadigd tijdens het transport, installeer het dan niet en raadpleeg uw dealer.
2. Veiligheidsvoorschriften
Lees en begrijp deze handleiding en de veiligheidsinstructies vóór ingebruikname.
Dit toestel is geschikt voor gebruik door kinderen vanaf 8 jaar, door personen met fysieke,
zintuiglijke of verstandelijke beperkingen, of door personen met gebrek aan ervaring en kennis,
op voorwaarde dat dit onder toezicht gebeurt van een persoon die verantwoordelijk is voor hun
veiligheid of hun aanwijzingen heeft gegeven, hoe zij het toestel moeten gebruiken en zich
bewust zijn van de risico's die het gebruik van het toestel met zich meebrengt. Kinderen mogen
niet met het toestel spelen. De reiniging en het onderhoud van het toestel mogen niet worden
uitgevoerd door kinderen, tenzij ze onder toezicht staan.
Trek de stekker uit het stopcontact wanneer het toestel niet in gebruik is of voordat u het
toestel reinigt. Houd de voedingskabel altijd vast bij de stekker en niet bij de kabel.
3. Algemene richtlijnen
Raadpleeg de Velleman® service- en kwaliteitsgarantie achteraan deze handleiding.
Bescherm het toestel tegen stof en extreme temperaturen.
Bescherm tegen schokken. Vermijd brute kracht tijdens de bediening van het toestel.
Leer eerst de functies van het toestel kennen voor u het gaat gebruiken.
Om veiligheidsredenen mag u geen wijzigingen aan het apparaat aanbrengen. Schade door
wijzigingen die de gebruiker heeft aangebracht aan het toestel valt niet onder de garantie.
Gebruik het toestel enkel waarvoor het gemaakt is. De garantie vervalt automatisch bij ongeoorloofd gebruik.
De garantie geldt niet voor schade door het negeren van bepaalde richtlijnen in deze handleiding en
uw dealer zal de verantwoordelijkheid afwijzen voor defecten of problemen die hier rechtstreeks
verband mee houden.
Installeer en gebruik dit toestel NIET voor illegale praktijken en respecteer ieders privacy.
Bewaar deze handleiding voor verdere raadpleging.
4. Eigenschappen
Draadloos video-intercomsysteem. De buitencamera wordt gevoed door een externe voedingsadapter of
meegeleverde batterijpack wanneer er geen stopcontact beschikbaar is.
Dankzij het unieke design kunt u de buiteneenheid in elke positie monteren.
De draadloze ontvanger is oplaadbaar via het laadstation.
camera met witte leds voor nachtzicht
2-weg audio-overdracht
de deur kan via de ontvanger met optionele elektrische deuropener ontgrendeld worden: HAA272
opnamefunctie: snapshotknop op de ontvanger

SCAMSETW5
V. 03 –04/04/2018 13 ©Velleman nv
5. Omschrijving
Raadpleeg de afbeeldingen op pagina 2 van deze handleiding.
Buitenstation
1
luidspreker
5
belknop
2
led
6
microfoon
3
camera
7
batterijpack
4
lichtsensor
Ontvanger
8
menutoets
14
monitortoets
9
oproep beantwoorden
15
microfoon
10
LCD-display
16
luidspreker
11
navigatietoets
17
batterijvak
12
deur ontgrendelen
18
antenne
13
aan-uit/beëindigen
19
antennevergrendeling
LCD-display
a
batterijniveau
e
signaalsterkte
b
uitgaande oproep
f
oproep weigeren
c
zoom
g
12 V-voeding buitenstation
d
zwakke batterij
h
geselecteerde buitenstation
6. Batterijen
OPGELET
Explosiegevaar wanneer de batterij niet correct vervangen wordt. Vervang
uitsluitend door een batterij van hetzelfde of gelijkwaardige type. Stel
batterijen (batterijpack of geïnstalleerde batterijen) niet bloot aan hoge
temperaturen zoals direct zonlicht, open vuur en andere warmtebronnen. Als u
de stekker gebruikt om het apparaat uit te schakelen, zorg er dan voor dat
deze bereikbaar blijft.
U mag batterijen nooit doorboren of in het vuur gooien (explosiegevaar).
Herlaad geen alkalinebatterijen. Gooi batterijen weg volgens de plaatselijke
milieuwetgeving. Houd batterijen buiten het bereik van kinderen.
6.1 Ontvanger
OPGELET
Gebruik uitsluitend oplaadbare batterijen.
1. Open het batterijvak en plaats 3 HR3/AAA-batterijen. Respecteer de polariteit.
2. Sluit het batterijvak om de ontvanger aan te sluiten op de lader en de batterijen opgeladen te
houden.
OPMERKING
De datum en tijd moeten opnieuw ingesteld worden na het vervangen van de
batterijen.
6.2 Batterijpack
OPGELET
Gebruik uitsluitend alkalinebatterijen.
1. Open het batterijvak en plaats 4 x LR6/AA-batterijen. Respecteer de polariteit.
2. Sluit het batterijvak.
3. Verwijder de rubberen pakking van het buitenstation en sluit het batterijpack aan.

SCAMSETW5
V. 03 –04/04/2018 14 ©Velleman nv
7. Montage
OPMERKING
Kies een geschikte montageplaats. Installeer het toestel niet in de nabijheid
van metalen voorwerpen of elektrische toestellen. Zorg ervoor dat er zich geen
voorwerpen tussen de zender en de ontvanger bevinden. Plaats het toestel zo
centraal mogelijk waar er weinig of geen obstakels zijn.
Test het systeem vóór de montage.
7.1 Ontvanger
1. Sluit de voedingskabel aan op het laadstation. Sluit het laadstation aan op het lichtnet.
2. Plaats de ontvanger in het laadstation.
7.2 Buitenstation
1. Kies een geschikte montageplaats. Houd rekening met de gemiddelde lengte van de bezoekers.
2. Kies of u het buitenstation met of zonder het batterijpack wilt gebruiken. Kies de geschikte
behuizing.
3. Monteer de behuizing recht of onder een hoek.
4. Indien nodig, sluit het buitenstation elektrisch aan (aanbevolen). Plaats het buitenstation in de
behuizing en bevestig met de schroef.

SCAMSETW5
V. 03 –04/04/2018 15 ©Velleman nv
8. Installatie van de vergrendeling - Aansluitschema
OPMERKING
Door het verbruik van het buitenstation, is het aan te raden om een
voedingsadapter te gebruiken in plaats van batterijen. Gebruik de
voedingsadapter en de batterijen nooit gelijktijdig!
8.1 Normaal open
a
voeding –12 VDC
c
DC-voeding voor vergrendeling
b
voeding –massa
d
N.O.-vergrendeling
8.2 Normaal gesloten
a
voeding –12 VDC
c
DC-voeding voor vergrendeling
b
voeding - massa
d
N.C.-vergrendeling
9. Basisgebruik
9.1 De ontvanger in-/uitschakelen
Houd de toets aan-uit/beëindigen ingedrukt om de ontvanger in of uit te schakelen.

SCAMSETW5
V. 03 –04/04/2018 16 ©Velleman nv
9.2 Een buitenstation toevoegen
OPMERKING
Het buitenstation en de ontvanger zijn in de fabriek gesynchroniseerd. Zie
onderstaande instructies om tot 3 extra buitenstations toe te voegen.
toevoegen
1. Druk op de menuknop van de ontvanger en selecteer vervolgens het symbool toevoegen.
2. Druk op de belknop van het buitenstation. Houd de toets toevoegen ingedrukt tot de led knippert.
3. Weerklinkt een geluidssignaal, dan is het buitenstation succesvol toegevoegd aan de ontvanger.
De ontvanger ondersteunt tot 4 buitenstations en geeft deze weer (links: buitenstation 2 toegevoegd,
rechts: 4 buitenstations toegevoegd).

SCAMSETW5
V. 03 –04/04/2018 17 ©Velleman nv
9.3 Een buitenstation verwijderen
1. In stand-bymodus, houd de toetsen oproep beantwoorden en deur ontgrendelen gelijktijdig
ingedrukt gedurende 5 seconden.
2. Het buitenstation is verwijderd.
9.4 De ontgrendelingstijd veranderen
1. In stand-bymodus, houd de toetsen oproep beantwoorden en de menuknop gelijktijdig
ingedrukt gedurende 5 seconden.
2. Selecteer het buitenstation met de navigatietoets.
3. Stel de ontgrendelingstijd in met de navigatietoetsen naar omhoog en naar omlaag.
4. Druk op de menukop om te bevestigen.
9.5 Monitorfunctie
Druk op de monitortoets om de camera op het buitenstation in te schakelen. Selecteer het
gesynchroniseerde buitenstation met de navigatietoets en bevestig met de menuknop.
9.6 Videofunctie
Wanneer de belknop wordt ingedrukt, geeft de ontvanger het camerabeeld weer.
Druk op de toets aan-uit/beëindigen om het videobeeld uit te schakelen of om het gesprek te
beëindigen.
Druk op de toets oproep beantwoorden om een videogesprek te voeren.
Houd de monitortoets ingedrukt om op het videobeeld in te zoomen.
OPMERKING
Een videogesprek wordt automatisch beëindigd na 2 minuten.
Het videobeeld verdwijnt automatisch na 5 minuten.

SCAMSETW5
V. 03 –04/04/2018 18 ©Velleman nv
9.7 De deur ontgrendelen
Druk op de toets deur ontgrendelen om de deur te ontgrendelen.
9.8 Stille modus
Houd de toets aan-uit/beëindigen gedurende 3 seconden ingedrukt om de ontvanger op het
buitenstation te ontkoppelen. De verbinding wordt automatisch hervat na 5 minuten.
10. Menufuncties
10.1 Datum en tijd instellen
datum en tijd
1. Druk op de menuknop om het menu weer te geven.
2. Selecteer het symbool datum en tijd en druk op de menuknop om te bevestigen.
3. Selecteer het uur en de minuten, en stel deze in met de navigatietoets.
4. Druk op de menuknop om te bevestigen.
5. Stel de datum in op dezelfde manier.
10.2 Het volume instellen
volume
Videogesprek niet actief
Druk op de navigatietoets naar links of naar rechts om het volume hoger of lager te zetten.
Tijdens een videogesprek
1. Druk op de menuknop om het menu weer te geven.
2. Selecteer het symbool volume en druk op de menuknop om te bevestigen.
3. Stel het volume in met de navigatietoets.
4. Druk op de menuknop om te bevestigen.
10.3 De helderheid instellen
helderheid
Videogesprek niet actief
Druk op de navigatietoets naar omhoog of naar omlaag om het volume hoger of lager te zeggen.
Tijdens een videogesprek
1. Druk op de menuknop om het menu weer te geven.
2. Selecteer het symbool helderheid en druk op de menuknop om te bevestigen.
3. Stel het helderheidsniveau in met de navigatietoets.
4. Druk op de menuknop om te bevestigen.

SCAMSETW5
V. 03 –04/04/2018 19 ©Velleman nv
10.4 De toetstonen in-/uitschakelen
toetstonen
1. Druk op de menuknop om het menu weer te geven.
2. Selecteer het symbool toetstonen en druk op de menuknop om te bevestigen.
3. Schakel de toetstonen in of in met de navigatietoets.
4. Druk op de menuknop om te bevestigen.
10.5 De snapshotfunctie in-/uitschakelen
Snapshot
De snapshotfunctie maakt automatisch een snapshot wanneer de belknop wordt op het buitenstation
wordt ingedrukt. Er kunnen tot 50 snapshots opgeslagen worden in het geheugen. Als het geheugen vol
is, wordt de oudste snapshot overschreven. Druk op de monitortoets om een snapshot te nemen.
1. Druk op de menuknop om het menu weer te geven.
2. Selecteer het symbool snapshot en druk op de menuknop om te bevestigen.
3. Schakel de snapshotfunctie in of uit met de navigatietoets.
4. Druk op de menuknop om te bevestigen.
5. De toets deur ontgrendelen licht op om aan te geven dat er nieuwe snapshots zijn.
10.6 Uw snapshots bekijken
bekijken
Met deze functie kunt u de opgenomen snapshots opslaan/verwijderen.
1. Druk op de menuknop om het menu weer te geven.
2. Selecteer het symbool bekijken en druk op de menuknop om te bevestigen.
3. Blader door de snapshots met de navigatietoets.
4. Om te verwijderen, selecteer de snapshot met de menuknop en bevestig met de toets deur
ontgrendelen.
10.7 Fabrieksinstellingen herstellen
standaardinstelling
1. Druk op de menuknop om het menu weer te geven.
2. Selecteer het symbool standaardinstelling en druk op de menuknop om te bevestigen.
3. Selecteer ja of nee met de navigatietoets.
4. Druk op de menuknop om te bevestigen.
OPMERKING
Als het toestel wordt teruggezet naar de fabrieksinstellingen, worden alle
eerder gemaakte instellingen gewist.

SCAMSETW5
V. 03 –04/04/2018 20 ©Velleman nv
11. Reiniging en onderhoud
Trek de stekker uit het stopcontact voordat u het toestel reinigt.
Maak het toestel af en toe schoon met een vochtige doek. Gebruik geen bijtende chemische producten,
reinigingsmiddelen of sterke detergenten.
12. Technische specificaties
buitencamera
camera ............................................................................1/4" CMOS-kleurensensor
videoresolutie ................................................................................ 320 x 240 pixels
beelden per seconde..................................................................................... 25 fps
gezichtshoek.................................................................................................. 135°
lens ................................................................................................f2.6 mm / F2.1
witbalans ....................................................................................................... auto
nachtzicht ............................................................................................ 6 witte leds
zendbereik .......................................................................... max. 50 m (gebouwen)
voeding
adapter ....................................................................... 12 VDC (niet meegelev.)
batterijpack ........................................4 x LR6/AA-batterij (LR6C, niet meegelev.)
werktemperatuur .........................................................................-20 °C tot +40 °C
afmetingen
125 x 38 x 48 mm (zonder batterijpack)
198 x 38 x 48 mm (met batterijpack)
ingebouwde microfoon en luidspreker
ontvanger
monitor..............................................................................2.4" LCD-kleurenscherm
opname ...................................................................................................snapshot
batterij .................................................. 3 x HR3/AAA-batterij (HR3C/11, meegelev.)
laadstation ......................................................... 7.5 V-voedingsadapter (meegelev.)
afmetingen ................................................................................. 165 x 50 x 26 mm
ingebouwde microfoon en luidspreker
RED Verklaring van overeenstemming
Hierbij verklaar ik, Velleman NV, dat het type radioapparatuur [SCAMSETW5] conform is met Richtlijn
2014/53/EU.
De volledige tekst van de EU-conformiteitsverklaring kan worden geraadpleegd op het volgende
internetadres: www.velleman.eu.
Gebruik dit toestel enkel met originele accessoires. Velleman nv is niet aansprakelijk voor
schade of kwetsuren bij (verkeerd) gebruik van dit toestel. Voor meer informatie over dit
product en de laatste versie van deze handleiding, zie www.perel.eu. De informatie in deze
handleiding kan te allen tijde worden gewijzigd zonder voorafgaande kennisgeving.
© AUTEURSRECHT
Velleman nv heeft het auteursrecht voor deze handleiding. Alle wereldwijde rechten
voorbehouden. Het is niet toegestaan om deze handleiding of gedeelten ervan over te nemen, te
kopiëren, te vertalen, te bewerken en op te slaan op een elektronisch medium zonder voorafgaande
schriftelijke toestemming van de rechthebbende.
Other manuals for SCAMSETW5
1
Table of contents
Languages:
Other Perel Intercom System manuals

Perel
Perel SCAMSETW5 User manual

Perel
Perel EDMTW User manual

Perel
Perel EDB5 User manual

Perel
Perel EDB7 User manual

Perel
Perel SCAMSET16 User manual

Perel
Perel SCAMSET8N User manual

Perel
Perel EDB4 User manual

Perel
Perel SCAMSET User manual

Perel
Perel SCAMSET8 User manual

Perel
Perel SCAMSET6 Reference manual