5
4
3
6
1
2
5
PRISE DE LA TEMPÉRATURE
Retirez le capuchon de la sonde pour prendre la température, en mode frontal ou auriculaire.
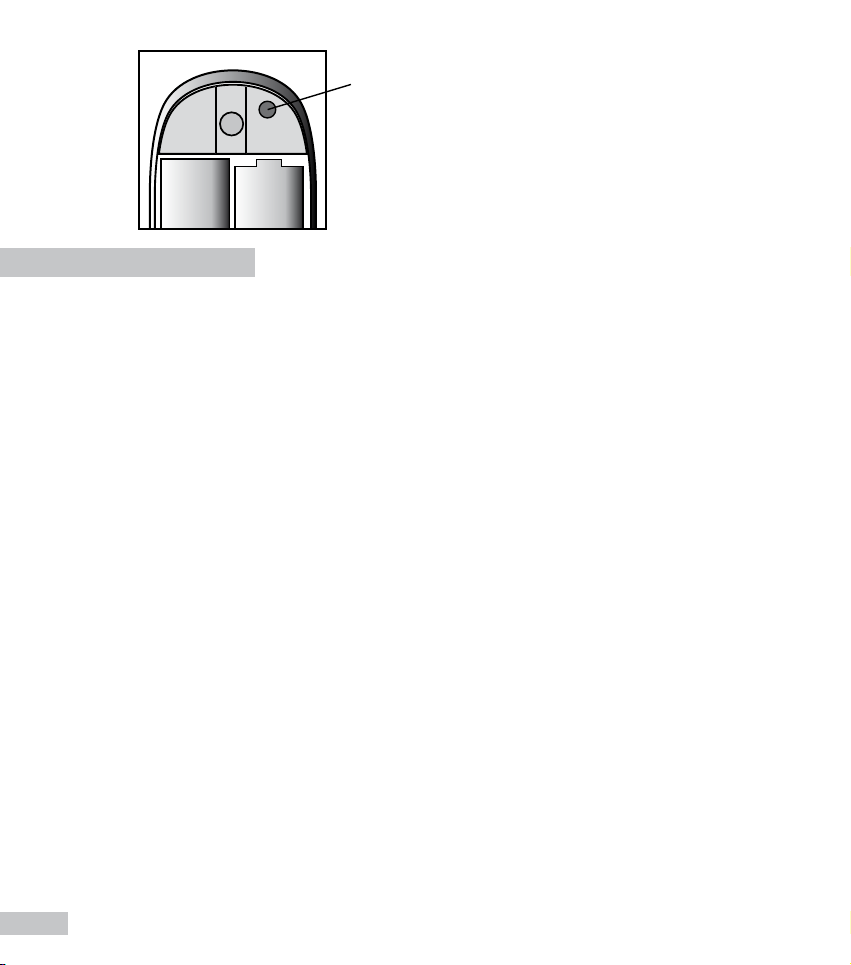
1. Prise de température frontale
• Retirez le capuchon de la sonde.
• Déplacer le bouton switch sur le mode frontal (g. 1)
• Appuyez sur le bouton de prise de température « START ».
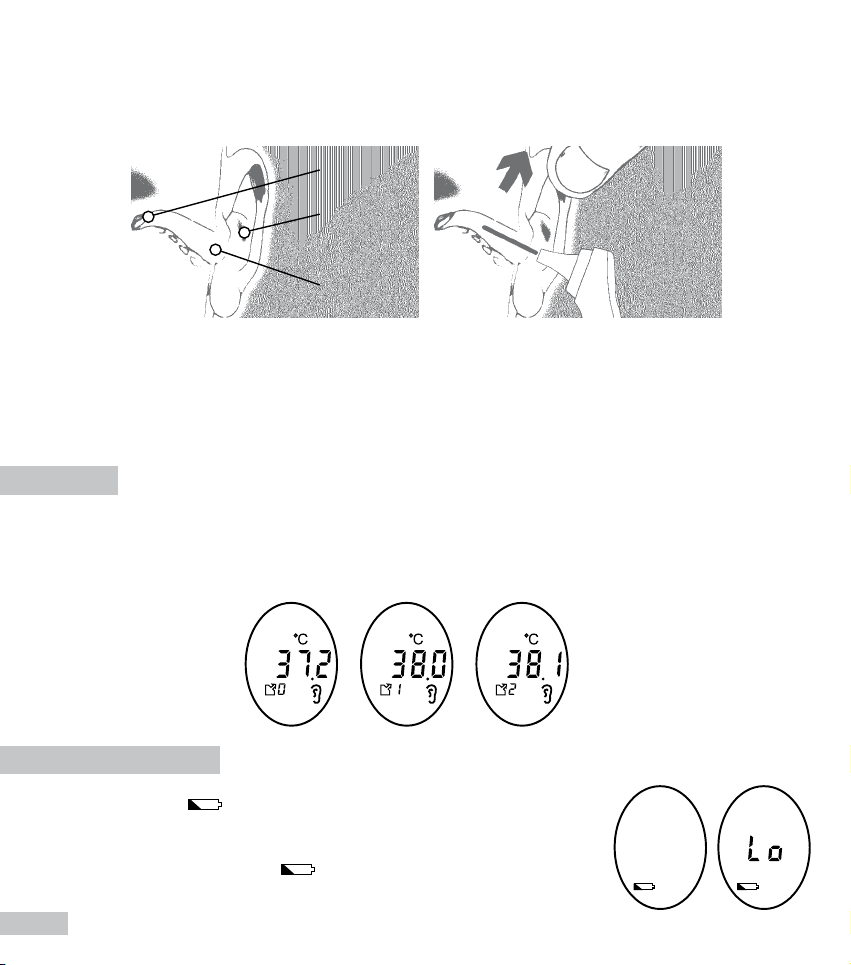
• Lors de la première prise de température, tous les éléments de l’écran (g. 3) s’afchent,
suivi de « -- » (g. 4), d’un bip sonore et de « 36.8°C » par défaut (g. 5).
• Dès la deuxième prise de température, tous les éléments de l’écran s’afchent (g. 3),
suivi de « -- » (g. 4), d’un bip sonore et de la dernière température en mémoire.
• Placez la sonde sur le haut de la tempe.
• Pressez et maintenez enfoncé le bouton de prise de température « START » pendant
environ 2 secondes.
• Relâchez le bouton « START » et retirez le Thermo Color de la tempe.
• La température s’est afchée ainsi que la couleur verte ou rouge en fonction du résultat.
La température frontale peut subir l’influence des conditions climatiques extérieures, en
cas de doute n’hésitez pas à prendre la température auriculaire.
2. Auriculaire
• Retirez le capuchon de la sonde.
• Déplacez le bouton switch sur le mode auriculaire (g. 2).
• Appuyez sur le bouton de prise de température « START ».
• Lors de la première prise de température, tous les éléments de l’écran (g. 3) s’afchent,
suivi de « -- » (g. 4), d’un bip sonore et de « 36.8°C » par défaut.
• Dès la deuxième prise de température, tous les éléments de l’écran s’afchent (g. 3),
suivi de « -- » (g. 4), d’un bip sonore et de la dernière température en mémoire (g. 6).
• Insérez la sonde dans le conduit auditif.
• Pressez et maintenez enfoncé le bouton de prise de température « START ».
• Quand le bip sonore retentit, vous pouvez relâcher le bouton « START ».
• Retirez la sonde du conduit auditif. La température s’est afchée ainsi que la couleur
verte ou rouge en fonction du résultat.