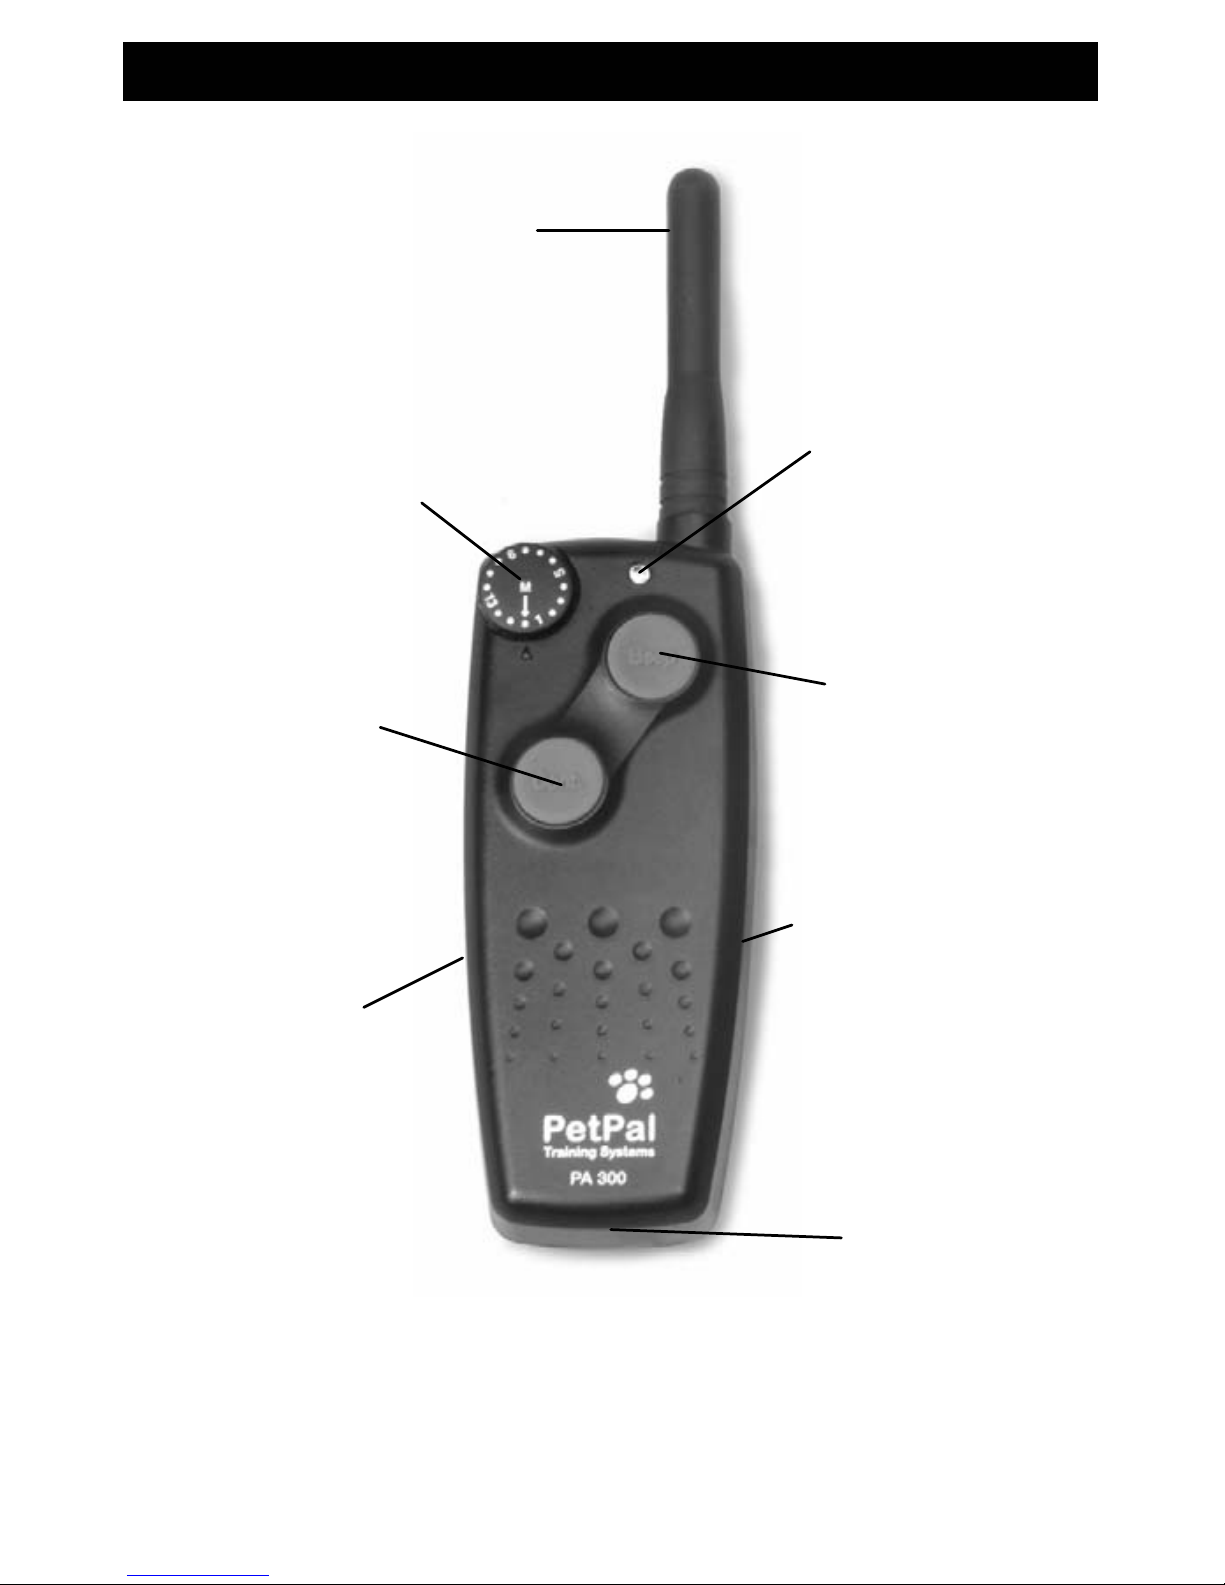
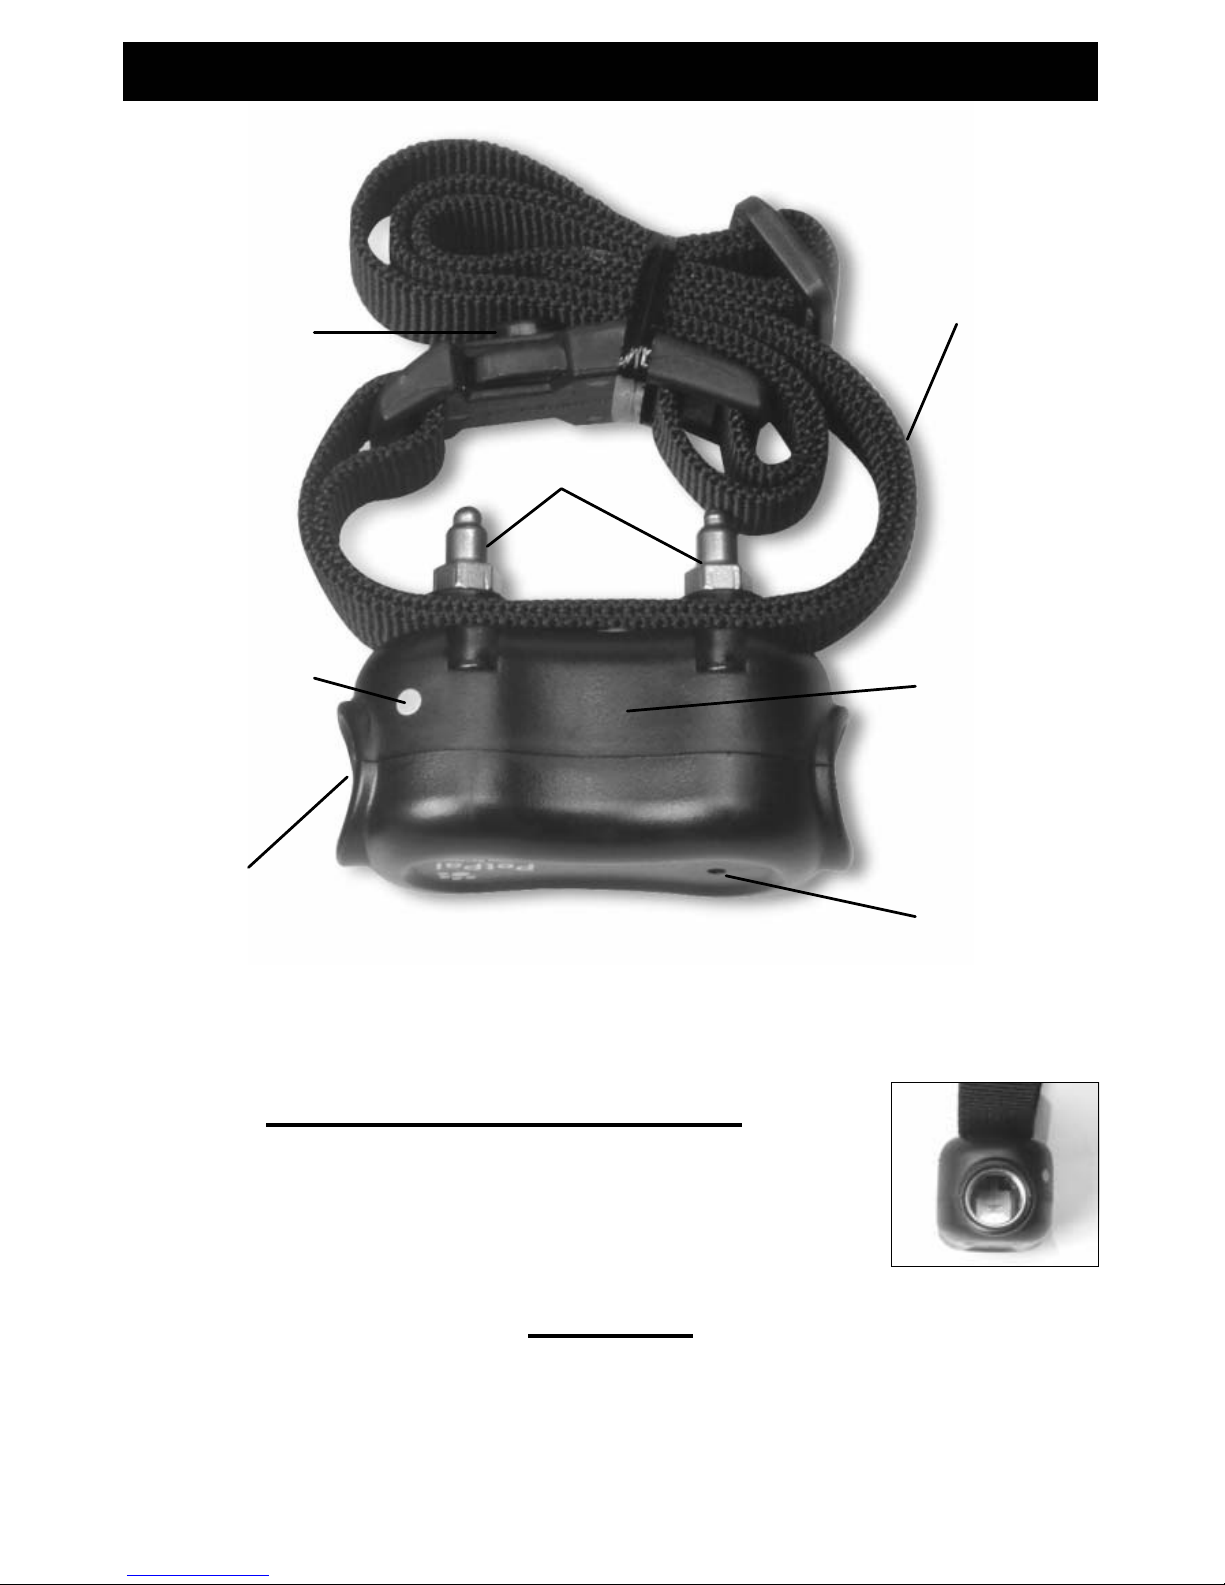
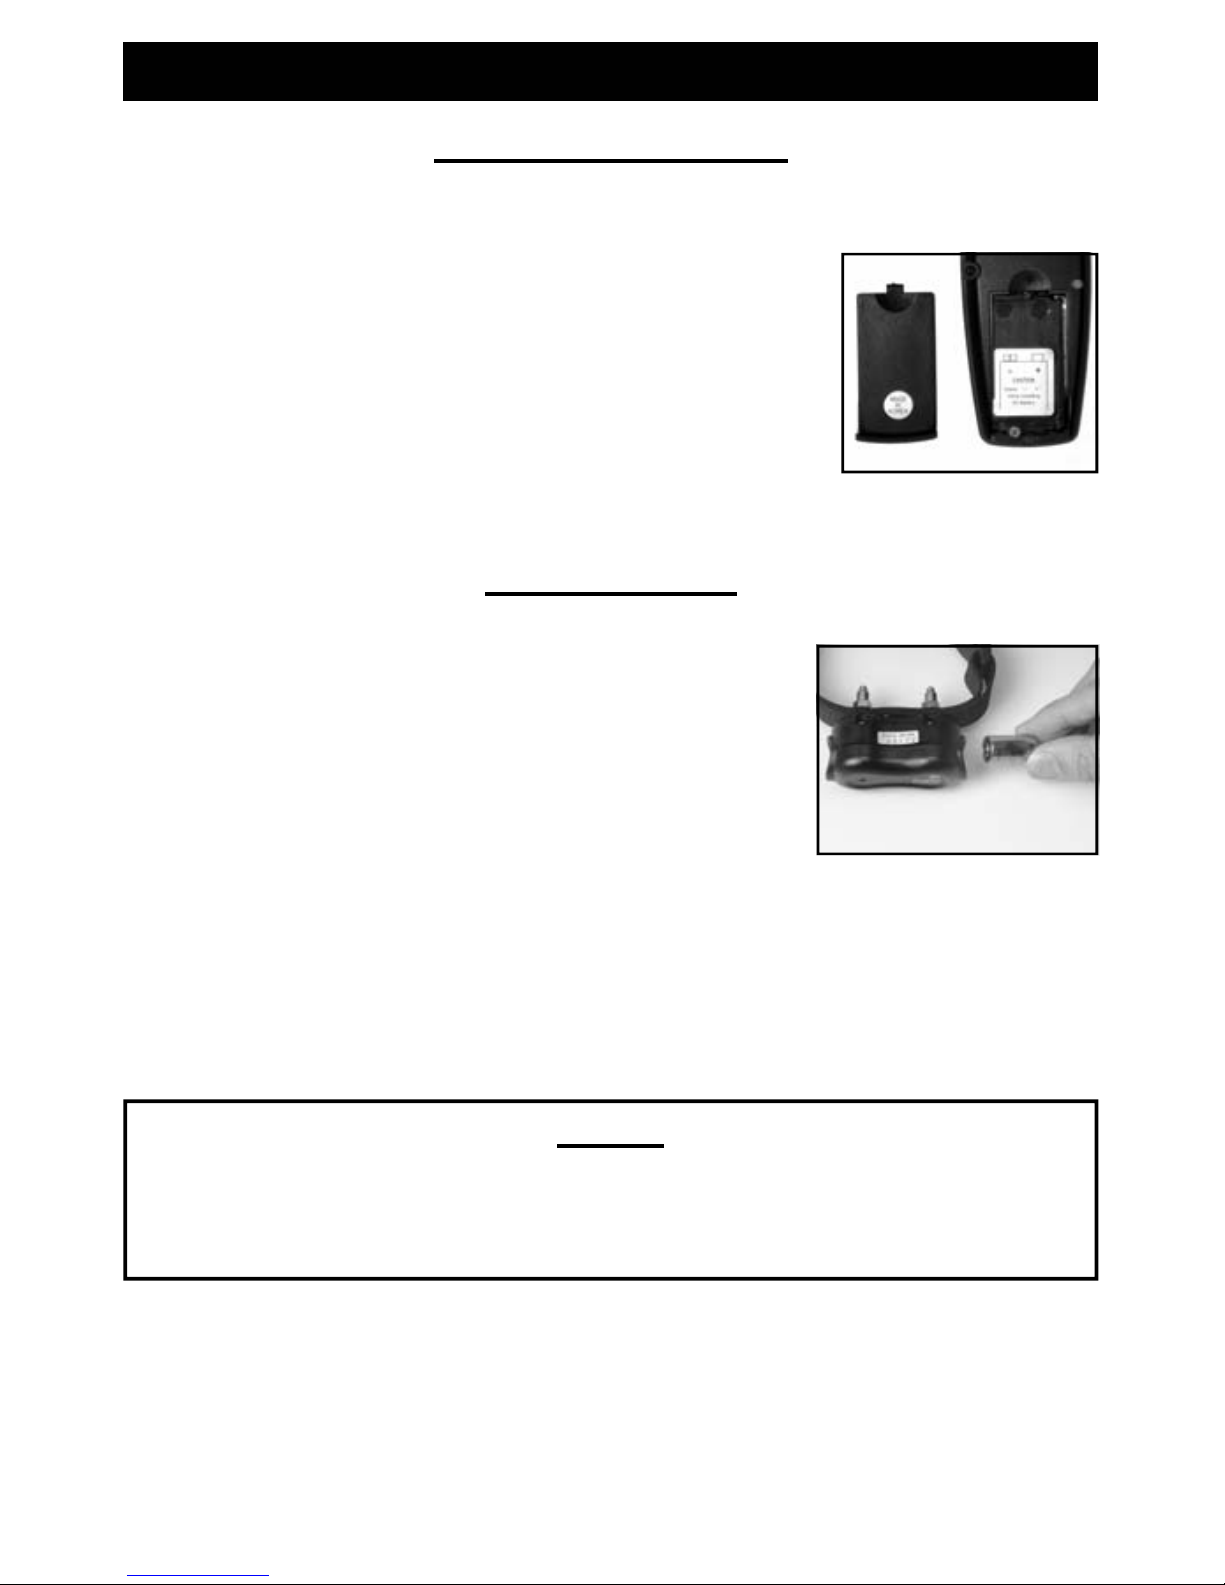
9
Magnetic Switch Indicator (Red Mark)
The Magnetic Switch Indicator is a red dot showing
where the Magnetic Activation Switch is located. You
can use the Magnetic Indicator on the Transmitter or the
Activation Magnet on the Buckle to activate and
deactivate your Collar Receiver (see page 11).
Collar Receiver LED Indicator Light
The LED light on the Collar Receiver will turn on when
Magnet Indicator is held against the Magnetic Switch
Indicator. When the Collar Receiver is ON, the LED light
will flash once every 2 seconds in normal mode and
double-flash every 2 seconds in Battery Saving Mode.
You will also see flashes when applying Continuous
Stimulation or Beep. When the collar battery is low and
needs to be replaced, the LED will flash rapidly (about 3
times every 2 seconds) while the Collar Receiver is ON.
Speaker
Emits an audible beep when “Beep” button is pushed.
Collar Belt with Embedded Receiver Antenna
The Collar Belt is adjustable to fit a wide range of neck
sizes (see page 15). The embedded collar antenna is
woven into the Collar Belt, and it is about 4 inches long.
You should be able to feel the embedded antenna on the
nylon belt.
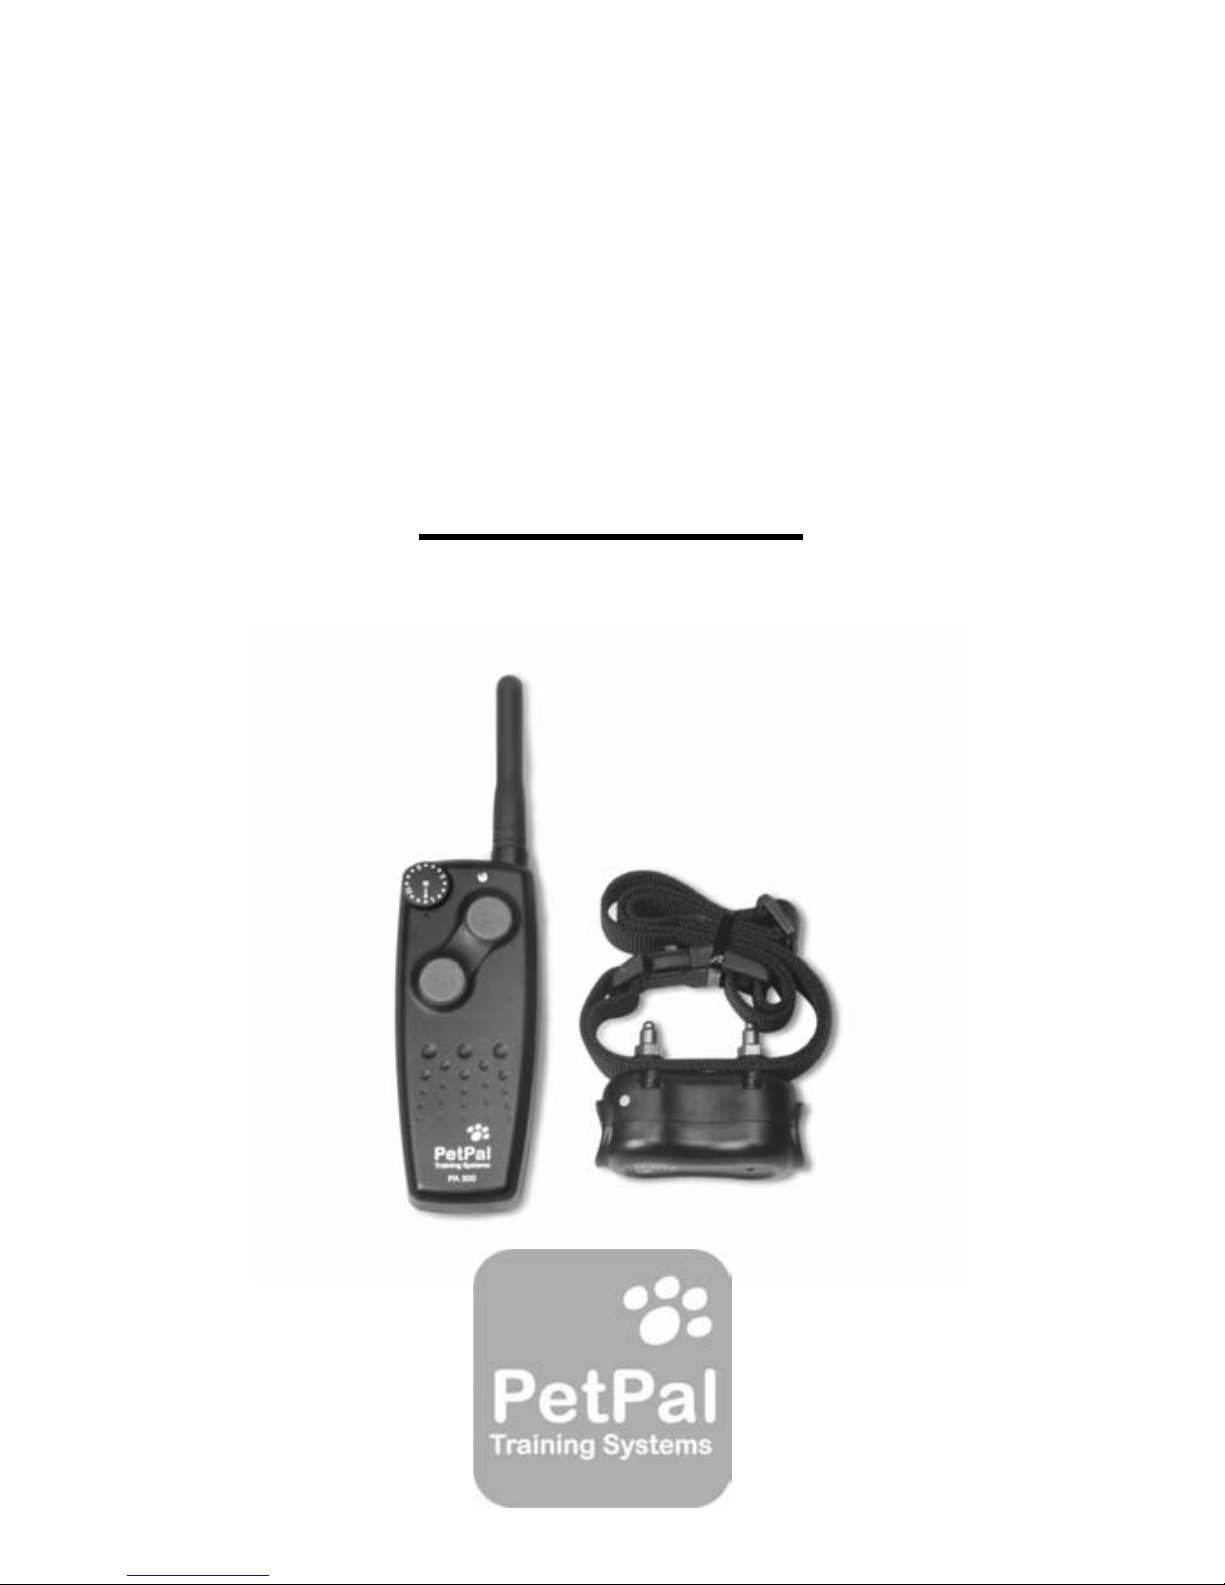
PARTS & FUNCTIONS
WARNING
Do not cut the part of the Collar Belt that has the embed-
ded antenna. Doing so will damage the antenna and may
result in severely decreased Collar Receiver range.