Instructions
for
Operators
1.
Brief
Description
of
the
Pfaff
238
The
Pfaff 238
high-speed
zigzag sewing machine Is an Improved version of
the
Pfaff 138
which has been redesigned to match
our
modern high-speed straight stitchers In out
ward
appearance
and
sewing
performance.
Like the Pfaff 138, It Is organized with link take-up and transverse rotary sewing hook
which features aspecial balancing collar In order to
ensure
vibratlonless running.
The Pfaff 238 Is supplied in Models A
and
B for a maximum stitch length of down to 7
stitches
per
Inch.
The
permissible
top
speed
of
the
machine
depends
on
the
model
and
the
stitch
width.
Model B machines
are
normally fitted for a stitch width of 11/64", or 4.5 mm, and a
top
speed
of
3,500
s.p.m.
If
desired,
Model B
machines
can
be fitted with a
special
parts
set
for a stitch width of
about
'A", or 6.0 mm, and maximum
speed
of 3,200 s.p.m.
As a
special
variety,
the
Pfaff
238
can
be
supplied
In
Model
A
for
a
maximum
stitch
width of 5/32" and a sustained
speed
of 3,800 s.p.m.
2.
Setting
Up
the
Machine
In
most
Instanoes,
the
Pfaff 238 Is
supplied
for Individual
power
drive.
Sewing
head
and
power
table
are
packed
separately.
The machine Is driven by a
Va-HP
clutch motor. (Type of current and voltage optional to
suit
local
requirements.)
Power
Is
transmitted
from
the
motor
to
the
sewing
machine
by
means
of a V-belt 25/64",
or
10 mm,
wide
and
conforming
to
German
DIN 2215
standards.
When
connected
to a
50-cycle
power
supply,
the
motor
runs
at
a
speed
of 2,800 r.p.m.,
and
when
connected
to a
60-cycle
power
supply,
at
3,400 r.p.m.
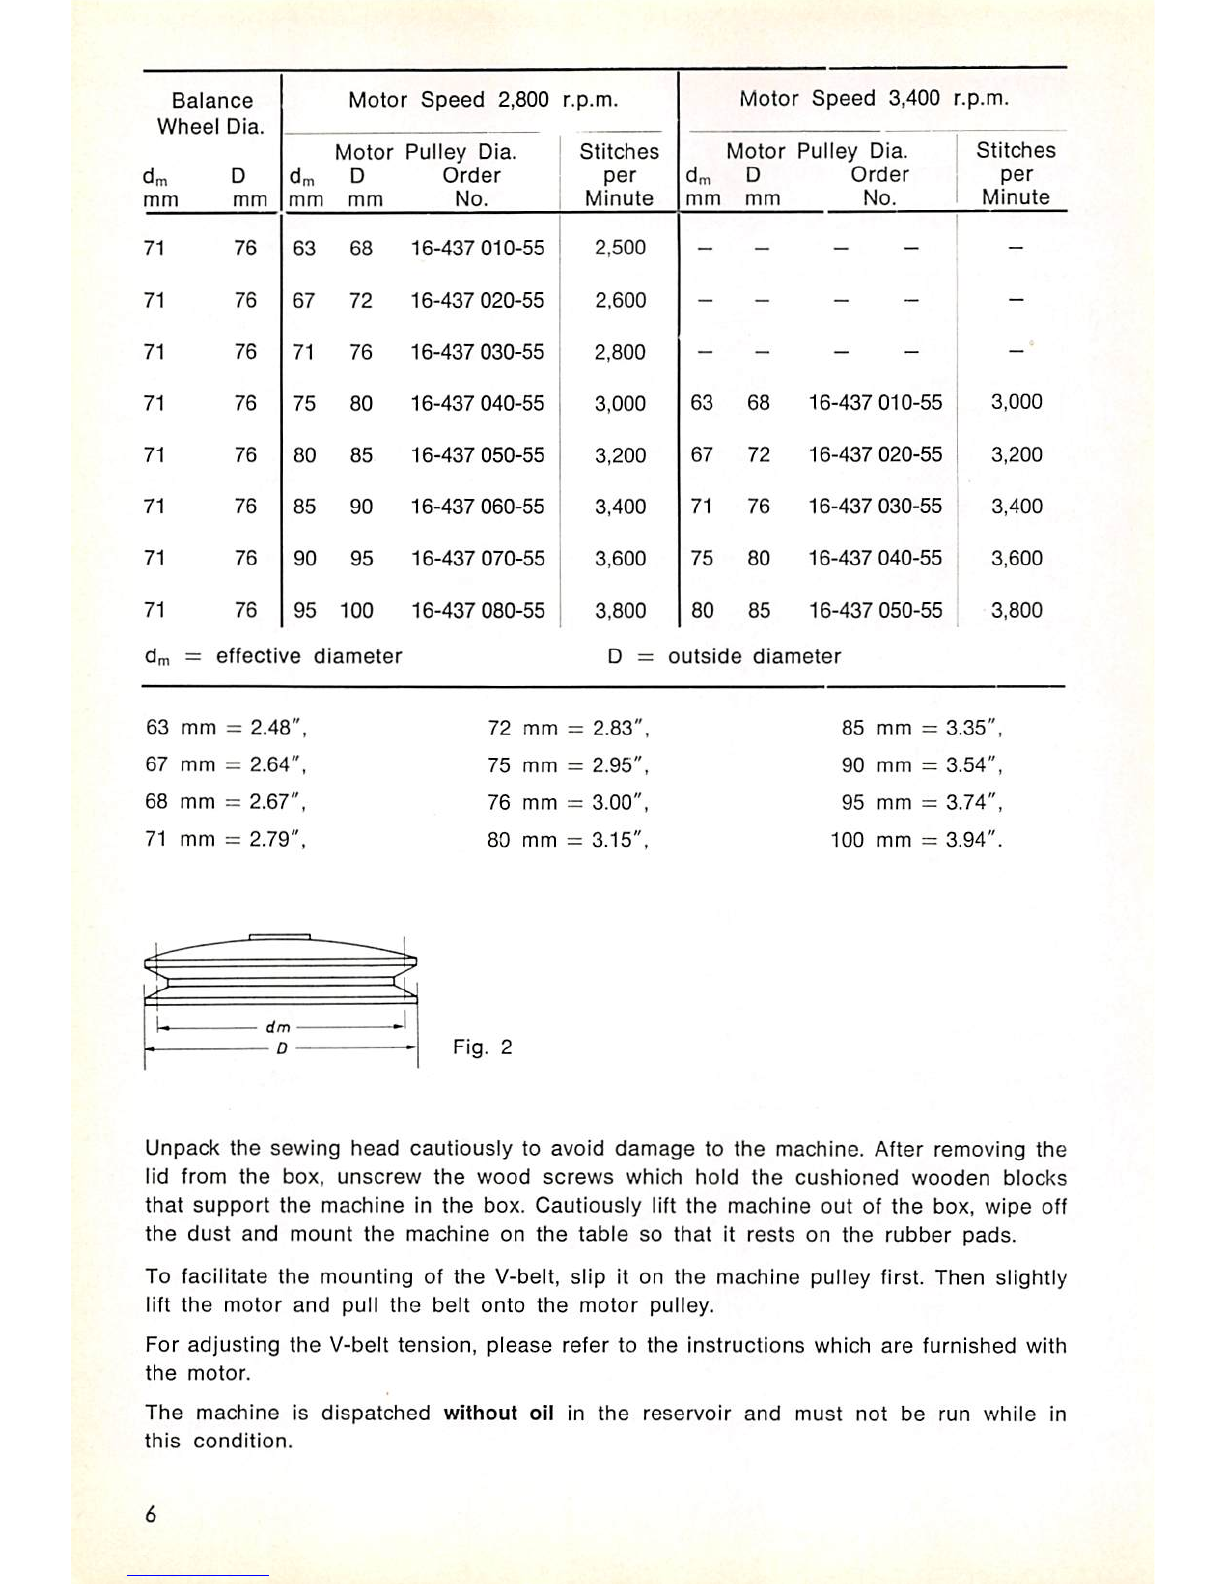
The
motor
pulley
can
be
easily
exchanged
In
order
to vary
the
maximum
sewing
speed,
as
may
be
required.
The
relationship
between
pulley
diameter
and
maximum
sewing
speed
Is
Indicated
In
the
table
below: