manuals.online logo
Brands
  1. Home
  2. •
  3. Brands
  4. •
  5. Pfister
  6. •
  7. Plumbing Product
  8. •
  9. Pfister Canton F-529-7CN User manual

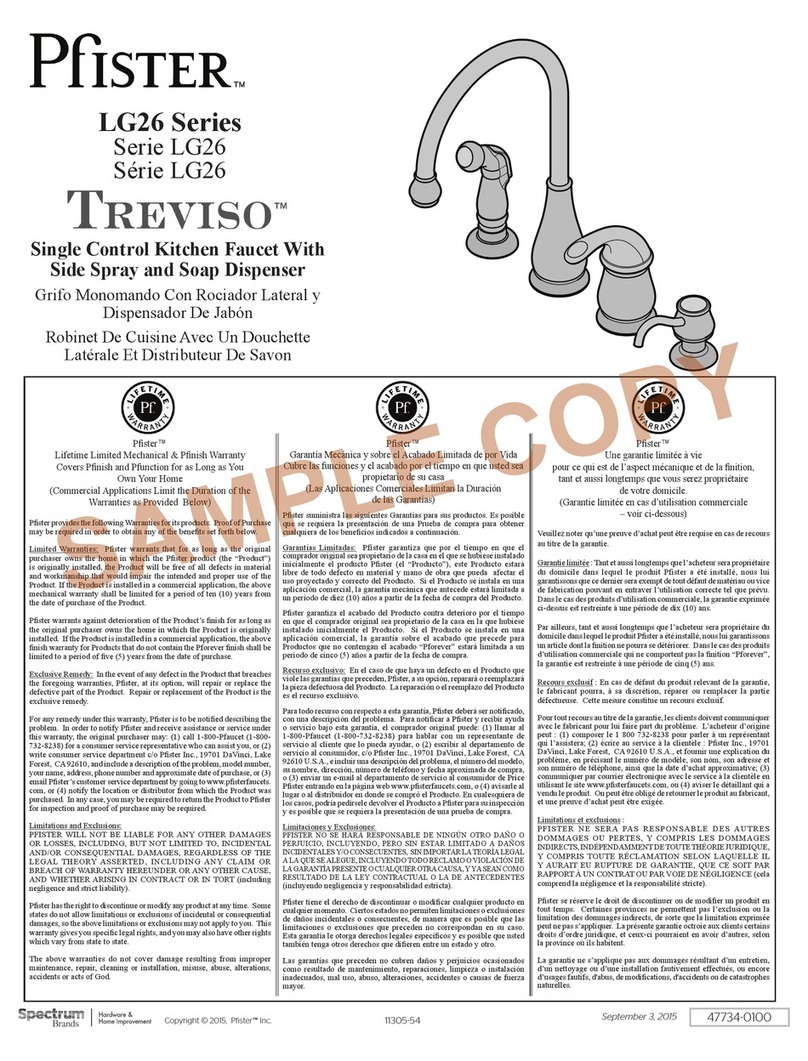
Pfister Canton F-529-7CN User manual

421920200
November 18, 2015
Installation Support • Soporte de instalación • Support d’installation
Personal Assistance, Product Specs, &
“How-to” Questions:
Asistencia personal, especificaciones del
producto y preguntas sobre “cómo hacerlo”:
Aide personnelle, spécifications du produit
et questions « pratico-pratiques » :
1800PFAUCET (7328238)
pisterfaucets.com/support
Installation Videos Available
Videos de instalación a disposición
Vidéos d’installation disponibles
pisterfaucets.com/videos
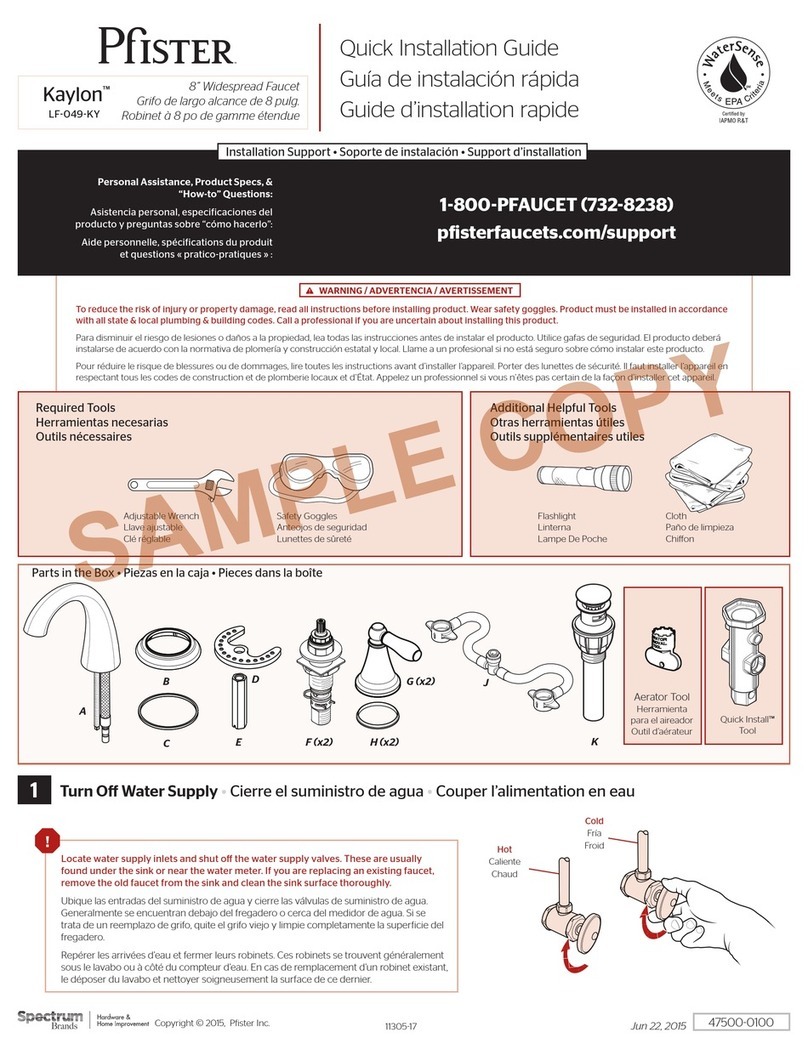
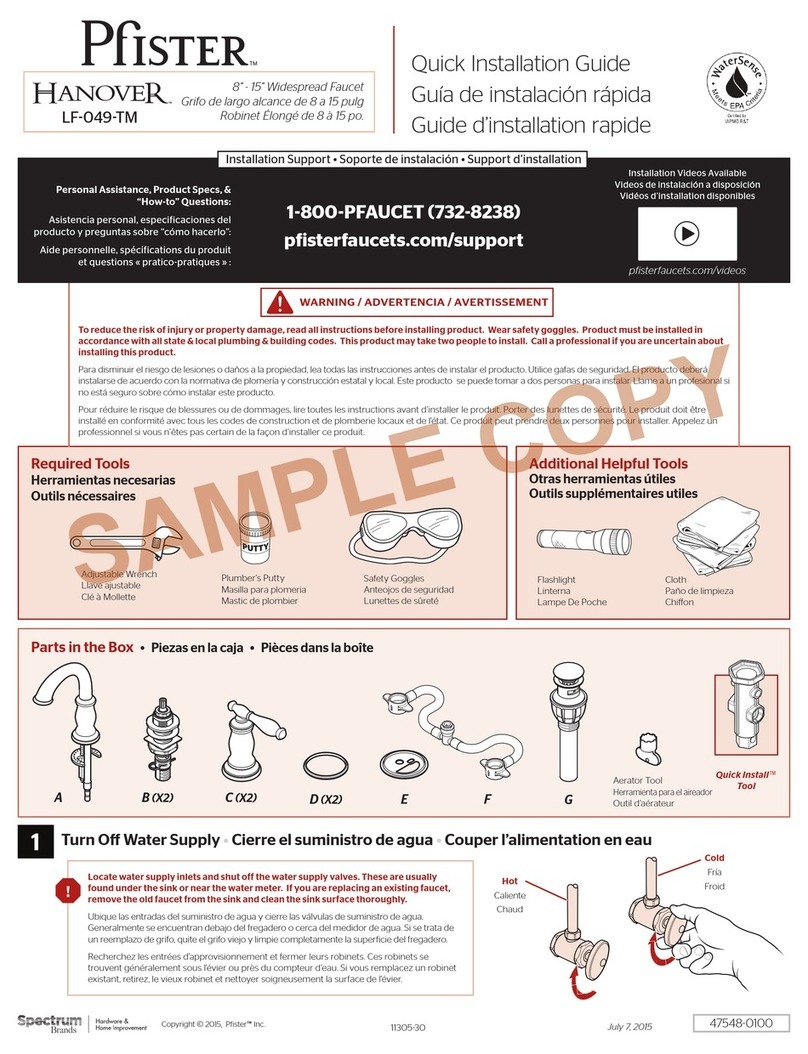
Pull-Down Kitchen Faucet
Grifo Con Ducha Desmontable Para La Cocina
Branchement Robinet De Cuisine
Copyright © 2015, Pister™ Inc.
Adjustable Wrenches
Llaves ajustables
Clés à mollette
Safety Goggles
Anteojos de seguridad
Lunettes de sûreté
Plumber’s Putty
Masilla para plomeria
Mastic de plombier
Screwdriver
Destornillador
Tournevis
Flashlight
Linterna
Lampe De Poche
Cloth
Paño de limpieza
Chion
Quick Installation Guide
Guía de instalación rápida
Guide d’Installation Rapide
Canton™
To reduce the risk of injury or property damage, read all instructions before installing product. Wear safety goggles. Product must be installed in
accordance with all state & local plumbing & building codes. Call a professional if you are uncertain about installing this product.
Para disminuir el riesgo de lesiones o daños a la propiedad, lea todas las instrucciones antes de instalar el producto. Utilice gafas de seguridad. El producto deberá
instalarse de acuerdo con la normativa de plomería y construcción estatal y local. Llame a un profesional si no está seguro sobre cómo instalar este producto.
Pour réduire le risque de blessures ou de dommages, lire toutes les instructions avant d’installer le produit. Portez des lunettes de sécurité. Il faut installer
le produit en respectant tous les codes de construction et de plomberie locaux et d’état. Appelez un professionnel si vous n’êtes pas certain de la façon
d’installer ce produit.
Quick Install™
Tool
1
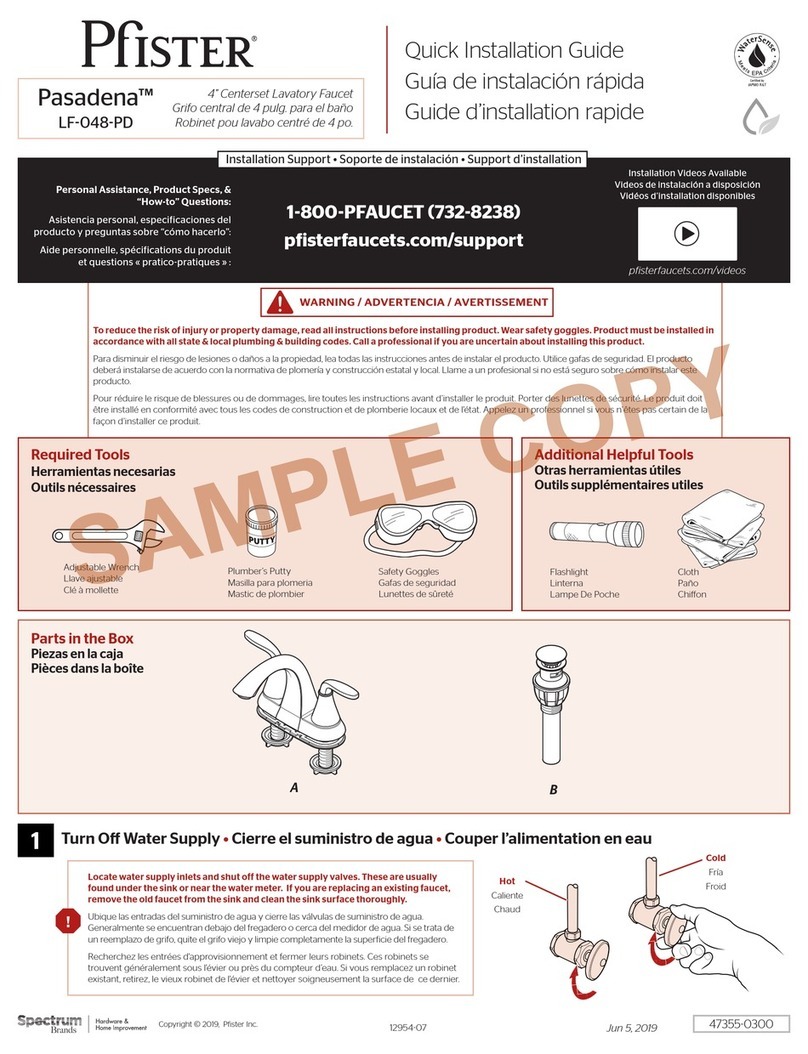
Locate water supply inlets and shut of the water supply valves. These are usually
found under the sink or near the water meter. If you are replacing an existing faucet,
remove the old faucet from the sink and clean the sink surface thoroughly.
Ubique las entradas del suministro de agua y cierre las válvulas de suministro de agua.
Generalmente se encuentran debajo del fregadero o cerca del medidor de agua. Si se trata de
un reemplazo de grifo, quite el grifo viejo y limpie completamente la supericie del fregadero.
Recherchez les entrées d'approvisionnement et fermer les robinets. Ces robinets se
trouvent généralement sous l'évier ou près du compteur d’eau. En cas de remplacement
d’un robinet existant, retirez le de l'évier et nettoyer soigneusement la surface de ce dernier.
Turn O Water Supply •Cierre el suministro de agua •Couper l’alimentation en eau
Hot
Caliente
Chaud
Cold
Fría
Froid
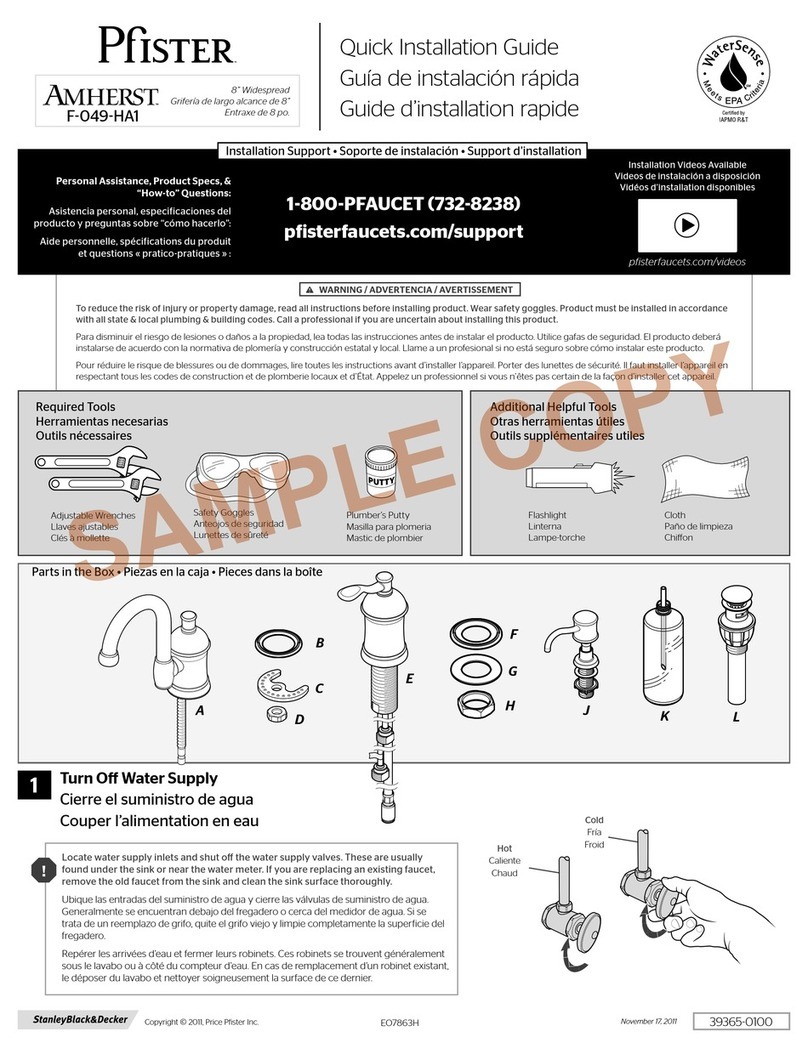
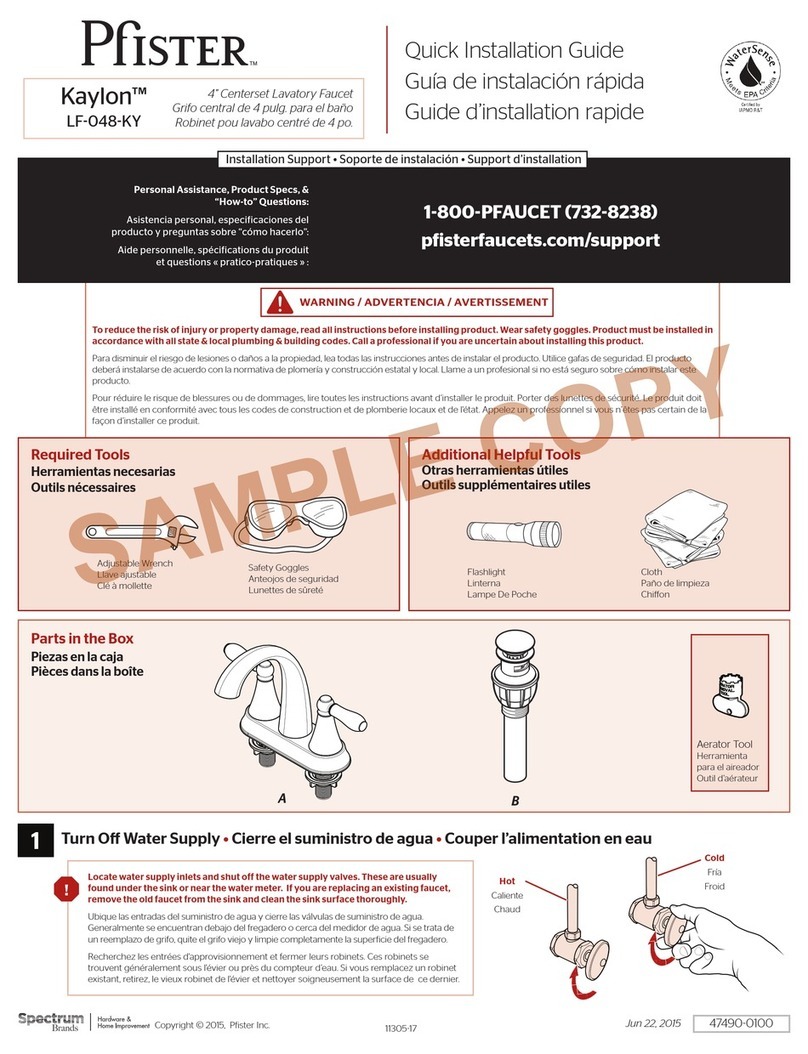
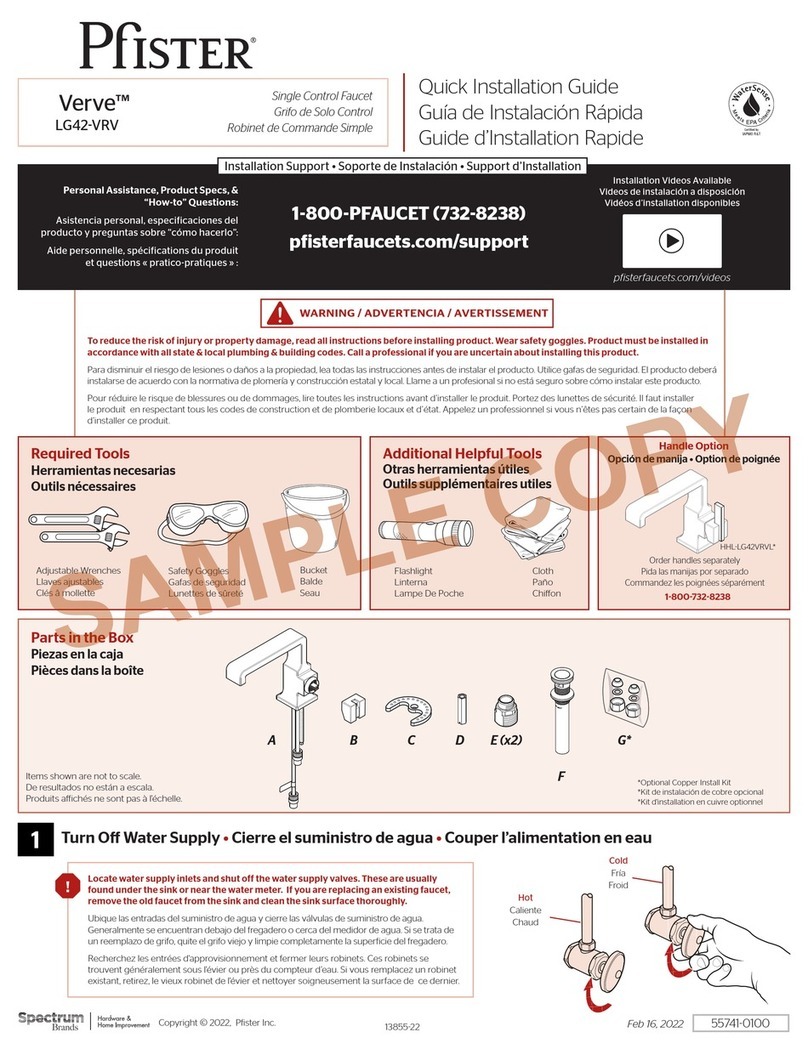
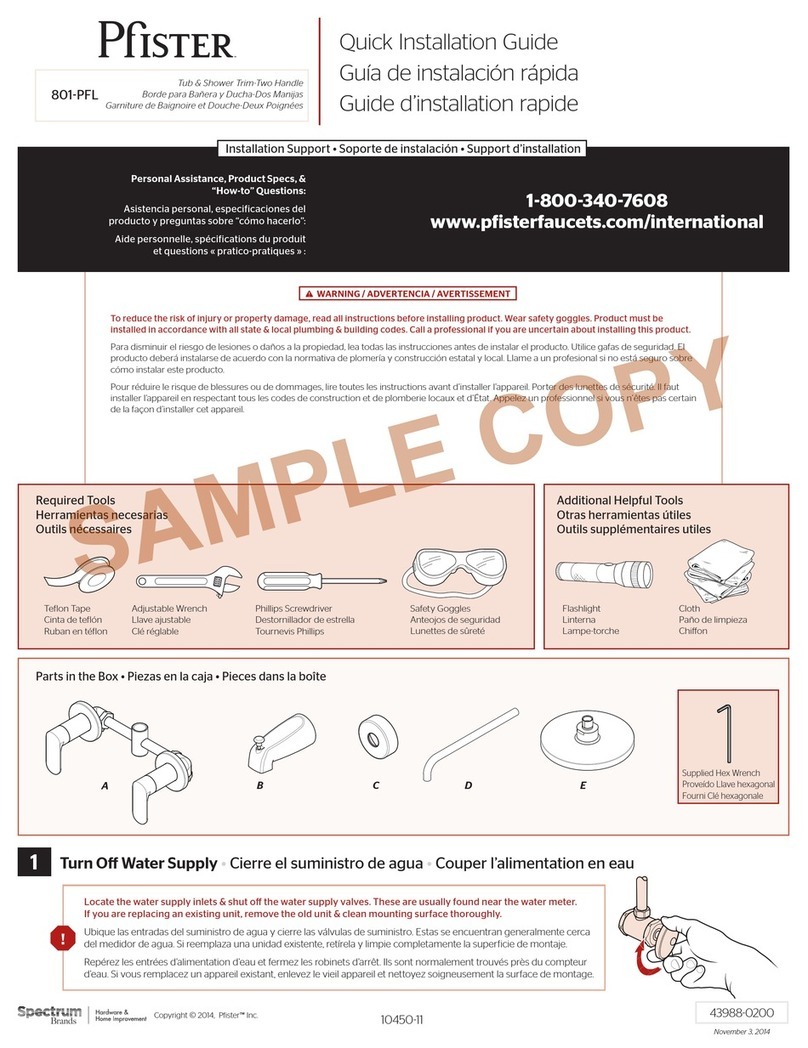
Required Tools
Herramientas necesarias
Outils nécessaires
Additional Helpful Tools
Otras herramientas útiles
Outils supplémentaires utiles
Parts in the Box
Piezas en la caja
Pieces dans la boîte
Items shown are not to scale.
De resultados no están a escala.
Produits aichés ne sont pas à l'échelle.
F- 529 -7C N
A
E
C
BDH
1125904
WARNING / ADVERTENCIA / AVERTISSEMENT
F
G
SAMPLE COPY
2
2A
2Prepare Faucet for Installation
Prepare el grifo para la instalación
Préparez le robinet pour l'installation
2D
No Tools Required for This Step
No se necesitan herramientas para este paso
Pas d'outil nécessaire pour cette étape
2B
Remove and save for step 5A.
Quite y ahorre para el paso 5A.
Enlevez et économisez pour
l'étape 5A.
Disassemblies and hose position
Desmontajes y posición de la manguera
Démontages et position de tuyau
Retract hose to position shown
Contraiga las mangueras a la posición
demostrada
Rétractez les tuyaux dans la position
montrée
A
2C
Remove and save for step 4B.
Quite y ahorre para el paso 4B.
Enlevez et économisez pour
l'étape 4B.
A2
A1
3
3
3A
OPTION 1: Install Spout without Deckplate
OPCIÓN 1: Instalación de el surtidor sin la placa de cubierta
OPTION 1 : Installez le bec sans la plaque de couverture
Check for sharp edges on mounting holes
before inserting hoses.
Compruebe para saber si hay ilos en los agujeros de
montaje antes de insertar las mangueras..
Vériiez les bords pointus sur des trous de montage
avant d'insérer des tuyaux.
No Tools Required for This Step
No se necesitan herramientas para este paso
Pas d'outil nécessaire pour cette étape
B3
A
E
D
A
E
D
4
3
3A
OPTION 2: Install Spout with Deckplate
OPCIÓN 2: Instalación de el surtidor con la placa de cubierta
OPTION 2 : Installez le bec avec la plaque de couverture
Plumber’s Putty
Masilla para plomeria
Mastic de plombier
B
C
B3
B
B3
A
B3
C
Check for sharp edges on mounting
holes before inserting hoses.
Compruebe para saber si hay ilos en los
agujeros de montaje antes de insertar las
mangueras.
Vériiez les bords pointus sur des trous de
montage avant d'insérer des tuyaux.
Apply plumber’s putty in the groove along the bottom
outer edge of plate (B).
Use plumber's putty
according to manufacturer’s
instructions.
Aplique masilla de plomería en la ranura a lo largo del borde
exterior de la placa inferior (B).
Utilice plumber' masilla de s según las instrucciones del
fabricante.
Appliquez du mastic de plombier dans la rainure sur le bord
extérieur de la plaque (B).
Employez plumber' ; mastic de s selon les instructions du
fabricant.
A
5
4A
4
4B
Screwdriver
Destornillador
Tournevis
From Step 2C.
Desde el paso 2C.
De l’étape 2Cz .
F
G
A2
Secure Faucet
Asegure el grifo
Fixez le robinet
Quick Install ™
Tool
B3
G
B3
F
Bumps face up.
Topa cara arriba.
Cogne récepteur.
B3
A2
Replace nut removed at step 2C,
hand tighten.
Substituya la tuerca quitada del paso 2C,
mano aprietan.
Remplacez l'écrou enlevé de l'étape 2C,
main serrent.
Quick Install™Tool
Before inal tightening,
ensure faucet is aligned.
Antes del apriete inal,
asegurar el grifo está alineado.
Avant le serrage inal, assurez
robinet est aligné.
6
5B
5
Hex Wrench
Llave hexagonal
Clé hexagonale
5A
Install Weight and Re-Attach Connector to Hose
Instale el peso y reate el conectador a la manguera
Installez le poids et rattachez le connecteur au tuyau
No Tools Required for This Step
No se necesitan herramientas para este paso
Pas d'outil nécessaire pour cette étape
From Step 2B.
Desde el paso 2B.
De l’étape 2B.
A1
H
Push up until cannot
pull down.
Empuje para arriba
hasta no puede tirar
hacia abajo.
Poussez vers le haut
jusqu'au au pouvoir
abaisser.
B3
A1
B3
H
Replace connector removed at step 2B.
Hand tighten.
Conector quitado en el paso 2B reemplazar.
Apriete con la mano.
Remplacer connecteur retiré à l'étape 2B.
Serrez à la main.
7
6
Adjustable Wrenches
Llaves ajustables
Clés â mollette
Connect Water Supply Lines
Conecte las tuberías de suministro de agua
Raccorder les conduites d’alimentation en eau
No Parts Required for This Step
No se necesitan piezas para este paso
Aucune pièce nécessaire pour cette étape
Hot water supply line connects to left inlet indicated by red clip (tag side).
Cold water supply line connects to right inlet indicated by blue clip.
NOTE: Incorrect application of supply lines and ittings may result in the failure
or leak of the supply lines and itting.
La línea de suministro de la agua caliente conecta con la entrada izquierda indicada por
el clip rojo (lado de la etiqueta).
La línea de suministro de la agua fría conecta con la entrada derecha indicada por el clip azul.
NOTA : El uso incorrecto de líneas de suministro y de guarniciones puede dar lugar a la
falta o al escape de las líneas de suministro y de la guarnición.
La canalisation d'alimentation d'eau chaude se relie à l'admission gauche indiquée par
l'agrafe rouge (côté d'étiquette).
La canalisation d'alimentation d'eau froide se relie à l'admission droite indiquée par l'agrafe
bleue.
REMARQUE : L’application incorrecte des canalisations et des garnitures d’alimentation
peut avoir comme conséquence l’échec ou la fuite des canalisations et de l’ajustage de
précision d’alimentation.
Loop & secure if neccessary.
El lazo y asegura en caso de necesidad.
La boucle et ixent au besoin.
3/8 inch female connection. Adapter
may be required (not supplied).
Conexión de la hembra de 3/8 pulgada.
El adaptador puede ser requerido (no
proveído).
Reccordement de femelle de 3/8 pouce.
L'adapteur peut être exigé (non fourni).
6A
x2 Blue (cold)
Red (hot)
Rojo (frío)
Azul (caliente)
Rouge (froid)
Bleu (chaud)
8
8
9
9C9A 9B
Allow full hot & full cold water to run for at
least 15 seconds each.
Deje correr el agua caliente y fría durante al
menos 15 segundos cada una.
Permettez à l'eau chaude et l'eau froide de
couler au moins 15 secondes chacun.
15
sec
Turn On Water & Conirm Proper Installation
Active el suministro de agua y conirme que la instalación está adecuadamente efectuada
Ouvrez l’eau et conirmez que l’installation est correcte
Flush the Faucet Before Using
Limpie el grifo con un chorro de agua antes de usar
Rincez le robinet avant utilisation
No Parts Required for This Step
No se necesitan piezas para este paso
Pas de pièce nécessaire pour cette étape
Check for leaks above and below the sink.
Revise si hay fugas encima y debajo del fregadero
Vériiez s'il y a des fuites au dessus ainsi qu'au dessous
de l'évier.
Cold
Fría
Froid
Hot
Caliente
Chaud
Open
Abierta
Ouvert
9
10
For Additional Installation Help:
Para la instalación adicionales de ayuda:
Pour aider à l’installation supplémentaires:
1800PFAUCET (7328238)
pisterfaucets.com
Faucet Functions
Funciones del grifo
Fonctions du robinet
Hot
Caliente
Chaud
Cold
Fría
Froid
Open
Abierta
Ouvert
The faucet will always turn on in stream mode.
To activate the spray mode, depress lower button.
To return to stream mode, quickly depress upper button.
To pause in either mode, depress and hold upper button.
El grifo siempre se enciende en modo de lujo.
Para activar el modo de rociado, presione el botón inferior.
Para volver al modo corriente presión rápidamente el botón superior.
Para hacer una pausa en los modos, presione y mantenga presionado
el botón superior.
Le robinet est toujours sous tension en mode lux.
Pour activer le mode de pulvérisation, appuyez sur le bouton ci-
dessous.
Pour revenir au mode actuel appuyez rapidement sur le bouton du
haut.
En mode de pause, appuyez et maintenez le bouton du haut.
SAMPLE COPY

Other Pfister Plumbing Product manuals

Pfister Verve LG42-VRV User manual

Pfister

Pfister Verve LG42-VRV User manual

Pfister Solita 8P8-SO User manual

Pfister

Pfister Solita 8P8-SO User manual

Pfister Woodbury LG49-WD0 User manual

Pfister

Pfister Woodbury LG49-WD0 User manual

Pfister Arterra LG6-4DE User manual

Pfister

Pfister Arterra LG6-4DE User manual

Pfister Karci LF-049-KA User manual

Pfister

Pfister Karci LF-049-KA User manual

Pfister Venturi LF-042-VN User manual

Pfister

Pfister Venturi LF-042-VN User manual

Pfister Kaylon F-049-KY User manual

Pfister

Pfister Kaylon F-049-KY User manual

Pfister Venturi F-529-7VN User manual

Pfister

Pfister Venturi F-529-7VN User manual
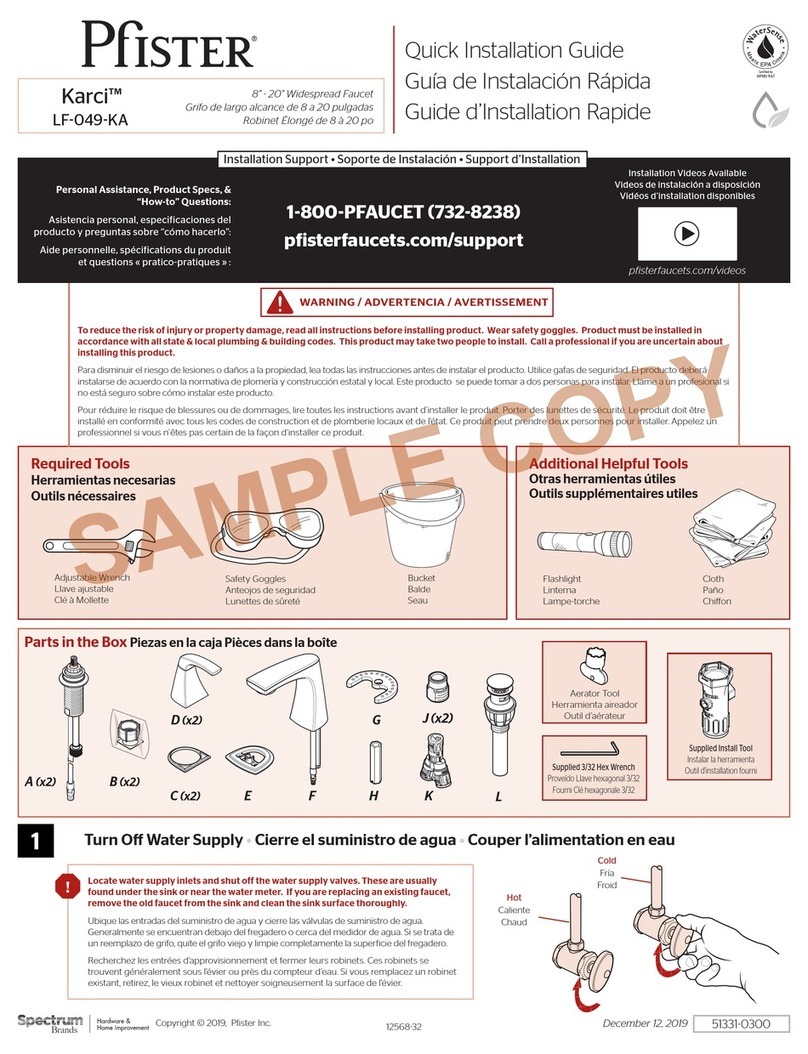
Pfister Jaida LF-042-JD User manual

Pfister

Pfister Jaida LF-042-JD User manual

Pfister Santiago 49 Series User manual

Pfister

Pfister Santiago 49 Series User manual

Pfister Kenzo RT6-4DF User manual

Pfister

Pfister Kenzo RT6-4DF User manual

Pfister Auden LF-042-AD User manual

Pfister

Pfister Auden LF-042-AD User manual

Pfister Arterra RT6-4DE User manual

Pfister

Pfister Arterra RT6-4DE User manual

Pfister Vorena F534-7VO User manual

Pfister

Pfister Vorena F534-7VO User manual

Pfister Savannah 801 Series User manual
Pfister

Pfister Savannah 801 Series User manual

Pfister Winfield LG48-WF0 User manual

Pfister

Pfister Winfield LG48-WF0 User manual

Pfister Park Avenue LG40-FE0 User manual

Pfister

Pfister Park Avenue LG40-FE0 User manual

Pfister Solita F-049-SO User manual

Pfister

Pfister Solita F-049-SO User manual

Pfister Ashfield LG72 Series User manual

Pfister

Pfister Ashfield LG72 Series User manual

Pfister Vorena 8P8-VO User manual

Pfister

Pfister Vorena 8P8-VO User manual

Pfister Kaylon LF-049-KY User manual

Pfister

Pfister Kaylon LF-049-KY User manual

Pfister Talby F-034-4TT User manual

Pfister

Pfister Talby F-034-4TT User manual

Pfister Jaida F-042-JD User manual

Pfister

Pfister Jaida F-042-JD User manual

Pfister Iyla 016-TR1 User manual

Pfister

Pfister Iyla 016-TR1 User manual

Popular Plumbing Product manuals by other brands

Grohe EUROSMART COSMOPOLITAN E 36 332 manual

Grohe

Grohe EUROSMART COSMOPOLITAN E 36 332 manual

Dallmer DallBit S 15 manual

Dallmer

Dallmer DallBit S 15 manual

baliv DU-2080 manual

baliv

baliv DU-2080 manual

EQUATION BB77 instruction manual

EQUATION

EQUATION BB77 instruction manual

Weka Kemi Eck 1 ASSEMBLY, USER AND MAINTENANCE INSTRUCTIONS

Weka

Weka Kemi Eck 1 ASSEMBLY, USER AND MAINTENANCE INSTRUCTIONS

VOXORT BIANCA 46461 Installation instruction

VOXORT

VOXORT BIANCA 46461 Installation instruction

Belanger 43CT PRODUCT CARE

Belanger

Belanger 43CT PRODUCT CARE

Sanela SLW 02GT Instructions for use

Sanela

Sanela SLW 02GT Instructions for use

Moen ioDIGITAL T3490 Series manual

Moen

Moen ioDIGITAL T3490 Series manual

HSK Lavida 1900019 manual

HSK

HSK Lavida 1900019 manual

American Standard 6516 Top Spud Series installation instructions

American Standard

American Standard 6516 Top Spud Series installation instructions

Franke SIRIUS ZSIRX0040 Installation and operating instructions

Franke

Franke SIRIUS ZSIRX0040 Installation and operating instructions

Rubi LEXA RLX32D quick start guide

Rubi

Rubi LEXA RLX32D quick start guide

STIEBEL ELTRON WSN 10 Operation and installation manual

STIEBEL ELTRON

STIEBEL ELTRON WSN 10 Operation and installation manual

T&S B-0679 Installation and maintenance instructions

T&S

T&S B-0679 Installation and maintenance instructions

Hans Grohe Metris S 31063821 manual

Hans Grohe

Hans Grohe Metris S 31063821 manual

Toto TTMR202MFK manual

Toto

Toto TTMR202MFK manual

abi VESI 13543 installation guide

abi

abi VESI 13543 installation guide

manuals.online logo
manuals.online logoBrands
  • About & Mission
  • Contact us
  • Privacy Policy
  • Terms and Conditions

Copyright 2025 Manuals.Online. All Rights Reserved.