Set Up Menu:
The setup menu s used to adjust the d fferent parameters of the hazer.
The MENU button s used to nav gate through the menu opt ons.
• DMX512 Add: Press the up and down arrows to adjust the DMX address.
• FAN SPEED: press the up and down arrows to adjust the fan speed.
• VOLUME OUT: press the up and down arrows to adjust the output volume 1-100%
• INTERVAL SET: press the up and down arrows to adjust the nterval t me 10s-200s
• DURATION SET: press the up and down arrows to adjust the durat on t me 10s-100s
First Time Operation - Panel Control:
• Before you start us ng th s un t, please check there s no transportat on damage, should there be any, please
do not use the dev ce and contact your dealer mmed ately.
• The PFX1000H PRO s des gned to be used w th water based haze l qu d, NEVER OIL BASED.
• Put the haze mach ne on a flat stable surface. Make sure no one can put any body part close to the heater output.
• Unscrew the L d on the flu d bottle, f ll up w th a su table fog l qu d, do not to overf ll. Screw the plast c cap
back on and ensure the tank never runs dry dur ng operat on.
• Connect the PFX1000H PRO to a su table ma ns supply.
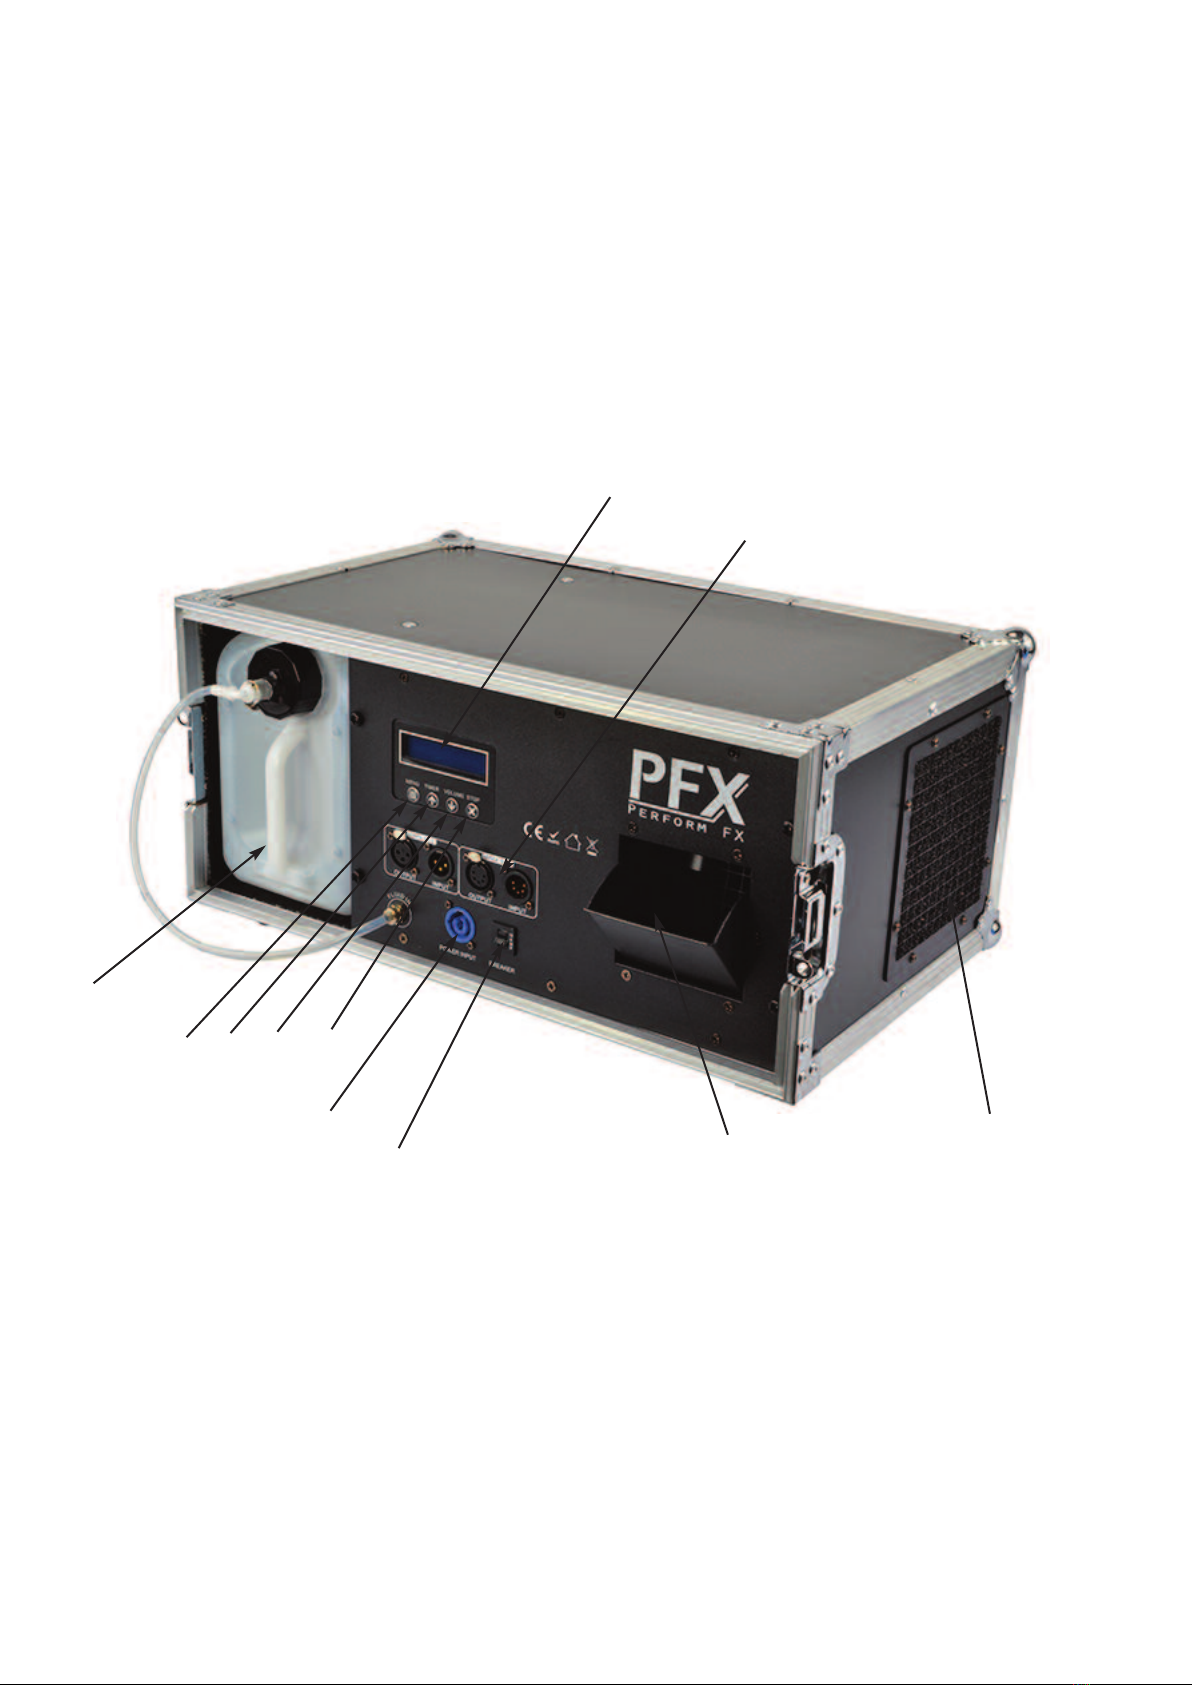
• There s a s mple 4 button menu w th LCD d splay on the back of the un t, the buttons control menu, T mer,
Volume and Stop. When you f rst turn on the haze mach ne you w ll need to wa t for around 3-5 m nutes for
the heater to warm up. Then you w ll get access to the controls.
• Press the menu button to scroll through opt ons and use the up down buttons to make changes. Use the 4
button Menu to set, fan speed, volume, nterval and durat on.
• Once set the volume button act vates manual mode, t mer button act vates t mer mode. The stop button
stops t mer and manual mode.
• After press ng stop allow the self clean ng funct on to run before turn ng the haze mach ne off.
First Time Operation Wit DMX:
• Before you start us ng th s un t, please check there s no transportat on damage, should there be any, please
do not use the dev ce and contact your dealer mmed ately.
• The PFX1000H PRO s des gned to be used w th water based haze l qu d. NEVER OIL BASED.
• Put the haze mach ne on a flat stable surface. Make sure no one can put any body part close to the heater output.
• Unscrew the L d on the flu d bottle, f ll up w th a su table fog l qu d, do not to overf ll. Screw the plast c cap
back on and ensure the tank never runs dry dur ng operat on.
• Connect the PFX1000H PRO to a su table ma ns supply.
• There s a s mple 4 button menu w th LCD d splay on the back of the un t, the buttons control menu, T mer,
Volume and Stop. When you f rst turn on the haze mach ne you w ll need to wa t for around 3-5 m nutes for
the heater to warm up. Then you w ll get access to the controls.
• Press the menu button to scroll through opt ons and use the up down buttons to make changes.
• Set a DMX address v a the 4 button d splay.
• Once heated the hazer can be controlled by 2 channels of DMX, 1=Fan Speed and 2= Volume Output.
• Remember to set the volume output to zero, th s runs the self clean ng funct on. Wa t wh le th s s
performed, then turn off the haze mach ne.
Self-Cleaning Function:
Please do not turn your un t stra ght off after us ng. Th s mach ne has a self-clean ng funct on. Th s pushes a r
through the pump and heater to remove any res due of l qu d left after use, th s w ll prolong the l fe of the
heater. If n DMX mode turn the haze output to zero, then turn the power off after about 1 m nute 30
seconds. If us ng the nternal menu, use the stop button, then turn power off after 1m nute 30 seconds.