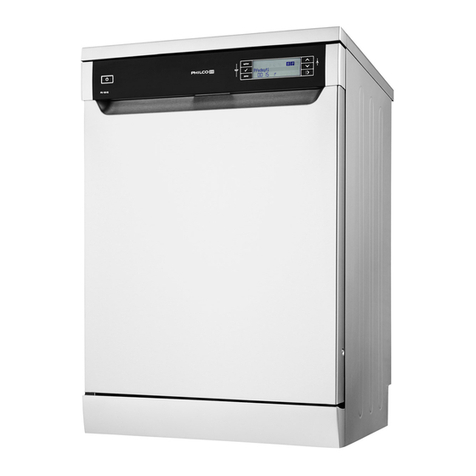
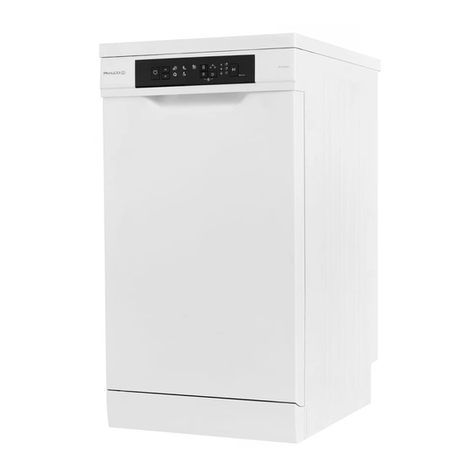
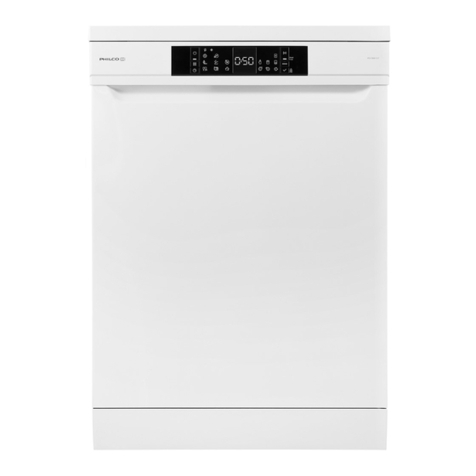
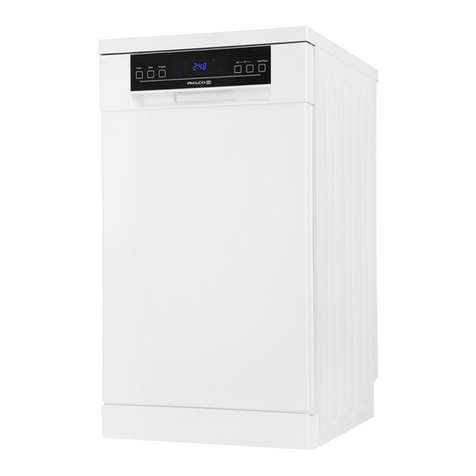
Philco PDT 66 F User manual

Dishwasher
OWNER’S MANUAL
PDT 66 F

Dear customer,
Thank you for buying a PHILCO brand product. So that your appliance serves you well, please read all
the instructions in this user’s manual.
Copyright © 2020, Fast ČR, a. s. Revision 10/2021

Copyright © 2020, Fast ČR, a. s. Revision 10/2021
EN - 1
CONTENTS
PART 1: SAFETY PRECAUTIONS .......................................................................................................................2
PART 2: PRODUCT OVERVIEW..........................................................................................................................5
PART 3: USING YOUR DISHWASHER ................................................................................................................6
Loading The Salt Into The Softener.............................................................................................................................................. 6
PART 4: MAINTENANCE AND CLEANING.........................................................................................................8
External Care........................................................................................................................................................................................8
Internal Care......................................................................................................................................................................................... 8
Caring For The Dishwasher...........................................................................................................................................................10
PART 5: INSTALLATION INSTRUCTION ..........................................................................................................12
About Power Connection..............................................................................................................................................................12
Water Supply And Drain ................................................................................................................................................................13
Connection Of Drain Hoses..........................................................................................................................................................14
Positioning The Appliance............................................................................................................................................................15
Built-In Installation...........................................................................................................................................................................15
PART 6: TROUBLESHOOTING TIPS .................................................................................................................19
Availability Of Spare Parts.............................................................................................................................................................21
PART 7: LOADING THE BASKETS ACCORDING TO EN60436.........................................................................22
PART 8: QUICK USER GUIDE ...........................................................................................................................24
PART 9: USING YOUR DISHWASHER ..............................................................................................................25
Control Panel .....................................................................................................................................................................................25
Water Softener ..................................................................................................................................................................................26
Preparing And Loading Dishes....................................................................................................................................................27
Function Of The Rinse Aid And Detergent..............................................................................................................................30
Filling The Rinse Aid Reservoir.....................................................................................................................................................31
Filling The Detergent Dispenser .................................................................................................................................................32
PART 10: PROGRAMMING THE DISHWASHER...............................................................................................33
Wash Cycle Table ..............................................................................................................................................................................33
Wash Cycle Table ..............................................................................................................................................................................34
Saving Energy....................................................................................................................................................................................35
Starting A Programme....................................................................................................................................................................35
Changing The Program Mid-cycle..............................................................................................................................................35
Forget To Add A Dish? ....................................................................................................................................................................36
PART 11: ERROR CODES..................................................................................................................................37
PART 12: TECHNICAL INFORMATION.............................................................................................................38
PART 13: PRODUCT INFORMATION SHEET..................................................................................................39
TECHNICAL INFORMATION ...........................................................................................................................................................40
TESTING INFORMATION .................................................................................................................................................................40
CUSTOMER CARE AND SERVICE..................................................................................................................................................40
INSTRUCTIONS AND INFORMATION REGARDING THE DISPOSAL OF USED PACKAGING MATERIALS...............41
DISPOSAL OF USED ELECTRICAL AND ELECTRONIC APPLIANCES.................................................................................41

Copyright © 2020, Fast ČR, a. s. Revision 10/2021
EN - 2
PART 1: SAFETY PRECAUTIONS
WARNING! Please adhere to the precautions below when using
the dishwasher:
This appliance can be used by children aged from 8 years and
above and by persons with reduced physical, sensory or mental
capabilities or lack of experience and knowledge if they have been
given supervision or instructions concerning use of the appliance
in a safe way and if they understand the hazards involved.
Children must not play with the appliance.
Cleaning and user maintenance cannot be performed by children
without supervision.
If the supply cable gets damaged, have it replaced by a specialized
service center in order to avoid dangerous situations. It is
prohibited to use an appliance with the supply cable damaged.
Do not leave the door in the open position to prevent the risk of
tripping.
When storing dishes into the dishwasher:
- WARNING: Knives and other utensils with sharp points
and edges must be placed in the basket with points facing
downwards or stored horizontally.
- Sharp items should be placed so that they cannot damage the
door gasket.

Copyright © 2020, Fast ČR, a. s. Revision 10/2021
EN - 3
- Knives and other similar sharp items should always be placed
with their handles pointing upwards so that the sharp edge
would not hurt anybody.
- Do not use the dishwasher to wash plastic items that have
not been labeled as dishwasher safe by the manufacturer. The
presence of plastic dishes in the dishwasher causes worsening
of drying process results. Please adhere to the manufacturer’s
recommendations regarding plastic items that have not been
labeled as dishwasher safe.
THIS APPLIANCE IS INTENDED TO BE USED ONLY IN
HOUSEHOLDS AND NOT IN SIMILAR PREMISES, SUCH AS:
– kitchenettes in shops, oces and other workplaces;
– agricultural facilities;
– hotels, motels, and other accommodation facilities where
appliances are used by guests;
– bed and breakfast facilities.
• Donotsitorstandonthedooranddishbasketsofthe
dishwasher and to not use force during operation.
• Donotplaceanyheavyitemsontheapplianceanddotostand
on the door when it is open. The appliance might tip over
towards the front.
Use only detergents and polishing agents intended to be used with
automatic dishwashers. Never use soap, detergents or washing
agents for manual dish washing.
Make sure to prevent children from accessing detergents and
polishing agents and also open door of the dishwasher that might
contain residues of the agents as they are strongly alcaline and
might be very dangerous.

Copyright © 2020, Fast ČR, a. s. Revision 10/2021
EN - 4
The appliance, the power cord or the electric outlet must not lie
in, tough or be submerged in water or any other liquid to avoid
electrical hazards.
If the power cord gets damaged, it must be replaced by the
manufacturer, its service technician or another person with similar
qualication so that safety is not jeopardized.
The appliance must not stand on the power cord.
The appliance should be connected to the water supply using a
new hose, not using a hose that has already been used.
Dispose of packaging in a proper manner.
The power cord must not be excessively or dangerously bent or
compressed during installation.
The controls are not to be played with.
Make sure that the openings in the bottom part of the appliance
are not blocked by the carpet.
The dishwasher should be used only for the purpose it was
intended for - for washing dishes.
This dishwasher is for interior use only.
PLEASE READ THOSE SAFETY PRECAUTIONS CAREFULLY AND
STORE THEM FOR FUTURE REFERENCE

Copyright © 2020, Fast ČR, a. s. Revision 10/2021
EN - 5
PART 2: PRODUCT OVERVIEW
IMPORTANT:
To get the best performance from your dishwasher, read all operating instructions before using it for the
rst time.
Spray arm
Filter assembly
Salt container
Dispenser
Cup rack
Basket Cutlery rack
NOTE:
Pictures are only for reference, dierent models may be dierent.

Copyright © 2020, Fast ČR, a. s. Revision 10/2021
EN - 6
PART 3: USING YOUR DISHWASHER
Before using your dishwasher:
OutsideInside
1. Set the water softener
2. Loading the salt Into the softener
3. Loading the basket
4. Fill the detergent dispenser
NOTE:
Please check the section “Water Softener”. If you need to set the water softener.
Loading The Salt Into The Softener
NOTE:
If your model does not have any water softener, you may skip this section.
Always use salt intended for dishwasher use.
The salt container is located beneath the lower basket and should be lled as explained in the following:
WARNING
• Onlyusesaltspecicallydesignedfordishwashersuse!
Every other type of salt not specically designed for dishwasher use, especially table salt, will damage
the water softener. In case of damages caused by the use of unsuitable salt the manufacturer does not
give any warranty nor is liable for any damages caused.
• Onlyllwithsaltbeforerunningacycle.
This will prevent any grains of salt or salty water, which may have been spilled, remaining on the
bottom of the machine for any period of time, which may cause corrosion.

Copyright © 2020, Fast ČR, a. s. Revision 10/2021
EN - 7
Please follow the steps below for adding dishwasher salt:
1. Remove the lower basket and unscrew the reservoir cap.
2. Place the end of the funnel (if supplied) into the hole and pour in about 1 kg of dishwasher salt.
3. Fill the salt container to its maximum limit with water, It is normal for a small amount of water to come out
of the salt container.
4. After lling the container, screw back the cap tightly.
5. The salt warning light will turn o after the salt container has been lled with salt.
6. Immediately after lling the salt into the salt container, a washing program should be started (We suggest
to use a short program). Otherwise the lter system, pump or other important parts of the machine may
be damaged by salty water. This is out of warranty.
NOTE:
• Thesaltcontainermustonlyberelledwhenthesaltwarninglight(
) in the control panel comes
on. Depending on how well the salt dissolves, the salt warning light may still be on even though the
salt container is lled. If there is no salt warning light in the control panel (for some models), you can
estimate when to ll the salt into the softener by the cycles that the dishwasher has run.
• Ifsalthasspilled,runasoakorquickprogramtoremoveit.

Copyright © 2020, Fast ČR, a. s. Revision 10/2021
EN - 8
PART 4: MAINTENANCE AND CLEANING
External Care
The door and the door seal
Clean the door seals regularly with a soft damp cloth to remove food deposits.
When the dishwasher is being loaded, food and drink residues may drip onto the sides of the dishwasher
door. These surfaces are outside the wash cabinet and are not accessed by water from the spray arms. Any
deposits should be wiped o before the door is closed.
Thecontrolpanel
If cleaning is required, the control panel should be wiped with a soft damp cloth only.
WARNING
• Toavoidpenetrationofwaterintothedoorlockandelectricalcomponents,donotuseaspraycleaner
of any kind.
• Neveruseabrasivecleanersorscouringpadsontheoutersurfacesbecausetheymayscratchthenish.
Some paper towels may also scratch or leave marks on the surface.
Internal Care
Filtering system
The ltering system in the base of the wash cabinet retains coarse debris from the washing cycle, including
foreign objects such as tooth picks or shards. The collected coarse debris may cause the lters to clog. Check
the condition of the lters regularly, carefully remove foreign objects and clean the parts of the ltering
system if necessary with water. Follow the steps below to clean the lter.
NOTE:
Pictures are only for reference, dierent models of the ltering system and spray arms may be dierent.

Copyright © 2020, Fast ČR, a. s. Revision 10/2021
EN - 9
1Hold the coarse lter and rotate it
anticlockwise to unlock the lter. Lift the
lter upwards and out of the dishwasher.
2Lift ne lter up from main lter.
Open
Fine lter
Main lter
3Larger food remnants can be cleaned by
rinsing the lter under running water.
For a more thorough clean, use a soft
cleaning brush.
4Reassemble the lters in the reverse
order of the disassembly, replace the lter
insert, and rotate clockwise to the close
arrow.
WARNING
• Donotovertightenthelters.Puttheltersbackinsequencesecurely,otherwisecoarsedebriscould
get into the system and cause a blockage.
• NEVERusethedishwasherwithoutltersinplace.Improperreplacementoftheltermayreducethe
performance level of the appliance and damage dishes and utensils.

Copyright © 2020, Fast ČR, a. s. Revision 10/2021
EN - 10
Sprayarm
It is necessary to clean the spray arm regularly for hard water chemicals will clog the spray arm jets and
bearings.
To clean the spray arm, follow the instructions below:
1To remove the spray arm, pull out the
spray arm upward.
2Wash the spray arm in soapy and warm
water and use a soft brush to clean the
jets. Replace them after rinsing them
thoroughly.
Caring For The Dishwasher
Frostprecaution
Please take frost protection measures on the dishwasher in winter. Every after washing cycles, please operate
as follows:
1. Cut o the electrical power to the dishwasher at the supply source.
2. Turn o the water supply and disconnect the water inlet pipe from the water valve.
3. Drain the water from the inlet pipe and water valve. (Use a pan to gather the water)
4. Reconnect the water inlet pipe to the water valve.
5. Remove the lter at the bottom of the tub and use a sponge to soak up water in the sump.
After every wash
After every wash, turn o the water supply to the appliance and leave the door slightly open for a while so that
moisture and odors are not trapped inside.
Removetheplug
Before cleaning or performing maintenance, always remove the plug from the socket.

Copyright © 2020, Fast ČR, a. s. Revision 10/2021
EN - 11
Nosolventsorabrasivecleaning
To clean the exterior and rubber parts of the dishwasher, do not use solvents or abrasive cleaning products.
Only use a cloth with warm soapy water.
To remove spots or stains from the surface of the interior, use a cloth dampened with water an a little vinegar,
or a cleaning product made specically for dishwashers.
When not in use for a long time
It is recommend that you run a wash cycle with the dishwasher empty and then remove the plug from the
socket, turn o the water supply and leave the door of the appliance slightly open. This will help the door seals
to last longer and prevent odors from forming within the appliance.
Movingtheappliance
If the appliance must be moved, try to keep it in the vertical position. If absolutely necessary, it can be
positioned on its back.
Seals
One of the factors that cause odours to form in the dishwasher is food that remains trapped in the seals.
Periodic cleaning with a damp sponge will prevent this from occurring.

Copyright © 2020, Fast ČR, a. s. Revision 10/2021
EN - 12
PART 5: INSTALLATION INSTRUCTION
WARNING
Electrical Shock Hazard
Disconnect electrical power before installing dishwasher.
Failure to do so could result in death or electrical shock.
ATTENTION:
The installation of the pipes and electrical equipments should be done by professionals.
AboutPowerConnection
WARNING
Forpersonalsafety:
• Donotuseanextensioncordoranadapterplugwiththisappliance.
• Donot,underanycircumstances,cutorremovetheearthingconnectionfromthepowercord.
Electrical requirements
Please look at the rating label to know the rating voltage and connect the dishwasher to the appropriate
power supply. Use the required fuse 10A/13A/16A, time delay fuse or circuit breaker recommended and
provide separate circuit serving only this appliance.
Electrical connection
Ensure the voltage and frequency of the power being corresponds to those on the rating plate. Only insert
the plug into an electrical socket which is earthed properly. If the electrical socket to which the appliance
must be connected is not appropriate for the plug, replace the socket, rather than using a adaptors or the like
as they could cause overheating and burns.
Ensurethatproperearthingexistsbeforeuse.

Copyright © 2020, Fast ČR, a. s. Revision 10/2021
EN - 13
WaterSupplyAndDrain
Cold water connection
Connect the cold water supply hose to a threaded 3/4 (inch) connector and make sure that it is fastened
tightly in place.
If the water pipes are new or have not been used for an extended period of time, let the water run to make
sure that the water is clear. This precaution is needed to avoid the risk of the water inlet to be blocked and
damage the appliance.
ordinary supply hose
safety supply hose
Aboutthesafetysupplyhose
The safety supply hose consists of the double walls. The system guarantees its intervention by blocking the
ow of water in case of the supply hose breaking and when the air space between the supply hose itself and
the outer corrugated hose is full of water.
WARNING
A hose that attaches to tap can burst if it is installed on the same water line as the dishwasher. If your sink
has one, it is recommended that the hose be disconnected and the hole plugged.
Howtoconnectthesafetysupplyhose
1. Pull the safety supply hoses out from storage compartment located at rear of dishwasher.
2. Tighten the screws of the safety supply hose to the faucet with thread 3/4 inch.
3. Turn the water fully on before starting the dishwasher.
Howtodisconnectthesafetysupplyhose
1. Turn o the water.
2. Unscrew the safety supply hose from the faucet.

Copyright © 2020, Fast ČR, a. s. Revision 10/2021
EN - 14
Connection Of Drain Hoses
Insert the drain hose into a drain pipe with a minimum diameter of 4 cm, or let it run into the sink, making
sure to avoid bending or crimping it. The height of drain pipe must be less than 600 mm. The free end of the
hose must not be immersed in water to avoid the back ow of it.
Please securely x the drain hose in either position A or position B
B
A
MAX 600 mm
Counter
DrainPipe
Back of dishwasher
Drain pipe
Inletpipeconnector
Drainpipe
MainsCable

Copyright © 2020, Fast ČR, a. s. Revision 10/2021
EN - 15
How to drain excess water from hoses
If the connection to the drain pipe is positioned higher than 1000 mm, excess water may remain in the drain
hose. It will be necessary to drain excess water from the hose into a bowl or suitable container that is held
outside and lower than the sink.
Water outlet
Connect the water drain hose. The drain hose must be correctly tted to avoid water leaks. Ensure that the
water drain hose is not kinked or squashed.
Extension hose
If you need a drain hose extension, make sure to use a similar drain hose.
It must be no longer than 4 meters; otherwise the cleaning eect of the dishwasher could be reduced.
Syphonconnection
The waste connection must be at a height less than 1000 mm (maximum) from the bottom of the dishwasher.
PositioningTheAppliance
Position the appliance in the desired location. The back should rest against the wall behind it, and the sides,
along the adjacent cabinets or walls. The dishwasher is equipped with water supply and drain hoses that can
be positioned either to the right or the left sides to facilitate proper installation.
Built-In Installation
Step1a:
If only the body into cabinets, please make this map the size of the cabinet hole.
min. 555
100
min. 550
min. 458
80
Electrical, drain band water supply
line entrances, both sides
Space of cabinet

Copyright © 2020, Fast ČR, a. s. Revision 10/2021
EN - 16
Step1b:
If the entire decorative panel into the cabinet also, the size of A should be equal to D +9.5; size B should be
equal to C+6;
Meanwhile, the cabinet around the inward booster:
both sides of the (C-555) / 2 +3; C, D and E as the second step within the relevant size decorative panels.
B=C(590)+6
min. 555
E(17)
min. 550
80
min. 458
A=D(480)+9.5
( C-555 ) / 2 +3
25
100
Electrical, drain band water supply
line entrances, both sides
Space of cabinet
Step2:Aestheticpanel’sdimensionsandinstallation
Weight of the decorative panel should be min 3Kg-max 4Kg.
Dim. A and B could be alterable by handle,
Dim. C, D and E could be alterable by fact,
Dim. E should be in range 16~22mm, besides the appliance assembling decorative panel.
8- 2(deep12)
2- 15(deep5)
21.5
457.5
590( )
480(D) 95
35
C
26.5
2- 6 through(A,changed be handle)
415.5(B,changed be handle) decorativ
e
16~22(E)
(deep12)
(deep5)
415.5 (B,changed be handle)
through (A, changed be handle)
decorative panel

Copyright © 2020, Fast ČR, a. s. Revision 10/2021
EN - 17
Step3:Assemblethedecorativepanel
NOTE:
If the machine with a decorative plate, no this step.
Step4:
Assemble the decorative door on the dishwasher, as gure. First install screw between the cabinet base board
and decorative panel, in all 16; then pull glide from out door groove, case 8-screw between decorative panels
and glide.
19 10 29 16
32
32
19 16831
3
Cabinet base board Install the hingle by screw,in all 16

Copyright © 2020, Fast ČR, a. s. Revision 10/2021
EN - 18
Decorativepanel
6
Screw,in all 16
Decorative panel
Cabinet base board Screw, in all 8
Step5:Installtheadjustscrewintothebase
Step6:
Install the dishwasher in aperture, but not full, as gure, adjust screw, let its bottom align aperture’s base, then
push dishwasher full.
Adjust screw
Table of contents
Other Philco Dishwasher manuals

Philco
Philco PD 1261 BiB User manual

Philco
Philco PDI 1568 DTBISX User manual

Philco
Philco PD 1080 User manual

Philco
Philco PDA 1482 BiT User manual

Philco
Philco PDA 1291 BIX User manual

Philco
Philco PD 156 WTE User manual

Philco
Philco PDA 870 User manual

Philco
Philco PDT 671 User manual

Philco
Philco PDP 4 WH User manual

Philco
Philco PDI 1468 BT User manual

Philco
Philco PD 1261 User manual

Philco
Philco PDA 1291 BIT User manual

Philco
Philco 204276237 User manual

Philco
Philco PD 114 XE User manual

Philco
Philco PDA 15103 X User manual

Philco
Philco PDA 1281 User manual

Philco
Philco PD 1251 BiT User manual

Philco
Philco PD 1261 BiB User manual

Philco
Philco PD 1562 W User manual

Philco
Philco PD 1052 BiT User manual