Philco PTB 821 BU User manual

REFRIGERATOR
USER’S MANUAL
PTB 821 BU

Dear customer,
Thank you for buying a PHILCO brand product. So that your appliance serves you well, please read
all the instructions in this user‘s manual.

EN - 1
05/2016
Copyright © 2016, Fast ČR, a. s.
CONTENTS
PART 1: SAFETY AND WARNING INFORMATION.......................................................................................... 2
PART 2: VIEW OF THE APPLIANCE ................................................................................................................. 5
PART 3: INSTALLATION................................................................................................................................... 6
PART 4: CHANGING OVER THE FREEZER COMPARTMENT DOOR ............................................................ 13
PART 5: OPERATION AND FUNCTIONS ....................................................................................................... 14
PART 6: NOISES DURING OPERATION......................................................................................................... 16
PART 7: DEFROSTING.................................................................................................................................... 18
PART 8: ENERGY SAVING TIPS...................................................................................................................... 19
PART 9: TROUBLESHOOTING ....................................................................................................................... 20
PART 10: INFORMATION SHEET .................................................................................................................... 21

This appliance is in accordance with the following EU guidelines: and and
EN - 2
05/2016
Copyright © 2016, Fast ČR, a. s.
PART 1: SAFETY AND WARNING INFORMATION
2009/125/EC and EC.643/2009 and 2002/96/EC
For your safety and correct usage before installing and rst using the appliance, read this user manual carefully,
including its hints and warnings. To avoid unnecessary mistakes and accidents, it is important to make sure
that all people using the appliance are thoroughly familiar with its operation and safety features. Save these
instructions and be sure that they remain with the appliance if it is moved or sold, so that anyone using it
throughout its life, will be properly informed on its usage and safety notices.
For the safety of life and property, keep the precautions of these user’s instructions as the manufacturer is not
responsible for damages caused by omission.
Safety for children and others who are vulnerable people
• This appliance can be used by children aged from 8 years and above and persons with reduced physical,
sensory or mental capabilities or lack of experience and knowledge if they have been given supervision or
instruction concerning use of the appliance in a safe way and understand the hazards involved. Children
shall not play with the appliance. Cleaning and user maintenance shall not be made by children without
supervision.
• Keep all packaging away from children as there is risk of suocation.
• If you are discarding the appliance, pull the plug out of the socket, cut the connection cable (as close to the
appliance as you can) and remove the door to prevent children playing from suering an electric shock or
from closing themselves inside it.
• If this appliance, featuring a magnetic door seals, is to replace an older appliance having a spring lock
(latch) on the door or lid, be sure to make the spring lock unusable before you discard the old appliance.
This will prevent it from becoming a death trap for a child.
General safety
WARNING!
This appliance is intended to be used in household and similar applications such as
- sta kitchen areas in shops, oces and other working environments;
- farm houses and by clients in hotels, motels and other residential type environments;
- bed and breakfast type environments;
- catering and similar non-retail applications
• WARNING — Do not store explosive substances such as aerosol cans with a ammable propellant in this
appliance.
• WARNING — If the supply cord is damaged, it must be replaced by the manufacturer, its service agent or
similarly qualied persons in order to avoid a hazard.
• WARNING — Keep ventilation openings, in the appliance enclosure or in the built-in structure, clear of
obstruction.
• WARNING — Do not use mechanical devices or other means to accelerate the defrosting process, other
than those recommended by the manufacturer.
• WARNING — Do not damage the refrigerant circuit.
2014/35/EU 2014/30/EU
EN - 3
05/2016
Copyright © 2016, Fast ČR, a. s.
• WARNING — Do not use electrical appliances inside the food storage compartments of the appliance,
unless they are of the type recommended by the manufacturer.
• WARNING — The refrigerant and insulation blowing gas are ammable. When disposing of the appliance,
do so only at an authorized waste disposal centre. Do not expose to ame.
• WARNING — To avoid a hazard due to instability of the appliance, it must be xed in accordance with the
instructions.
Refrigerant
The refrigerant isobutene (R600a) is contained within the refrigerant circuit of the appliance, a natural gas
with a high level of environmental compatibility, which is nevertheless ammable. During transportation and
installation of the appliance, ensure that none of the components of the refrigerant circuit becomes damaged.
The refrigerant (R600a) is ammable.
Caution: risk of re
If the refrigerant circuit should be damaged:
- Avoid opening ames and sources of ignition.
- Thoroughly ventilate the room in which the appliance is situated.
It is dangerous to alter the specications or modify this product in any way. Any damage to the cord may cause
a shortcircuit, re, and/or electric shock.
Electrical safety
1. The power cord must not be lengthened.
2. Make sure that the power plug is not crushed or damaged. A crushed or damaged power plug may
overheat and cause a re.
3. Make sure that you can access the main plug of the appliance.
4. Do not pull the main cable.
5. If the power plug socket is loose, do not insert the power plug. There is a risk of electric shock or re.
6. You must not operate the appliance without the interior lighting lamp cover.
7. The fridge is only applied with power supply of single phase alternating current of 220~240V/50Hz.
If uctuation of voltage in the district of user is so large that the voltage exceeds the above scope, for
safety sake, be sure to apply A.C. Automatic voltage regulator of more than 350W to the fridge. The fridge
must employ a special power socket instead of common one with other electric appliances. Its plug must
match the socket with ground wire.
Daily use
• Do not store ammable gass or liquids in the appliance, There is a risk of an explosion.
• Do not operate any electrical appliances in the appliance (e.g.electric ice cream makers, mixers etc.).
• When unplugging always pull the plug from the mains socket, do not pull on the cable.
• Do not place hot items near the plastic components of this appliance.
• Store pre-packed frozen food in accordance with the frozen food manufacture’s instructions.
• The appliances manufactures storage recommendations should be strictly adhered to. Refer to relrelevant
instructions for Storage.
• Frozen food can cause frost burns if consumed straight from the freezer compartment.
• Do not place the appliance in direct sunlight.

EN - 4
05/2016
Copyright © 2016, Fast ČR, a. s.
• Keep buring candles, lamps and other items with naked ames away from the appliance so that do not set
the appliance on re.
• The appliance is intended for keeping food stu and/or beverages in normal household as explained in
this instruction booklet The appliance is heavy. Care should be taken when moving it.
• Do not remove nor touch items from the freezer compartment if your hands are damp/wet, as this could
cause skin abrasions or frost/freezer burns.
• Never use the base, drawers, doors etc. to stand on or as supports.
• To avoid items falling and causing injury or damage to the appliance, do not overload the door racks or put
too much food in the crisper drawers.
• Never cover or obstruct the ventilation slats on the appliance.
Care and cleaning
• Before maintenance, switch o the appliance and disconnect the mains plug from the mains socket.
• Do not clean the appliance with metal objects, steam cleaner, ethereal oils, organic solvents or abrasive
cleansers.
• Do not use sharp objects to remove frost from the appliance. Use a plastic scraper.
Installation Important!
• For electrical connection carefully, follow the instructions given in this manual.
• Unpack the appliance and check if there are damages on it. Do not connect the appliance if it is damaged.
Report possible damages immediately to the place you bought it. In this case retain packing.
• It is advisable to wait at least four hours before connecting the appliance to allow the oil to ow back in the
compressor.
• Adequate air circulation should be around the appliance, lacking this leads to overheating. To achieve
sucient ventilation, follow the instructions relevant to installation.
• Wherever possible the back of the product should not be too close to a wall to avoid touching or catching
warm parts (compressor, condenser) to prevent the risk of a re, follow the instructions relevant to
installation.
• The appliance must not be locate close to radiators or cookers.
• Make sure that the mains plug is accessible after the installation of the appliance.
Service
• Any electrical work required to do the servicing of the appliance should be carried out by qualied
electrician or competent person.
• This product must be serviced by an authorized Service Center, and only genuine spare parts must be
used.
1) If the appliance is Frost Free.
2) If the appliance contains freezer compartment.

EN - 5
05/2016
Copyright © 2016, Fast ČR, a. s.
PART 2: VIEW OF THE APPLIANCE
1.
2.
3.
4.
5.
6.
7.
8.
9.
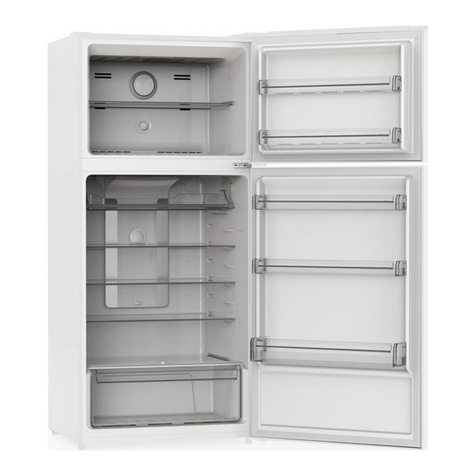
1. Freezer Chamber
2. Ice Tray
3. Temperature Regulator
4. Shelf
5. Crisper Drawer Cover
6. Crisper Drawer
7. Rack Cover
8. Upper rack on the door
9. Lower rack on the door
NOTE:
Due to unceasing modication of our products your refrigerator may be slightly dierent from this
Instruction Manual, but its functions and using methods remain the same.
How to remove the shelf from the appliance
The shelf may be placed randomly upon any of the guide slots inside the appliance. It is protected against
sliding out.
In case you want to adjust the shelves or remove the shelves from the appliance.
• Lift the shelf by hand and pull it towards you until it reaches the crack in the guide slot.
• Lift the shelf up and pull it out inclined between the door and appliance.
• Reinsertion is carried out in the opposite procedure.

EN - 6
05/2016
Copyright © 2016, Fast ČR, a. s.
PART 3: INSTALLATION
Positioning
Position the appliance away from sources of heat such as stoves, radiators, direct sunlight etc.
Maximum performance and safety are guaranteed by maintaining the correct indoor temperature for the class
of unit concerned, as specied on the rating plate. This application perform well from N to ST.
The Appliance may not work properly if it is left for a longer period at a temperature above or below the
indicated range.
Climate class Ambient temperature
SN +10°C to +32°C
N +16°C to +32°C
ST +16°C to +38°C
T +16°C to +43°C
Appliances must not be exposed to rain. Sucient air must be allowed to circulate in the lower rear section of
appliances, as poor air circulation can aect performance. Built-in appliances should be positioned away from
heat sources such as heaters and direct sunlight.
A deviation of –6V to +6V is admissible with respect to the rated voltage. For operation with other voltage
supplies, a right autotransformer is required.
Always connect the appliance to an useful earthing system For the above, if the main supply is not earthed,
connect the appliance to a separate earthing system. Consult a specialized technician to carry out the latter in
compliance with current standards.
The manufacturer declines all responsibility for failure to observe the above accident prevention standards.
Cleaning the interior prior to use
Prior to use, clean all internal parts with warm water and neutral detergent to remove the“new” odor and dry
thoroughly. Never use abrasive detergents and/or powders that can damage the appliance.
Installation instructions:
Before installing, carefully read the instruction in order to avoid a certain number of problems.

EN - 7
05/2016
Copyright © 2016, Fast ČR, a. s.
Dimensions of mounting slot
Height regulation

EN - 8
05/2016
Copyright © 2016, Fast ČR, a. s.
Installation of the appliance under the worktop
Fastening the appliance under the worktop

EN - 9
05/2016
Copyright © 2016, Fast ČR, a. s.
• This must be done before tting the cabinet outer door.
• Ensure the fridge is unplugged and empty.
• We recommend you have someone to assist you.
Tools required
• Phillips style screwdriver.
• Flat bladed screwdriver.
WARNING!
Take care when opening the hinges, They are sprung and there is a risk of injusry if they close on your
hand.
Door exchange
Remove the blanking plates from the outside of the Larder fridge door.
With the door closed remove the screws on the outside of the hinges. Start with the top hinge.
Open the hinges away from the door.

EN - 10
05/2016
Copyright © 2016, Fast ČR, a. s.
Supporting the bottom of the door as you do so. Be careful with the hinges. Remove the door.
With the top hinge open undo the screws holding it to the cabinet. Be careful with the hinge, use a long
shafted screwdriver if you have one.
Remove the blanking plates for the cabinet.
Tum the hinge over and place it on the diagonally opposite comer of the cabinet. Screw back in place.

EN - 11
05/2016
Copyright © 2016, Fast ČR, a. s.
Repeat with the other hinge, Replace the cabinet blanking plates. Replace the door and re-attach the hinges.
Check that the larder fridge door is aligned horizontally and vertically and that the door seals are secure on all
sides before nally tightening the hinge bracket screws.

EN - 12
05/2016
Copyright © 2016, Fast ČR, a. s.
Mounting the kitchen cabinet door

EN - 13
05/2016
Copyright © 2016, Fast ČR, a. s.
PART4: CHANGINGOVERTHEFREEZERCOMPARTMENTDOOR
Open the freezer compartment door a little way Using a small screwdriver, press the spring in the opening of
the lower door bearing slightly upwards and take the door bearing out complete with the door.
Position the covering cap (M) on the opposite side Turn the freezer compartment door through 180° and t the
lower door bearing into the lower bearing cavity of the freezer compartment door.
Lift the freezer compartment door a little way upwards, t it into the upper door bearing, and at the same time
insert the lower door bearing into the square hole.
Small upward and downward adjustments of the freezer compartment door will make tting easier.
TIP:
Make sure the small freezer door is closed well in the daily use. Or it may be frozen around the freezer
door, then the freezer door would be hard to open. What’s worse, the energy consume will be increased.

EN - 14
05/2016
Copyright © 2016, Fast ČR, a. s.
PART 5: OPERATION AND FUNCTIONS
Starting up and temperature regulation
Insert the plug of the connection lead into the plug socket with protective earth contact. When the refrigerator
compartment door is opened, the internal lighting is switched on.
The temperature selector knob is located on the right side of the refrigerator compartment.
Setting 0 means:
O.
Turning clockwise in direction Refrigerating unit on, the latter then operating automatically.
Setting 1 means:
Highest temperature, warmest setting.
Setting 7 (end-stop) means:
Lowest temperature, coldest setting.
IMPORTANT!
Normally we advise you select setting of 2 or 3 or 4, if you want the temperature warmer or colder please
turn the knob to lower or higher setting accordingly. When you turn the knob to lower which can lead to
the more energy eciency. Otherwise, it would result the energy-consuming.
IMPORTANT!
High ambient temperatures (e.g. on hot summer days) and a cold setting on the temperature regulator
(position 6 to 7) can cause the compressor to run continuously or even non-stop!
Reason: when the ambient temperature is high, the compressor must run continuously to maintain the
low temperature in the appliance.
IMPORTANT!
Please select the operation steps depengding on the type of the bulb.

EN - 15
05/2016
Copyright © 2016, Fast ČR, a. s.
Changing the light bulb
WARNING!
Before changing the light bulb, switch o the appliance and unplug it, or pull the fuse or the circuit
breaker.
Light bule data: 220-240V, max.15W.
To switch o the appliance, set the temperature regulator to position “0”.
Unplug the mains plug. To change the light bulb, undo the screw. Press the light bulb cover and slide it
backwards. Change the defective light bulb. Ret the light bulb cover and the screw.
Put the refrigerator back into operation.
Changing the led bulb
WARNING!
Changing the LED bulb carry out by inexperienced persons may cause injury or serious malfunctioning.
It must be replaced by a qualied persons in order to avoid a hazard. Contact your local Service Force
Center for help.
Before changing the light bulb, switch o the appliance and unplug it, or pull the fuse or the circuit
breaker.
LED bulb data: 220-240V, max.1.5W.
To switch o the appliance, set the temperature regulator to position “0”.
Unplug the mains plug. To change the light bulb, undo the screw. Press the light bulb cover and slide it
backwards. Pull out the Lampholders xed block. Change the defective light bulb. Push back the LED
bulb to the bottom, insert the Lampholders xed block into the slot. Ret the light bulb cover and the
screw. Put the refrigerator back into operation.

EN - 16
05/2016
Copyright © 2016, Fast ČR, a. s.
PART 6: NOISES DURING OPERATION
The following noises are characteristic of refrigeration appliances:
Clicks
Whenever the compressor switches on or o, a click can be heard.
Humming
As soon as the compressor is in operation, you can hear it humming.
Bubbling
When refrigerant ows into thin tubes, you can hear bubbling or splashing noises.
Splashing
Even after the compressor has been switched o, this noise can be heard for a short time.
Storing food and drink
For optimal use of the refrigerator compartment observe the following instructions:
Never put hot liquid or food in the refrigerator while evaporating;
Cover or wrap food prior to storage (food containing spices in particular);
Arrange food so that air can circulate freely inside the compartment.
Meat (all types): wrap in protective material and store up to 1-2 days maximum.
Cooked food and cold meals etc must be covered well and stored in any position in the refrigerator.
Fruit and vegetables should be cleaned and stored in the relative drawer.
Bananas, potatoes, onions and garlic should be stored in the refrigerator unless rewrapped.
Food shelves
The walls of the cold storage area are equipped with guides to enable insertion of the grids or shelves in
various positions as required.
Positioning inner door trays
Inner door trays can be inserted in various positions. To change the position proceed as follows:
Pull the tray up out of its seat and ret in the new position.
The upper tray can be removed to ensure thorough cleaning when required.
Storing frozen food/freezing fresh food
Appliances with compartments with the symbol can be used to store frozen food for a maximum time
of one month. Appliances with the symbol are suitable for storing frozen food but not for freezing
fresh food, while appliance with symbol are suitable for both uses.
• To store frozen food, ensure that the retailer has previously stored it correctly.
• The interval between purchase and placing the food in the freezer should be the minimum possible.
• Never exceed the storage period indicated on the food packaging.
• Only open the freezer door when necessary and as briey as possible.

EN - 17
05/2016
Copyright © 2016, Fast ČR, a. s.
• In the event of operation after prolonged periods of disuse, take care to set the thermostat knob to the
highest setting, and switch on the appliance under no-load conditions for 2-3 hours, then place food in
the refrigerator as required and adjust the thermostat knob to an intermediate setting. Appliances with
compartments that have no symbol are unsuitable for freezing fresh foods and for storing frozen food
• If the food stored in the freezer compartment is unintentionally defrosted, e.g.due to a power failure, it
should be consumed within a short interval even if not completely thawed. The food may also be refrozen
after being cooked ( appliance).
• Brief interruptions (up to 6-8 hours) do not aect frozen food.
IMPORTANT!
In order to make the most of the volume of the fresh food storage compartment and frozen-food storage
compartment, the user can removed one or more shelves, drawers, out of the appliance, according to
your daily use.

EN - 18
05/2016
Copyright © 2016, Fast ČR, a. s.
PART 7: DEFROSTING
Why defrosting
Water contained in food or getting into air inside the fridge be opening doors may form a layer pf frost inside.
It will weaken the refrigeration when the frost is thick. While it is more than 10mm thick, you should defrost.
Defrosting in fresh food storage compartment
It is automatically controlled by switching the temperature regulator on or o so that there is no need of
operation of defrosting.Water from defrosting will be drained into an drip tray through a drain pipe at the back
of the fridge automatically.
Defrosting in frozen-food storage compartment
Defrosting in freezer chamber is operated manually. Before defrosting, take the food out; take the ice tray and
drawers out or put them into the fresh food compartment temporarily, then set the knob of the temperature
regulator to position“0”(where the compressor will stop working) and leave the door of the refrigerator open
until ice and frost dissolve thoroughly and accumulation at the bottom of the freezer chamber. Wipe o the
water with soft cloth. In the case of speeding up the process of defrosting, you may put a bowl of warm water
(about 50°C) into the freezer chamber, and scrape away the ice and rost with a defrosting spatula. After doing
so, be sure to set the knob of the temperature regulator to the original position. It is not advisable to heat
the freezer chamber directly with hot water or hair dryer while defrosting to avoid deformation of the inner
case. It is also not advisable to scrape o ice and frost or separate food from the containers which have been
congealed together with the food with sharp tools or wooden bars, so as not to damage the inner casing or
the surface of the evaporator.
WARNING!
Before defrosting, please switch o the appliance.
To switch o the appliance, turn the temperature regulator to position ”0”.
IMPORTANT!
The fridge should be defrosted at least every one month. During the using process, if the door was opened
frequently or using the appliance in the extreme humidity, we advise the user to defrost every two weeks.
Periods of disuse
In the event of prolonged periods of disuse, clean thoroughly after emptying, disconnect the appliance from
the power supply and leave the door ajar to avoid the formation of unpleasant odors.
Table of contents
Other Philco Refrigerator manuals

Philco
Philco PCD 3602 ENF User manual

Philco
Philco PSB 442 User manual

Philco
Philco PCN 495 EX User manual

Philco
Philco PC 455 Adora User manual

Philco
Philco PT 569 Maestro User manual

Philco
Philco PC 1721 BI User manual

Philco
Philco PTL 2402 User manual

Philco
Philco PX 5261 User manual

Philco
Philco PCN 17742 EBI User manual

Philco
Philco PX 4011 X User manual

Philco
Philco PX 4551i User manual

Philco
Philco PC 2902 User manual

Philco
Philco PTL 3602 NX User manual

Philco
Philco PTB 80 F User manual

Philco
Philco PTL 3602 NX User manual

Philco
Philco PTB 1172 User manual

Philco
Philco PHK15BM Setup guide

Philco
Philco PRD-100/4A+ User manual

Philco
Philco PSL 441 User manual

Philco
Philco PT 2122 User manual