Register your product and get support at CEM210
EN Quick Start Guide
34
2
1abc
efgh
d
L-CHR-CH
AMP
a
c
b
ef
ghi
b
a
c
d
aa
bcd
abcd
b
c
d
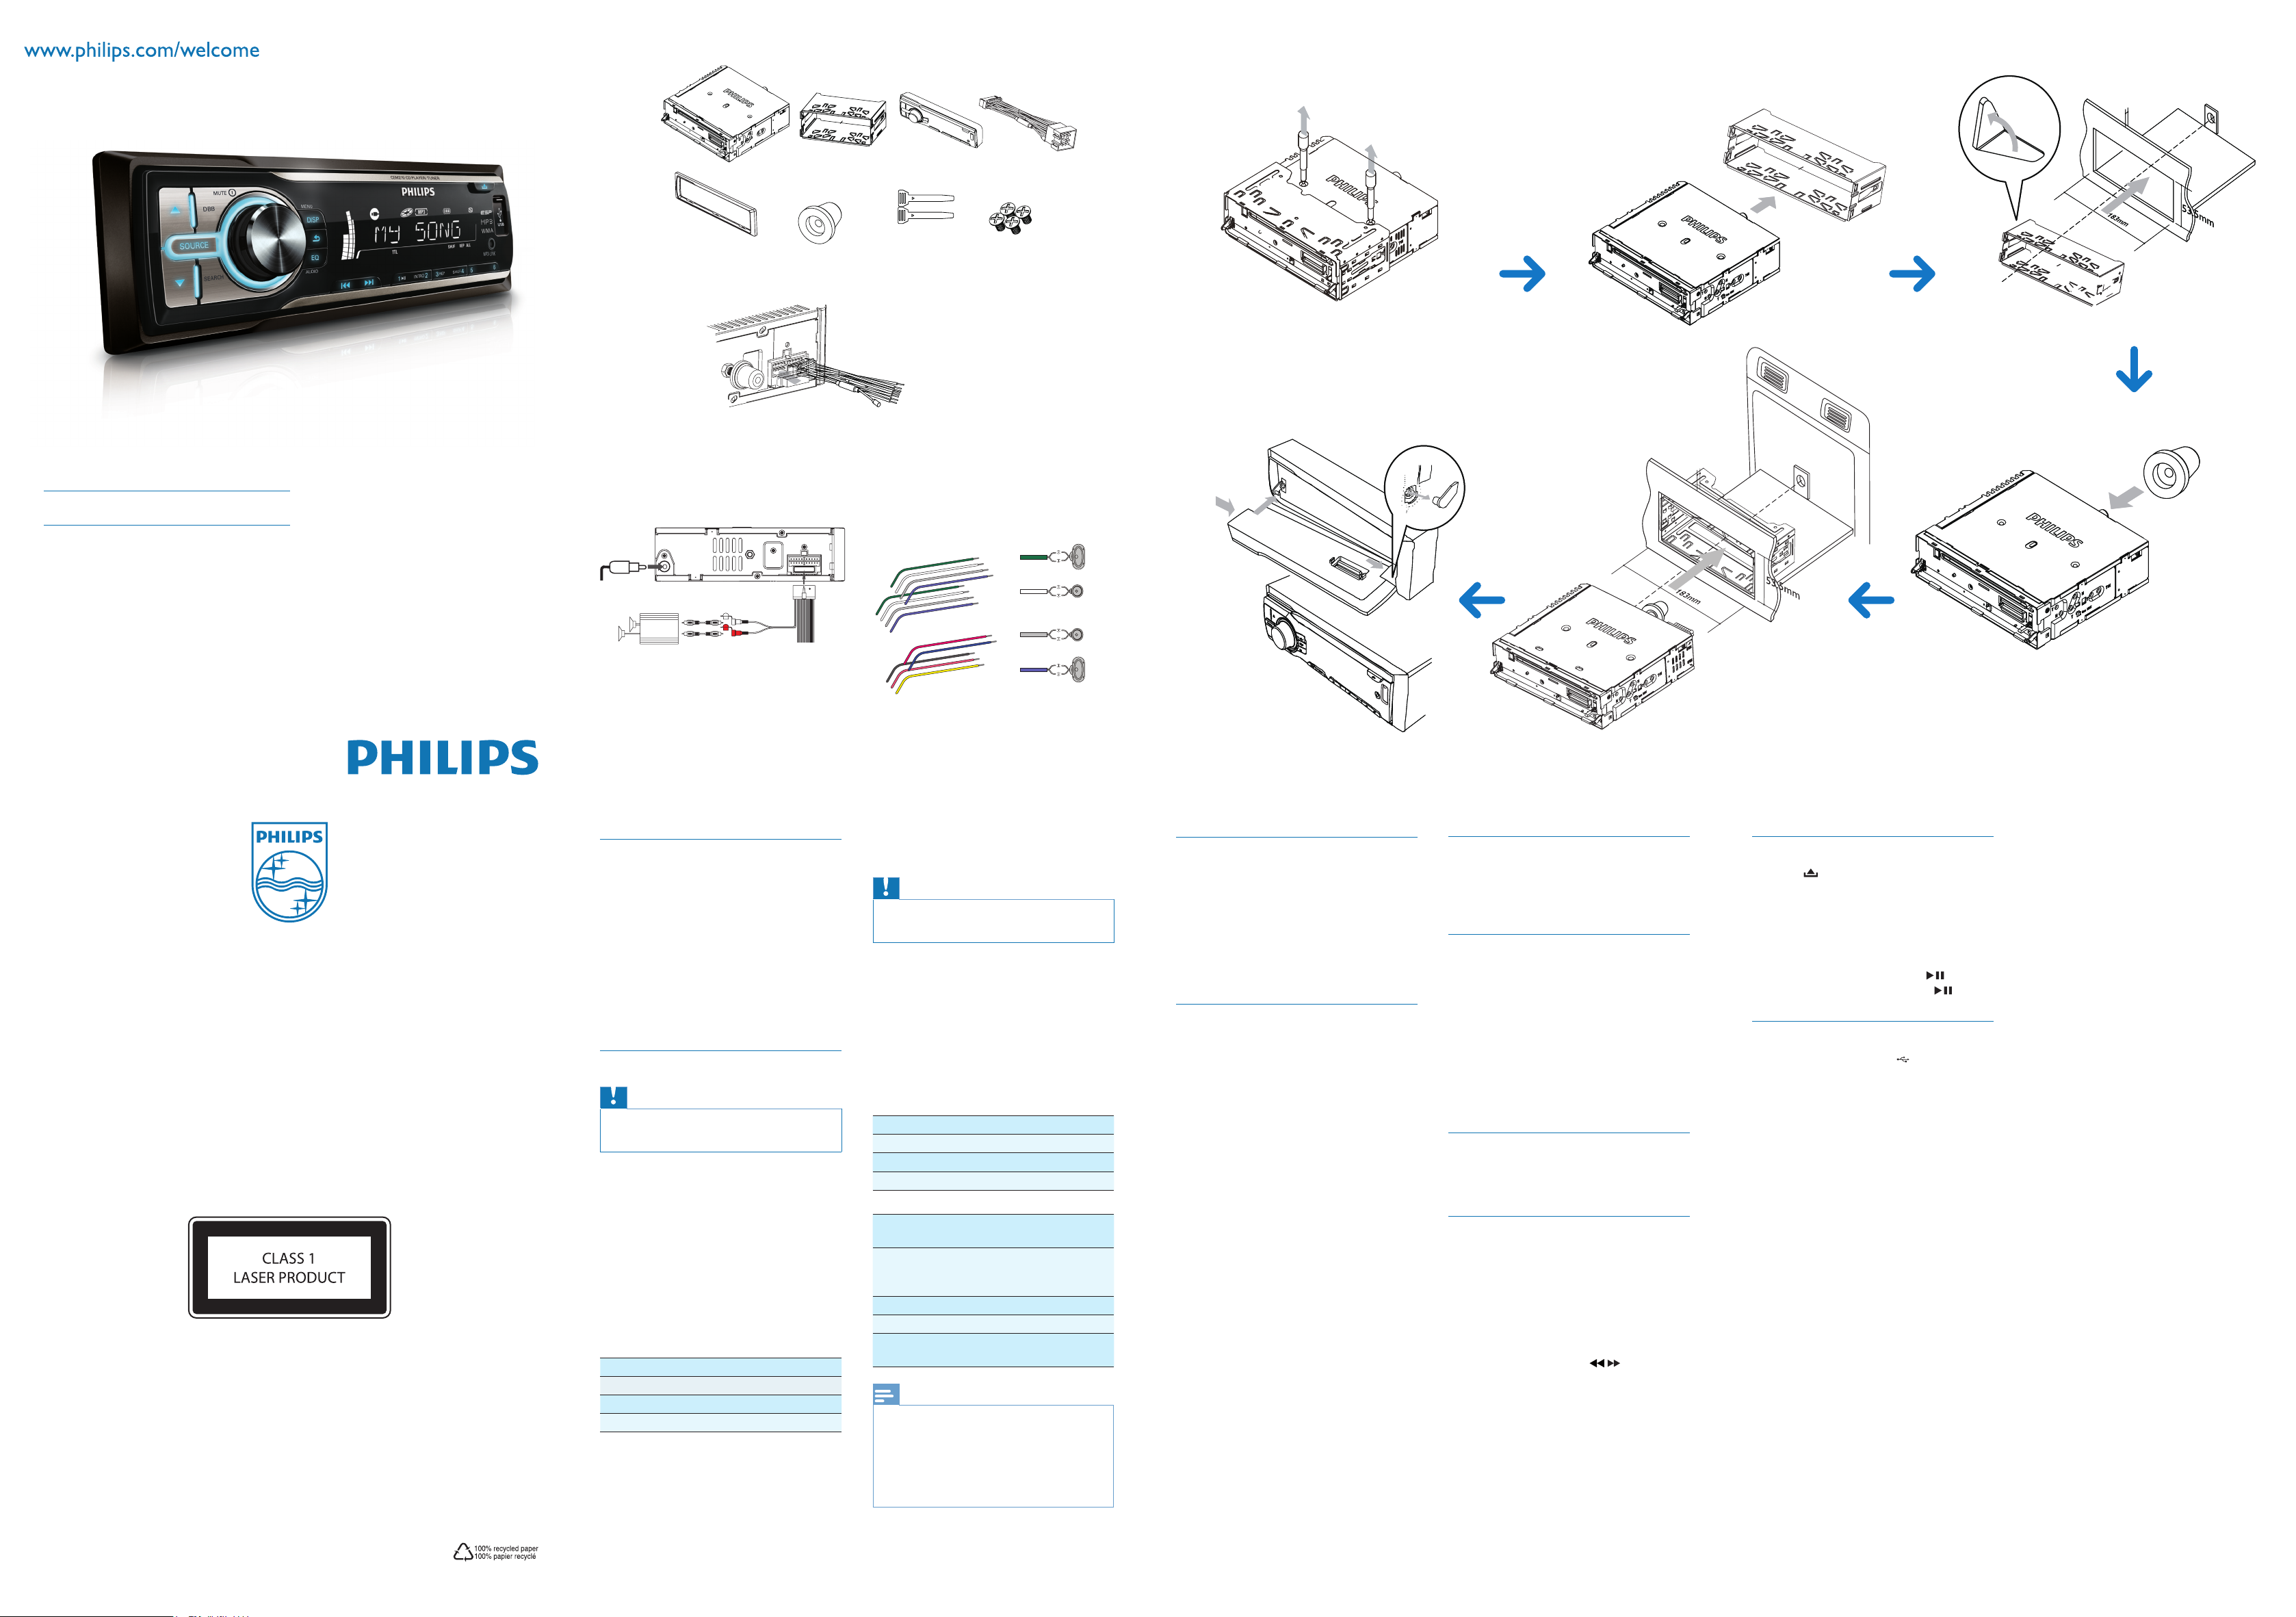
Overview of parts 1
Check and identify the contents of your package:
aIn-car audio system
bSleeve
cFront panel
dISO connector
eTrim plate
fRubber cushion
gDisassembly tools
hScrews (4 pieces)
Connect wires
Caution
Ensure that all loose leads are insulated with
•
electrical tape.
For cars with ISO connectors 2 3
1Pull out the ISO connectors from car
dashboard and connect them to the bigger
end of the supplied standard connector.
2Connect the other end of the supplied
standard connector to the unit.
3Connect the antenna and amplier as
illustrated, if applicable.You can connect the
car audio to the amplier through RCA-TO-
RCA cables (not supplied).
Connector Connect to
1ANTENNA Antenna
2REAR LINE OUT R Rear right speaker
3REAR LINE OUT L Rear left speaker
For cars without ISO connectors 3 4
Caution
Be sure to connect the black ground (earth)
•
lead rst.
1 Connect the antenna and amplier as
illustrated, if applicable.
2Cut off the bigger end of the supplied
standard connector.
3Check the car’s wiring carefully and connect
them to the supplied standard connector.
4Connect the supplied standard connector to
the unit.
1 Green/black strip Left speaker (Rear)
2 White/black strip Left speaker (Front)
3 Gray/black strip Right speaker (Front)
4 Purple/black strip Right speaker (Rear)
e RED Ignition key +12V DC when ON/
ACC
fBLUE Motor/electric antenna relay
control lead/Amplier relay
control lead
gBLACK Ground
h Orange Illumination switch
iYELLOW To the +12V car battery which is
energized at all times
Note
Check wire connection before you mount the
•
unit into a car.
If preset radio stations are lost when the
•
ignition key is turned OFF and then back
ON, reconnect the red leads crosswise to the
yellow ones.
Attach the front panel 5
1Attach the trim plate.
2Insert the right side of the panel in the
chassis until it is correctly engaged.
3Press the left side of the panel and point the
left hole at the left pillar.
4Release the panel to engage the left side.
Mount in the dashboard 5
1If the car does not have an on-board drive or
navigation computer, disconnect the negative
terminal of the car battery.
If you disconnect the car battery in a car•
that has an on-board drive or navigation
computer, the computer may lose its
memory.
If the car battery is not disconnected,•
to avoid short-circuit, ensure that bare
wires do not touch each other.
2Remove the two screws on the top of the
unit.
3Remove the mounting sleeve with the
supplied disassembly tools.
4Ensure that car dashboard opening is within
these measurements:
5Install the sleeve into the dashboard and
bend the tabs outward to x the sleeve.
6Place the supplied rubber cushion over the
end of the mounting bolt.
7Slide the unit into the dashboard until you
hear a click sound.
8Reconnect the negative terminal of the car
battery.
Turn on
1Press zto turn on the unit.
•To turn off the unit, press zfor 3
seconds.
Set clock
1Press MENU/DISP for 3 seconds.
2Press 3 or 4repeatedly to until the
currently time is displayed.
3Turn zclockwise to set hour.
4Press z to conrm.
5Turn zanti-clockwise to set minute.
6Press z to conrm.
View clock
1Press MENU/DISP repeatedly until the clock
is displayed.
Listen to radio
1Press SOURCE repeatedly to select Radio.
2Press 3 or 4to select band: [FM1], [FM2],
[FM3], [AM1], or [AM2] .
3Press ∞or §to tune to a radio station
manually.
To search for a radio station•
automatically, press /for 3 seconds.
Play audio les
1Press on the front panel to release the
panel.
2Insert a CD with the printed side facing up.
3Close the panel.
Play starts automatically.
»
To pause CD play, press 1•.
To resume CD play, press•1 again.
Insert the USB device
1Open the cover marked on the front
panel.
2Insert the USB device into the USB socket.
The unit starts playing from the USB
»
device automatically.
© 2009 Koninklijke Philips Electronics N.V.
All rights reserved.
CEM210_56_QSG_V1.0
CEM210_51_QSG_V1.0.indd 1 11/19/2009 1:42:01 PM


