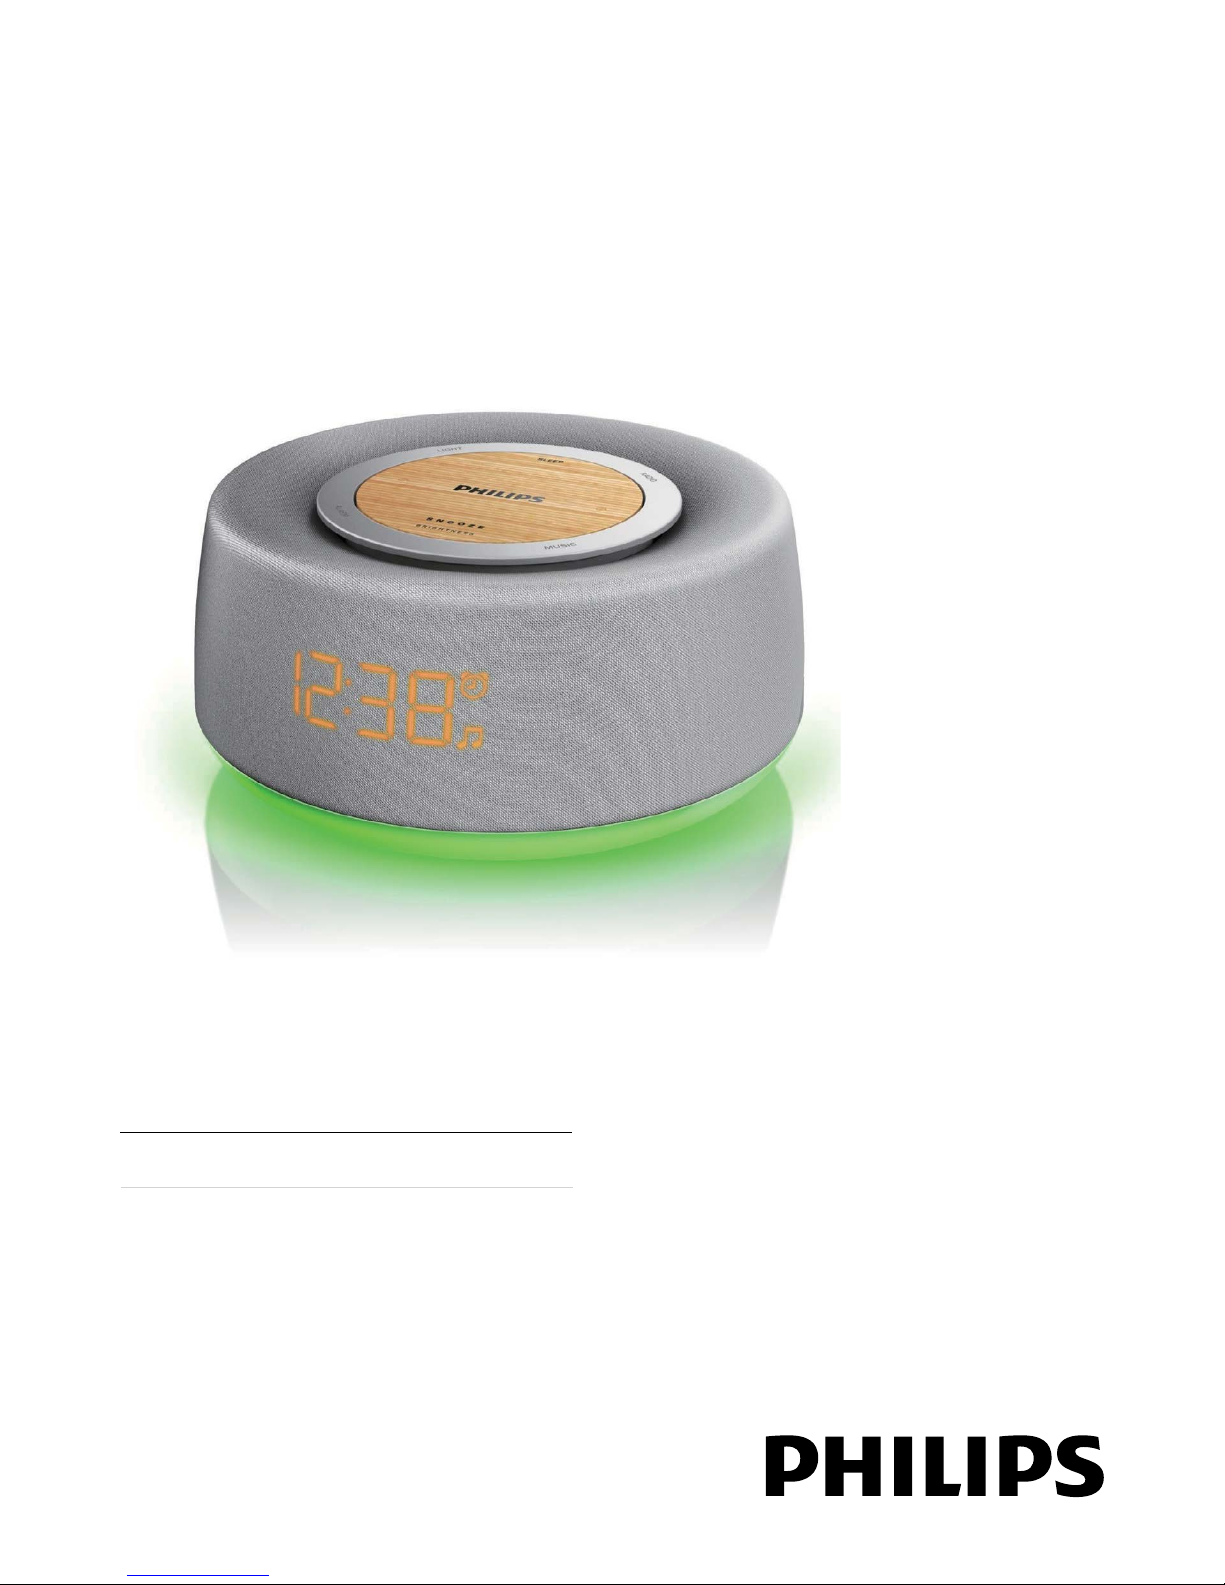
Philips AJH5100 User manual

Register your product and get support at
www.philips.com/welcome
AJH5100
EN User manual

2EN
Contents
1 Important 3
Safety 3
2 Your clock radio 4
Introduction 4
What's in the box 4
Overview of the main unit 5
3 Get started 6
Connect power 6
Plug and set 6
Select time zone 6
Set clock 6
Replace battery 7
4 Main features 7
Listen to FM radio 7
Listen to relaxing music 7
Enjoy mood light 8
Adjust volume 8
5 Other features 8
Set alarm timer 8
Set sleep timer 9
Select daylight saving time (DST) mode 9
Adjust display brightness 9
6 Product information 10
Specications 10
7 Troubleshooting 10
8 Notice 11

3EN
1 Important
Safety
• Read these instructions.
• Follow all instructions.
• Do not block any ventilation openings.
Install in accordance with the
manufacturer's instructions.
• Do not install near any heat sources such
as radiators, heat registers, stoves, or
otherapparatus(includingampliers)that
produce heat.
• Protect the power cord from being
walked on or pinched, particularly at plugs,
convenience receptacles, and the point
where they exit from the clock radio.
• Onlyuseattachments/accessoriesspecied
by the manufacturer.
• Unplug this clock radio during lightning
storms or when unused for long periods
of time.
• Referallservicingtoqualiedservice
personnel. Servicing is required when
the clock radio has been damaged in any
way, such as power-supply cord or plug
is damaged, liquid has been spilled or
objects have fallen into the clock radio, the
clock radio has been exposed to rain or
moisture, does not operate normally, or
has been dropped.
• Keep the battery away from heat, sunshine
orre.Neverdiscardbatteryinre.
• Replace the battery only with the same or
equivalent type.
• The battery contains chemical substances,
so it should be disposed of properly.
• Keep children away from the battery.
• This clock radio shall not be exposed to
dripping or splashing.
• Do not place any sources of danger on the
clockradio(e.g.liquidlledobjects,lighted
candles).
• Where the plug of the Direct Plug-in
Adapter is used as the disconnect device,
the disconnect device shall remain readily
operable.

4EN
2 Your clock radio
Congratulations on your purchase, and
welcometoPhilips!Tofullybenetfromthe
support that Philips offers, register your product
at www.philips.com/welcome.
Introduction
With this clock radio, you can:
• listen to FM radio;
• know the time;
• set one alarm;
• set time zone and daylight saving time;
• wake up to buzzer, radio, or music stored
in the clock radio; and
• enjoy mood light and music.
What's in the box
Check and identify the contents of your
package:
• Main unit (with battery)
• Quick start guide
• Safety sheet

5EN
Overview of the main unit
a SNOOZE/BRIGHTNESS
• Snooze alarm.
• Adjust display brightness.
b ALARM
• Turn alarm on/off.
c LIGHT
• Turn the mood light on/off.
• Dim the brightness of the mood light.
d SLEEP
• Set sleep timer.
e VOL
• Adjust volume.
f Power cord & Antenna
g LIGHT•COLOR
• Select a color of the mood light.
h SET TIME
• Set time.
i BATTERY
• Replace battery.
j 12/24H·DST
• Select12/24hourformat.
• Activate or deactivate daylight saving
time (DST) function.
a
b
d
e
l
k
m
n
jihg
f
c
k TIME ZONE
• Select time zone.
l + TUNING -
• Tune to FM radio stations.
• Adjust settings.
m RADIO
• Turn FM radio on/off.
n MUSIC
• Activate or deactivate music.

6EN
3 Get started
Always follow the instructions in this chapter in
sequence.
Connect power
Caution
•Risk of product damage! Make sure that the power
voltage corresponds to the voltage printed on the back
or underside of the clock radio.
•Risk of electric shock! When you unplug the AC
adapter, always pull the plug from the socket. Never
pull the cord.
Note
•The type plate is located on the bottom of the clock
radio.
Plug and set
Time has been preset at the factory.When
power is connected, the set time is displayed
automatically.
The built-in lithium battery can maintain clock
setting despite power interruption.
Select time zone
If the hour digits of the preset time do not
match your local time, you need adjust the time
zone settings.
1 In standby mode, press TIME ZONE.
» The current time zone number blinks
on the display panel.
2 Press TIME ZONE repeatedly to select
timezone(-1to+12adjustable).
For Europe:
Western European Time (WET) +0
Central European Time (CET) +1(De-
fault)
Eastern European Time (EET) +2
Moscow StandardTime (MST) +3
Set clock
In standby mode, you can set clock manually.
1 Press and hold SET TIME for 2 seconds..
» The hour digits blink.
2 Rotate + TUNING - to adjust hour.
3 Press SET TIMEtoconrm.
» The minute digits blink.
4 Repeat steps 2-3 to set the minute and
12/24hourformat.
Tip
•You can also press 12/24H·DST repeatedly to select
12/24hourformat.

7EN
Replace battery
Note
•You can only use AC power as power supply.The pre-
installedlithiumCR2032batterycanonlybackupclock
and alarm settings.
•When power is disconnected, the display backlight is off.
When the law battery indicator is displayed,
replace the battery as illustrated.
4 Main features
Listen to FM radio
Note
•Position the antenna as far as possible from TV,VCR, or
other radiation sources.
•For optimal reception, fully extend and adjust the
position of the antenna.
1 Press RADIO to turn on FM radio.
• To turn FM radio off, press RADIO
again.
2 Rotate + TUNING - to tune to an FM
radio station.
Listen to relaxing music
With this clock radio, you can get relaxed by
listening to realistic nature sounds and soft
music.
1 In standby mode, press MUSIC to activate
sounds stored in the clock radio.
• To stop playing the music, press
MUSIC again.
2 Rotate + TUNING - to select a sound.
The15soundsarelistedbelow:
Sound sequence Sound name
1Rain
2 Thunderstorm
3 Stream
4 Ocean
5 Night forest
6Wildre
7 Wind
8 Wind chime
9 Train
10 Space
11 Heartbeat
12 White noise

8EN
13 Sleepmusic1
14 Sleep music 2
15 Sleep music 3
Enjoy mood light
This clock radio provides you with changeable
mood light.You can adjust the color of the light
to match your mood.
To turn the mood light on or off:
1 In standby mode, press LIGHT to turn the
mood light on.
• You can press LIGHT twice to dim the
brightness of the mood light.
2 To turn the mood light off, press LIGHT
again.
To select a color of the mood light:
Press LIGHT•COLOR repeatedly to select a
color.
Adjust volume
Rotate VOL to adjust volume.
VOL
5 Other features
Set alarm timer
Note
•Make sure that you have set the clock correctly.
1 In standby mode, press and hold ALARM
for 2 seconds to activate alarm setting.
» The hour digits blink.
2 Rotate + TUNING - to adjust hour.
3 Press ALARMtoconrm.
» The minute digits blink.
4 Repeat steps 2-3 to set the minute.
5 Repeat steps 2-3 to select an alarm source.
• TUNE and FM icon: select your last
listened FM channel as alarm sound.
• BUZ and icon: select buzzer as
alarm sound.
• Nx (1-5) and icon: select one from
theveprestoredsoundsasalarm
sound.
6 Repeat steps 2-3 to set the alarm volume.
» The alarm time and icon are displayed.
FM

9EN
Theveprestoredsoundsarelistedbelow:
n1 Bell
n2 Jungle
n3 Bird
n4 Wakemusic1
n5 Wake music 2
Activate/deactivate the alarm timer
Press ALARM repeatedly.
» The alarm icon appears if the alarm timer is
on and disappears if it is off.
Snooze alarm
When alarm sounds, press SNOOZE.
» The alarm snoozes and repeats ringing nine
minutes later.
Set sleep timer
This clock radio can switch to standby mode
automatically after a preset period.
Press SLEEP repeatedly to select the sleep
timer period (in minutes).
» When the sleep timer is activated,
appears.
To deactivate the sleep timer, press SLEEP
repeatedly until [OFF] (off) appears.
15 30 60 90 120
OFF
Select daylight saving time
(DST) mode
For countries with daylight saving time (DST),
the clock radio offers you DST option to adjust
summer time.
In standby mode, press and hold 12/24H·DST
for two seconds.
» The clock advances by one hour.
Note
•To exit DST mode, repeat the above operation.
Adjust display brightness
Press BRIGHTNESS repeatedly to select
different brightness levels: high, mid, and low.

10EN
6 Product
information
Note
•Product information is subject to change without prior notice.
Specications
Amplier
Rated Output Power 0.6WRMS
Speaker
Speaker Impedance 8 ohm
Speaker Driver 1.5''
Tuner
Tuning Range FM:87.5-108MHz
Tuning grid FM:50KHz
Sensitivity
- Mono, 26dB S/N Ratio
- Stereo, 46dB S/N Ratio
FM: <22 dBf
FM:<51.5dBf
Search Selectivity FM: <28 dBu
Total Harmonic Distortion FM: <5%
Signal to Noise Ratio FM:>50dBA
General information
AC Power 100-240V,
50/60Hz
Operation Power
Consumption
3 W
Standby Power
Consumption
<1W
Dimensions
- Main Unit (W x H x D) 144x144x65mm
Weight
- With Packing
- Main Unit
0.73kg
0.45kg
7 Troubleshooting
Warning
•Never remove the casing of this clock radio.
To keep the warranty valid, never try to repair
the clock radio yourself.
If you encounter problems when using this
clock radio, check the following points before
requesting service. If the problem remains
unsolved, go to the Philips web site
(www.philips.com/support).When you contact
Philips, ensure that the clock radio is nearby
and the model number and serial number are
available.
No power
•Ensure that the AC power plug of the
clock radio is connected properly.
•Ensure that there is power at the AC
outlet.
No response from the clock radio
•Disconnect and reconnect the AC power
plug, then turn on the clock radio again.
Poor radio reception
•Increase the distance between the unit and
your TV or VCR.
•Fully extend the FM antenna.
Alarm does not work
•Set the clock/alarm correctly.
Clock/alarm setting erased
•Power has been interrupted or the power
plug has been disconnected.
•Reset the clock/alarm.

11 EN
8 Notice
This product complies with the radio
interference requirements of the European
Community.
Anychangesormodicationsmadetothis
device that are not expressly approved by
WOOX Innovations may void the user’s
authority to operate the equipment.
Your product is designed and manufactured
with high quality materials and components,
which can be recycled and reused.
When this crossed-out wheeled bin symbol is
attached to a product it means that the product
iscoveredbytheEuropeanDirective2002/96/
EC.
Please inform yourself about the local separate
collection system for electrical and electronic
products.
Please act according to your local rules and
do not dispose of your old products with your
normal household waste. Correct disposal of
your old product helps to prevent potential
negative consequences for the environment and
human health.
Your product contains batteries covered by
theEuropeanDirective2006/66/EC,which
cannot be disposed with normal household
waste.Please inform yourself about the local
rules on separate collection of batteries
because correct disposal helps to prevent
negative consequences for the environmental
and human health.
Environmental information
All unnecessary packaging has been omitted.
We have tried to make the packaging easy to
separate into three materials: cardboard (box),
polystyrene foam (buffer) and polyethylene
(bags, protective foam sheet.)
Your system consists of materials which can
be recycled and reused if disassembled by
a specialized company. Please observe the
local regulations regarding the disposal of
packaging materials, exhausted batteries and old
equipment.

Specifications are subject to change without notice.
2014 © WOOX Innovations Limited.All rights reserved.
Philips and the Philips’ Shield Emblem are registered
trademarks of Koninklijke Philips N.V. and are used by WOOX
Innovations Limited under license from Koninklijke Philips N.V.
AJH5100_12_UM_V2.0
Table of contents
Other Philips Clock Radio manuals

Philips
Philips AE2330 User manual

Philips
Philips 3000 series User manual

Philips
Philips AJ4200 User manual

Philips
Philips AJ5100/05 User manual

Philips
Philips AJ3231/37 User manual

Philips
Philips AJ1003 User manual

Philips
Philips AJ3200 User manual

Philips
Philips AJ3136 User manual

Philips
Philips AJ 3250 User manual

Philips
Philips D3630 User manual

Philips
Philips AJ-5030 User manual

Philips
Philips AJ5030/12 User manual

Philips
Philips AJ3600/05 User manual

Philips
Philips AJ3431 User manual

Philips
Philips AJ5300D User manual

Philips
Philips AJ130 User manual

Philips
Philips AJ3225 User manual

Philips
Philips R3505 User manual

Philips
Philips HF3330 User manual

Philips
Philips AJM180 User manual