1 Important
• Readtheseinstructions.
• Heedallwarnings.
• Followallinstructions.
• Donotblockanyventilationopenings.Installinaccordancewith
themanufacturer’sinstructions.
• Donotinstallnearanyheatsourcessuchasradiators,heat
registers,stoves,orotherapparatus(includingampliers)that
produceheat.
• Protectthepowercordfrombeingwalkedonorpinched,
particularlyatplugs,conveniencereceptacles,andthepoint
wheretheyexitfromtheclockradio.
• Onlyuseattachments/accessoriesspeciedbythemanufacturer.
• Unplugthisclockradioduringlightningstormsorwhenunused
forlongperiodsoftime.
• Referallservicingtoqualiedservicepersonnel.Servicingis
requiredwhentheclockradiohasbeendamagedinanyway,
suchaspower-supplycordorplugisdamaged,liquidhasbeen
spilledorobjectshavefallenintotheclockradio,theclockradio
hasbeenexposedtorainormoisture,doesnotoperatenormally,
orhasbeendropped.
• BatteryusageCAUTION–Topreventbatteryleakagewhichmay
resultinbodilyinjury,propertydamage,ordamagetotheclockradio:
• Installthebatterycorrectly,+and-asmarkedontheclockradio.
• Removethebatterywhentheclockradioisnotusedforalongtime.
• Thebatteryshallnotbeexposedtoexcessiveheatsuchas
sunshine,reorthelike.
• Thisclockradioshallnotbeexposedtodrippingorsplashing.
• Donotplaceanysourcesofdangerontheclockradio(e.g.liquid
lledobjects,lightedcandles).
• WheretheplugoftheDirectPlug-inAdapterisusedasthedisconnect
device,thedisconnectdeviceshallremainreadilyoperable.
2 Your clock radio
Congratulationsonyourpurchase,andwelcometoPhilips!Tofully
benetfromthesupportthatPhilipsoffers,registeryourproductat
www.philips.com/welcome.
What’s in the box
User manual
3 Get started
Alwaysfollowtheinstructionsinthischapterinsequence.
Install battery
Ifthereispowerinterruption,theclockmemorybackupallowsyour
alarmandclocksettingstobestoredforuptoaday.Thedisplay
backlightwillbeoff.
Caution
• Riskofexplosion!Keepthebatteryawayfromheat,sunshine
orre.Neverdiscardbatter yinre.
• Thebatterycontainschemicalsubstances,soitshouldbe
disposedofproperly.
Insert2x1.5VAAAbattery(notsupplied)withcorrectpolarity
(+/-)asillustrated.
Connect power
Caution
• Riskofproductdamage!Makesurethatthepowervoltage
correspondstothevoltageprintedonthebackorunderside
oftheclockradio.
• Riskofelectricshock!Whenyouunplugthepoweradapter,
alwayspulltheplugfromthesocket.Neverpullthecord.
Note
• Thetypeplateislocatedatthebottomoftheclockradio.
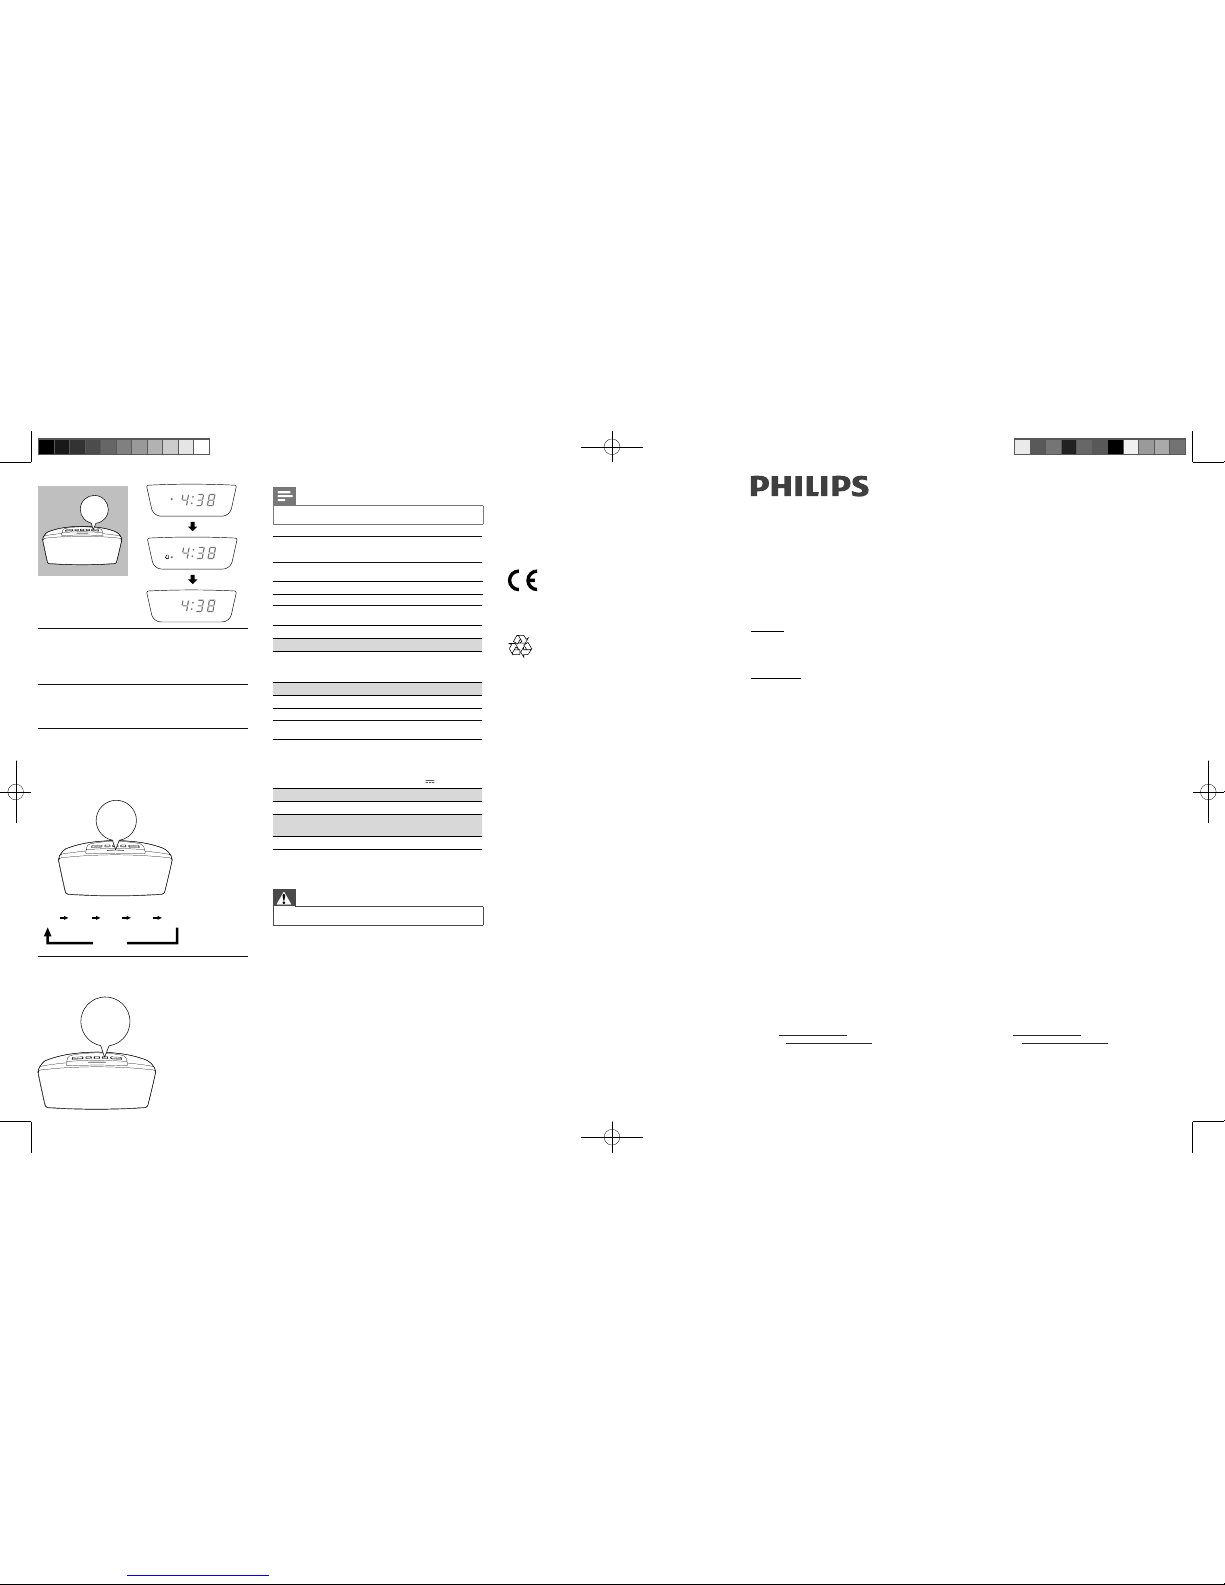
Set time
Note
• Youcanonlysettimeinstandbymode.
Specicationaresubjecttochangeswithoutnotice
2014©WOOXInnovationsLimited.Allrightsreser ved.
ThisproductwasbroughttothemarketbyWOOX
InnovationsLimitedoroneofitsafliates,furtherreferred
tointhisdocumentasWOOXInnovations,andisthe
manufactureroftheproduct.WOOXInnovationsisthe
warrantorinrelationtotheproductwithwhichthisbooklet
waspackaged.PhilipsandthePhilipsShieldEmblemare
registeredtrademarksofKoninklijkePhilipsN.V.
AJ3400_79_UM__V3.0
1
2 sec
2
34
PRESET/
SET TIME
PRESET/
SET TIME
HOUR
MIN
4 Listen to FM radio
Note
• Keeptheclockradioawayfromotherelectronicdevicesto
avoidradiointerference.
• Forbetterreception,fullyextendandadjustthepositionofthe
FMantenna.
Tune to FM radio stations
Store FM radio stations manually
Youcanstoreupto10FMradiostations.
1 TunetoanFMradiostation.
2 PressandholdPRESETfortwoseconds.
» Thepresetnumberbeginstoblink.
3 Press TUNING repeatedlytoselectanumber.
4 PressPRESETagaintoconrm.
5 Repeatsteps1to4tostoreotherstations.
Register your product and get support at
www.philips.com/support
AJ3400
Usermanual
Tip
• Toremoveapre-storedstation,storeanotherstationinitsplace.
Select a preset radio station
Intunermode,pressPRESETrepeatedlytoselectapresetnumber.
Adjust volume
Whilelistening,press- VOLUME +toadjustvolume.
» Thevolumelevel(1~15)showsinthedisplay.
5 Other features
Set alarm timer
Set alarm
Note
• Youcanonlysetthealarminstandbymode.
• Whenalarmsounds,volumerisesgradually.Youcannotadjust
thealarmvolumemanually.
• Makesurethatyouhavesettheclockcorrectly.
Followtheillustrationtosettherstalarm.
• AL1:settherstalarm.
• AL2:setthesecondalarm.
2 sec
AL1
1
HOUR
2
MIN
3
AL1
4
Tip
• Theclockradioexitsalarmsettingmodewhenbeingidlefor10seconds.
Select alarm source
YoucanselectFMradioorbuzzerasthealarmsource.
» Thecorrespondingalarmiconlightsup.