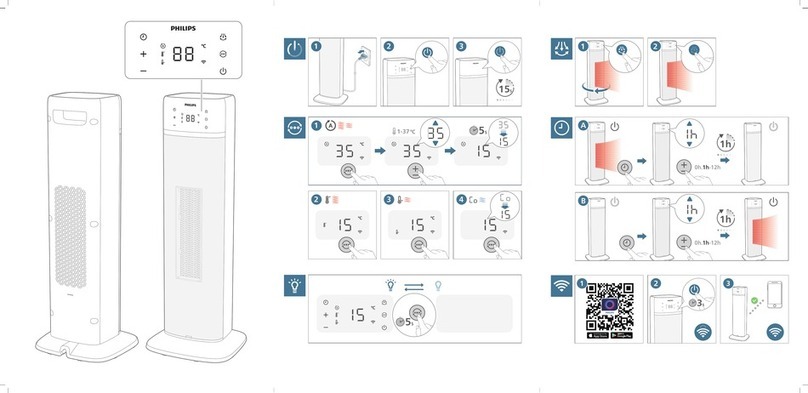
Philips Essence 5000 Series User manual

User manual
Heater
5000 Series
CX5120

Contents
1 Important�������������������������������������������������������������������������������� 1
Safety��������������������������������������������������������������������������������������������������������1
Electromagnetic elds (EMF) �������������������������������������������������������������3
Recycling��������������������������������������������������������������������������������������������������3
Simplied EU declaration of conformity�����������������������������������������3
2 YourHeater ���������������������������������������������������������������������������� 4
Product overview ���������������������������������������������������������������������������������4
Controls overview ���������������������������������������������������������������������������������5
3 UsingtheHeater ������������������������������������������������������������������� 6
Wi-Fi connection �����������������������������������������������������������������������������������6
Turning on and o ��������������������������������������������������������������������������������7
Switching the mode �����������������������������������������������������������������������������7
Setting the temperature ���������������������������������������������������������������������8
Using the timer function ���������������������������������������������������������������������9
Oscillation �����������������������������������������������������������������������������������������������9
Activating the display screen ��������������������������������������������������������� 10
Using the light on/o function ����������������������������������������������������� 10
4 Cleaningandmaintenance ����������������������������������������������10
5 Storage ����������������������������������������������������������������������������������11
6 Troubleshooting������������������������������������������������������������������11
7 Warrantyandsupport �������������������������������������������������������14

1EN
1 Important
Safety
Read this user manual carefully before you use the appliance, and save it for future
reference�
Danger
• Do not let any liquid or ammable detergent enter
the appliance, to avoid electric shock and/or a re
hazard.
• In order to avoid overheating and re, do not cover
the device.
Warning
• Some parts of this product can become very hot and cause
burns. Continuously supervision has to be given where children
and vulnerable people are present.
• This appliance can be used by children aged from 8 years and
above and persons with reduced physical, sensory or mental
capabilities or lack of experience and knowledge if they have
been given supervision or instruction concerning use of the
appliance in a safeway and understand the hazards involved.
• Children aged from 3 years and less than 8 years shall only
switch on/o the appliance provided that it has been placed
or installed in its intended normal operating position and they
have been given supervision or instruction concerning use
of the appliance in a safe way and understand the hazards
involved.
• Children aged from 3 years and less than 8 years shall not
plug in, regulate and clean the appliance or perform user
maintenance�
• Children of less than 3 years should be kept away unless
continuously supervised.
• Children shall not play with the appliance.
• Cleaning and maintenance shall not be made by children
without supervision.

2EN
• Do not use this heater in small rooms when they are occupied
by persons not capable of leaving the room on their own,
unless constant supervision is provided.
• When device working in heating mode, the surface
temperature will gradually increase. Do not touch the air outlet
to avoid being burn.
• To reduce the risk of re, keep textiles, curtains, beddings or
any other ammable material a minimum distance of 1 m
from the air outlet. Do not block the air inlet and outlet, e.g. by
placing items on the air outlet or in front of the air inlet.
• Do not insert ngers, sticks or other objects into the machine,
in order to avoid electric shocks, physical injury or re.
• Device has heating component. Do not use the appliance near
gas appliances, replaces.
• Do not spray any ammable materials such as insecticides or
fragrance around the appliance.
• Do not use if there are visible signs of damage to the device,
the plug, the power cord.
• Do not use this device if it has been dropped.
• If the power cord is damaged, you must have it replaced by
Philips, a service center authorized by Philips, or similarly
qualied persons in order to avoid a hazard.
Caution
• In order to avoid a hazard due to inadvertent resetting of the
thermal cut-out, this appliance must not be supplied through
an external switching device, such as a timer, or connected to a
circuit that is regularly switched on and o by the utility.
• The device must not be located immediately below a socket
outlet.
• Only plug in socket on the wall, do not use extension cord.
• Always place and use the appliance on a dry, stable, and
horizontal surface.
• Do not use the appliance in surroundings with high humidity
such as the bathroom, toilet, kitchen, swimming pool, or any
outdoor environment.

3EN
• Do not sit or stand on the appliance. Do not knock against
appliance. Do not place anything on top of the appliance.
• Always unplug the appliance when you want to move, clean
appliance, or carry out other maintenance.
• The appliance is only intended for household use under normal
operating conditions.
• Standard WiFi interface based on 802.11b/g/n at 2.4 GHz with
a maximum output power of 38.28 mW EIRP.
Electromagneticelds(EMF)
This appliance complies with the applicable standards and regulations regarding
exposure to electromagnetic elds.
Recycling
This symbol means that this product shall not be disposed of with normal
household waste (2012/19/EU).
Follow your country’s rules for the separate collection of electrical and electronic
products. Correct disposal helps prevent negative consequences for the
environment and human health.
SimpliedEUdeclarationofconformity
Hereby, DAP B.V. declares that the radio equipment type CX5120 is in compliance
with Directive 2014/53/EU. The full text of the EU declaration of conformity is
available at the following internet address: www�philips�com�

4EN
2 Your Heater
Congratulations on your purchase, and welcome to Philips!
To fully benet from the support that Philips oers, register your product at
Home�id/welcome�
Product overview
Air outlet
Power cord
Control panel
Handle

5EN
Controls overview
Control buttons
Timer button Temperature increase button
Temperature decrease button Oscillation button
Mode switch button Power on/o button
Display panel
Auto mode High mode
Low mode Wi-Fi indicator

6EN
3 Using the Heater
Wi-Ficonnection
SettinguptheWi-Ficonnectionforthersttime
1 Download and install the Philips “Air+” app from the App Store or
Google Play�
2 Put the plug of the Heater in the power socket and touch to
turn on the Heater.
»The Wi-Fi indicator blinks for the rst time.
3 Make sure that your smartphone or tablet is successfully connected to your
Wi-Fi network.
4 Launch the “Air+” app and click on “Connect a New Device” or press the “+”
button on the top of the screen. Follow the onscreen instructions to connect
the Heater to your network.
Note:
• This instruction is only valid when the Heater is being set up for the rst time.
If the network has changed or the setup needs to be performed again, see
Chapter “Reset the Wi-Fi connection” on page 6�
• If you want to connect more than one Heater to your smartphone or tablet, you
have to do this one by one.
• Make sure that the distance between your smartphone or tablet and the Heater
is less than 10 m without any obstructions.
ResettheWi-Ficonnection
Note:
• Reset the Wi-Fi connection when your default network has changed.
1 Put the plug of the Heater in the power socket and touch to turn on the
Heater.
2 Touch and hold for 3 seconds until you hear a beep.
»The Heater goes to pairing mode.
»The Wi-Fi indicator blinks.
3 Follow the steps 3-4 in “SettinguptheWi-Ficonnectionforthersttime”
section.

7EN
Turningonando
123
15S
1 Put the plug in the power socket.
2 Touch the button on the appliance to switch on the Heater. The appliance
beeps.
3 Touch the button again to switch o the Heater.
»The appliance starts countdown for 15 seconds before switching o.
Caution:
• When the Heater continuously runs for 16 hours without any operation, it will
be forced to shut down for protection.
Switching the mode
• Touch the button switch the mode: Auto mode ( ), High mode ( ), Low
mode ( ), and Ventilation mode.
1-37 3S5S
Auto mode: In this mode, your device will do the work for you. Based on the
sensor data that measures and tracks the temperature in your room, your device
automatically selects the heating speed to keep your room comfortable.

8EN
High mode: High speed,
quick results. When your
device is in high speed
mode, it operates on
the highest speed for
powerful, rapid heatup of
the air in your room.
Low mode: When in
Low mode, your device
provides you with a slight
comfortable heated
breeze.
Ventilation mode:
In ventilation mode the
device can double as a fan
on hot days. The heating
will be turned o and the
fan delivers a stream air
that's ideal for make the
warm rooms feel more
comfortable.
Setting the temperature
1-37 3S5S
In the Auto mode, you can adjust the temperature by touching the or button.
The temperature range is from 1°C-37°C.

9EN
Using the timer function
Touch the button to set operating hours of the appliance. The timer is available
from 0to 12hours. 0 hour means no timer is set.
Note:
• Touch and hold the button for 3 seconds to cancel the timer you have set.
After the set timer has elapsed:
In standby mode
• The Heater will be turned on automatically.
0h.1h-12h
1h
In power on mode
• The Heater will be o automatically.
0h.1h-12h
1h
Oscillation
Touch the button to activate the oscillation feature in your Heater.
1 2

10 EN
Activating the display screen
After the screen is o, you can either touch the button, or any other button to
wake up the screen.
Usingthelighton/ofunction
You can touch and hold the button for 5 seconds to turn on, or turn o the light
of the display panel.
3S5S
4 Cleaning and maintenance
Note:
• Always unplug the appliance before you clean it.
• Never immerse the appliance in water or any other liquid.
• Never use abrasive, aggressive, or ammable cleaning agents such as bleach or
alcohol to clean any part of the appliance.
Regularly clean the outside of the Heater to prevent dust from collecting.
• Use a soft, dry cloth to clean both the exterior of the appliance and the air
outlet.

11EN
5 Storage
1 Turn o the appliance and unplug from the power socket.
2 Clean the appliance.
3 Store the appliance in a cool, dry location.
4 Always thoroughly wash hands after cleaning.
6 Troubleshooting
This chapter summarizes the most common problems you could encounter with
the appliance. If you are unable to solve the problem with the information below,
contact the Consumer Care Center in your country.
Problem Possible solution
My heater is not
working after
plugging.
• The plug may not be connected properly to an electrical
outlet. Check whether the plug is properly connected to a
working electrical outlet.
• The appliance is equipped tip-over protection, ensure to
locate the appliance in upright position and at at surface.
• If the appliance doesn’t produce warm airow, check if it
is on Ventilation mode.
• Check your temperature settings in Auto mode. When
the set target temperature is lower than the ambient
temperature, the heating function will not be triggered.
My heater is
tripping during
use.
• The power exceeds the home circuit load. Please unplug
nearby high-power appliances on the same electrical
outlet and try again.
• If your heater fails to power on again on a working
electrical outlet, please contact Consumer Care Team in
your country.

12 EN
Problem Possible solution
My heater
suddenly stop
working.
• Check if the timer function of appliance is on .
• In Auto mode, when the target temperature is reached,
the heater will stop working, and work again when
the ambient temperature is lower than the target
temperature. In Low or High mode, the heater will stop
working when the sensor detects the temperature reaches
to 37 °C, and work again when the temperature becomes
lower.
• When the temperature exceeds the threshold of the
thermal cut-o, the appliance will automatically cut o
the power supply. Let the appliance cool down and check
if air inlet/outlet is unobstructed before use again.
• The heater is equipped with Auto shut o. Without
further operation, the appliance will shut o after running
for consecutive 16 hours.
My heater is too
loud.
• Relocate the appliance and ensure it’s on a stable, secure
surface, and no foreign objects beneath it.
• If there is abnormal sound, contact the Consumer Care
Center in your country.
My heater
produces a strange
smell.
• The rst few times you use the appliance, it may produce
a plastic smell. This is normal on new appliance. However,
if the appliance produces a burnt smell, turn o the
appliance and unplug immediately, then contact the
Consumer Care Center in your country.
It takes a long time
for my heater to
heat up.
• Set to higher target temperature in Auto mode or switch
to High mode, the appliance will run at higher power and
heat up in a shorter time.
• Ensure the air inlet/outlet is clean and unobstructed.
The ambient
temperature
display sometimes
shows slight
dierences
to other
thermometers
or my own
perception of the
temperature.
• The ambient temperature can be inuenced by various
factors, including room size, ventilation conditions, and
the distance between the thermometer and the heater.
• Each type of the thermometer has its own measuring
accuracy, which can lead to variations in temperature
readings.
• Occasionally, the residual warmth within the heater can
result in a lag eect may cause slight variances when
compared to other thermometers or your own sense of
temperature.

13EN
Problem Possible solution
What do the codes
on my appliance
mean?
• Error code “Eb” displays on the screen. The control panel
has malfunctioned. Contact the Consumer Care Center in
your country.
• Error code “E5” displays on the screen. The temperature
sensor has malfunctioned. Contact the Consumer Care
Center in your country.
• Error code “E6” displays on the screen. The appliance is
overheating. Turn o the appliance and unplug. Let the
appliance cool down for few minutes before use again.
• Error code “E9” displays on the screen. It indicates the
appliance is in tilted position. Turn o the appliance,
ensure it’s in the upright position and then power on
again�
The Wi-Fi setup is
not successful.
• If the router your appliance is connected to is dual-band
and it is currently not connecting to a 2.4GHz network,
please switch to another band of the same router
(2.4GHz) and try to pair your Heater again. 5GHz networks
are not supported.
• Web authentication networks are not supported.
• Check if the appliance is within range of the Wi-Fi router.
You can try to place the Heater closer to the Wi-Fi router.
• Check if the network name is correct. The network name is
casesensitive.
• Check if the Wi-Fi password is correct. The password is
case sensitive.
• Retry the setup with the instructions in the section “Wi-Fi
connection“�
• The Wi-Fi connectivity can be interrupted by
electromagnetic or other interferences. Keep the
appliance away from other electronic devices that may
cause interferences.
• Check if the mobile device is in airplane mode. Make sure
to have airplane mode deactivated when connecting to
the Wi-Fi network.
• Consult the help section in the app for extensive and up-
to-date troubleshooting tips.

14 EN
7 Warranty and support
Versuni oers a two-year warranty after purchase on this product. This warranty
is not valid if a defect is due to incorrect use or poor maintenance. Our warranty
does not aect your rights under law as a consumer. For more information or for
invoking the warranty, please visit our website www�philips�com/support�
Order parts or accessories
If you have to replace a part or want to purchase an additional part, go to your
Philips dealer or visit www�philips�com/support�
If you have problems obtaining the parts, please contact the Philips Consumer
Care Center in your country.

15EN
Model identier(s): CX5120
Item Symbol Value Unit Item Unit
Heat output - - - Type of heat input, for electric storage
localspaceheatersonly(selectone)
Nominal heat output P nom 2�0 kW manual heat charge control, with
integrated thermostat
NA
Minimum heat
output (indicative)
P min 1�1 kW manual heat charge control with room
and/or outdoor temperature feedback
NA
Maximum
continuous heat
output
P max, C 2�0 kW electronic heat charge control with
room and/or outdoor temperature
feedback
NA
Auxiliary electricity
consumption
- - kW fan assisted heat output NA
At nominal heat
output
el max N/A kW Type of heat output/room temperature
control(selectone)
At minimum heat
output
el min N/A kW single stage heat output and no room
temperature control
[no]
In standby mode el SB 0�001 kW Two or more manualstages, no room
temperature control
[no]
with mechanic thermostat room
temperature control
[no]
with electronic room temperature
control
[yes]
electronic room temperature control
plus day timer
[no]
electronic room temperature control
plus week timer
[no]
Othercontroloptions(multipleselections
possible)
room temperature control, with
presence detection
[no]
room temperature control, with open
window detection
[no]
with distance control option [yes]
with adaptive start control [no]
with working time limitation [yes]
with black bulb sensor [yes]
Contact details DAP B.V.
Tussendiepen 4 a, 9206AD Drachten, The Netherlands
Information requirements for electric local space heaters

PHILIPS and the Philips Shield Emblem are registered trademarks of Koninklijke Philips
N�V� and are used under license�
This product has been manufactured by and is sold under the responsibility of Versuni
Holding B�V�, and Versuni Holding B�V� is the warrantor in relation to this product�
2023 © Versuni Holding B�V�
CX5120_usermanual_v1.0(05/09/2023)
Other manuals for Essence 5000 Series
74
This manual suits for next models
2
Table of contents
Other Philips Heater manuals

Philips
Philips HD 3271 User manual

Philips
Philips HD3274/00 User manual

Philips
Philips HD3353/00 User manual

Philips
Philips HD3271/00 User manual

Philips
Philips HP8560 User manual

Philips
Philips HD3272/10 User manual

Philips
Philips HD3412/00 User manual
Philips
Philips HD 3345 User manual

Philips
Philips HD 3520 User manual

Philips
Philips Essence 5000 Series User manual