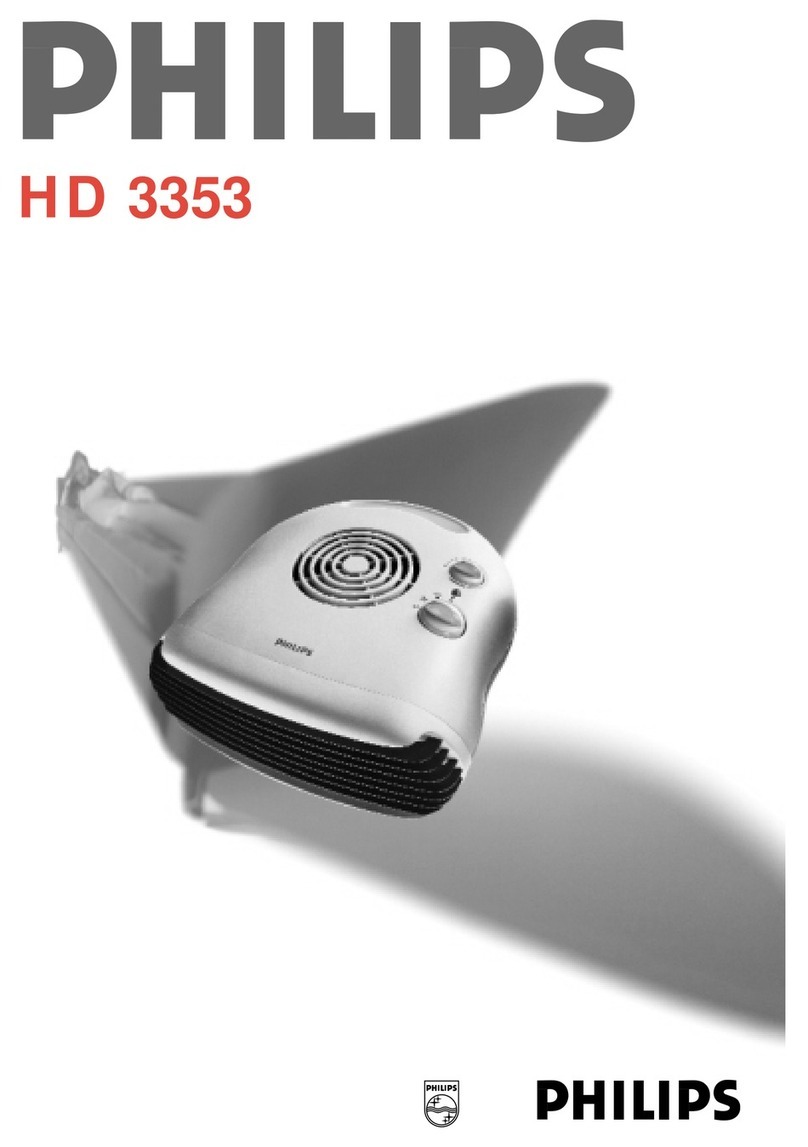
Philips HD 3345 User manual

HD 3345/46/48

2
English Page 4
• Keep pages 3 open when reading these
operating instructions.
Français Page 6
• Dépliez les pages 3 en lisant le mode d'emploi.
Deutsch Seite 9
• Schlagen Sie beim Lesen der
Gebrauchsanweisung Seite 3 auf.
Nederlands Pagina 12
• Sla bij het lezen van de gebruiksaanwijzing
pagina 3 op.
Italiano Pagina 14
• Prima di usare l'apparecchio, aprite le pagina 3
e leggete attentamente le istruzioni per l'uso.
Español Página 16
• Desplegar las páginas 3 al leer las
instrucciones de manejo.
Português Página 19
• Durante a leitura do modo de emprêgo,
desdobre e verifique as pág. 3.
Dansk Side 21
• Hold side 3 opslået mens De læser
brugsanvisningen.
Norsk Side 23
• Slå opp på side 3 før De leser videre.
Svenska Sid 25
• Ha sidan 3 utvikt när ni läser bruksanvisningen.
Suomi Sivu 27
• Pidä sivu 3 auki samalla kun luet käyttöohjetta.
Ελληνικά Σελίδα 29
•Για τις οδηγίες χρήσεως, ανοίξτε τις
σελίδες 3.

3
AB
C
D
F
G
E
ECO
ECO
ECO
ECO
Hot airsystemHot airsystemHot airsystem
HD 3346 HD 3348HD 3345

4
General description (fig. 1 on page 3)
AHandle
BAir inlet opening
CAir outlet opening
DFunction selector
EMains cord storage
Excess mains cord can be stored wound-up.
Do not use the appliance while the cord is
stored in this way.
FPilot light *)
GThermostat knob *)
Safe positioning
(also refer to section “Important”)
• The heater must not be located below a socket
outlet.
• The appliance must not be covered - otherwise
there is a risk of fire.
• Position the appliance in such manner that the
air flow, towards the heater and away from it, is
not obstructed.
• Select a safe spot to avoid electrical shock and
the risk of fire.
• Only touch the heater with dry hands.
• Allow ample space around the heater.
Important
•Before connecting the appliance check that the voltage indicated on the type plate
corresponds to the mains voltage in your home.
•Read these instructions carefully, in conjunction with the illustrations (page 3), before using
the appliance.
•The appliance is double insulated and need not be connected to an earthed mains outlet.
If you wish to use an extension cord, a 2-wire type is suitable. However, ensure that the
plugs and cord allow high power (16A-220V / 13A-240V AC). If a reel type is used, unroll
itcompletely to prevent overheating.
•It may happen, especially if the heater operates on maximum power ( 2) and another
electrical device is switched on as well, that a fuse or circuit breaker cuts off the mains
power. In such a case, the fuse or circuit breaker may not allow this high electrical power.
You may connect one of the involved appliances to another circuit (employing another fuse
or circuit breaker) or have the electrical installation revised by an authorized electrician.
•For your own safety and that of others: water and electricity are a dangerous combination!
Do not use this heater in a bathroom or near a swimming pool. Ensure that the appliance
cannot fall into water (bath, wash basin, shower cubicle, etc.).
•Do not use the heater in rooms with explosive gas (e.g. petrol) or while using inflammable
glue or solvent (e.g. when glueing or varnishing parquet floors, PVC etc.).
•Do not insert any objects into the heater.
•Ensure that children cannot play with the appliance.
•Attention: the front grille gets hot during use.
•Keep the mains cord at a safe distance from the air outlet openings.
•Prevent overheating of the appliance by keeping the air inlet and outlet openings free: do not
hang anything in front of it or above it. Check the openings from time to time for
accumulated dust.
If overheating should occur, the built-in overheating safety device will switch off the
appliance.
•Allow ample space around the heater. A safe area to be left free is 50 cm at the top and at the
sides, and 120 cm at the front.
•Do not allow aerosols, inflammable substances or materials sensitive to heat to be in the
flow of hot air.
•Do not use the heater on extremely deep-pile carpets.
•Fan heaters are designed to heat and circulate air in rooms. Therefore, use the fan heater for
this purpose only.
English
*) Only on types HD 3346 and HD 3348.

Switching on and off
The function selector (D) enables you to select the
following functions:
O = “Off”.Both the fan and the two heating
elements are switched off.
“= “Quiet”setting. (Type HD 3348 only.)
If set to this position the appliance operates
almost silently. Nevertheless it provides
enough heat to keep a person comfortably
warm if he/she is close to the heater.
1= “Warm air”for gradual heating-up.
The fan and one heating element are
switched on.
2= “Hot air”for quick heating-up.
The fan and two heating elements are
switched on.
Thermostatic temperature control
(Types HD 3346 and HD 3348 only)
Your fan heater is equipped with a thermostatic
temperature control (G). This control is used to
keep your room at a comfortable temperature by
sensing the temperature in the room and
switching the fan heater on and off automatically
to ensure this temperature is maintained.
To find the most comfortable setting:
- Turn the fan heater on.
- Turn the thermostat knob (G) clockwise to the
highest setting.
- When the room temperature is comfortable,
turn the knob slowly anti-clockwise until the fan
heater switches off.
- The fan heater will switch back on automatically
when the room temperature drops.
You can turn the thermostat knob while you are
using the fan heater.
Pilot light
- When the appliance is plugged in and switched
on, the pilot light will come on.
- The pilot light will stay on until the appliance is
switched off or unplugged.
- The pilot light will stay on even when the
thermostat turns the fan heater off.
This shows that the fan heater is still plugged in
and switched on.
Frost protection y
You can use the fan heater to keep frost away
from the area near the fan heater. For example, to
prevent pipes freezing.
- Put the fan heater close to the spot that you
want to keep frost-free.
- Switch the fan heater on.
- Set the thermostat knob to position y(the
lowest thermostat setting, which is about 5°C).
The fan heater will switch off.
- The fan heater will switch back on automatically
when the room temperature drops below 5°C.
Overheating safety device
To prevent damage and risks due to overheating,
the built-in overheating safety device cuts off the
power as soon as the heating elements become
too hot.
If this should happen:
-(Types HD 3346 and HD 3348 only): First
ensure that it was not the thermostat which has
switched off the heater. Set the thermostat to
maximum position. If the heater still does not
switch on, you can be sure that the safety
device has been activated.
- Remove the mains plug from the wall socket.
- Let the heater cool down for 10 minutes.
- Check that the heater has been placed correctly.
- Check if anything is obstructing the air flow.
If necessary, clean the grilles with a vacuum
cleaner.
- Replace the plug into the wall socket and switch
the heater on again.
If the safety device again switches off the heater:
- Remove the mains plug from the wall socket.
- Have the heater inspected by a Philips Service
Centre or your dealer.
Cleaning
- Set the function selector (D) to position Oto
switch off.
- Remove the mains plug from the wall socket.
- Wait for the heater to cool down sufficiently.
- You may clean the outside of the heater with a
damp cloth. Do not allow water to enter into the
appliance.
- Clean the air inlet and outlet openings regularly
(with normal use at least twice a year) with a
vacuum cleaner, using the brush attachment.
5

6
Description générale (fig. 1 page 3)
APoignée
BEntrée d'air
CSortie d'air
DSélecteur de fonctions
ERangement du cordon d'alimentation Vous
pouvez ranger le cordon en l'enroulant.
N'utilisez pas l'appareil lorsque le cordon se
trouve rangé dans cette position.
FTémoin lumineux *)
GBouton du thermostat *)
*) uniquement pour les chauffages types HD 3346
et HD3348
Précautions àprendre
(référez-vous également au paragraphe
“Important”)
• Le chauffage ne doit pas être placé au-dessous
d'une prise murale.
• L'appareil ne doit pas être recouvert afin
d'éviter tout risque d'incendie.
• Placez le chauffage de façon à ce que le
passage du flux d'air entrant et sortant de
l'appareil ne soit pas encombré.
• Choisissez un endroit permettant d'éviter tout
choc électrique et tout risque d'incendie.
• Le chauffage ne doit être touché qu'avec des
mains sèches.
Important
•Avant de brancher l'appareil, vérifiez que la tension indiquée sur la plaque signalétique
correspond àla tension du secteur de votre habitation.
•Lisez attentivement ce mode d'emploi en vous référant aux illustrations (page 3) avant
d'utilisez l'appareil.
•L'appareil étant àdouble isolation, il n'est pas nécessaire de le brancher sur une prise de
terre. Si vous souhaitez utiliser une rallonge, vous pouvez utiliser une prise àdeux fils.
Assurez-vous cependant que les prises et cordons peuvent supporter des courants de forte
intensité(16A-220V / 13A-240V). Si vous utilisez un cordon àenrouleur, déroulez-le
complètement afin d'éviter tout échauffement.
•Il se peut, en particulier si vous utilisez votre chauffage àpleine puissance (22) et qu'un
autre appareil électrique fonctionne en même temps, qu'un fusible ou que le disjoncteur
coupe l'alimentation du secteur. Essayez dans ce cas de brancher l'un des appareils
concernés sur un autre circuit (utilisant un autre fusible ou un autre disjoncteur) ou bien de
faire réviser votre installation électrique par un électricien agréé.
•Pour votre propre sécuritéet celle des autres, n'oubliez pas qu'il est dangereux d'associer
eau avec électricité. Cet appareil ne doit pas être placédans une salle de bain ou àproximité
d'une piscine. Prenez toutes les précautions nécessaires afin d'éviter que l'appareil ne
tombe dans l'eau (baignoire, lavabo, douche, etc...).
•N'utilisez pas le chauffage dans des pièces contenant des gaz explosifs (par exemple des
émanations d'essence) ou lorsque vous utilisez de la colle ou un solvant inflammable (par
exemple lorsque vous collez du PVC ou vernissez un parquet, etc...).
•N'insérez aucun objet àl'intérieur du chauffage.
•Ne laissez pas les enfants jouer avec l'appareil.
•Attention: la grille avant devient très chaude en cours d'utilisation
•Maintenez le cordon d'alimentation éloignédes orifices de sortie d'air.
•Afin d'éviter toute surchauffe de l'appareil, veillez àne pas obstruer les entrées et sorties
d'air: ne laissez rien pendre devant ou au-dessus de l'appareil. Vérifiez de temps àautres
que les ouvertures ne sont pas encombrées par de la poussière.
En cas de surchauffe, le dispositif de sécuritéinterne éteindra automatiquement l'appareil.
•Ménagez un espace libre suffisant autour du chauffage: 50 cm sur le dessus et sur les côtés
et 120 cm sur le devant.
•Ne laissez pas des aérosols, des substances inflammables ou des produits sensibles àla
chaleur dans le flux d'air chaud.
•N'utilisez pas le chauffage sur un tapis àpoils longs.
•Les chauffages àair pulsésont conçus pour chauffer et souffler de l'air dans les pièces. Ces
types de chauffages doivent donc être utiliséque dans ce but uniquement.
Français

• Laissez un espace libre assez vaste autour du
chauffage.
Mise en marche / arrêt
Le sélecteur de fonctions (D) vous permet de
sélectionner les fonctions suivantes:
O= Arrêt , le ventilateur et les deux éléments
chauffants sont éteints.
“= Silence (Type HD 3348 seulement). Réglé
sur cette position, l'appareil fonctionne de
façon presque silencieuse.
1= Position I (air chaud) pour une montée en
température progressive.
Le ventilateur et un élément chauffant
fonctionnent.
2= Position II (air très chaud) pour une montée
en température rapide.
Le ventilateur et les deux éléments chauffants
fonctionnent.
Régulation de la température par thermostat
(types HD 3346 et HD 3348 seulement)
Votre radiateur soufflant est équipé d'un
thermostat de contôle (G) qui régule la
température ambiante automatiquement.
Réglage du thermostat:
- Tournez le bouton de mise en marche (D) sur
une position de chauffage.
- Tournez le bouton du thermostat (G) dans le
sens des aiguilles d'une montre jusqu'à butée
(température la plus élevée).
- Lorsque la température de la pièce est
suffisante tournez le bouton du thermostat dans
le sens inverse des aiguilles d'une montre
jusqu'à l'arrêt du chauffage.
- Le thermostat remettra en marche le chauffage
automatiquement dés que la température de la
pièce diminue.
Vous pouvez modifier le réglage du thermostat à
n'importe quel moment, même pendant le
fonctionnement.
Témoin lumineux
- Lorsque l'appareil est branché et qu'il est en
marche, le témoin lumineux s'allume.
- Le témoin lumineux reste éclairé jusqu'à ce
l'appareil soit débranché ou éteint.
- Le témoin lumineux reste éclairé même lorsque
le thermostat a éteint le chauffage.
Cela permet de savoir que le chauffage est
toujours branché et allumé.
Protection contre le gel y
Vous pouvez utiliser le chauffage pour éviter le
gel d'éléments situés à proximité du chauffage.
Par exemple des tuyauteries.
- Placez le chauffage à proximité de l'endroit que
vous désirez protéger contre le gel.
- Allumez le chauffage
- Réglez le bouton du thermostat sur position y
(c'est à dire la valeur minimum de réglage du
thermostat, correspondant à environ 5 °C ). Le
chauffage s'éteint alors.
- Le chauffage ne se rallumera automatiquement
dès que la température ambiante sera
inférieure à 5 °C.
Système de coupure automatique en cas de
surchauffe
Afin d'éviter toute détérioration de l'appareil et tout
danger dû à une surchauffe du système, un
dispositif de sécurité intégré coupe le courant dès
lors que les éléments chauffants deviennent trop
chauds.
Que faire dans ce cas:
-(Types HD 3346 et HD 3348 seulement): Tout
d'abord, assurez-vous que ce n’est pas le
thermostat qui a éteint le chauffage. Réglez le
thermostat sur température maximum. Si le
chauffage ne s’allume toujours pas, vous
pouvez être certain que la coupure est peut être
due au déclenchement du dispositif de sécurité.
- Débranchez le cordon d’alimentation de la prise
murale.
- Laissez le chauffage refroidir pendant 10
minutes.
- Vérifiez que le chauffage a été positionné
correctement.
- Assurez-vous que rien ne gêne la circulation de
l'air. Le cas échéant, nettoyez les grilles à l'aide
d'un aspirateur.
- Rebranchez le cordon d'alimentation et
rallumez le chauffage.
Si le dispositif de sécurité éteint de nouveau le
chauffage:
- Débranchez le cordon d'alimentation de la prise
murale.
- Faites contrôler votre chauffage par votre
revendeur ou un Centre Service Agéé.
Nettoyage
- Placez le sélecteur de fonctions (D) sur la
position Opour éteindre le chauffage.
- Débranchez le cordon d'alimentation de la prise
murale.
7

8
- Laissez refroidir le chauffage suffisamment
avant de le ranger.
- Vous pouvez nettoyer les surfaces externes du
chauffage à l'aide d'un chiffon humide. Veillez à
ne pas faire pénétrer de l'eau à l'intérieur de
l'appareil.
- Nettoyez régulièrement les orifices d'entrée et
de sortie d'air (en utilisation normale, au moins
deux fois par an) à l'aide d'un aspirateur muni
de l'accessoire brosse.

9
Allgemeine Beschreibung (Abb. 1 auf Seite 3)
AGriff
BLufteinlaß
CLuftauslaß
DGeräteschalter
EKabelaufwicklung Das Kabel kann zur
Aufbewahrung des Geräts an der Unterseite
aufgewickelt werden. Wickeln Sie das Kabel
vor dem Gebrauch vollständig ab!
FKontrollampe *)
GThermostatregler *)
Sichere Aufstellung
(Vgl. den Abschnitt "Wichtig")
• Stellen Sie das Gerät nie direkt unter einer
Steckdose auf.
• Legen Sie nichts auf das Gerät. Brandgefahr!
• Stellen Sie das Gerät so auf, daß Lufteinlaß
und Luftauslaß nicht behindert werden.
Wichtig
•Prüfen Sie vor Inbetriebnahme, ob die Spannungsangabe auf dem Typenschild mit der
örtlichen Netzspannung übereinstimmt.
•Lesen Sie die Gebrauchsanweisung sorgfältig durch, und sehen Sie sich dabei die
Abbildungen auf Seite 3 an, bevor Sie das Gerät zum ersten Mal benutzen.
•Das Gerät ist doppelt isoliert und braucht deshalb nicht unbedingt an eine Schuko-
Steckdose angeschlossen zu werden.
Deshalb kann das Gerät auch über ein zweiadriges Verlängerungskabel angeschlossen
werden. Achten Sie aber darauf, daßdieses Kabel für höhere Stromstärken (16 A / 220 V
bzw. 13 A / 240 V ≈) geeignet ist.
Wickeln Sie das Kabel ganz ab, wenn Sie eine Kabeltrommel verwenden, um Überhitzung zu
vermeiden!
•Es kann vorkommen, daßdie Sicherung den Strom unterbricht; besonders wenn der
Heizlüfter auf Position 2betrieben wird oder ein weiteres Gerät an denselben Stromkreis
angeschlossen ist. Dann ist die Stromentnahme höher als zulässig.
Sie können in diesem Fall eines der Geräte ausschalten und über eine andere Sicherung an
einen anderen Stromkreis anschließen oder einen geprüften Elektriker beauftragen, die
Anlage entsprechend anzupassen.
•Beachten Sie zur persönlichen und zu fremder Sicherheit, daßjede Kombination von Wasser
und Elektrizität gefährlich ist!
Stellen Sie das Gerät nicht in der Nähe einer Badewanne, einer Duschkabine oder eines
Schwimmbeckens auf. Achten Sie darauf, daßdas Gerät nicht in Wasser fallen kann.
•Verwenden Sie den Heizlüfter nicht in einem Raum, in dem sich explosive Gase entwickeln
könnten; auch nicht beim Gebrauch von Benzin, von Lösungsmitteln und Klebern, etwa
beim Verlegen von Fußböden.
•Stecken Sie keinerlei Gegenstände in den Heizlüfter.
•Halten Sie Kinder von dem Gerät fern.
•Vorsicht! Die Abdeckung wird beim Betrieb heiß!
•Halten Sie das Netzkabel vom Luftauslaßfern.
•Vermeiden Sie eine Überhitzung des Geräts. Halten Sie Lufteinlaßund -auslaßfrei, und
hängen Sie nichts davor bzw. darüber. Entfernen Sie von Zeit zu Zeit den Staub, der sich in
den Öffnungen ansammelt.
Im Falle einer Überhitzung schaltet der eingebaute Überhitzungsschutz das Gerät
automatisch aus.
•Lassen Sie ausreichend Platz rund um den Heizlüfter: 50 cm über und 120 cm vor dem Gerät.
•Lassen Sie keine Sprays und keine hitzeempfindlichen oder explosiven Gase in die
eingesaugte Luft gelangen.
•Stellen Sie den Heizlüfter nicht auf sehr langflorigen Teppich.
•Heizlüfter dienen nur dazu, die Luft in Räumen zu heizen und umzuwälzen. Verwenden Sie
das Gerät ausschließlich zu diesem Zweck.
Deutsch
*) nur Typen HD 3346 und HD 3348.

die Kontrollampe.
- Die Kontrollampe leuchtet, bis das Gerät
ausgeschaltet oder der Strom unterbrochen
wird.
- Die Kontrollampe leuchtet auch, wenn der
Thermostat das Gerät ausgeschaltet hat. Sie
zeigt an, daß das Gerät am Netz und
betriebsbereit ist.
Frostschutz-Einstellung y
Das Gerät kann als Frostschutz verwendet
werden. Wenn Sie z.B. dafür sorgen wollen, daß
eine Wasserleitung nicht einfriert ...
- stellen Sie den Heizlüfter in die Nähe der Stelle,
die Sie frostfrei halten wollen;
- schalten Sie das Gerät ein;
- stellen Sie den Thermostatregler (G) auf die
niedrigste Position y, das sind ca. +5° C.
Das Gerät wird automatisch ausgeschaltet.
Auf dieser Stellung schaltet sich das Gerät ein,
wenn die Umgebungstemperatur unter +5° C
sinkt.
Der Überhitzungsschutz
Um Risiken und Schäden zu vermeiden, die durch
zu starke Erhitzung entstehen, schaltet der
Überhitzungsschutz das Gerät aus, sobald die
Heizelemente sich zu stark erhitzen.
Sollte dies geschehen, so verfahren Sie wie folgt:
-(Nur Typen HD 3346 und HD 3348:)
Vergewissern Sie sich zunächst, ob nicht der
Thermostat das Gerät ausgeschaltet hat.
Stellen Sie dazu den Thermostaten (G) auf die
höchste Position. Wird das Gerät dann nicht
eingeschaltet, hat tatsächlich der
Überhitzungsschutz das Gerät ausgeschaltet.
- Ziehen Sie den Netzstecker aus der Steckdose.
- Lassen Sie das Gerät 10 Minuten abkühlen.
- Prüfen Sie, ob der Heizlüfter vorschriftsmäßig
aufgestellt ist.
- Prüfen Sie weiter, ob die Luft durch die
Lufteinlaß- und Luftauslaßöffnungen zirkulieren
kann. Reinigen Sie bei Bedarf die Lufteinlaß-
und -auslaßöffnungen mit einem Staubsauger.
- Stecken Sie den Netzstecker wieder in die
Steckdose und schalten Sie das Gerät wieder
ein.
Wird das Gerät daraufhin erneut ausgeschaltet,
so ...
- ziehen Sie den Netzstecker aus der Steckdose
und
- lassen Sie das Gerät von Ihrem Philips-Händler
oder vom Philips Service Centre in Ihrem Lande
überprüfen.
• Wählen Sie einen sicheren Ort, an dem ein
elektrischer Schlag und Feuergefahr
ausgeschlossen werden können. Berühren Sie
das Gerät nie mit nassen oder feuchten
Händen.
• Berühren Sie das Gerät nicht mit feuchten oder
nassen Händen.
• Lassen Sie rund um das Gerät ausreichend
Platz.
Das Gerät ein- und ausschalten
Mit dem Geräteschalter (D) können Sie die
folgenden Funktionen einstellen:
O= Aus. Der Ventilator und die beiden
Heizelemente werden ausgeschaltet.
“= "Flüsterwind" (Nur Type HD 3348)
In dieser Position arbeitet das Gerät fast
lautlos. Trotzdem wird soviel Wärme
abgegeben, daß sich eine Person in der Nähe
des Geräts behaglich fühlt.
1= "Warmluft" zum allmählichen Erwärmen. Der
Ventilator und eines der beiden Heizelement
werden eingeschaltet.
2= "Heißluft" zum schnellen Aufheizen. Der
Ventilator und beide Heizelemente werden
eingeschaltet.
Thermostatische Temperaturregelung
(Nur Typen HD 3346 und HD 3348)
Ihr Heizlüfter ist mit einem Temperaturregler (G)
versehen, der die Raumtemperatur über einen
Thermostaten aufrechterhält. Der Thermostat mißt
die Temperatur und schaltet die Heizelemente
ein, wenn die Temperatur zu sinken beginnt, und
schaltet sie wieder aus, wenn die eingestellte
Temperatur erreicht ist.
So stellen Sie die gewünschte Temperatur ein:
- Schalten Sie das Gerät ein.
- Drehen Sie den Temperaturregler (G) im
Uhrzeigersinn auf die höchste Position.
- Ist die gewünschte Temperatur erreicht, drehen
Sie den Temperaturregler langsam entgegen
dem Uhrzeigersinn, bis das Gerät
ausgeschaltet wird.
- Das Gerät wird von jetzt an immer dann
eingeschaltet, wenn die Temperatur unter den
eingestellten Wert sinkt.
Der Temperaturregler kann bei eingeschaltetem
Gerät verstellt werden.
Die Kontrollampe
- Wenn das Gerät an das Stromnetz
angeschlossen und eingeschaltet ist, leuchtet
10
11
Reinigung
- Stellen Sie den Geräteschalter (D) auf die
Position O, um das Gerät auszuschalten.
- Ziehen Sie den Netzstecker aus der Steckdose.
- Warten Sie, bis das Gerät ausreichend
abgekühlt ist.
- Sie können das Äußere des Gehäuses mit
einem feuchten Tuch abwischen. Achten Sie
darauf, daß kein Wasser in das Innere des
Geräts eindringt.
- Reinigen Sie regelmäßig (bei normalem
Gebrauch zweimal jährlich) die Lufteinlaß- und
-auslaßöffnungen mit einem Staubsauger, unter
Verwendung des Bürstenaufsatzes.

12
Algemene beschrijving (fig. 1 op pag. 3)
AHandgreep
BLuchtinlaatopening
CLuchtuitstroomopening
DKeuzeschakelaar
ESnoeropbergmogelijkheid
Overtollig snoer kunt u hier opgerold bewaren.
Gebruik het apparaat echter niet wanneer het
snoer op deze wijze is opgerold.
FControlelampje *)
GThermostaatknop *)
Veilig plaatsen (zie ook “Belangrijk”)
• Plaats de kachel niet vlak onder een
stopcontact.
• Dek de kachel niet af. Als er iets op of over het
apparaat wordt gelegd, kan dit brandgevaar
opleveren.
• Stel het apparaat zodanig op, dat de toe- en
afvoer van lucht niet wordt gehinderd.
• Zorg voor een veilige plaats, om elektrische
schok en brandgevaar te vermijden.
• Raak het apparaat alleen met droge handen
aan.
• Laat voldoende ruimte vrij rond het apparaat.
Belangrijk
•Controleer, voordat u het apparaat aansluit, of het voltage dat op het typeplaatje is vermeld,
overeenkomt met de netspanning in uw woning.
•Lees de gebruiksaanwijzing goed door en bekijk de tekeningen (pag. 3) voordat u het
apparaat in gebruik neemt.
•Het apparaat is dubbel geïsoleerd, en hoeft dus niet op een geaard stopcontact te worden
aangesloten. Indien u een verlengsnoer wenst te gebruiken, kunt u een tweeaderig type
kiezen. Zorg er dan echter voor dat de stekker en contrastekker van het juiste type zijn, en
dat de belastbaarheid van het snoer voldoende is (16A-220V≈). Indien u een verlengsnoer op
kabelhaspel toepast, rol het snoer dan geheel uit om oververhitting te voorkomen.
•Het kan voorkomen, vooral wanneer het apparaat werkt op de hoogste stand ( 2) en u nog
een ander elektrisch apparaat inschakelt, dat een zekering in de meterkast doorbrandt of
uitschakelt. De zekering is wellicht niet op grote stroomsterkte berekend. Sluit in zo'n geval
één van beide apparaten op een andere “groep”aan (via een andere zekering) of laat uw
installatie wijzigen door een erkend installateur.
•Voor uw eigen veiligheid en die van anderen: water en elektriciteit vormen een gevaarlijke
combinatie! Gebruik het apparaat niet in badkamer of bij een zwembassin. Zorg ervoor dat
het apparaat nooit in water kan vallen (bad, douchebak, wasbak, enz.).
•Gebruik de kachel niet in ruimten waarin explosieve gassen (bijv. benzine) kunnen
voorkomen, of tijdens het verwerken van brandgevaarlijke lijmen en oplosmiddelen (zoals bij
het lijmen of lakken van parket, PVC e.d.).
•Steek geen voorwerpen in de kachel.
•Zorg ervoor dat kinderen niet met de kachel kunnen spelen.
•Let op: het rooster aan de voorzijde wordt heet tijdens het gebruik.
•Houd het snoer op veilige afstand van de luchtuitstroomopeningen.
•Voorkom oververhitting van de kachel. Houd daarom de luchtopeningen vrij: hang er dus
niets voor of overheen. Controleer de openingen van tijd tot tijd om na te gaan of er zich
geen stof heeft verzameld. Bij eventuele oververhitting van de kachel schakelt de
ingebouwde beveiliging het apparaat uit.
•Laat voldoende ruimte open rondom de kachel. (Een veilige vrije ruimte rondom de kachel is
50 cm aan de bovenkant en aan de zijkanten en 120 cm aan de voorzijde.)
•Houd spuitbussen, brandbare stoffen en materialen die gevoelig zijn voor warmte uit de
warme luchtstroom.
•Zet de kachel niet op zeer hoogpolige vloerbedekking.
•Ventilatorkachels zijn bedoeld om de lucht in huiskamers te verwarmen en te doen
circuleren. Gebruik de kachel daarom alleen voor dat doel.
Nederlands
*) Alleen bij alle types HD 3346 en HD 3348.

In- en uitschakelen
De keuzeschakelaar (D) biedt u de volgende
keuzemogelijkheden:
O = “Uit”.Zowel de ventilator als de beide
verwarmingselementen zijn uitgeschakeld.
“= “Fluister”stand. (Alleen bij type HD 3348.)
In deze stand werkt de ventilatorkachel vrijwel
geruisloos. Toch produceert het apparaat dan
voldoende warmte om iemand plezierig warm
te houden, indien deze dicht bij de kachel zit.
1= “Warme lucht”voor geleidelijk opwarmen.
De ventilator en één verwarmingselement zijn
ingeschakeld.
2= “Hete lucht”voor snel opwarmen.
De ventilator en twee verwarmingselementen
zijn ingeschakeld.
Thermostatische warmteregeling
(Alleen bij types HD 3346 en HD 3348)
De kachel is voorzien van een thermostatische
warmteregelaar. Deze houdt de temperatuur van
de omgevingslucht op een comfortabel niveau,
doordat het de temperatuur voortdurend meet en
de kachel beurtelings aan- en uitschakelt.
Om de meest comfortabele stand van de
thermostaat te vinden:
- Schakel het apparaat in.
- Draai de thermostaatknop (G) met de klok mee
op de hoogste stand.
- Zodra u de temperatuur behaaglijk vindt, draait
u de knop langzaam tegen de klok in totdat de
kachel uitschakelt.
- De kachel zal automatisch weer gaan werken
wanneer de kamertemperatuur daalt.
U kunt de thermostaat tijdens het gebruik
bijregelen.
Controlelampje
- Wanneer het apparaat is aangesloten en
ingeschakeld, gaat het controlelampje branden.
- Het lampje blijft branden totdat het apparaat
wordt uitgeschakeld of de stekker uit het
stopcontact wordt genomen.
- Het controlelampje blijft zelfs branden wanneer
de thermostaat het apparaat uitschakelt. Dit
geeft aan dat het apparaat nog is aangesloten
en in stand "ingeschakeld" staat.
Bescherming tegen vorst y
U kunt de ventilatorkachel gebruiken om de
direkte omgeving van de kachel vorstvrij te
houden, bijvoorbeeld om bevriezing van een
waterleiding te voorkomen.
- Zet de kachel dicht bij de plaats die vorstvrij
moet worden gehouden.
- Schakel de kachel in.
- Zet de thermostaatknop in stand y (d.i. de
laagste thermostaatstand, ca. +5 °C).
- De kachel schakelt uit.
- De kachel schakelt automatisch weer in als de
kamertemperatuur lager wordt dan 5 °C.
Beveiliging tegen oververhitting
Om schade en risico als gevolg van oververhitting
te voorkomen, schakelt de ingebouwde
beveiliging de stroom uit zodra de
verwarmingselementen te heet worden.
Indien dit mocht gebeuren:
- (Alleen bij types HD 3346 en HD 3348:):
Overtuig u er eerst van dat het niet de
thermostaat was, waardoor de kachel werd
uitgeschakeld. Zet de thermostaat in de
hoogste stand. Als de kachel niet gaat werken,
was het inderdaad de beveiliging die het
apparaat heeft uitgeschakeld.
- Neem de stekker uit het stopcontact.
- Laat de kachel 10 minuten afkoelen.
- Controleer of u het apparaat op de juiste manier
hebt geplaatst.
- Controleer of iets de doorstroming van lucht
belemmert. Maak zonodig de luchtopeningen
schoon met behulp van een stofzuiger.
- Steek de stekker weer in het stopcontact en
schakel de kachel weer in.
Als de beveiliging de kachel opnieuw mocht
uitschakelen:
- Neem de stekker uit het stopcontact.
- Laat de kachel door uw leverancier of in een
Philips Service Centrum controleren.
Schoonmaken
- Zet de keuzeschakelaar (D) in stand O om het
apparaat uit te schakelen.
- Neem de stekker uit het stopcontact.
- Wacht totdat de kachel voldoende is afgekoeld.
- Neem de stekker uit het stopcontact.
- U kunt de buitenkant van de kachel
schoonmaken met een vochtige doek. Zorg
ervoor dat er geen water in het apparaat komt.
- Met behulp van de stofzuiger (kleine zuigmond
met langharige borstel) kunt u de luchtinlaat-
opening en de luchtuitstroomopening
schoonmaken.
Wij raden u aan dit minstens twee keer per jaar
te doen.
13

14
Descrizione generale (fig. 1, pag. 3)
AImpugnatura
BGriglia ingresso aria
CGriglia uscita aria
DSelettore
EAvvolgicavo
Il cavo può essere raccolto sull'avvolgicavo.
Non usate l'apparecchio mentre il cavo è
arrotolato in questo modo.
FSpia *)
GManopola termostato *)
*) Solo sui tipi HD 3346 e HD 3348
Posizionamento sicuro
(Far riferimento anche alla sezione "Importante")
• Il termoventilatore non deve essere posizionato
sotto una presa di corrente.
• L'apparecchio non deve essere coperto -
altrimenti c'è il rischio di incendi.
• Posizionate l'apparecchio in modo che il flusso
d'aria verso il termoventilatore e in uscita da
esso non sia ostacolato.
• Scegliete una posizione sicura per evitare
possibilità di scosse elettriche o incendi.
• Toccate l'apparecchio solo con le mani asciutte.
• Lasciate spazio in abbondanza attorno al
termoventilatore.
Importante
•Prima di usare l'apparecchio, controllate che la tensione indicata nella targhetta corrisponda
a quella della rete locale.
•Prima di usare l'apparecchio leggete attentamente le istruzioni d'uso guardando le figure
relative (pag. 3).
•L'apparecchio èdotato di doppio isolamento per cui non ènecessario collegarlo ad una
presa munita di terra. Se dovete usare una prolunga, èsufficiente il tipo a 2 conduttori.
Controllate comunque che la presa di corrente e la prolunga sopportino la potenza
necessaria (16 A-220 V).
Se usate una prolunga contenuta nell'apposito avvolgicavo, per evitare di surriscaldarla
svolgetela completamente.
•Se il termoventilatore funziona nella posizione 2e viene acceso un altro apparecchio
elettrico puòsuccedere che bruci il fusibile o scatti l'interruttore di protezione dell'impianto.
In questo caso vuol dire che la potenza assorbita dagli apparecchi elettrici èsuperiore a
quella ammessa dall'impianto.
Potete spostare uno degli apparecchi in un'altra presa (protetta da un altro fusibile o da un
altro interruttore) o far modificare l'impianto elettrico da un elettricista qualificato.
•Per la vostra e l'altrui sicurezza ricordate che acqua ed elettricitàcostituiscono un
abbinamento pericoloso! Non usate l'apparecchio nelle immediate vicinanze di una vasca da
bagno, di una doccia o di una piscina.
•Non usate l'apparecchio in ambienti con gas esplosivi (es. benzina) o quando vengono usati
colle o solventi infiammabili (es. per la lucidatura di parquet, per incollare PVC, ecc.).
•Non infilate oggetti nella griglia di protezione mentre l'apparecchio ècollegato alla rete.
•Controllate che i bambini non giochino con il termoventilatore.
•Attenzione: la griglia frontale diventa calda durante l'uso.
•Tenete il cavo di alimentazione a distanza di sicurezza dalla griglia d'uscita dell'aria calda.
•Evitate possibili surriscaldamenti mantenendo libere le aperture d'ingresso e d'uscita
dell'aria: non appendete nulla davanti o sopra l'apparecchio. Ogni tanto eliminate la polvere
accumulata sulle griglie.
Nel caso di surriscaldamento, il dispositivo di sicurezza spegneràautomaticamente
l'apparecchio.
•Lasciate dello spazio libero attorno all'apparecchio. Almeno 50 cm sopra e ai lati, 120 cm
davanti.
•Nel flusso di aria calda non devono entrare aerosol, sostanze infiammabili o materiali
sensibili al calore.
•Non usate il termoventilatore sopra tappeti particolarmente folti.
•Il termoventilatore èstato progettato solo per riscaldare e far circolare l'aria nell'ambiente.
Usatelo quindi solo per questo scopo e non come fonte principale di riscaldamento.
Italiano

Utilizzazione del termoventilatore
Il selettore (D) vi permette di scegliere le seguenti
funzioni:
O= "Spento". Sia il ventilatore che i due
elementi riscaldanti sono spenti.
“= "Funzionamento silenzioso". (Solo il tipo
HD 3348)
In questa posizione il funzionamento
dell'apparecchio è molto silenzioso. In ogni
caso fornisce abbastanza calore da riscaldare
in modo confortevole una persona vicina
all'apparecchio.
1= "Aria tiepida" per un riscaldamento
graduale.
Sono accesi il ventilatore e uno dei due
elementi riscaldanti.
2= "Aria calda" per un riscaldamento veloce.
Sono accesi il ventilatore e tutti e due gli
elementi riscaldanti.
Controllo termostatico della temperatura
Il vostro termoventilatore è provvisto di un
termostato per il controllo della temperatura (G).
Tale dispositivo è utilizzato per mantenere il locale
alla temperatura ottimale, in quanto è in grado di
accendere e spegnere automaticamente il termo-
ventilatore dopo aver rilevato la temperatura.
Per impostare il valore ottimale:
- Accendete il termoventilatore.
- Ruotate il termostato (G) in senso orario fino ad
impostare il valore più alto.
- Non appena avrete raggiunto la temperatura
ottimale all’interno del locale, ruotate
lentamente il termostato in senso antiorario fino
a quando l’apparecchio non si spegnerà.
- L’apparecchio si riaccenderà automaticamente
non appena la temperatura all’interno del locale
diminuirà.
É possibile ruotare il termostato anche con
l’apparecchio in funzione.
Luce spia
- La spia si accende quando l'apparecchio è
collegato alla rete e viene acceso.
- La spia resta accesa finché l'apparecchio non
viene spento o viene staccato dalla presa di
corrente.
- La spia rimane accesa anche quando l'appa-
recchio viene spento dall'intervento del
termostato.
La spia accesa indica che l'apparecchio è
ancora collegato alla rete ed è acceso.
Protezione antigelo y
Potete usare il termoventilatore per evitare che si
formi del ghiaccio in una zona nelle immediate
vicinanze dell'apparecchio. Es. per impedire che
ghiaccino dei tubi dell'acqua.
- Mettete l'apparecchio vicino al punto dove
volete evitare la formazione del ghiaccio.
- Accendete il termoventilatore.
- Portate il termostato nella posizione y(è la
posizione corrispondente alla temperatura
minima - circa +5° C).
Il termoventilatore si spegne.
- L'apparecchio si riaccende automaticamente
quando la temperatura ambiente scende sotto i
5° C.
Protezione contro i surriscaldamenti
Per evitare danni e rischi dovuti a
surriscaldamento il dispositivo di protezione
interrompe l'alimentazione degli elementi
riscaldanti se la temperatura diventa troppo alta.
In questo caso:
-(Solo tipi HD 3346 e HD 3348):
Verificate innanzitutto che non sia stato il
termostato a spegnere il termoventilatore.
Portate la manopola nella posizione
corrispondente alla temperatura massima. Se
l'apparecchio non si accende significa che è
intervenuto il dispositivo di protezione.
- Staccate la spina dalla presa di corrente.
- Lasciate raffreddare l'apparecchio per 10 minuti.
- Verificate che l'apparecchio sia stato disposto
correttamente.
- Verificate che non ci siano ostacoli al flusso
d'aria.
Se necessario, pulite le griglie con un
aspirapolvere.
- Inserite la spina nella presa di corrente e
accendete nuovamente l'apparecchio.
Se la protezione spegne di nuovo l'apparecchio:
- Staccate la spina dalla presa di corrente.
- Fate controllare l'apparecchio da un Centro
Assistenza Autorizzato Philips o dal vostro
rivenditore.
Pulizia
- Spegnete il termoventilatore portando il
selettore (D) nella posizione O.
- Staccate la spina dalla presa.
- Aspettate che l'apparecchio sia abbastanza
freddo.
- Potete pulire l'esterno dell'apparecchio con un
panno umido. Non fate entrare acqua all'interno
dell'apparecchio.
- Pulite regolarmente le griglie d'entrata e
d'uscita dell'aria (almeno un paio di volte
all'anno per un uso normale) con un
aspirapolvere, usando la bocchetta con la
spazzola.
15

16
Descripción general (fig. 1 de la pág. 3)
AEmpuñadura
BRejilla de entrada de aire.
CRejilla de salida de aire.
DInterruptor selector.
EAlojamiento para el cable.
El exceso de cable de red puede ser
almacenado enrollándolo.
No usen el aparato con el cable de red
enrollado.
FLámpara piloto *)
GMando del termostato *)
*) Solo tipos HD 3346 y HD 3348
Importante
•Antes de conectar el aparato a la red, comprueben que el voltaje indicado en la placa de
características se corresponda con el de su hogar.
•Lean cuidadosamente estas instrucciones, conjuntamente con las ilustraciones (página 3),
antes de usar el aparato.
•El aparato es de doble aislamiento y no necesita ser conectado a un enchufe con toma de
tierra.
Si desean usarlo con un cable prolongador, pueden hacerlo con uno de 2 conductores. No
obstante, asegúrense de que las clavijas y el cable son adecuados para una alta potencia
(16 A a 220 V AC).
Si emplean un cable enrollado, desenróllenlo completamente para evitar el
sobrecalentamiento.
•Puede suceder, especialmente si el calentador funciona en la posición (22) y además es
conectado otro aparato eléctrico, que un fusible o un disyuntor corten la corriente.
En tal caso, el fusible o disyuntor no permiten esta alta potencia eléctrica.
Pueden conectar uno de los aparatos involucrados en otro circuito (que emplee otro fusible
o disyuntor) o hacer revisar la instalación eléctrica por un electricista autorizado.
•Para su propia seguridad y la de los demás ¡El agua y la electricidad forman una
combinación peligrosa !
No usen este calentador en un cuarto de baño o en las cercanías de una piscina.
Asegúrense de que el aparato no pueda caer al agua (bañera, lavabo, ducha, etc.).
•No usen el calentador en habitaciones con atmósfera explosiva (por ejemplo, gasolina) o
mientras usen colas o disolventes inflamables (por ejemplo, cuando encolen o barnicen
suelos de parquet, PVC, etc.).
•No introduzcan ningún objeto en el termoventilador.
•No permitan que los niños jueguen con el aparato.
•Atención : La rejilla frontal se calienta durante el uso.
•Mantengan el cable de red a una distancia segura de las salidas de aire.
•Eviten los sobrecalentamientos del aparato, manteniendo libres las aberturas de entrada y
salida del aire.
No cuelguen nada en la parte frontal o encima del aparato.
De vez en cuando, eliminen el polvo acumulado en las aberturas.
Si se produce un sobrecalentamiento, el dispositivo de seguridad que lleva incorporado
desconectaráel aparato.
•Dejen un espacio amplio alrededor del termoventilador.
Una área de seguridad consiste en dejar libres 50 cm por encima y a los lados y 120 cm en la
parte frontal.
•No dejen aerosoles, sustancias inflamables o materiales sensibles al calor en la corriente de
aire caliente.
•No usen el calentador sobre alfombras de pelo muy largo.
•Los termoventiladores están diseñados para calentar y hacer circular el aire en habitaciones
y, por ello, solo deben ser usados para ese fin.
Español

Colocación segura
(consulten también la sección "Importante")
• El calentador no debe ser colocado debajo de
un enchufe.
• El aparato no debe ser tapado ya que, de otro
modo, habrá riesgo de incendio.
• Coloquen el aparato de modo que no se
obstruya el flujo de aire que entra y el que sale
del aparato.
• Seleccionen un lugar seguro para evitar
choques eléctricos y el riesgo de incendio.
• Toquen el aparato solo con las manos secas.
• Dejen un amplio espacio alrededor del
calentador.
Puesta en marcha y paro
El interruptor selector (D) les permite seleccionar
las siguientes funciones :
O= Paro ("Off"). Se desconectan tanto el
ventilador como los dos elementos
calefactores.
“= Posición Silenciosa ("Quiet")(Solo tipo
HD 3348)
Si seleccionan esta posición, el aparato
funcionará casi en silencio. Sin embargo, les
proporcionará suficiente calor para mantener a
una persona confortablemente caliente si está
cerca del termoventilador.
1= Aire caliente ("Warm air"). Para un
calentamiento gradual.
El ventilador y uno de los dos elementos
calefactores se ponen en marcha.
2= Aire muy caliente ("Hot air"). Para un
calentamiento rápido.
El ventilador y los dos elementos calefactores
se ponen en marcha.
Control termostático de la temperatura
(Solo tipos HD 3346 y HD 3348)
Su termoventilador está equipado con un
termostato (G) para el control de la temperatura,
con el fin de mantener su habitación a una
temperatura confortable. Su función es
comprobar la temperatura de la habitación, y
poner automáticamente en marcha o parar el
termoventilador para asegurar el mantenimiento
de esa temperatura.
Para encontrar el ajuste más confortable :
- Pongan en marcha el termoventilador.
- Giren el botón del termostato (G) en el sentido
de las agujas del reloj hasta la posición más
alta.
- Cuando la temperatura de la habitación sea
confortable, giren lentamente el botón en
sentido contrario al de las agujas del reloj hasta
que el termoventilador se pare.
- El termoventilador volverá a conectarse
automáticamente cuando descienda la
temperatura de la habitación.
Pueden girar el botón del termostato mientras
estén usando el termoventilador.
Lámpara piloto
- Cuando el aparato esté enchufado a la red y
puesto en marcha, la lámpara piloto se
encenderá.
- La lámpara piloto permanecerá encendida
hasta que el aparato sea desconectado o
desenchufado de la red.
- La lámpara piloto permanecerá encendida
incluso cuando el termostato desconecte el
aparato.
Ello indica que el termoventilador está todavía
conectado a la red y puesto en marcha.
Protección anticongelación y
Pueden usar el termoventilador para mantener los
alrededores del calentador libres de hielo (Por
ejemplo, para evitar la congelación de tuberías).
- Coloquen el calentador cerca del lugar que
deseen mantener libre de hielo.
- Pongan el termoventilador en marcha.
- Ajusten el mando del termostato a la posición
y (El ajuste mínimo del termostato está a unos
5 ºC).
El termoventilador se parará.
- El termoventilador se pondrá automáticamente
en marcha tan pronto como la temperatura de
la habitación descienda por debajo de 5 ºC.
Dispositivo de seguridad contra
sobrecalentamientos
Para impedir deterioros y riesgos debidos al
sobrecalentamiento, el dispositivo de seguridad
contra sobrecalentamientos que lleva incorporado
corta la corriente tan pronto como los elementos
calefactores se calientan demasiado.
Si esto sucediera :
-(Tipos HD 3346 y HD 3348) Primero,
asegúrense de que no ha sido el termostato el
que ha desconectado el termoventilador.
Ajusten el termostato a la posición máxima.
Si el termoventilador no se pone en marcha, es
seguro que se ha activado el dispositivo de
seguridad.
- Desenchufen el aparato de la red.
- Dejen enfriar el termoventilador durante 10
minutos.
17

18
- Comprueben que el termoventilador ha sido
colocado correctamente.
- Comprueben si algo está obstruyendo el flujo
de aire. Si es necesario, limpien las rejillas con
un aspirador.
- Vuelvan a enchufar el aparato a la red y
pongan, de nuevo, en marcha el
termoventilador.
Si el dispositivo de seguridad desconecta otra vez
el termoventilador:
- Desenchufen el aparato de la red.
- Hagan que el termoventilador sea comprobado
por un Centro de Servicio Philips o por su
vendedor.
Limpieza
- Lleven el interruptor selector (D) a la posición
"O" para desconectar el termoventilador.
- Desenchufen el aparato de la red.
- Esperen que el termoventilador se enfríe
suficientemente.
- Pueden limpiar el exterior del termoventilador
con un paño húmedo. No permitan que el agua
penetre en el aparato.
- Limpien regularmente las aberturas de entrada
y de salida de aire (con un uso normal, al
menos dos veces al año) con un aspirador y
usando el cepillo.

19
Descrição geral
(fig. 1 na página 3)
APega
BGrelha para entrada do ar
CGrelha para saída do ar
DComutador de selecção
ECompartimento do fio
O fio excedente pode ser guardado
enrolando-o. Mas o aparelho não deve ser
usado com o fio enrolado.
FLâmpada piloto *)
GBotão do termostato *)
*) Apenas nos modelos HD 3346 e HD 3348.
Condições de segurança
(consulte também a secção "Importante")
• O aparelho não deve ser colocado debaixo
duma tomada de corrente.
• O aparelho não deve ser coberto - se o fizer,
corre o risco de provocar um incêndio.
• Coloque o termoventilador de modo que o fluxo
de ar, de e para o aparelho, não fique
obstruído.
• Escolha um local seguro para evitar choques
eléctricos ou risco de incêndio.
• Nunca toque no aparelho com as mãos
molhadas.
Importante
•Antes de ligar o aparelho, verifique primeiro se a voltagem nele indicada corresponde à
voltagem da sua casa.
•Leia as instruções, acompanhando as ilustrações fornecidas (pág. 3), antes de se servir do
aparelho pela primeira vez.
•O aparelho éduplamente isolado, pelo que não se torna necessário ligá-lo a uma tomada
com terra. Se pretender utilizar uma extensão, poderáfazê-lo com um cabo de dois fios.
Contudo, deveráutilizar um cabo e uma tomada com suficiente potência (16A-220V / 13A-
240V AC). Se utilizar uma bobina, desenrole todo o fio para evitar o risco de
sobreaquecimento.
•Pode acontecer, principalmente se o aparelho estiver a funcionar na sua máxima potência
(22) e tiver outro aparelho eléctrico a trabalhar, que os fusíveis ou o quadro não suportem a
carga. Deverá, então, ligar os aparelhos em diferentes fases (ou noutro fusível). Se, mesmo
assim, tiver problemas, serámelhor rever a instalação eléctrica por um técnico
especializado.
•Para sua própria segurança e dos outros: a água e a electricidade são uma combinação
perigosa! Não utilize na casa de banho ou perto de piscinas. Certifique-se que não háo
risco de cair àágua (banheira, lavatório, duche, etc.)
•Não utilize o termoventilador em salas com gás explosivo (p.ex. gasolina) ou quando estiver
a usar colas ou solventes inflamáveis (p.ex. quando estiver a colar ou a envernizar soalhos
de parquet, de PVC, etc.).
•Não introduza quaisquer objectos no aparelho.
•Nunca permita que as crianças brinquem com o aparelho.
•Atenção: a grelha da frente aquece durante a utilização.
•Mantenha o cabo de alimentação a uma distância razoável das grelhas de saída do ar.
•Evite o sobreaquecimento do aparelho mantendo livres as grelhas de entrada e saída do ar:
não pendure nada àfrente do aparelho ou sobre ele. Verifique de tempos a tempos se não
háacumulação de poeiras nas grelhas do aparelho.
Se ocorrer um sobreaquecimento, o dispositivo de segurança incorporado desligaráo
aparelho.
•Mantenha algum espaço livre àvolta do termoventilador. A zona de segurança situa-se nos
50 cm para cima e para os lados e nos 120 cm para a frente.
•Não utilize aerossóis, substâncias inflamáveis ou matérias sensíveis ao calor junto do fluxo
de ar quente.
•Não coloque o aparelho sobre alcatifas ou carpetes de pêlo muito alto.
•Os termoventiladores foram concebidos para aquecer e fazer circular o ar dentro das salas.
Deve ser essa a sua única aplicação.
Português

• Deixe bastante espaço na área circundante do
aparelho.
Ligar e desligar
O comutador de selecção (D) permite seleccionar
as seguintes funções:
O= "Off". A ventoinha e as duas resistências
estão desligadas.
“= "Silêncio". (Apenas no modelo HD 3348).
Se estiver nesta posição, o aparelho funciona
sem qualquer ruído. Contudo, o calor
produzido é suficiente para manter uma
pessoa confortável e quente se estiver perto
do aparelho.
1= "Ar morno" para um aquecimento gradual.
Estão ligadas a ventoinha e uma resistência.
2= "Ar quente" para um aquecimento rápido.
Estão ligadas a ventoinha e duas resistências.
Controlo termostático da temperatura
(Apenas nos modelos HD 3346 e HD 3348)
O seu termoventilador está equipado com um
termostato pra controlar a temperatura (G). Este
controlador utiliza-se para manter a temperatura
do ambiente num nível confortável, uma vez que
possui um sensor que liga e desliga o aparelho
automaticamente para equilibrar a temperatura da
sala onde se encontra.
Para encontrar a temperatura ideal:
- Ligue o termoventilador.
- Rode o botão do termostato para a direita (G)
até à posição mais alta.
- Logo que a temperatura da sala estiver boa,
rode o botão ligeiramente para a esquerda até
o termoventilador se desligar.
- O termoventilador volta a ligar-se
automaticamente quando a temperatura da
sala baixar.
Poderá regular a temperatura durante a
utilização.
Lâmpada piloto
- Quando o aparelho está ligado à corrente e se
põe a trabalhar, a lâmpada piloto acende-se.
- A luz manter-se-á até se desligar o aparelho ou
desligando-o da corrente.
- A lâmpada piloto manter-se-á acesa mesmo
quando o termostato desligar o aparelho.
Isso indicará que o termoventilador ainda está
ligado e a trabalhar.
Protecção anti-congelamento y
O termoventilador pode ser utilizado para evitar
que as proximidades do aparelho congelem, ou
seja, que os tubos fiquem congelados.
- Coloque o aparelho perto do local que pretende
proteger.
- Ligue o termoventilador.
- Coloque o botão do termostato na posição y
(na posição mais baixa, isto é, cerca de 5ºC).
A ventoinha desliga-se.
- O aparelho volta a ligar-se automaticamente
quando a temperatura da sala descer abaixo
dos 5ºC.
Dispositivo de segurança contra
sobreaqueicmento
Para evitar danos e riscos devidos a
sobreaquecimento, o dispositivo de segurança
incorporado corta automaticamente a energia
logo que os elementos ficam demasiado quentes.
Se isso acontecer:
-(Apenas nos modelos HD 3346 e HD 3348):
Verifique primeiro se não foi o termostato que
desligou o aparelho. Coloque o termostato na
posição máxima. Se o aparelho não ligar, é
sinal que o dispositivo de segurança foi
activado.
- Retire a ficha da tomada de corrente.
- Deixe o aparelho arrefecer durante 10 minutos.
- Certifique-se que o aparelho está
correctamente colocado.
- Verifique se nada está a obstruir o fluxo de ar.
Se necessário, limpe as grelhas com um
aspirador.
- Volte a colocar a ficha na tomada e volte a ligar
o aparelho.
Se o dispositivo de segurança voltar a desligar o
aparelho:
- Retire a ficha da tomada de corrente.
- Leve o aparelho a um Centro de Assistência
Philips ou a um seu concessionário.
Limpeza
- Coloque o comutador de selecção (D) na
posição O para desligar o aparelho.
- Retire a ficha da tomada de corrente.
- Deixe o termoventilador arrefecer.
- Poderá limpar o exterior do aparelho com um
pano húmido. Não deixe entrar água para
dentro do aparelho.
- Limpe as grelhas de entrada e de saída do ar
com regularidade (numa utilização normal, pelo
menos duas vezes por ano) com um aspirador
e o bocal de escova.
20
This manual suits for next models
4
Table of contents
Languages:
Other Philips Heater manuals

Philips
Philips HD3353/00 User manual

Philips
Philips HD3412/00 User manual

Philips
Philips HD 3520 User manual

Philips
Philips Essence 5000 Series User manual

Philips
Philips HP8560 User manual

Philips
Philips Essence 5000 Series User manual

Philips
Philips HD3455/77 User manual

Philips
Philips Sunstudio HB935/A User manual

Philips
Philips HD 3271 User manual

Philips
Philips HD3272/10 User manual