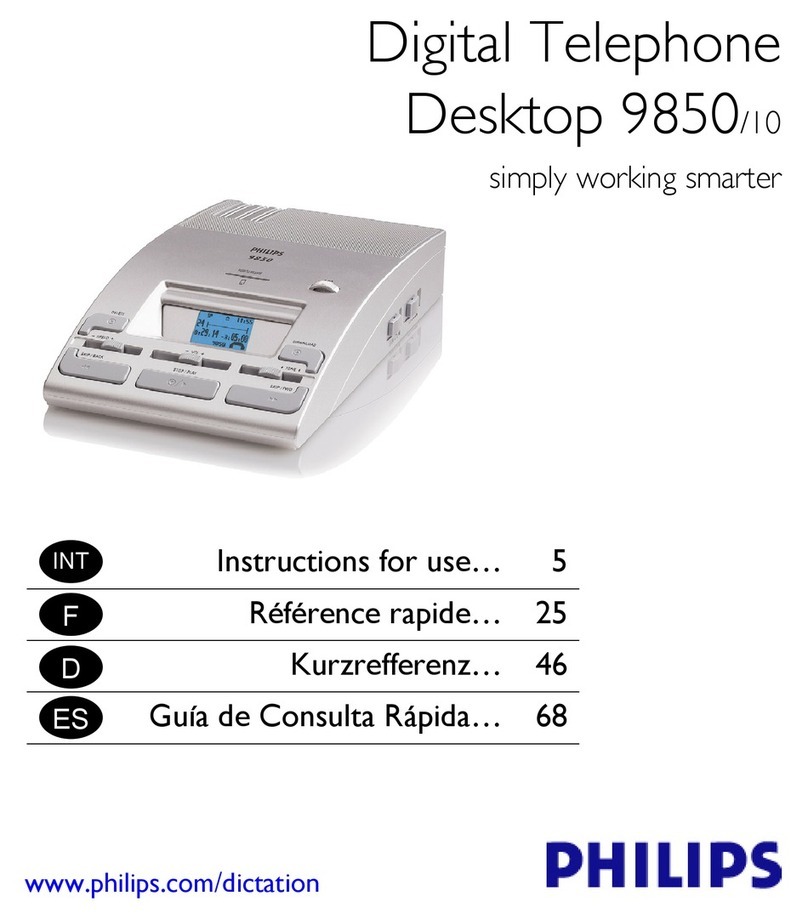
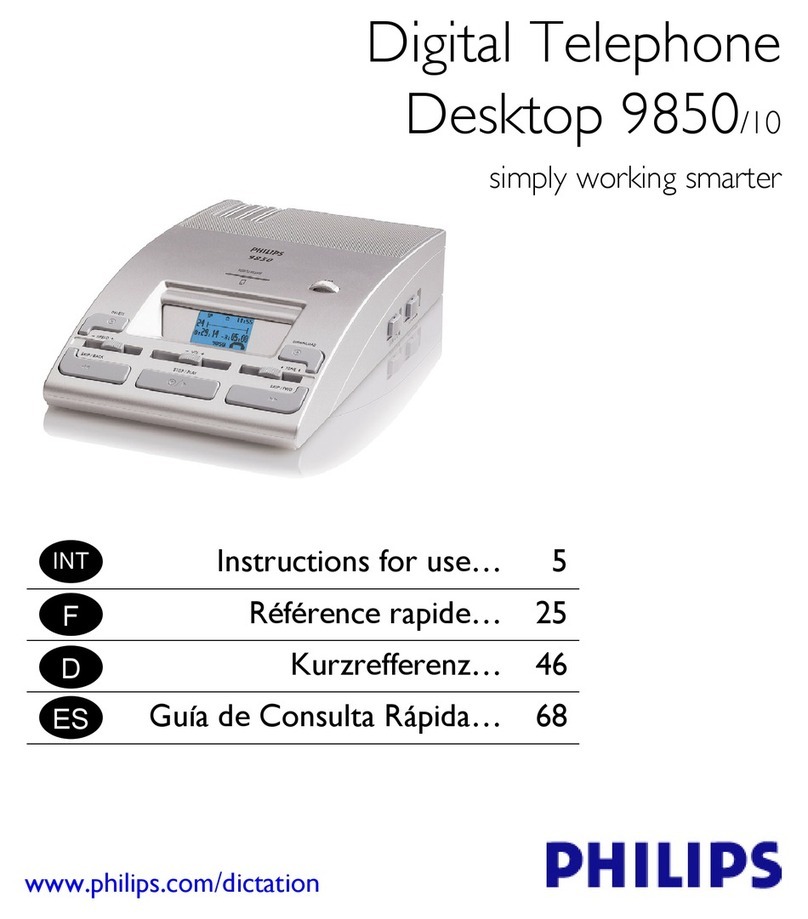
Philips LFH 9850 User manual

Digital Telephone Desktop
EN User manual 3
DE Benutzerhandbuch 17
FR Manuel de l‘utilisateur 33
ES Manual del usuario 47
LFH 9850
For product information and support, visit
www.philips.com/dictation


3User manual
ENGLISH
1 Welcome 4
1.1 What’s in the box 4
2 Important 4
2.1 Safety 4
2.2 Disposal of your old product 4
3 Get started 5
3.1 Overview – controls and connections 5
3.2 Overview – display indicators and
symbols 6
4 Use the Digital Telephone Desktop7
4.1 Activation and power-save mode 7
4.2 Record 7
4.3 Play back a recording 8
4.4 Delete 8
4.4.1 Delete a recording 8
4.4.2 Delete part of a recording 8
4.4.3 Delete all recordings 9
4.5 Menu settings 9
4.5.1 Menu list 9
5 Use more of your Digital Telephone
Desktop 11
5.1 Use Philips SpeechExec software 11
5.2 Advanced configuration 11
5.2.1 Assign author IDs to allow authorized
phone recordings only 11
5.2.2 Assign a work type code 12
5.2.3 Assign a client or subject code 12
5.3 Download recordings to the computer 13
5.4 Use the foot control (optional) 13
5.4.1 Installation 13
5.4.2 Transcribe using the foot control 13
5.5 Use the Philips headphones (optional) 14
5.5.1 Change the ear cushions 14
5.5.2 Install the hanging bracket 14
5.6 Hands-free recording 15
6 Technical support and warranty 15
7 Technical data 16
User manual

4User manual
Important2
Safety2.1
To avoid a short circuit, do not expose the•
product to rain or water.
Do not expose the product to excessive•
heat caused by heating equipment or direct
sunlight.
Protect the cables from being pinched,•
particularly at plugs and the point where they
exit from the unit.
Back up your files. Philips is not responsible•
for any loss of data.
Disposal of your old product2.2
Your product is designed and manufactured•
with high quality materials and components
that can be recycled and re-used.
When this crossed-out wheeled bin•
symbol is attached to a product, it
indicates that the product is covered
by the European Directive 2002/96/EC.
Become informed about the local separate•
collection system for electrical and electronic
products.
Please act according to your local rules and•
do not dispose of old products with normal
household waste. The correct disposal of old
products will help prevent potential negative
consequences for the environment and human
health.
Welcome1
Congratulations on your purchase and welcome
to Philips!
To fully benefit from the support that Philips
oers, visit our Website for support information
such as user manuals, software downloads,
warranty information and more:
www.philips.com/dictation.
What’s in the box1.1
Headphones *
Telephone Desktop CD-ROM
Foot Control *
Power supplyMini USB cable
User manuals
Digital Desktop
EN User manual 3
DE B enutzerhandbuch 1 6
FR Manuel de l‘utilisateur 30
LFH 9750
For product information an d support, visi t
www.philips.com/dictation
* LFH 9850/52 only

5User manual
ENGLISH
Get started3
Overview – controls and connections3.1
1Built-in speaker
2Automatic backspace (ABS)
3Speaker selection (headphones/built-in
speaker)
4Jog dial (file selection and menu navigation)
5DOWNLOAD button (for PC download)
6TONE slider (adjusts the playback tone)
7SKIP/FWD button (fast forwarding and
skipping to the end of the file)
8VOL slider (playback volume)
9STOP/PLAY button
10 SKIP/BACK button (fast rewinding and
skipping to the start of the file)
11 SPEED slider (playback speed)
12 DELETE button
13 Display
14 Memory card slot
15 Storage spaces for additional memory cards
12
3
9
2
10
7
14
11
8
15
1
4
5
6
13

6User manual
16 USB socket (for PC download)
17 Conference microphone socket
(for Philips LFH 9172)
18 Telephone socket
Overview – display indicators and symbols3.2
19 Foot control socket (for Philips LFH 2210)
20 Headphone socket (for Philips LFH 234 and
LFH 334)
21 Power supply socket (for Philips LFH 155)
16 17 18 19 20 21
1Recording format (Standard Play or Long
Play mobile mode)
2Memory card is write-protected (locked)
3Insert recording mode is activated
4Voice-activated recording mode is enabled
5Current time
6Position bar
7Remaining recording time (–) or used-up
recording time (+) on the memory card
8Receiving a telephone call
9Recording / playback time
10 Recording is marked finished/locked (✓) and
has priority assignment (!)
11 Recording number
1 2 4 5
11
10
9
6
7
3
8

7User manual
ENGLISH
Use the Digital Telephone4
Desktop
Activation and power-save mode4.1
The Telephone Desktop is operated with a
power supply (Philips LFH 155); the Telephone
Desktop is switched on and o by connecting or
disconnectingit from the power supply.
If the unit remains inactive for longer than 15
minutes, it automatically switches to the power
save mode and the display is switched o.
Reactivate the unit by pressing any button.
Record4.2
The memory card by-packed with the1
Telephone Desktop must be inserted into
the memory card slot.
Connect the telephone cable supplied to2
the back of the Telephone Desktop and the
telephone socket. The Telephone Desktop
must be the only device connected to the
telephone socket.
Make a phone call to the telephone3
number to which the Telephone Desktop
is connected. The Telephone Desktop
gives authors feedback and guidance during
telephone recording (voice prompts). You
will be promted to start speaking.
Use the telephone keypad to control the4
recording functions:
ABS
Pause Record Fast
rewind
Play
Hang up
Press *
followed
by #
Finish &
new file
Finish &
new file
& assign new
work type code
#
!
Pause
Enter
Auto-
back-
space
Fast
forward Priority
P• ress 1to pause recording; press 2to
start recording again.
Press• 8to lock the file and mark it as
finished (EOL/end-of-letter). The
symbol is displayed and the Telephone
Desktop automatically creates a new,
empty file.
Press• 6to assign priority status to the
recording. The !symbol is displayed,
indicating that the file has priority status.
This can be done at any time.
P• ress *followed by #to disconnect the
Telephone Desktop from the telephone.
This can be done at any time.
DNote
The commands Fast Rewind (3), Fast Forward•
(4), Play (7) are available to advanced users
only. See Advanced configuration on page 11 for
more information.
The language of the voice guidance feature•
can be changed using the menu. See Menu
settings on page 9 for more information.

8User manual
Play back a recording4.3
Use the1 speaker selection on the right
side to select the audio output device
(built-in speaker / headphones / speaker &
headphones).
Move the2 JOG DIAL or press the SKIP/BACK
or SKIP/FWD button while stopped to select
the file to play and locate the beginning of
the recording.
Press the3 STOP/PLAY button to start
playback.
A4 djust the volume (VOL ), tone (TONE) and
speed (SPEED) during playback using the
corresponding sliders.
To fast rewind, press and hold the5
SKIP/BACK button while playing. Release the
SKIP/BACK button to start playback.
To fast forward, press and hold the6
SKIP/FWD button while playing. Release the
SKIP/FWD button to start playback.
Press the7 STOP/PLAY button to stop
playback.
DNote
The length for the automatic backspace during
playback of a recording can be set with the ABS
slider:
Playback does not begin where the• recording
was stopped, rather a few seconds earlier.
To turn o the automatic backspace, set the•
slider to 0.
Delete4.4
Delete a recording4.4.1
Follow these steps to delete a file entirely:
Move the1 JOG DIAL or press the SKIP/BACK
or SKIP/FWD button while stopped to select
the file to be deleted.
Press and hold the2 DELETE button for two
seconds. The symbol is displayed.
Press and hold the3 DELETE button again for
two seconds to confirm the deletion or
press the STOP/PLAY button to exit without
deleting.
Delete part of a recording4.4.2
Follow these steps to delete a section from a
recording:
Navigate to the beginning of the section to1
be deleted by playback or forward/rewind.
Press the2 DELETE button while stopped to
mark the beginning of the section to be
deleted.
Find the second mark position by playback3
or forward / rewind and press the DELETE
button.
Press and hold the4 DELETE button for two
seconds to confirm the deletion or press
the STOP/PLAY button to exit without
deleting.

9User manual
ENGLISH
Delete all recordings4.4.3
Follow these steps to delete all recordings:
Press and hold the1 DELETE button 12 for
two seconds. The symbol is displayed.
Press the2 JOG DIAL. ALL is displayed on top
of the symbol.
Press and hold the3 DELETE button again for
two seconds to confirm the deletion or
press the STOP/PLAY button to exit without
deleting.
DNote
The voice prompt files that are used to give
authors feedback and guidance during telephone
recording will not be deleted by this operation.
Menu settings4.5
The menu oers general and user-defined
setting options to make dictation and
transcription easier.
Press and hold the1 JOG DIAL for two
seconds to open the menu.
Move the2 JOG DIAL left or right to select
the next/previous menu item.
Press the3 JOG DIAL to enter a sub-menu.
Press the DELETE button to exit the menu.
Move the4 JOG DIAL left or right to select a
function.
Press the5 JOG DIAL to confirm a selection. A
check mark next to a menu entry indicates
that the setting is activated.
DNote
Some settings, such as defining author IDs
or switching to the simple display mode, are
available only through Philips SpeechExec Dictate.
See Advanced configuration on page 11 for more
information.
Menu list4.5.1
Switch to insert recording mode to make
additions to a recording.
The recording format determines the audio
quality of recordings and aects the number of
audio files that can fit on the memory card.
Standard Play (SP) requires 1 megabyte for•
10 minutes of recording.
Long Play mobile (LPm) requires 1 megabyte•
for 15 minutes of recording.
Set the date and the time
Set the microphone sensitivity for the
environment and your recording preferences.
The microphone sensitivity is adjusted
automatically during telephone recording.
Display backlight
Display the remaining (–) or used-up (+)
recording time
One or more keywords, such as the author’s
ID, can be assigned to every recording.
Keywords can be used to identify recordings
and automatic file routing in Philips SpeechExec
software.
Device beep
10 User manual
Voice-activated recording is a convenience
feature for hands-free recording (See Hands-free
recording on page 15 for more information).
When voice-activated recording is enabled,
recording will start when you begin speaking.
When you stop speaking, the Telephone
Desktop will automatically pause recording
after three seconds of silence, and resume only
when you begin speaking again. Voice-activated
will be turned o during telephone recording.
Display contrast
Format memory card.
Important: The memory card supplied includes
voice prompt files (.wav format) to give authors
feedback and guidance during telephone
recording. These files are deleted during
formatting and must be copied to the memory
card again. The voice prompt files can be found
on the CD by-packed with the product or
downloaded from www.philips.com/dictation.
If no keys are pressed and no voice level
was detected during pause (stop) mode, the
Telephone Desktop will prompt “please press
any key”. Adjustable in increments of 1 / 5 / 10
/ 30 minutes.
Busy detection: Set the level between 1
(highest sensitivity, quick disconnect after very
short busy sequence) and 4 (long busy signal
necessary, most selective between voice and
busy tone). Set the level to 5 to deactive the
busy detection.
Set the number of ring tones before the unit
answers.
Set the voice prompt language: English, French,
German, Spanish or Private. The option Private
allows to add an additional language. The
corresponding wave-prompts must be stored
on the memory card (file format: .wav, 16 bit,
12 kHz, mono).
Exit the menu

11User manual
ENGLISH
Use more of your Digital5
Telephone Desktop
Use Philips SpeechExec software5.1
Philips SpeechExec software can be used for
advanced configuration of the Telephone
Desktop, automatic download, conversion and
routing of dictation files.
DNote
For detailed information about SpeechExec
software, refer to the SpeechExec user manual.
Advanced configuration5.2
The Configuration Wizard is part of the Philips
SpeechExec Dictate software. It guides users
through the device configurations and settings
of the Telephone Desktop. The wizard assists
in configuring time format, sound feedback,
voice-activated recording, display appearance
(standard or advanced display mode), recording
format, microphone sensitivity, author IDs, and
file download to the computer.
Connect the Telephone Desktop to the1
computer using a USB cable.
Start2 Philips SpeechExec Dictate software.
Click3 Settings > General settings on the menu
bar of SpeechExec to open the settings
menu and select DPM/DT Configuration > DPM
Wizard from the list on the left side.
Click the4 Start Wizard… button to open the
wizard. Follow the on-screen instructions to
customize the Telephone Desktop.
Click the5 Finish button to close the wizard
and confirm the transfer of the new settings
to the Telephone Desktop.
DNote
When the Telephone Desktop is connected
to the computer for the first time, Windows
detects the new hardware and automatically
installs the required drivers. When the
installation is complete, Windows may prompt
you to restart the computer.
Assign5.2.1 author IDs to allow
authorized phone recordings only
It is possible to create IDs to allow phone
recordings by authorized authors only. The
author ID is also stored in the dictation file
as Keyword 1, allowing additional sorting and
filtering during transcription.
Follow the steps in the previous chapter to1
start the Configuration Wizard.
On the2 keyword definition page, define
all required user IDs. Type Author as the
category name for Keyword 1 and enter an

12 User manual
ID for every authorized user (minimum one
digit, maximum four digits).
DNote
Up to 20 IDs can be assigned to one
desktop. Include a +character after the ID
(e.g. 1010+) to assign advanced user rights
with full remote functions. To give advanced
user rights to everyone, enter a single +
character into the first cell of Keyword 1.
Continue through the wizard3 and click
the Finish button to close the wizard and
confirm the transfer of the new settings to
the Telephone Desktop.
You will now be promted to4 enter the
author ID followed by the number sign (#)
when calling the Telephone Desktop.
Assign a work type code5.2.2
It is possible to assign a work type code during
telephone recording. The work type code is
also stored in the dictation file as Keyword 2,
allowing additional sorting and filtering during
transcription.
Follow the steps in chapter1 5.2 to start the
Configuration Wizard.
On the2 keyword definition page, type Work
Type as the category name for Keyword 2.
Continue through the wizard3 and click
the Finish button to close the wizard and
confirm the transfer of the new settings to
the Telephone Desktop.
You will now be promted to4 enter the work
type ID (minimum one digit, maximum two
digits) followed by the number sign (#)
when calling the Telephone Desktop.
Assign a client or subject code5.2.3
It is possible to assign a client or subject code
during telephone recording. The code is also
stored in the dictation file as Keyword 3,
allowing additional sorting and filtering during
transcription.
Follow the steps in chapter1 5.2 to start the
Configuration Wizard.
On the2 keyword definition page, type Code
as the category name for Keyword 3.
Continue through the wizard3 and click
the Finish button to close the wizard and
confirm the transfer of the new settings to
the Telephone Desktop.
You will now be promted to4 enter the code
ID (minimum one digit, maximum eight
digits) followed by the number sign (#)
when calling the Telephone Desktop.

13User manual
ENGLISH
Download recordings to the5.3
computer
With USB mass storage support, the Telephone
Desktop is automatically displayed as an external
drive when it is connected to the computer. It
can then be accessed easily with any Microsoft
Windows program as a regular drive.
Use Philips SpeechExec software for automatic
download, conversion, and routing of files.
Start1 Philips SpeechExec Dictate software.
Connect the Telephone Desktop to the2
computer using the USB cable.
Press the3 DOWNLOAD button on the
Telephone Desktop to establish the
connection.
Press the4 DOWNLOAD button again to start
the data transfer. By default, the recordings
on the Telephone Desktop will be moved
to the Finished dictations folder of the
SpeechExec work list.
To leave the USB mode, press the5 STOP/
PLAY button on the Telephone Desktop.
DNote
How and which files are downloaded after
a Telephone Desktop is connected can be
configured in the settings menu of SpeechExec
or with the Configuration Wizard.
Use the foot control (optional)5.4
The Philips foot control is designed to oer an
ergonomic, hands-free tool for playback and
recording files for transcription.
Installation5.4.1
Connect the plug of the foot control to1
the foot control socket of the Telephone
Desktop.
Transcribe using the foot control5.4.2
The foot control 2210 has three pedals: fast
rewind 1, fast forward 2and playback 3.
2
1 3
1Press and hold the pedal for fast rewind.
When rewinding reaches the desired
position, release the pedal.
2Press and hold the pedal to fast forward.
When forwarding reaches the desired
position, release the pedal.
3The pedal starts playback. The behavior
to start and stop playback depends on
the setting of the playback switch on the
underside of the foot control:

14 User manual
N (Neutral) position:• Press and hold the
right pedal for playback. When the pedal
is released, playback is stopped.
T (Toggle) position:• Press and release the
right pedal to start continuous playback.
Press the right pedal again to stop
playback.
Use the Philips headphones5.5
(optional)
The headphones are equipped with soft ear
cushions for wearing comfort and a hanging
bracket that attaches the headphone to a
monitor.
BWarning
Listen at a moderate volume to avoid hearing
damage.
Change the ear cushions5.5.1
Follow the illustration below to change the ear
cushions:
1 2
3 4
Install the hanging bracket5.5.2
Follow the illustration below to install the
hanging bracket:
1 2
3 4

15User manual
ENGLISH
Hands-free recording5.6
In this operating mode, you can control the
dictation functions with the foot control to
keep your hands free.
Connect the foot control plug to the foot1
control socket of the Telephone Desktop.
Set the switch on the underside of the foot2
control to the T position.
Connect the conference microphone LFH3
9172 (optional) to the CONF. REC socket of
the Telephone Desktop. Press and hold both
buttons DOWNLOAD and SKIP/FWD while
pressing the middle pedal of the foot control.
HF is displayed on the screen. The Telephone
Desktop is in “record standby” mode.
To start recording, press the4 right pedal of
the foot control. For short pauses, press
the right pedal of the foot control again. To
continue recording, press the right pedal
one more time.
To stop recording, press the left pedal5 of
the foot control. To continue recording,
press the middle pedal of the foot control to
enter “record standby” mode and continue
at step 4 .
Press and hold the left pedal6 of the foot con-
trol for fast rewind. When rewinding reaches
the desired position, release the pedal.
When recording is stopped, press the right7
pedal of the foot control to start playback.
Press the right pedal of the foot control
again to stop playback.
To exit the hands-free mode, press the8
STOP/PLAY button on the Telephone
Desktop.
Technical support and6
warranty
This Philips product is designed and
manufactured to the highest quality standards.
If your Philips product is not working correctly
or is defective, contact your supplying Philips
Speech Processing dealer who will provide the
necessary information on how to proceed.
If you have questions that your dealer cannot
answer or any other related question, visit
www.philips.com/dictation to contact us.
No components are user-serviceable. Do not
open or remove covers and do not insert
objects not suitable for the specific connectors.
Repairs may be made only by Philips service
centers and ocial repair facilities. Failure to do
so will void any warranty, stated or implied. Any
operation expressly prohibited in this manual,
any adjustments, or assembly procedures not
recommended or authorized in this manual will
void the warranty.

16 User manual
Disclaimer and Notices
Philips performs extensive testing with the most popular configurations. However, since computer add-ons and
device drivers are updated continually, conflict-free operation cannot be guaranteed.
Telephone Desktop 9850
Acoustic frequency response:•
300 – 6,000 Hz
Output power: 600 mW•
Earphone socket: 3.5 mm•
Microphone socket: 2.5 mm•
Telephone socket•
Data input/output socket:•
Mini-USB 2.0 full speed
Power Supply socket: 12 V DC•
Dimensions (W × D × H):•
232 × 135 × 45 mm
Weight: 1,600 g•
Headphones 334
Magnet type: Neodymium•
Diaphragm: PET dome•
Impedance: 2 × 32 Ohm•
Maximum power input:•
2 × 10 mW
Sensitivity: 103 dB•
Speaker diameter: 14 mm / ½ "•
Cable length: 3 m / 10 ft•
Connector: 3.5 mm / ⅛ “•
stereo, right angled
Dimensions (W × D × H):•
160 mm × 150 mm × 18 mm
Weight: 53 g•
Technical data7
Foot control 2210
Connector: 3.5 mm plug•
Dimensions (W × D × H):•
195 × 130 × 35 mm
Weight: 660 g•
SpeechExec Dictate Software
Minimum: Pentium III, 500 MHz•
and 512 MB RAM
Recommended: Pentium IV or•
similar, 1 GHz and 1 GB RAM
Hard disk space: 100 MB•
for SpeechExec, 250 MB for
Microsoft .NET Framework
Sound card and headphone•
output or speakers
1 free USB port•
Recommended minimum transfer•
rate for LAN: 100 Mbit/s
Operating system: Windows•
Vista, XP (SP 2), 2000 (SP 4)
Green Specifications
Compliant to 2002/95/EC (RoHS)•
Lead-free soldered product•
Operation conditions
Temperature: 5° – 45° C /•
41° – 113° F
Humidity: 10 % – 90 %•
Optional accessories
Headphones 232, 233, 234, 236,•
334, 2236
Foot control 2210•
Philips SD (Secure Digital)•
memory card

17Benutzerhandbuch
DEUTSCH
1 Willkommen 18
1.1 Verpackungsinhalt 18
2 Wichtig 18
2.1 Sicherheit 18
2.2 Entsorgung Ihres Altgeräts 18
3 Erste Schritte 19
3.1 Übersicht über Bedienungselemente
und Anschlüsse 19
3.2 Übersicht der Displaysymbole 20
4 Verwendung des Telefon
Desktops 21
4.1 Aktivierung und Energiesparmodus 21
4.2 Aufnehmen 21
4.3 Wiedergabe 22
4.4 Löschen 22
4.4.1 Löschen eines Diktats 22
4.4.2 Löschen eines Abschnittes innerhalb
eines Diktats 23
4.4.3 Löschen aller Diktate 23
4.5 Menüeinstellungen 23
4.5.1 Menüübersicht 23
5 Weitergehende Funktionen 26
5.1 Philips SpeechExec verwenden 26
5.2 Weitergehende Konfiguration 26
5.2.1 Verwenden von Benutzer-IDs für
autorisierte Telefonaufzeichnungen 27
5.2.2 Verwenden von Arbeitstyp-Codes 27
5.2.3 Verwenden von Klienten-Codes 28
5.3 Herunterladen von Aufnahmen auf
den PC 28
5.4 Den Philips-Fußschalter verwenden
(optional) 29
5.4.1 Installation 29
5.4.2 Wiedergabe mit dem Fußschalter 29
5.5 Verwenden der Philips-Kopfhörer
(optional) 29
5.5.1 Austauschen der Ohrpolster 30
5.5.2 Anbringen der Aufhängungsklammer 30
5.6 Freihändiges Diktieren 30
6 Technische Unterstützung und
Garantie 31
7 Technische Daten 32
Benutzerhandbuch

18 Benutzerhandbuch
Wichtig2
Sicherheit2.1
Um Kurzschlüsse zu vermeiden, darf das Gerät•
weder Regen noch Wasser ausgesetzt werden.
Setzen Sie das Gerät keinen hohen•
Temperaturen durch Wärmequellen oder
direkter Sonneneinstrahlung aus.
Schützen Sie Kabel vor unbeabsichtigten Be-•
schädigungen durch Knicken oder Quetschen,
besonders im Bereich des Steckers und der
Austrittsstelle des Kabels aus dem Gehäuse.
Bitte erstellen Sie Sicherungskopien Ihrer•
Dateien. Philips haftet nicht für den Verlust
von Dateien.
Entsorgung Ihres Altgeräts2.2
Ihr Gerät wurde unter Verwendung•
hochwertiger Materialien und Komponenten
entwickelt und hergestellt, die recycelt und
wieder verwendet werden können.
Befindet sich dieses Symbol (durchgestrichene•
Abfalltonne auf Rädern) auf dem
Gerät, bedeutet dies, dass für dieses
Gerät die Europäischen Richtlinie
2002/96/EG gilt.
Informieren Sie sich über die geltenden Bestim-•
mungen zur getrennten Sammlung von Elektro-
und Elektronik-Altgeräten in Ihrem Land.
Richten Sie sich bitte nach den geltenden•
Bestimmungen in Ihrem Land, und entsorgen
Sie Altgeräte nicht über Ihren Haushaltsabfall.
Durch die korrekte Entsorgung Ihrer
Altgeräte werden Umwelt und Menschen vor
möglichen negativen Folgen geschützt.
Willkommen1
Herzlichen Glückwunsch zu Ihrem Kauf und
willkommen bei Philips!
Besuchen Sie unsere Webseite für zusätzliche
Informationen wie Benutzerhandbücher,
Software-Downloads, Garantieinformationen
und vieles mehr: www.philips.com/dictation.
Verpackungsinhalt1.1
Kopfhörer *
Telefon Desktop CD-ROM
Fußschalter *
NetzteilMini-USB-Kabel
Benutzerhandbücher
Digital Desktop
EN User manual 3
DE B enutzerhandbuch 1 6
FR Manuel de l‘utilisateur 30
LFH 9750
For product information an d support, visi t
www.philips.com/dictation
* nur bei LFH 9850/52

19Benutzerhandbuch
DEUTSCH
Erste Schritte3
Übersicht über Bedienungselemente und Anschlüsse3.1
1Integrierter Lautsprecher
2Automatischer Rücksprung (ABS)
3Lautsprecherauswahl (Kopfhörer/integrierter
Lautsprecher)
4Jog-Rad (Dateiauswahl und Menünavigation)
5DOWNLOAD-Taste (für PC-Download)
6TONE-Schieberegler (Einstellung des Klangs
bei der Wiedergabe)
7SKIP/FWD-Taste (für schnellen Vorlauf und
Sprung zum Ende der Datei)
8VOL-Schieberegler (Einstellung der Laut-
stärke von Lautsprecher oder Kopfhörer)
9STOP/PLAY-Taste (Starten und Stoppen der
Wiedergabe)
10 SKIP/BACK-Taste (für schnellen Rücklauf
und Sprung zum Anfang der Datei)
11 SPEED-Schieberegler (Einstellung der
Wiedergabegeschwindigkeit)
12 DELETE-Taste (Löschen)
13 Display
14 Steckplatz für die Speicherkarte
15 Ablage für zusätzliche Speicherkarten
12
3
9
2
10
7
14
11
8
15
1
4
5
6
13

20 Benutzerhandbuch
16 USB-Anschluss (für PC-Download)
17 Anschluss für Konferenzmikrofon
(Philips LFH 9172)
18 Telefonanschluss
Übersicht der Displaysymbole3.2
19 Anschluss für den Fußschalter
(für Philips LFH 2210)
20 Kopfhöreranschluss
(für Philips LFH 234 und LFH 334)
21 Anschluss für das Netzteil (Philips LFH 155)
16 17 18 19 20 21
1Aufnahmeformat (Standard Play oder Long
Play mobile)
2Speicherkarte ist schreibgeschützt (gesperrt)
3Einfügemodus ist aktiviert
4Sprachaktivierte Aufnahme ist aktiviert
5Aktuelle Uhrzeit
6Positionsleiste
7Verbleibende Aufnahmezeit (–) oder Ge-
samtaufnahmezeit (+) auf der Speicherkarte
8Ein Anruf wird entgegengenommen
9Aufnahme- / Wiedergabedauer
10 Aufnahme als abgeschlossen/gesperrt
(EOL) gekennzeichnet (✓) und mit Priorität
gekennzeichnet (!)
11 Aufnahmenummer
1 2 4 5
11
10
9
6
7
3
8
Other manuals for LFH 9850
2
This manual suits for next models
2
Table of contents
Languages:
Other Philips Telephone Accessories manuals

Philips
Philips SJA9192 User manual

Philips
Philips SDJ6060W User manual

Philips
Philips SDJ6703 User manual

Philips
Philips TRIPLEX SDJ6051 User manual

Philips
Philips SWL6170 User manual

Philips
Philips SDJ8040W/17 User manual

Philips
Philips Wall Jack SDJ6000W User manual

Philips
Philips US2-PH0900 User manual

Philips
Philips LFH 9850 User manual

Philips
Philips SDJ6040W User manual