manuals.online logo
Brands
  1. Home
  2. •
  3. Brands
  4. •
  5. Philips
  6. •
  7. Telephone
  8. •
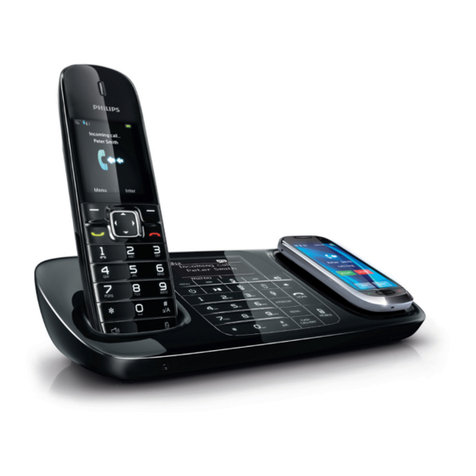
  9. Philips TU5352/BA071P User manual

Philips TU5352/BA071P User manual

This manual suits for next models

8

Other Philips Telephone manuals

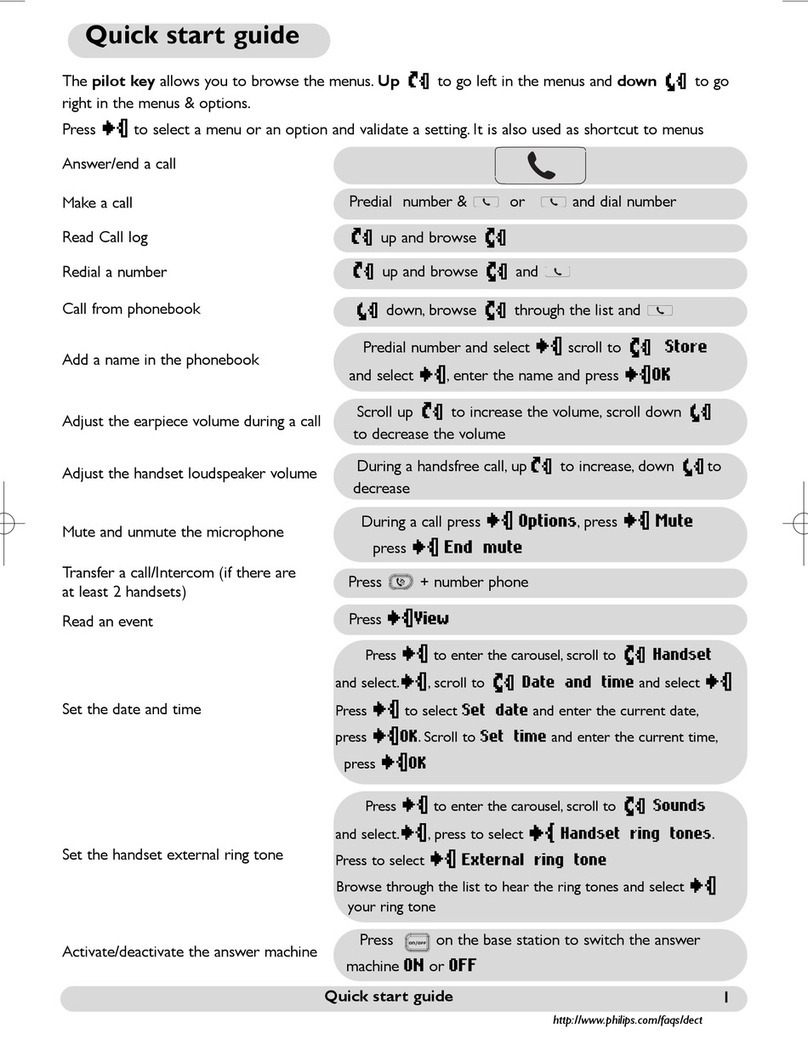
Philips SE765 User manual

Philips

Philips SE765 User manual

Philips MobileLink S8A User manual

Philips

Philips MobileLink S8A User manual

Philips D131 Product information sheet

Philips

Philips D131 Product information sheet

Philips XL3402 User manual

Philips

Philips XL3402 User manual

Philips M350 Product information sheet

Philips

Philips M350 Product information sheet

Philips VOIP4332S/05 User manual

Philips

Philips VOIP4332S/05 User manual

Philips TD9068B/051 User manual

Philips

Philips TD9068B/051 User manual

Philips TD9363 User manual

Philips

Philips TD9363 User manual

Philips M315 Operator's manual

Philips

Philips M315 Operator's manual

Philips WelcomeEye Comfort DES9500VDP User manual

Philips

Philips WelcomeEye Comfort DES9500VDP User manual

Philips VOIP3211 User manual

Philips

Philips VOIP3211 User manual

Philips Voice Extension 68XT User manual

Philips

Philips Voice Extension 68XT User manual

Philips M5501WG/63 User manual

Philips

Philips M5501WG/63 User manual

Philips SOPHO IPC 100 User manual

Philips

Philips SOPHO IPC 100 User manual

Philips DCTG272B User manual

Philips

Philips DCTG272B User manual

Philips B141 User manual

Philips

Philips B141 User manual

Philips M555 Product information sheet

Philips

Philips M555 Product information sheet

Philips TD5350/BB058P User manual

Philips

Philips TD5350/BB058P User manual

Philips XL490 User manual

Philips

Philips XL490 User manual

Philips D1211B/90 Product information sheet

Philips

Philips D1211B/90 Product information sheet

Philips D260 Product information sheet

Philips

Philips D260 Product information sheet

Philips Onis 300 User manual

Philips

Philips Onis 300 User manual

Philips DECT2254S/05 User manual

Philips

Philips DECT2254S/05 User manual

Philips M110 User manual

Philips

Philips M110 User manual

Popular Telephone manuals by other brands

V-tech i6772 user guide

V-tech

V-tech i6772 user guide

BT FREELANCE XD 5100 quick start guide

BT

BT FREELANCE XD 5100 quick start guide

Uniden 1360 user guide

Uniden

Uniden 1360 user guide

Fanvil D800 user manual

Fanvil

Fanvil D800 user manual

Avaya IP500 user guide

Avaya

Avaya IP500 user guide

NEC Univerge SV9100 installation manual

NEC

NEC Univerge SV9100 installation manual

Amanda MiniSOHO Installation and programming manual

Amanda

Amanda MiniSOHO Installation and programming manual

Hitachi SelecSet 900 Series user guide

Hitachi

Hitachi SelecSet 900 Series user guide

mPTech HAMMER BS21 quick start guide

mPTech

mPTech HAMMER BS21 quick start guide

NEC 2000IVX user guide

NEC

NEC 2000IVX user guide

ooma Phone Genie quick start guide

ooma

ooma Phone Genie quick start guide

Siemens Gigaset S450 user guide

Siemens

Siemens Gigaset S450 user guide

Clarity RC100 operating instructions

Clarity

Clarity RC100 operating instructions

GE 2-9480 user guide

GE

GE 2-9480 user guide

Geemarc PHOTOPHONE 155 user guide

Geemarc

Geemarc PHOTOPHONE 155 user guide

Interquartz Gemini IQ333 operating instructions

Interquartz

Interquartz Gemini IQ333 operating instructions

SSS Siedle HT 840-0 operating instructions

SSS Siedle

SSS Siedle HT 840-0 operating instructions

Motorola TITANIUM manual

Motorola

Motorola TITANIUM manual

manuals.online logo
manuals.online logoBrands
  • About & Mission
  • Contact us
  • Privacy Policy
  • Terms and Conditions

Copyright 2025 Manuals.Online. All Rights Reserved.

Onis 300
Onis 300 Vox
Onis 300 Duo Vox
Charge handset(s)
for 24 hours before use.
This equipment is not designed for making
emergency telephone calls when the power fails.
!
Intercom
Call all p.19
Handset list p.19
Base
Sounds
Ringer type p.27
Record a personal melody p.27
Ringer volume p.27
Music on hold p.27
Registration p.27
Line settings
Dial mode* p.28
Network p.28
Recall type* p.28
Operator type* p.28
irst ring p.28
Service codes settings p.28
P onebook
View p.21
Add new p.20
Network
C eapest rates fct p.23
Operator Services p.24
SMS
Send SMS p.9
SMS list p.10
SMS settings
SMS mode p. 10
SMS boxes p.10
SMS center p.11
Validity period* p.11
Menu overview
By using the Pilot key on the side of the handset you can scroll through the menus.
Handset
Sounds
Ringer type p.11
Ringer volume p.12
Earpiece tone p.12
Key & feedback tones p.12
Notification beep p.12
Babysit mode p.12
Registration
Register handset p.12
Un-register handset p.13
Rename andset p.13
C ange languages* p.13
Date & time p.14
Display contrast p.14
Call log
View P.22
Delete all p.23
Settings
Incoming calls p.23
Outgoing calls p.23
Extra
VIP melody function p 25
Call cost & duration*
View total p.25
Unit cost p.25
Alarm clock
Activation p.25
Settings p.26
Do Not Disturb mode p.26
Answer mac ine (Onis 300 Vox)
Saved messages
Listening to messages p.15
Deleting messages p.15
Record memo p.18
Outgoing messages
Answer mode p.16
Record personal message p.16
Settings
Answer mode (ON/O ) p.15
Rings before answer p.16
Voice prompts p.16
Call screening p.17
Recording quality p.17
Remote control p.17
* Country dependent
Menu
Onis 300 manual_Retail_UK_Indice2.qxd 07/01/03 14:08 Page 2
Onis 300 andset 1
Icons
Answer machine ON
(Onis 300 Vox)
Line key
Press to take the line, answer a call or
hang up
Correct key
- To correct a digit when predialling or a
character when editing
- A short press to go back one menu when
navigating
- A long press to return to idle mode
when navigating
- To insert R for operator services when
on line
P onebook
- A short press to access the phonebook
- A long press to add a new entry
Call log
- A short press to access the call log
- A long press to directly access the vocal
messages list (Onis 300 Vox)
Keypad lock & Editing
- A short press to insert *
- A long press to lock/unlock the keypad in
idle mode
- A long press to enter multitap or Eatoni®
editor when entering text
Alarm clock
- A short press to dial 0
- A long press to activate/deactivate the
alarm clock
Do Not Disturb & case mode
- A short press to insert # (pause) when
dialling
- A long press to activate/deactivate the
Do Not Disturb mode
- Press to switch case mode when editing
Pilot key
Press to enter the carousel or validate
a menu or an option
- Scroll to navigate in the menus &
options
- Move the cursor left/right
- Scroll up to reach Intercom from
idle mode
- Scroll down to reach C eapest
rates prefix from idle mode
A long press to unlock the keypad
External call in
progress
Internal call in
progress
Handset loudspeaker
ON
Ringer deactivated
Registered & in range
of the base
Answer machine full
New message on answering
machine or voice mailbox
- Incoming external call in
progress
- Line is already busy
Internal incoming call
Base loudspeaker ON
(Onis 300 Vox)
New SMS
Not registered
Blinking
SMS memory full
Fast blinkingSteady ON
T e battery symbol
When charging, the battery bars scroll :
When the handset discharges, the battery shows the status : ull , 2/3 , 1/3 and empty .
Loudspeaker
- A short press to take the line or activate
the handset loudspeaker during a call
- A long press to activate the base
loudspeaker during a call (Onis 300 Vox)
Microp one
Earpiece
Onis 300
Handset
Onis 300 manual_Retail_UK_Indice2.qxd 07/01/03 14:08 Page 1
Base stations
2
Onis 300 Base station
Event indicator (red)
Blinking : New events
(new SMS, missed calls etc...)
Fast blinking : SMS Memory full
Answer machine indicator (red)
ON :Answer machine activated
OFF :Answer machine
deactivated
Blinking : New messages
Fast blinking : Answer machine
memory full
Using GAP standard compliance
The GAP standard guarantees that all DECTTMGAP handsets and base stations comply with a minimum
operating standard irrespective of their make.Your Onis 300 handset and base station are GAP
compliant, which means the minimum guaranteed functions are : register a handset, take the line, receive a
call and dial.The advanced features may not be available if you use another handset than an Onis 300 with
your base station.
To register and use your Onis 300 handset with a GAP standard base station of a different make, first
follow the procedure described in the manufacturers instructions, then follow the procedure page 12.
To register a handset from another make to the Onis 300 base station, place the base station into
registration mode (page 12), then follow the procedure in the manufacturers instructions.
Register a DECTTMperip eral wit out keypad
Some DECTTMperipherals, such as repeaters, do not have a keypad.A special menu-operated procedure is
used to register such peripherals with the base station without the need to disconnect the base station.
See page 27 and use the peripheral instructions to register it to the base station.
Paging key
Press to locate all handsets
Paging key
Press to locate all handsets
Loudspeaker
Delete key
Press to delete current message
Long press to delete all the messages
(except unread ones)
Onis 300 Vox Base station
Power indicator (green)
ON : System correctly
connected to the mains
OFF : System not powered
Blinking : the line is busy
ON/O key
Press to switch answer machine ON/O
Power indicator (Green)
ON : System correctly
connected to the mains
OFF : System not powered
Blinking : the line is busy
Play/Stop key
Press to listen to the new messages
Next key
Press to listen to the next messages
Previous key
Press to listen to the previous messages
Base loudspeaker volume keys
Answer machine control keys
Onis 300 manual_Retail_UK_Indice2.qxd 07/01/03 14:09 Page 2
Table of contents 3
Onis 300 andset 1
Icons 1
Base stations Onis 300 & Onis 300 Vox 2
GAP Standard 2
Table of contents 3
Conformity, Environment and Safety 4
Installing the base station 4
Installing and replacing the batteries 4
Battery life and range 4
Introduction
Screen in idle mode 5
Understanding the menu system 5
How to navigate in the menus 5
Calling/answering a call/ot er principles 6
In-call features 7
Editing systems 8
Sending SMS
Sending SMS 9
Reading the private SMS 10
SMS settings 10-11
Handset
Setting the standard ringer type 11
Setting the ringer volume 12
Setting the earpiece tone 12
Setting the key & feedback tones 12
Setting the notification beep 12
Babysit mode 12
Registering/unregistering an additional handset 12-13
Using Onis 300 handset with several base stations 13
Renaming the handset 13
Changing the language 13
Setting the date and time 14
Setting the display contrast 14
Using t e answer mac ine (Onis 300 Vox)
Setting the answer machine ON/O 14-15
Listening to your messages 15
Deleting messages 15
Selecting the answer mode and the outgoing message type 15-16
Recording your personal outgoing message 16
Setting the number of rings before answer 16
Setting the voice prompts 16
Setting the call screening 17
Setting the recording quality 17
Activating the remote control 17
Using the remote control 17-18
Changing remote control code 18
Recording a local message (memo) 18
Using t e intercom
Making internal calls/activating babysit mode 19
Transfering a call 19
Using conference call 19
Using t e p onebook
VIP settings 20
Adding a name 20
Calling from phonebook 20
Viewing the phonebook 20-21
Using t e call log
Viewing the call log 22
Deleting the call log 23
Setting the call log 23
Network
Using the cheapest rates function 23
Using the operator services 24
Using t e extra features
Setting the VIP ringer type 25
Setting the call cost & duration 25
Setting the alarm clock 25
Setting the Do Not Disturb mode 26
Base
Setting the standard ringer type 27
Record a personal melody 27
Setting the ringer volume 27
Setting music on hold 27
Registration 27
Setting the line 28
Setting the service codes 28
Troubles ooting
Index
Table of contents
Philips has marked the battery and packaging with standard symbols designed to promote the recycling and appropriate
disposal of your eventual waste.
A financial contribution has been paid to the associated national recovery & recycling system.
The labelled packaging material is recyclable.
DECTTMis a Trade Mark of ETSI registered for the benefit of the implementers of the DECT technology.
Onis 300 manual_Retail_UK_Indice2.qxd 07/01/03 14:09 Page 3
!
The battery life is about 250 hours in stand by time (when the handset is in idle mode & ready to receive
a call) and around 16 hours in communication. A battery low alert will inform you that the handset has
to be recharged, if this is during a call, the call will end shortly after the alert.
Optimal battery life is reac ed after 3 cycles of full c arge/disc arge.
Under ideal conditions the range is a maximum of 50 metres indoors and 300 metres outdoors.When
reaching the range limit, the conversation will become crackly, move closer to the base station otherwise
the call will be cut off.To reach optimal range place the base station away from electrical appliances.
To insert the batteries, open the battery cover, place the
batteries as indicated and put the battery cover back.When
the handset is placed on the base station the 3 battery bars
scroll (if charge is needed).Allow the handset to charge for 24
hours to reach full charge. On first use it may be necessary to
wait for a few minutes before seeing symbols on the display.
In case you need to change the batteries, the following type is
mandatory R03/AAA NiMh 600/650 mAh.
Warning :The base station must always be plugged into the mains
when charging. Always use rechargeable batteries.
Conformity, Environment & Safety
4
Installing t e base station
To properly install the base station, plug the line cord and the
power cable into the base station. Plug the cord and the cable
into the wall.The green indicator on the base station and a beep
indicate that the phone is properly installed.
Warning :Always use the cables provided with the product.
Installing and replacing t e batteries
Conformity, Environment and Safety
Safety information :This equipment is not designed to make emergency calls when the power fails.An
alternative has to be made available to allow emergency calls.
Conformity : See back cover page. In case you need a copy of the original certificate please contact the
customer service centre.This product can only be connected to the analogue telephone network in the
area which is indicated on the label placed on the packaging.
Power requirements : This product requires an electrical supply of 220-240 volts, alternating
monophased power, excluding IT installations defined in standard EN 60-950.
Warning ! The electrical network is classified as dangerous according to criteria in the standard EN 60-
950.The only way to power down this product is to unplug the power supply from the electrical outlet.
Ensure the electrical outlet is located close to the apparatus and is always easily accessible.
Telep one connection : The voltage on the network is classified as TNV-3 (Telecommunication
Network Voltages, as defined in the standard EN 60-950).
Safety precautions : Do not allow the handset to come into contact with water. Do not open the
handset or the base station.You could be exposed to high voltages. Do not allow the charging contacts or
the battery to come into contact with conductive materials. (1).
Environmental care : Please remember to observe the local regulations regarding the disposal of your
packaging materials, exhausted batteries and old phone and where possible promote their recycling.
(1) Do not insert anything in this opening.
Battery life and range Batteries should not be disposed of with general household waste.
Onis 300 manual_Retail_UK_Indice2.qxd 07/01/03 14:09 Page 4
Introduction 5
Understanding t e menu system
To access the carousel menu from idle screen press on the side of the
handset.
The carousel represents a loop of icons that gives access to the different
first level menus. Scroll up or down to reach the desired menu. Press
to validate.
The sub menus are listed and represented by little squares at the bottom
of the display.To reach one particular sub-menu use the pilot key and
press to validate your choice.
A tick shows the selected sub-menu or option.The shows the
option you are browsing.
Note : Certain menus are also directly accessible via a dedicated key on the
keypad (example Phonebook , Call log ).
T e screen in idle mode
In idle mode, the Onis 300 display shows different information :
In normal idle mode the display shows the date & time, the name of the
handset and the instruction to access the menu.
Example of navigation in t e menus
To reach the ringer type menu
These steps are described as follows in this manual :
To c ange t e ringer type
1- (Press) to enter the carousel menu
2- (Go to) Handset,press (validate)
3- (Select) Sounds,press (validate)
4- (Select) Ringer type,press (validate)
5- The first option of the ringer type sub-menu is displayed External
Standard ringer
6- Scroll to change sub-menu or validate to see the list of melodies
Press to see
the list of
melodies
& listen
Scroll
up or down
Press to
select
Press to
select
Press
to select Press to
select
Do Not Disturb mode , and the alarm clock , if activated, are also
displayed on the idle screen.
To modify these settings use & on the keypad.
Missed calls , new SMS or new messages (answer machine) or
(voice mailbox), if any, are displayed in idle mode.The pilot key
on the side of the handset gives access to the corresponding menu.
Onis 300 manual_Retail_UK_Indice2.qxd 07/01/03 14:09 Page 5
Calling/answering a call/ot er principles
6
Basic principles
To redial a number through the call log, press and select from the list.
Press to enter the options and select Call or directly press
Pre-dialling
1- Dial from keypad
To correct a digit use
2- Make the call
Talk to the other party
3- Hang up
Direct dialling
1- Connect the line
2- Dial from the keypad
Talk to the other party
3- Hang up
Making a call
When the phone rings, press to answer the call.
To stop the phone from ringing without answering, press to select
Silence
You can chain dial 2 numbers. (One predialled and the other one from the
phonebook or the call log, or both from the phonebook).
1- Predial the number (for example, operator prefix)
2- Use or to open the call log or the phonebook
3- Scroll through the list
4- Select an entry and validate
You can move the cursor , erase or change a digit with
5- Connect the line
Note : It is possible to chain dial in direct dialling mode.You can also
retrieve numbers from the SMS list or the Cheapest Rates menu.
1- to enter carousel 2- to reach the phonebook menu
3- to select the menu, 4- to reach the name
5- Select Call in the options or make the call
Note :You can also press to directly reach the phonebook
To c ain dial (predial mode)
Calling from t e call log (Redial or call back last caller)
Answering/ending a call
Calling from p onebook
Onis 300 manual_Retail_UK_Indice2.qxd 07/01/03 14:09 Page 6
In-call features 7
To switc t e loudspeaker ON/OFF
Press to activate/deactivate the louspeaker on the handset.
A long press activates the base loudspeaker (Onis 300 Vox).
In-call features
During an external call you can access additional features available in the in-call options.
Press to enter the Options.
Intercom (if t ere are several Onis 300 andsets)
During a call, you can put a call on hold, transfer an external call or share
the conversation on conference call : 1 external caller + 2 internal callers
(See page 19).
To record a conversation (Onis 300 Vox)
1- While on line press
2- Scroll to Record and validate
The call is recorded for a maximum of 6 minutes on the answer machine.
To continue recording resume from step 1 above.
To listen to the conversation use the Call log menu or the messages list ( ).
Warning : Recording a conversation may be illegal.We advise you to inform the
person you are calling.
To mute t e andset microp one
1- Press
2- Scroll to Mute and validate
The caller can no longer hear you.
To resume the conversation press again to Unmute.
To increase/decrease t e andset earpiece or loudspeaker volume
during a call
Scroll the pilot key up or down on the side of the handset.
Or use the keys on the base station.
During an internal call other in-call features are available, such as Switch and End intercom.
If you subscribe to that service, a beep in the earpiece informs you of a
second incoming call.The name or the number of the second caller may be
displayed if you also subscribe to the Caller Line Identification service.To
answer that second call, use then (according to your network, the
code may be different). Please contact your network provider for more
details.
CLI/Call waiting
Onis 300 manual_Retail_UK_Indice2.qxd 07/01/03 14:09 Page 7
Editing systems
Editing systems
8
Multi-tap Sequence
[space] 1 @ _ # = < > ( ) & ¤£ $ ¥
a b c 2 à ä ç æ å
d e f 3 è é ) N
g h i 4 ì G
j k l 5 7
m n o 6 ñ ò ö
p q r s 7 ß A 2 E
t u v 8 ù ü
w x y z 9 f S XQ
. 0 , / : ; " ' ! ¡ ? ¿ * + - %
T e Eatoni®system is a new predictive editing system designed to help you write an SMS.
A little E in the header helps you know the mode you are using.
Eatoni®is a word editor that chooses the most probable letter.
The operation of the Eatoni®system is the following :
Press the key that displays the character you want to edit.The character that is most likely to be correct
is displayed on the screen. If it does not match the expected letter, press to display the next most
probable character available on the key.
Keypad Keys
1
2
3
4
5
6
7
8
9
0
To write Peter with multi-tap
Press once : P
Press twice : Pe
Press once : Pet
Press twice : Pete
Press three times : Peter
To write Peter
with Eatoni®
Capitalisation
By default, the first letter of a sentence is in upper case. Use to change the case mode : all
characters in upper case (AB) or all letters in lower case (ab). Punctuation and mathematical marks are
available through while other special characters are available on .
Scroll to move the cursor left or right. Press to delete a character ; a long press deletes the
whole text.
Press to
change character
Press to
activate Eatoni®
Press to validate the name.
T e standard multi-tap system allows you to enter the text character by character, pressing the
corresponding key as many times as necessary to reach the desired character.
Press
Press
Press
Press
Press
Onis 300 uses two editing systems : Multi-tap and Eatoni®. Make a long press on to switch between
both systems. Lets compare both systems to write Peter.
Eatoni®& LetterWise are trademarks of Eatoni Ergonimics, Inc. and
used by Philips under license.
Onis 300 manual_Retail_UK_Indice2.qxd 07/01/03 14:09 Page 8