For detailed specifications, product tutorial videos and more, please visit www.photoflex.com Rev 9/2016
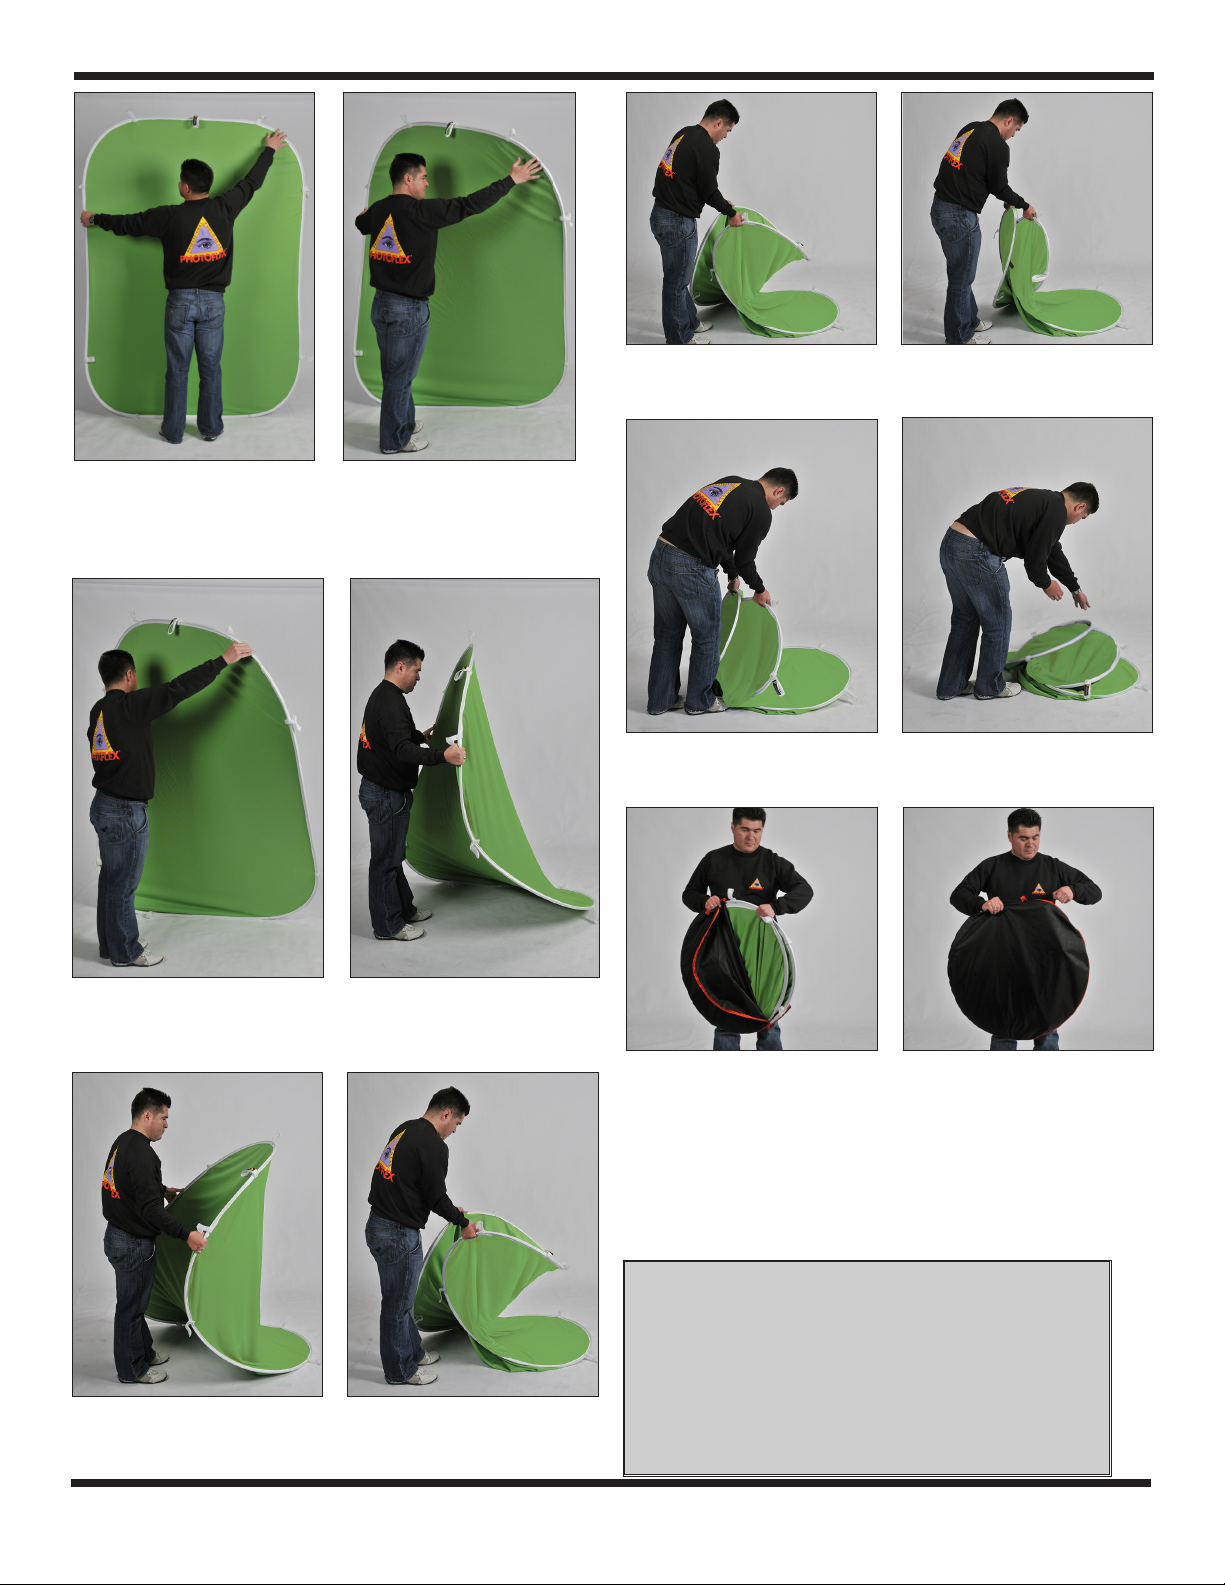
Figure 10
Figure 12
Figure 14
Figure 16
Figure 13
Figure 11
Figure 15
Figure 17
Figure 18 Figure 19
7. With the FlexDrop standing vercally in front of you, place your right
hand (if right-handed) on the upper right corner of the disc. Loosely
hold the le side of the frame simultaneously. Figures 8 and 9
8. Pull down on the corner in the diagonal direcon while sll holding
loosely onto the le side of the frame. Figures 10 and 11
9. Take a step backwards as the corner collapses to approximately waist
height. Figures 12 and 13
10. You should now be holding the frame in two hands and feel it
beginning to collapse. Figures 14 and 15
11. Arrange the stacked secons so the FlexDrop ts in the carry bag.
Figures 16 and 17
12. The FlexDrop ts easily back into the provided nylon bag. Figures 18 and 19
Figure 8 Figure 9
Customer Support (831) 786-1370
Photoflex is a division of PromarkBRANDS, Bartlett, IL USA.
©2016 ALL RIGHTS RESERVED. FlexDrop®, Photoflex® and the Photoflex logo are
trademarks or registered trademarks of Photoflex and/or its affiliates in the U.S. and
other countries.
PHOTOFLEX® WARRANTY
• Warranties only cover manufacturer’s defects and workmanship.
• We reserve the right to inspect all merchandise returned (end
users and dealers) for warranty fulfillment.
• All returns must be pre-approved with Return Manufacturers
Authorization obtained from Photoflex/PromarkBRANDS.
• A receipt showing date of purchase will be required for all returns.
• Freight must be paid by the customer or dealer.
• Warranties are valid only from date of Original Purchase.


