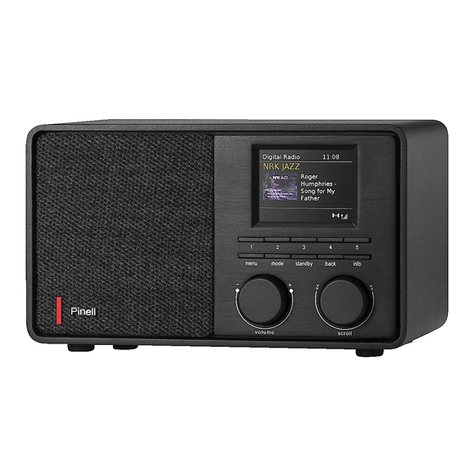
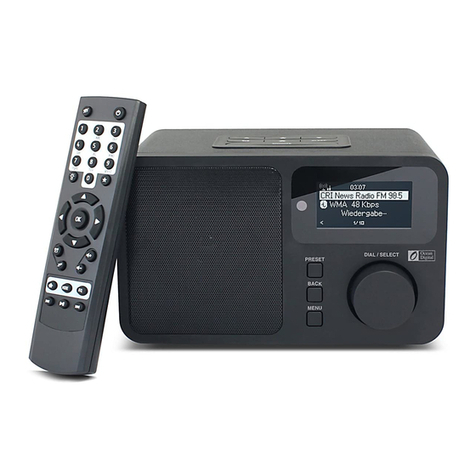
Pinell Explorer User manual

www.pinell.no
User’s Manual
Pinell Explorer
DAB+ / DAB / FM / Internet Radio

www.pinell.noPage2
Contents
Contents 2
Safety Information.....................................................................................................................................................3
The Contents of the Package 4
Internet Radio Quick Start Guide 5
This is what you need before you can begin to use your Internet Radio..................................................................6
Overview of controls (a)............................................................................................................................................7
Remote Control Overview......................................................................................................................................... 8
Overview of outputs/inputs (b)..................................................................................................................................9
Setup guide ..............................................................................................................................................................10
Accessing wireless networks and using the Internet Radio .................................................................................... 13
Connecting to a network by means of cable ...........................................................................................................17
Changing to wireless network .................................................................................................................................19
Choosing a station via Podcasts ..............................................................................................................................20
Obtaining an access code.........................................................................................................................................21
Adding a station to “My favourites” .......................................................................................................................22
Add a station to “My Added Stations”....................................................................................................................23
Changing station information.................................................................................................................................. 24
Music Player mode..................................................................................................................................................25
DAB mode............................................................................................................................................................... 26
Manual tuning:.........................................................................................................................................................27
Dynamic Range Control (DRC) value ....................................................................................................................28
FM mode..................................................................................................................................................................29
Specifying preset stations........................................................................................................................................30
Selecting a preset station .........................................................................................................................................30
AUX IN mode.......................................................................................................................................................... 31
Sleep function .......................................................................................................................................................... 32
Setting the clock ...................................................................................................................................................... 33
Daylight saving time................................................................................................................................................34
Setting the alarm...................................................................................................................................................... 35
General use 38
Returning to the main menu .................................................................................................................................... 38
Adjusting the volume............................................................................................................................................... 38
Scrolling through station information .....................................................................................................................38
System settings 39
Equaliser .................................................................................................................................................................. 39
Network setup..........................................................................................................................................................40
Language..................................................................................................................................................................40
Resetting to factory default settings........................................................................................................................41
Software updates......................................................................................................................................................42
Running the setup wizard........................................................................................................................................ 43
Software version and Radio ID ...............................................................................................................................43
Appendices 44
Step 1: Setting up media sharing in Windows Media Player (WMP) 11 ...............................................................44
Step 2: Playing music from Media Player using the Internet radio........................................................................46
WPS encrypted networks......................................................................................................................................... 46
Charging batteries.................................................................................................................................................... 46
Use of rechargeable batteries...................................................................................................................................47
Fault-finding ............................................................................................................................................................47
Frequently Asked Questions....................................................................................................................................48
Specifications 50

www.pinell.noPage3
Safety Information
CE safety instructions
UL safety instructions
9. If the accompanying electrical plug does not fit your power
outlet, you should obtain help from an electrician or purchase
an adapter.
The lightning flash with arrowhead symbol,
within an equilateral triangle is intended to alert
the user to the presence of uninsulated
"dangerous voltage" within the product's
enclosure that may constitute a risk of electric
shock.
10. Protect the power cord from being walked on or pinched
particularly at plugs, power outlets, and the point where it
exits from the apparatus. If the power cord is damaged, it
should be repaired by an electrician.
11. Only use attachments / accessories specified by the
manufacturer.
12. When moving the apparatus, be careful to avoid damage.
13. Unplug this apparatus during lightning storms or when unused
for long periods of time.
14. Refer all servicing to qualified service personnel. Servicing is
required when the apparatus has been damaged in any way,
such as when a power supply cord or plug is damaged, liquid
has been spilled or objects have fallen into the apparatus, the
apparatus has been exposed to rain or moisture, does not
operate normally, or has been dropped.
15. Do not expose the apparatus to dripping or spraying liquids, or
place containers filled with water, such as vases, on the
apparatus.
16. The mains switch or mains plug is used as a disconnect device
and shall always remain readily operable during operation.
17. Refer to the Rating Labels on the back of the radio for
information about the input power and other safety
information.
Batteries:
Always remove batteries from the battery holder when
discharged or if the apparatus is not to be used for a long
period.
Do not attempt to charge non-rechargeable batteries. Never
attempt to open or short-circuit batteries as this may cause
explosion. Fluids leaking from batteries may cause skin
irritation. If fluid contacts bare skin, rinse with plenty of
water; if you get it in your eyes, rinse thoroughly for 10
minutes and contact a doctor.
WARNING: TO REDUCE THE RISK OF
ELECTRIC SHOCK, DO NOT EXPOSE
THIS APPLIANCE TO RAIN OR
MOISTURE.
IMPORTANT SAFETY INSTRUCTIONS
To reduce the risk of electrical shock, fire, etc.
1. Read these instructions.
2. Keep these instructions.
3. Heed all warnings.
4. Follow all instructions.
5. Do not use this product near water.
6. Clean with a dry cloth. To remove stubborn
marks, use a soft cloth with a mild cleaning
agent and water. Dry the apparatus
immediately afterwards. Do not use coarse
cloths, thinners, alcohol or other chemical
solvents, as this may damage surfaces or erase
labelling.
7. Do not block any ventilation openings.
Ventilation openings should never be covered
by such objects as newspapers, table cloths,
curtains, etc.
8. Do not install near any heat sources such as
radiators, heaters, stoves, or other apparatus
that produces heat.
WARNING
INCORRECT BATTERY
INSTALLATION CAN LEAD TO
DANGER OF EXPLOSION
ONLY REPLACE BATTERIES WITH
BATTERIES OF THE SAME BRAND AND
SIZE
www.pinell.noPage4
The Contents of the Package
Main unit with
Remote Control
User’s Manual

www.pinell.noPage5
Internet Radio Quick Start Guide
Welcome
Thank you for choosing the Pinell Explorer. Your radio will provide you with many hours
of listening pleasure with simple access to thousands of internet radio stations all over the
world, as well as a range of possibilities for music streaming. Wherever you live in the
world, you will be able to listen to domestic and foreign radio stations. You may also
select genres such as classical music, jazz, and so on. Your Pinell will give you the radio
stations you prefer.
Register your product at http://www.pinell.no.
We will then send you up-to-date information about the development of your product (software
updates etc.) and other exciting news from Pinell.
The radio’s manual contains tips and advice for use and how to solve any problems which may
arise. We also recommend you to visit www.pinell.no for updates and news.
User manuals in other languages (Norwegian, Danish, Swedish and Finnish) are
available at www.pinelldigital.com
The information in this manual may be revised without warning. The manual is protected
by copyright laws. It is illegal to copy or reproduce any part of this manual without the
consent of TT Micro AS.
This product must not be disposed of with ordinary waste. The product may contain
materials which can impact the environment and should be delivered to a facility for
collection of electronic waste.
Copyright© 2009
WEEE Symbol
Electrical and electronic equipment may contain materials and substances which
may be present environmental and health hazards if waste originating in such
equipment is not correctly handled. Equipment labelled with the WEEE symbol
must not be treated as household waste, but must be delivered as toxic waste to
the local municipality’s recycling or environmental facility.
(WEEE = Waste Electrical and Electronic Equipment)
THE SYMBOL INDICATES THAT THE EQUIPMENT COMPLIES WITH EUROPEAN
SAFETY AND ELECTROMAGNETIC DIRECTIVES

www.pinell.noPage6
This is what you need before you can begin to use
your Internet Radio
LAN settings:
Ensure that your network is in order and that you have access to the network settings.
If you need to enter the MAC address in your router, this can be found at:
Main menu System settings Network View settings MAC address
Wireless LAN settings:
A broadband Internet connection must be available.
You need a wireless (Wi-Fi) access point to the broadband connection, preferably via a router.
If the wireless network is configured to use Wired Equivalent Privacy (WEP) or Wi-Fi Protected
Access (WPA) data encryption, you must know the WEP or WPA code if the Internet radio is to
communicate with the network.
If the wireless network is configured for reliable stations, you must specify the MAC address of the
radio in the wireless access point. The MAC address of the radio can be found at:
Main menu System settings Network View settings MAC address
Ensure that the wireless access point is switched on and connected to the broadband network, or that
the LAN cable is correctly connected, before proceeding. To ensure that this part of the system
functions, you are recommended to read the instructions accompanying the wireless access point or
LAN connection device.

www.pinell.noPage7
Overview of controls (a)
Radio viewed from the front
Button Internet DAB + FM Media Player AUX IN
Power
Press to switch radio on or off
When the alarm sounds, press this button to switch it off.
SOURCE
Press to switch between Internet Radio, Media Player (Music Player), DAB (DAB+), FM and
AUX IN mode.
NB: for use only in Media Player
Press to play the previous track, press to play/pause, press to go to the next
track.
PRESET
NB: for use only in Internet Radio, DAB+ and FM modes. See Page 31 for more
information.
Press and hold to store preset stations. Press to load a stored station.
FORWARD
Press to go forward in the menu system.
BACK
Press to go backwards in the menu system.
a. Rotate to scroll through options, press to confirm selection.
b. Press to go to the main menu or change options.
c. Rotate to adjust the volume

www.pinell.noPage8
Remote Control Overview

www.pinell.noPage9
Overview of outputs/inputs (b)
Radio viewed from the back
Headphone
jack: a. The radio is equipped with a 3.5 mm headphone jack.
b. When headphones are connected, the internal speaker is automatically muted.
AUX IN
jack: a. Used to connect an external audio unit.

www.pinell.noPage10
Setup guide
Step 1 – Switch on
1. Plug in the power adapter and check that the LED lamp is illuminated.
2. When in use, the radio can be switched off by pressing the STANDBY/ON button. The first time you
switch on, the Setup Wizard will be displayed.
Step 2 – Setup guide
Continue the setup by pressing SELECT to confirm “YES” and rotate the knob to select 12/24 hour
format. Press to confirm. Here you can choose whether the clock display will have 12 or 24 hour
format.
Press SELECT to confirm “Update from network”. The radio will now automatically obtain the date and
time of day.
Rotate the knob or use the arrow keys to highlight your time zone. Press to confirm.

www.pinell.noPage11
Rotate the knob or use the arrow keys to highlight Daylight saving. Press to confirm.
Rotate the knob or use the arrow keys to highlight the desired WLAN region. Press to confirm.
Rotate the knob or use the arrow keys to select SSID. Press to confirm. The radio stores this in its
memory. The SSID is the name of your local network (LAN).
NB: In some cases the radio may find more than one network. Rotate the knob or use the arrow keys to select
the one you prefer, and press to confirm.
If the network has not been configured to request a password (WEP/WPA) the radio will connect to the
network and display:
If a WEP or WPA key (password) is required, you will be asked to enter this using the following display:

www.pinell.noPage12
Rotate the knob or use the arrow keys to scroll through the alphanumeric characters and press the knob
to select each character.
NB: WEP/WPA passwords are case-sensitive, in other words, they distinguish between small and capital
letters..
If you select an incorrect character when entering the password, select “ ” to
delete this character.
NB: a.> is an abbreviation of “Backspace”.
b.> To select ,or : with the arrow pointing to “ ”, rotate the knob or use
the arrow keys to move in an anti-clockwise direction. You will see these options:
c.> Select to return to the previous display.
d.> After selecting the last character in the password, rotate the knob or use the arrow keys to highlight
. Press to confirm.
e.> The radio stores the WEP/WPA key you have specified so that you don’t need to provide it again.
Press Select to exit.
The setting has now been entered.
NB: If you are using an encrypted WPS network, refer to Page 51.

www.pinell.noPage13
Accessing wireless networks and using the Internet
Radio
1. After completing the Setup Wizard, press SELECT to enter Internet Radio mode.
NB: You can also press SOURCE repeatedly until Internet Radio is displayed.
Later, the display will show:
2. With the arrow pointing to Station list, press SELECT to confirm.
If the radio shows:
when you attempt to connect to the network, you should:
a.
Check that the router is functioning correctly.
b.
Move the radio to a place where the signal is stronger.
c.
Check that you have provided the correct password.

www.pinell.noPage14
Local stations
NB: Check that the radio is connected to the network.
1. With the arrow pointing to Station list, press SELECT to confirm.
2. Rotate the knob or use the arrow keys to highlight Local Norway, and press to confirm.
NB: “Local Norway” may be replaced by something else, depending on where you are. You may for
example see “Local UK” or “Local US”. It is easy to find your local station.
3. Rotate the knob or use the arrow keys to find your favourite, press to confirm and proceed to the
desired programme.

www.pinell.noPage15
Selecting a station
NB: Check that the radio is connected to the network.
1. With the arrow pointing to Station list, press SELECT to confirm.
2. Rotate the knob or use the arrow keys to highlight Stations. Press to confirm.
3. There are five alternative ways of selecting a station as shown above.
“LOCATION”enables you to choose from the radio stations available in each of the countries you select
from the list.
a. With the arrow pointing to Location, press SELECT to confirm.
b. Rotate the knob or use the arrow keys to highlight the region you want. Press to confirm.
c. Use the same method to select country and station. The radio will begin to play.

www.pinell.noPage16
“GENRE” enables you to select radio stations according to content, for example classic rock, sport, news,
etc.
a. Rotate the knob or use the arrow keys to highlight Genre. Press to confirm.
b. Rotate the knob or use the arrow keys to select your favourite content. Press to confirm.
c. Rotate the knob or use the arrow keys to select the desired station. Press to confirm.
NB: a. Some radio stations broadcast 24 hours a day, while others do not.
If the radio station is not broadcasting, an error message may be displayed. In that case, return to
the station overview to select a different station.
b. If the station has content which can be selected, a list will be displayed of previously broadcast
programmes (podcasts).

www.pinell.noPage17
Connecting to a network by means of cable
Step 1 – Select LAN settings
NB: a. Ensure that the LAN cable is connected to the LAN port.
1. Press MENU, or rotate the knob or use the arrow keys to highlight Main Menu. Press to confirm.
2. Rotate the knob or use the arrow keys to highlight System settings. Press to confirm.
3. Rotate the knob or use the arrow keys to highlight Network. Press to confirm.
4. Rotate the knob or use the arrow keys to highlight Manual settings. Press to confirm.
5. With the arrow pointing to Wired, press SELECT to confirm.
6. With the arrow pointing to DHCP enable, press SELECT to confirm.

www.pinell.noPage18
Later, the display will show:
The LAN setting has now been entered.
Step 2 – Enter Internet Radio mode from another mode
1. Press MENU or rotate the knob or use the arrow keys to highlight Main Menu. Press to confirm.
2. With the arrow pointing to Internet radio, press SELECT to confirm, or press SOURCE repeatedly
until Internet Radio is displayed.
or
Continue with the above-mentioned steps. After a few seconds, the following will be displayed:
or
If this happens, proceed as follows:
a. Check that the router is functioning correctly.
b. Check that the LAN cable is connected properly and is not damaged.
c. Check the cable port.

www.pinell.noPage19
Changing to wireless network
NB: For this procedure to apply, you must either reset to the factory settings or follow the steps below:
1. Refer to “Select LAN settings” on Page 19 and rotate the knob or use the arrow keys to highlight
Wireless. Press to confirm.
2. With the arrow pointing to DHCP enable, press SELECT to confirm and go through the wireless
network configuration step by step.
The wireless setup is now complete.

www.pinell.noPage20
Choosing a station via Podcasts
1. Once the radio is connected to the network and Internet Radio has been selected, select the station
list and rotate the knob or use the arrow keys to highlight Podcasts.
2. Press SELECT to confirm and then find your favourite.
3. Press SELECT to confirm and then select the preferred programme step by step.
Table of contents
Other Pinell Radio manuals

Pinell
Pinell SUPERSOUND MICRO User manual

Pinell
Pinell SUPERSOUND 201 User manual

Pinell
Pinell Supersound 301 User manual

Pinell
Pinell SUPERSOUND 101 User manual

Pinell
Pinell Go radio User manual

Pinell
Pinell SUPERSOUND 202 User manual

Pinell
Pinell Supersound 301 User manual

Pinell
Pinell Supersound II User manual

Pinell
Pinell North User manual

Pinell
Pinell SUPERSOUND 201W User manual