manuals.online logo
Brands
  1. Home
  2. •
  3. Brands
  4. •
  5. Pioneer
  6. •
  7. Dashcam
  8. •
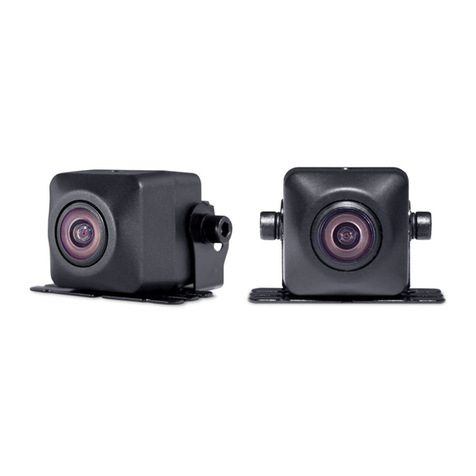
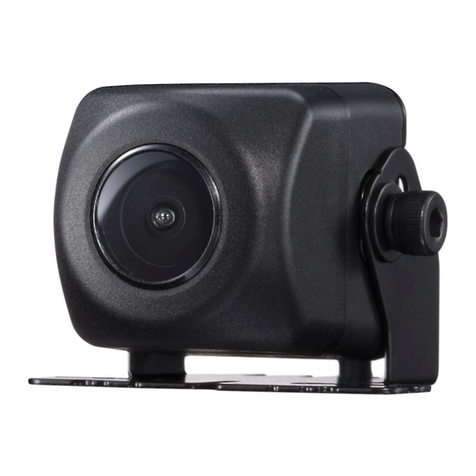
  9. Pioneer ND-BC5 User manual

Pioneer ND-BC5 User manual

UNIVERSAL REAR-VIEW CAMERA
CAMERA DE RECUL UNIVERSELLE
Owner’s Manual
Mode d’emploi
ND-BC5
This device complies with part 15 of the FCC
Rules.
Operation is subject to the following two
conditions:
(1) This device may not cause harmful interference,
and (2) this device must accept any interference
received, including interference that may cause
undesired operation.
Information to User
Alteration or modifications carried out without
appropriate authorization may invalidate the user’s
right to operate the equipment.
Note:
This equipment has been tested and found to comply
with the limits for a Class B digital device, pursuant
to Part 15 of the FCC Rules. These limits are
designed to provide reasonable protection against
harmful interference in a residential installation.
This equipment generates, uses and can radiate radio
frequency energy and, if not installed and used in
accordance with the instructions, may cause harmful
interference to radio communications. However, there
is no guarantee that interference will not occur in a
particular installation. If this equipment does cause
harmful interference to radio or television reception,
which can be determined by turning the equipment
off and on, the user is encouraged to try to correct
the interference by one or more of the following
measures:
• Reorient or relocate the receiving antenna.
• Increase the separation between the equipment and
receiver.
• Connect the equipment into an outlet on a circuit
different from that to which the receiver is
connected.
• Consult the dealer or an experienced radio/TV
technician for help.
If you want to dispose this product, do not
mix it with general household waste. There
is a separate collection system for used elec-
tronic products in accordance with legisla-
tion that requires proper treatment, recovery
and recycling.
Private households in the 25 member states of the
EU, in Switzerland and Norway may return their
used electronic products free of charge to designated
collection facilities or to a retailer (if you purchase a
similar new one).
For countries not mentioned above, please contact
your local authorities for the correct method of dis-
posal.
By doing so you will ensure that your disposed prod-
uct undergoes the necessary treatment, recovery and
recycling and thus prevent potential negative effects
on the environment and human health.
WARNING:
Handling the cord on this product or cords associated
with accessories sold with the product may expose
you to chemicals listed on proposition 65 known to
the State of California and other governmental enti-
ties to cause cancer and birth defects or other repro-
ductive harm. Wash hands after handling.
IMPORTANT
SAFEGUARDS
• Installation and wiring of this product require spe-
cialist skill and experience. To assure your safety,
please request a specialist technician to install the
unit.
• Do not attempt to heat the surface of the camera
lens or camera lens itself with a lighter and so on
when they have become frozen. This can cause a
malfunction.
• This product is a rear view camera for checking
the view at the rear of a car.
A rear view camera is a camera that provides sym-
metrical images in the same way as rear and side
view mirrors.
• Connection to a TV with an RCA video input is
possible, but confirm whether the TV you use has
a reverse gear connection function.
• This product is designed to supplement the driver’s
rear view, but the camera images do not show all
dangers and obstacles. Be sure to look behind you
when reversing to confirm the view.
• This product features a wide-angle lens, so the
near view is wide and the far view is narrow,
which may create a false sense of distance. Be
sure to look behind you when reversing to confirm
the view.
• Do not wash your car with an automatic car wash
or high-pressure water as it may result in water
entering the camera or the camera falling off.
• Check camera stand installation before driving.
Are the screws loose?
– Is the camera stand firmly secured?
– If the rear view camera comes loose while you
are driving it may cause an accident.
3. Adjust the angle so that the bumper
or rear edge of the car is displayed
at the bottom of the TV screen.
(Fig. 6, Fig. 7, Fig. 8)
①Hexagon wrench
②Bumper or rear edge of car
4. Attach the power supply unit.
(Fig. 9)
Affix the Hook and loop fastener (hard
type) to the bottom of the power supply
unit, and affix the Hook and loop fastener
(soft type) to the mounting location.
①Power supply unit
②Hook and loop fastener (hard type)
③Hook and loop fastener (soft type)
• You can use Hook and loop fastener (hard
type) to attach directly to a carpet, but do not
use the soft type.
• Install the power supply unit close enough
for the rear view camera cable to reach.
Installation <ENGLISH>
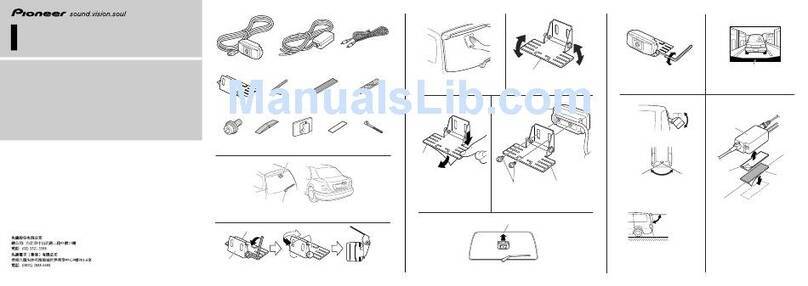
Parts supplied
𝖠Rear view camera ×1
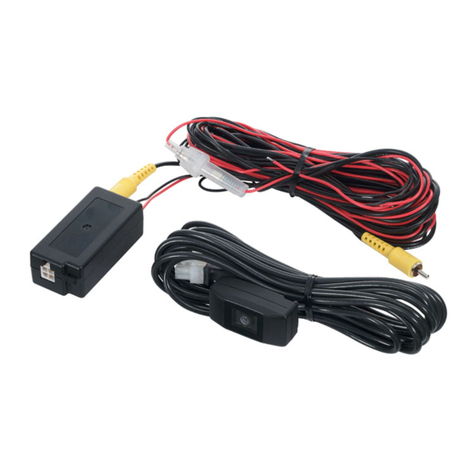
𝖡RCA power supply cable ×1
𝖢Power supply unit ×1
𝖣Hexagon wrench ×1
𝖤Hook and loop fastener (soft type) ×1
𝖥Hook and loop fastener (hard type) ×1
𝖦Clamp ×6
𝖧Waterproof pad ×1
𝖨Double-sided tape ×1
Installation example (Fig. 1)
①Glass surface
②Make sure it doesn’t touch the wiper
③Install on the center part
Installation Procedure
Note:
• Before making a final installation of the unit,
temporarily connect the wiring to confirm that
the connections are correct and the system works
properly.
• Use only the parts included with the unit to ensure
proper installation. The use of unauthorized parts
can cause malfunctions.
• Consult with your nearest dealer if installation
requires the drilling of holes or other modifications
of the vehicle.
• Install the unit where it does not get in the driver’
s way and cannot injure the passenger if there is a
sudden stop, like an emergency stop.
• When mounting this unit, make sure none of the
leads are trapped between this unit and the sur-
rounding metalwork or fittings.
• To prevent electric shock, do not install the power
supply unit in places where it might come in con-
tact with liquids.
• Do not mount this unit near the heater outlet,
where it would be affected by heat, or near the
doors, where rainwater might splash onto it. (Never
install in locations such as the above because of
the danger of malfunction due to high tempera-
tures.)
• Before drilling any mounting holes always check
behind where you want to drill the holes. Do not
drill into the gas line, brake line, electrical wiring
or other important parts.
• If this unit is installed in the passenger compartment,
anchor it securely so it does not break free while the
car is moving, and cause injury or an accident.
• If this unit is installed under a front seat, make
sure it does not obstruct seat movement. Route
all leads and cords carefully around the sliding
mechanism so they do not get caught or pinched in
the mechanism and cause a short circuit.
• Install the unit near the center of the car.
• Locate in the position you want to install the rear
view camera. Adjust the angle of the rear view
camera, and install so that the camera doesn’t
touch the car.
• When sticking to a glass surface, stick it on in a
position that assures the camera doesn’t touch the
rear window.
• Install so that it does not obstruct the rear field of
view.
• Install so that it does not protrude from the side of
the car.
• Do not perform installation in rain or fog.
• When humidity is high, dry the surface to which
the unit is to be attached before installing. Moisture
on the attachment surface reduces adhesive strength
which may lead to the unit coming off.
• If the temperature of the attachment surface is
low, warm with a hair dryer of other means before
installing to improve adhesive strength.
• Do not attach the camera stand to areas on the car
body treated with fluorocarbon resin, or glass. This
may result in the rear view camera falling off.
• During the 24-hour period after installing:
– Do not apply water to the unit.
– Do not expose the unit to rain.
– Do not subject the camera to unnecessary force.
• Thoroughly clean where tape is used for sticking
on the unit.
1. Clean the surface to which the rear
view camera is to be installed.
(Fig. 2)
Use a cloth or other item to wipe oil, wax,
dust and any other dirt from the installation
surface.
2. Peel off the sheet on the back of the
camera stand and stick it on. (Fig. 3,
Fig. 4, Fig. 5)
Press the camera stand with your fingers to
stick it to the installation surface. Touching
the adhesive surface or sticking the unit
on a second time reduces adhesive power
which may result in the unit coming off.
①Camera stand
②Top
③Mark
④Bottom
⑤Make sure to install the rear view camera so
that the mark is located on top of the camera.
⑥Be sure not to hide any part of the characters
on the license plate when attaching the cam-
era.
①Glass surface
②Make sure it doesn’t touch the wiper
③Install on the center part
Fig. 1
Abb. 1
𝖠Rear view camera ×1 𝖢Power supply unit ×1𝖡RCA power supply cable ×1
𝖣Hexagon wrench ×1 𝖤Hook and loop fastener
(soft type) ×1
𝖥Hook and loop fastener
(hard type) ×1
𝖧Waterproof
pad ×1
𝖦Clamp ×6 𝖨Double-sided
tape ×1
①Camera
stand
Fig. 2
Abb. 2
Fig. 3
Abb. 3
Fig. 4
Abb. 4
Fig. 8
Abb. 8
Fig. 6
Abb. 6
Fig. 9
Abb. 9
②Bumper or rear edge of car
①Power supply unit
②Hook and loop
fastener
(hard type)
③Hook and loop
fastener
(soft type)
⑥Be sure not to hide any part of the char-
acters on the license plate when attaching
the camera.
Fig.5
Abb. 5
Fig. 7
Abb. 7
②Top
③Mark
④Bottom
⑤Make sure to install the rear view camera so
that the mark is located on top of the camera.
①Hexagon wrench
Fig. 10
Abb. 10
①Power supply unit
③RCA power supply cable
connector
②Rear view camera
connector
⑥Red
⑤RCA pin
⑧Black
⑦Fuse (1A) 3 m (9 ft. 10 in.)
3 m (9 ft. 10 in.)
④Rear view camera
①Clamps
②Rear view
camera
④Product with a video
input jack (Hideaway
unit etc.)
⑥Made with a rasp etc.
⑦Scuff plate
⑧Clamp
⑨Waterproof pad
Attach the waterproof pad using
double-sided tape.
③RCA power
supply cable
⑤Power supply
unit
1.5 m (4 ft. 11 in.)
Fig. 11
Abb. 11
7 m (23 ft. 4 in.)
Fig. 12
Abb. 12
①Pull out from here ②Hinge
③Harness cover
⑤Hatch
④Rear view
camera
②Waterproof pad
Fig. 13
Abb. 13
①Clamps
③Rubber packing
④Make a U-shaped loop in
the lead outside the rubber
packing to prevent rainwa-
ter from flowing along the
lead into the interior of the
vehicle.
Attach the waterproof pad
using double-sided tape.
Connection <ENGLISH>
Note:
• This unit is for vehicles with a 12-volt battery and nega-
tive grounding. Before installing it in a recreational vehi-
cle, truck, or bus, check the battery voltage.
• To avoid shorts in the electrical system, be sure to discon-
nect the battery cable before beginning installation.
• Refer to the owner’s manual for details on connecting the
other units, then make connections correctly.
• Secure the wiring with cable clamps or adhesive tape. To
protect the wiring, wrap adhesive tape around them where
they lie against metal parts.
• Route and secure all wiring so it cannot touch any mov-
ing parts, such as the gear shift, handbrake and seat rails.
Do not route wiring in places that get hot, such as near
the heater outlet. If the insulation of the wiring melts or
gets torn, there is a danger of the wiring short-circuiting
to the vehicle body.
• Do not shorten any leads.
• Never feed power to other equipment by cutting the insu-
lation of the power supply lead of the unit and tapping
into the lead. The current capacity of the lead will be
exceeded, causing over heating.
• When replacing the fuse, be sure to only use a fuse of the
rating prescribed on the fuse holder.
• To minimize noise locate the TV antenna cable, radio
antenna cable and RCA power supply cable as far away
from each other as possible.
• Connection to a TV with an RCA video input is possible,
but confirm whether the TV you use has a reverse gear
connection function.
• If this unit is installed in a vehicle that does not have an
ACC (accessory) position on the ignition switch, the red
lead of the unit should be connected to a terminal coupled
with ignition switch ON/OFF operations. If this is not
done, the vehicle battery may be drained when you are
away from the vehicle for several hours.
A
C
C
O
N
S
T
A
R
T
O
F
F
O
N
S
T
A
R
T
O
F
F
ACC position No ACC position
• Cords for this product and those for other products may
be different colors even if they have the same function.
When connecting this product to another product, refer to
the supplied manuals of both products and connect cords
that have the same function.
Connection sample (Fig. 10)
①Power supply unit
②Rear view camera connector
③RCA power supply cable connector
④Rear view camera
Video input jack
Connect to camera input jack (REAR
VIEW CAMERA IN).
⑤RCA pin
Accessory power supply
To electric terminal controlled by ignition
switch (12 V DC) ON/OFF.
⑥Red
⑦Fuse (1A)
Ground
To vehicle (metal) body.
⑧Black
Cord installation (Fig. 11)
①Clamps
②Rear view camera
③RCA power supply cable
④Product with a video input jack
(Hideaway unit etc.)
⑤Power supply unit
⑥Made with a rasp etc.
⑦Scuff plate
⑧Clamp
⑨Waterproof pad
Attach the waterproof pad using double-
sided tape.
Cord installation points (Fig. 12)
• When pulling the cord out of the car,
pull from the outer side of the hatch har-
ness cover and hinge.
①Pull out from here
②Hinge
③Harness cover
④Rear view camera
⑤Hatch
After cord installation (Fig. 13)
• Open and close the hatch door slowly
to confirm that the cord is not rubbing
against the rim of the door.
• When the rear view camera cord cannot
be pulled out from the lower side due to
the type of car.
As shown in the figure 13, bend the cord
into a U shape in front of the waterproof
pad, making sure that rain water cannot
enter the car by running down the cord.
①Clamps
②Waterproof pad
③Rubber packing
④Make a U-shaped loop in the lead outside
the rubber packing to prevent rainwater from
flowing along the lead into the interior of the
vehicle.
Attach the waterproof pad using double-
sided tape.
Power source ........................................... 14.4 V DC
(10.8 V to 15.1 V allowable)
Grounding system .............................. Negative type
Max. current consumption .......................... 100 mA
Output video ....................................... Mirror image
(for rear view confirmation)
Sensor ......................... 1/4-inch color CMOS sensor
No. of pixels
..................effective no. of pixels roughly 310 000
Lens ........................................................ Wide-angle,
focal length f = 1.4 mm, F value 2.3
Angle of view ................... Horizontal: approx. 135º
Vertical: approx. 105º
IR cutoff filter (special filter for vehicle mounting)
.................................................................. Provided
Iris system .......................................... Electronic iris
Scanning system ........................................ Interlace
Synchronizing system ....... Internal synchronization
Signal-to-noise ratio .......................... 40 dB or more
(at the recommended intensity of illumination)
Horizontal resolution ............ Approx. 300 TV lines
Illumination range .... Approx. 0.9 lux to 100 000 lux
Image output .........NTSC compatible 1 Vp-p (75 Ω)
Operation temperature range ........... –30ºC to +70ºC
–22ºF to +158ºF
Storage temperature range .............. –40ºC to +85ºC
–40ºF to +185ºF
Dimensions
Camera unit
..... 23 (W) mm ×23 (H) mm ×24 (D) mm
........... 7/8 (W) in. ×7/8 (H) in. ×1 (D) in.
Power supply unit
..... 56 (W) mm ×23 (H) mm ×22 (D) mm
..... 2-1/4 (W) in. ×7/8 (H) in. ×7/8 (D) in.
Weight
Camera unit ................................ 135 g (0.3 lbs)
(including the cable)
Power supply unit ...................... 110 g (0.2 lbs)
(including the power cord)
Length
Rear view camera cable .......... 7 m (23 ft. 4 in.)
RCA power supply cable ........ 3 m (9 ft. 10 in.)
Note:
Specifications and the design are subject to possible
modification without prior notice due to improve-
ments.
Specifications <ENGLISH>
PIONEER CORPORATION
11,Shinogura,Saiwaiku,Kawasakishi,Kanagawa2120031,JAPAN
PIONEER ELECTRONICS (USA) INC.
P.O.Box1540,LongBeach,California908011540,U.S.A.
TEL:(800)4211404
PIONEER EUROPE NV
Haven1087,Keetberglaan1,B9120Melsele,Belgium/Belgique
TEL:(0)3/570.05.11
PIONEER ELECTRONICS ASIACENTRE PTE. LTD.
253AlexandraRoad,#0401,Singapore159936
TEL:6564727555
PIONEER ELECTRONICS AUSTRALIA PTY. LTD.
5ArcoLane,Heatherton,Victoria,3202Australia
TEL:(03)95866300
PIONEER ELECTRONICS OF CANADA, INC.
340FerrierStreet,Unit2,Markham,OntarioL3R2Z5,Canada
TEL:18772835901
TEL:9054794411
PIONEER ELECTRONICS DE MEXICO, S.A. de C.V.
Blvd.ManuelAvilaCamacho13810piso
Col.LomasdeChapultepec,Mexico,D.F.11000
TEL:5591784270
©2011PIONEERCORPORATION.
Allrightsreserved.
©2011PIONEERCORPORATION.
Tousdroitsdereproductionetdetraduction
réservés.
PrintedinJapan
ImpriméauJapon
<CYR1084A>EL<KFWNX><11F00000>

Other manuals for ND-BC5

1

Other Pioneer Dashcam manuals

Pioneer VR6C-H310SH User manual

Pioneer

Pioneer VR6C-H310SH User manual

Pioneer NDBC4 User manual

Pioneer

Pioneer NDBC4 User manual

Pioneer VREC-Z810SH User manual

Pioneer

Pioneer VREC-Z810SH User manual

Pioneer ND-DVR100 User manual

Pioneer

Pioneer ND-DVR100 User manual

Pioneer ND-DVR100 User manual

Pioneer

Pioneer ND-DVR100 User manual

Pioneer VREC-170RS User manual

Pioneer

Pioneer VREC-170RS User manual

Pioneer VREC-200CH User manual

Pioneer

Pioneer VREC-200CH User manual

Pioneer VREC-DH300D User manual

Pioneer

Pioneer VREC-DH300D User manual

Pioneer VREC-DH300D User manual

Pioneer

Pioneer VREC-DH300D User manual

Pioneer ND-BC8 User manual

Pioneer

Pioneer ND-BC8 User manual

Pioneer ND-BC2/E5 User manual

Pioneer

Pioneer ND-BC2/E5 User manual

Pioneer ND-BC1/E User manual

Pioneer

Pioneer ND-BC1/E User manual

Pioneer VREC-DZ700DC User manual

Pioneer

Pioneer VREC-DZ700DC User manual

Pioneer ND-BC1 - Rear View Camera User manual

Pioneer

Pioneer ND-BC1 - Rear View Camera User manual

Pioneer VREC-130RS User manual

Pioneer

Pioneer VREC-130RS User manual

Pioneer AVH-X5700BHS Use and care manual

Pioneer

Pioneer AVH-X5700BHS Use and care manual

Pioneer VREC-Z710SH User manual

Pioneer

Pioneer VREC-Z710SH User manual

Pioneer VREC-DH200 User manual

Pioneer

Pioneer VREC-DH200 User manual

Pioneer VREC-DZ600 User manual

Pioneer

Pioneer VREC-DZ600 User manual

Pioneer VR6C-Z710DH User manual

Pioneer

Pioneer VR6C-Z710DH User manual

Pioneer ND-BC6 User manual

Pioneer

Pioneer ND-BC6 User manual

Pioneer VREC-150MD User manual

Pioneer

Pioneer VREC-150MD User manual

Pioneer VREC-130RS User manual

Pioneer

Pioneer VREC-130RS User manual

Pioneer VREC-100CH User manual

Pioneer

Pioneer VREC-100CH User manual

Popular Dashcam manuals by other brands

Osram ROADsight 30 manual

Osram

Osram ROADsight 30 manual

Papago Dashcam GoSafe 330 quick start guide

Papago

Papago Dashcam GoSafe 330 quick start guide

Fleetly FTDC-ADP-4CH Installation sheet

Fleetly

Fleetly FTDC-ADP-4CH Installation sheet

Rexing W202 Mini user manual

Rexing

Rexing W202 Mini user manual

Brickhouse Security VCWV user guide

Brickhouse Security

Brickhouse Security VCWV user guide

Gator HDDVR302 instruction manual

Gator

Gator HDDVR302 instruction manual

LAMAX DRIVE C5 Dual user manual

LAMAX

LAMAX DRIVE C5 Dual user manual

Avic View-i HD user manual

Avic

Avic View-i HD user manual

DOD LS330W Hardware installation guide

DOD

DOD LS330W Hardware installation guide

StuntCams DC-101 user manual

StuntCams

StuntCams DC-101 user manual

Transcend 620 user manual

Transcend

Transcend 620 user manual

Connects2 CAM-VW8 user manual

Connects2

Connects2 CAM-VW8 user manual

Silent Witness SW020 user manual

Silent Witness

Silent Witness SW020 user manual

GPSTab AI-12 user guide

GPSTab

GPSTab AI-12 user guide

Neoline G-TECH X5x series user manual

Neoline

Neoline G-TECH X5x series user manual

Azdome M08 owner's manual

Azdome

Azdome M08 owner's manual

COXPAL A7 Dual HW user manual

COXPAL

COXPAL A7 Dual HW user manual

Magnadyne C-LP1 Owners and installation manual

Magnadyne

Magnadyne C-LP1 Owners and installation manual

manuals.online logo
manuals.online logoBrands
  • About & Mission
  • Contact us
  • Privacy Policy
  • Terms and Conditions

Copyright 2025 Manuals.Online. All Rights Reserved.