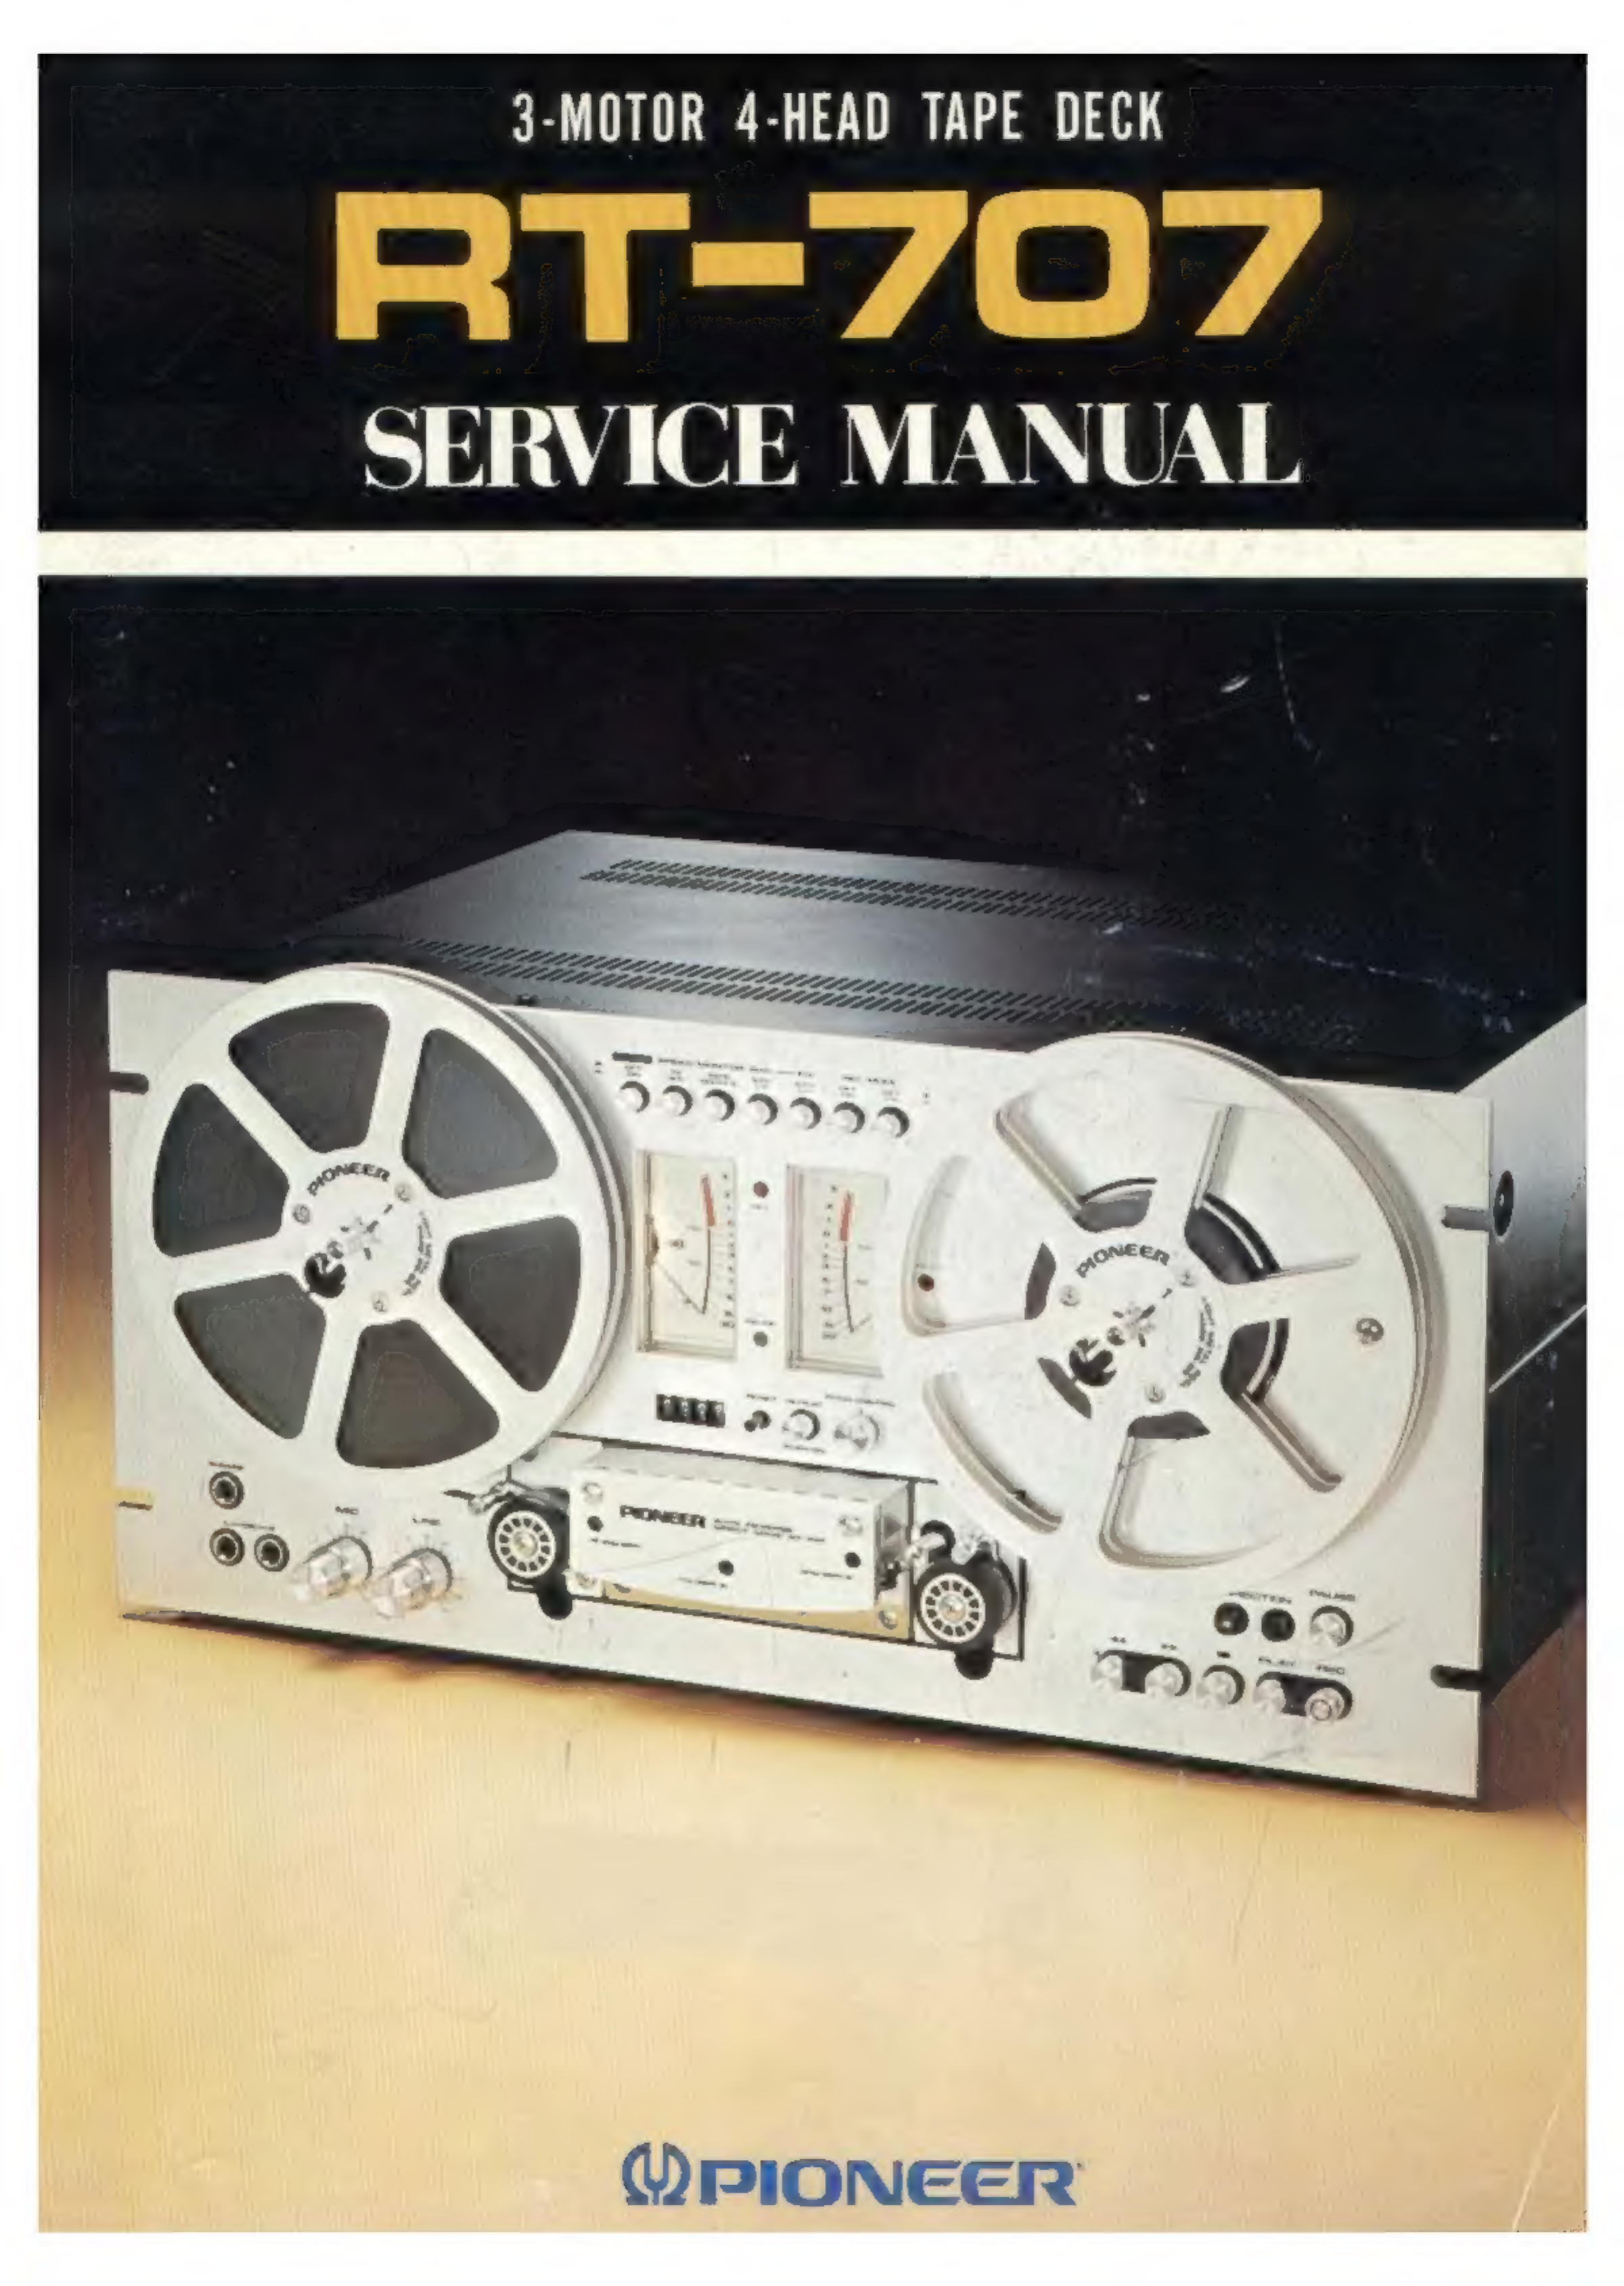
Pioneer RT-707 User manual

3-MOTOR
4-HEAD
TAPE
DECK
RT-707
SERVICE
MANUAL
WMPIONEER

MODEL
RT-707
COMES
IN
TWO
VERSIONS
DISTINGUISHED
AS
FOLLOWS:
RT-707
r
T
>
Type
|
Voltage
Remarks
KU
|
120V
only
U.S.A.
model
Kc
120V
only
Canada
mode!
CONTENTS
1.
SPECIFICATIONS
........
0c
ccc
cccceccccc
ee
cescneceecnesseesssescnsens
3
2.
CONNECTION
DIAGRAM
.........
0.
cece
cece cece cece
eee
e
eee
e
ee
eeneeeeee
4
3.
FRONT
PANEL
FACILITIES
.......
0... cece
cece
cc
cect
teen
eee
eeeee
5
4.
BLOCK
DIAGRAM
.....
22...
ccc
cece
cece
cee
tenet
e
eee
een
7
5.
LEVEL
DIAGRAM
....
0...
ccc
ete
eee
e
eee
eeeeeneeeeees
9
6.
CIRCUIT
DESCRIPTIONS
6:1!
“Power
Supply
ses
ccs
ean
ie
eames
Shei
2S
ends
Ae
dae
oh
aaeee
oeteasten
10
6.2
Control
Circuit
10
6.3
Direction
Switch
Circuit
....
2.2...
ccc
cee
eee
e
eens
13
6.4
Switching
Circuit,
Muting
Circuit...
2.2...
6.
cece
eee
tee
eee
14
6.5
Playback
Amplifier...
2.2.0.6...
cece
cece
cece
eee
ee
eee
eee
e
eee
enee
15
6.6
Bias
Oscillator
.
.
16
6.7.
Recording
Amplifier
16
6.8
Frequency
Generator
........
6.
ccc cee
eect
eee
eee
eee
c
eect
teen
eeees
17
7.
DISASSEMBLY
TA
(BONNE
6.5.5
sci
ke
Sees
ee
dace
Seis
Rea
wis
We
deals
Gade
aeie
sue
tek
B
21
7.2
Rear
Panel
..
21
7.3
Bottom
Plate
22
7.4
Front
Panel
22
8.
PARTS
LOCATIONS
8.1
Front
Panel
View
...........
cc
cece
cece cece eect
teen
e
cece
eeeeeeeaees
23
8.2
Front
View
With
Front
Panel
Removed
............
00.
cece
ee
cece
cece
eee
25
8.3.
Top
View
With
Bonnet
Removed
........
27
8.4
Bottom
View
With
Bottom
Panel
Removed
29
8.5)
Rear
Panel
View
oieiecc
sci6ib
aid
oboe
sia
de
Relea
ele
niece
0 a
icia
eb/6is,
aoe
valde
a
wees
es
31
9.
MECHANICAL
ADJUSTMENTS
9.1
Reel
Base
Height
Adjustment
...........
2.0...
c
cece
cece
cece
cece
eeenees
33
9.2:
‘Brake
Adjustment:
ooo
e0.3.3
ic
cided
cspees
cee
ees
hid eek
Sis
dee
eew
eae
é
33

10.
11.
12.
13.
14.
9.3.
Takeup
Torque,
Back
Tension
Adjustment
.................
00:
c
eee
eee
34
9.4
Pinch
Roller
Pressure
Adjustment
35
O15,
Pause
Adjustments.
24.4
2c.00
25
toed
etapa
dae
ARES
eae
ayeid
weeterd
serene
ge
36
9.6
Tape
Speed
Adjustment
..............
0
cece
eee
e
cece
teen
ee
eeeee
36
HEAD
ADJUSTMENTS
10.1
Head
Rough
Adjustment
...............-08-
:
vee
37
10.2
Playback
Head
Adjustment
38
10.3
Record
Head
Adjustment
..........0
0
ccc
cee
eee
cece
ence
tees
eeeeeneues
38
ELECTRICAL
ADJUSTMENTS
11.1.
Playback
Level
Adjustment
2.0.0...
0...
cece
cece
cee
cnet
e
ee
eneeaes
39
11.2
Playback
Equalizer
Adjustment
39
11.3
Level
Meter
OVU
Adjustment
39
11.4
Dummy
Coil
Adjustment
..........0.
00
c
ccc
e
eee
eee
eeaee
40
115
Bias
Trap
Adjustment
......
0...
cc
cee
ccc
cect
cece
en
eet
cesses
ceeseevens
40
11.6
Recording
Bias
Adjustment
.......
40
11.7.
Record/Play
Frequency
Response
41
11.8
Recording
Level
Adjustment
...........0
0
cece
cece
cent
eee
e
eee
e
eee
n
eee
41
EXPEODED
VIEW...
cs
icciad
éccccsaid,
CaS
alades
oTSaP
Valdes
vargas
oe
eles
eae
e
Mam
42
SCHEMATIC
DIAGRAMS,
P.C.
BOARD
PATTERNS
AND
PARTS
LIST
13.1.
Miscellaneous
Parts
List
....
2.2.0...
e
eee
e
eee
ee
eee
teens
2+.
59
13.2
External
Appearance
of
Transistors,
ICs
and
Circuit
Diagrams
of
IC
60
13.3
Connection
Diagram
....
2.0...
.
cece
ce
cee
eee
eee
cence
nee
eeeneenes
61
13.4
Schematic
Diagram
.......
6...
cece
eee
eee
eee
eee
e
eee
e
nena
63
13.5
Playback
Amplifier
Assembly
(RWF-069)
..........
0.
ccc
cece
eee
enes
65
13.6
Meter
Amplifier
Assembly
(RWX-155).......
71
13.7.
Power
and
Oscillation
Assembly
(RWR-053)
73
13.8
Indicator
Assembly
(RWX-142)
......
00.
ccc
cc
cee
cee
cee
tenet eeaee
13.9
Fuse
Assembly
(RWX-141)
....
13.10
Equalizer
Amplifier
Assembly
(RWX-154)
13.11
Head
Amplifier
Assembly
(RWF-070)
...........
0.0
cece
cece
eee
eee
13.12
Connector
Assembly
L
(RWX-151)
22...
6.
cece
cece
eee
n
eee
e
eee
13.13
Connector
Assembly
R
(RWX-152)
.........
00.
cece
eee
e
eee
cece
eee
eeee
13.14
Function
Switch
Assembly
(RWS-052)
..........
0...
c
cece
eee
ce
eee
eeeeee
13.15
MIC
Amplifier
Assembly
(RWF-065)
..........
0...
c
cece
cece
ee
eee
eeees
13.16
Control
Assembly
(RWG-070)
.......
0.
cece
cece cece
eee
eect
eee
eeeees
13.17
Servo
Amplifier
Assembly
(RWG-076)
.......
13.18
Switch
Assembly
(RWS-058....
.
KC
type)
(RWS-059.....
KU
type)
PACKING)
ivccs
ce
cee Sot
oes
5,30
34
cio
eel
8
Sk
nS
se
easle
wow
Sarde
waniea
est
106

1.
SPECIFICATIONS
Type
acchanes
op
Bass
4-track,
2-channel
stereo
tape
deck
(Recording,
playback
with
reverse
playback)
.
Solenoid
drive,
Pushbutton
direct
change
system,
Timer
can
be
set
for
recording
and
playback.
HeadSis
asters
toate
e
Recording
Head
;
1
Erase
Heads
;
1
Forward
playback
Head
;
1
Reverse
playback
Heai
Motors...
02.22.0005
Capstan
drive
moto
(FG-system,
AC
servo,
direct
drive)
Reel base
drive
motors
;
2
(6-pole
inner
rotor
induction
type)
Acceptable
Reel
Size
.
Tin
(17m)
Tape
Speed
19cm/s
(7-1/2ips),
9.Scm/s
(3-3/4ips)
40.5%
Less
than
100
sec.
with
7-inch
reel
and
370m
tape
Wow
and
Flutter...
..
. .
Less
than
0.05%
WRMS
(19cm/s)
Less
than
0.08%
WRMS
(9.5cm/s)
More
than
58dB
Fast
Forward/Rewind
Times
...
.
Signal-to-Noise
Ratio.
Total
Harmonic
Distortion...
..
.
Less
than
1%
(19cm/s)
Frequency
Response
i
eee
eerie
weir
20Hz
to
28,000Hz
(30Hz
to
24,000Hz
+3dB)
SSM:
5
kis
toast
20Hz
to
20,000Hz
(30Hz
to
16,000Hz
+34B)
ome
More
than
S0dB
Channel
Separation.
.
More
than
S0dB
Erasure
Rate
.
More
than
704B
Recording
Bias
Frequency
.
.
125kHz
Equalization.
.........
NAB
Standards
Inputs
(Sensitivity/Maximum
allowable
level/Input
impedance)
MIC;
0.25mV/125mV/27k2,
6mm
diam.
jacks
(suitable
microphone,
2502
to
30k22)
LINE;
50mV/25V/100k2,
DIN;
16mV/8V/1.3k22,
DIN
standards
Outputs
(Reference
level/Maximum
level/Load
impedance)
LINE;
450mV/700mV/SOk2,
DIN;
450mV,
700mV/50k2,
DIN
standards
HEADPHONES;
70mV/822,
6mm
diam.
jack
Semiconductors.
. .
+
67
transistors
(4
FET’s),
5
IC’s,
47
diodes
(1
thyristor,
2
LED's,
4
Zener
diodes,
2
varistors,
)
Crosstalk
Accessory
Functions
©
Pitch
control
(more
than
+6%
of
rated
tape
speed)
@
Auto
reverse
playback
(with
sensing
tape:
manual
reverse
is
possible)
©
Auto
repeat
(counter-interlocked)
©
Recording
mode
switches
(L,
R
independent)
©
Tape
selectors:
BIAS
(STD/LH);
EQ
(STD/LH)
©
MIC/LINE
mixing
©
Output
volume
controls
‘©
Pause
indicator
lamp
Power
Requirements...
. .
AC
120V 60Hz
Power
Consumption
.
120
watts,
Max.
AC
Outlets,
Dimensions
.
. .
.
.
»
Unswitched
(300W
max.)
x
1
+
480(W)
x
230(H)
x
356(D)mm
18-29/32
x
9-1/16
x
14in
Weight...
22.2.0
000-
Without
package;
20.0kg
441b
loz
With
package;
23.5kg
511b
1302
RT-707
Accessories
..........
©
Tin
metal
reel
(Pioneer
PR-85)
x
1
Connecting
cord
with
pin
plugsx2
Head
cleaning
kit
x
1
Sensing
tape
x
1
Splicing
tape
x
1
Operating
instructions
x
1
NOTE:
Specifications
and
the
design
subject
to
possible
modification
without
notice
due
to
improvements.

2.
CONNECTION
DIAGRAM
LINE
output
level
controls
I
|
SS
DQUOQUNAON000
00)
QQQA0UI0N00U0U1
Ac
OUTLET
MAX
MIN
OUTPUT
LEVEL
AC
OUTLET
This
is
the
power
socket
(maxi-
mum
power
capacity:
300W).
You
can
connect
the
power
plug
on
another
tape
deck
or
amplifier
to
this
socket,
These
controls
can
be
used
to
adjust
the
LINE
output
levels.
Turn
them
clockwise
to
increase
the
levels,
They
have
a
center
click
position
where
the
standard
output
level
(450mV
with
0dB
displayed
on
the
level
meter)
of
a
standard
tape
can
be
obtained.
terminal
To
the
power
outlet
or
AC
outlet
on
the
stereo
amplifier
Ground
wire
Tape
connectors
of
RT-707's
playback
/
the
stereo
amplifier
recording
connectors
TAPE
OUTPUT
INPUT
Connections
for
recording
a
mol
|
IN/OUT
Left
channel
DIN
connector
Connections
for
playback
Right
channel
Left
channel
REC/PLAY
connector
(DIN
standard)
of
sec-
‘ond
stereo
amplifier
REC/PLAY
001006
¢@670090
Recording/
playback
cord
(DIN
standard)

3.
FRONT
PANEL
FACILITIES
POWER
SWITCH
Push
this
switch
and
power
is
supplied
to
the
tape
deck.
Push
for
a
second
time
to
turn
the
power
off.
SPEED
SWITCH
-
This
switch
selects
the
tape
speed.
Push
for
a
9.5cm/s
speed;
push
again
for
a
19cm/s
speed
(released
position).
19cm/s:
Used
for
recording
music
programs,
etc.
9,5cm/s:
Used
for
recording
lengthy
conversations,
etc.
PAUSE
LAMP:
This
green
lamp
lights
up
when
the
PAUSE
button
is
pressed
to
indicate
the
tape
has
stopped
temporarily.
PHONES
JACK
This
is
the
output
jack
for
stereo
headphones.
Signals
selected
by
the
MONITOR
switch
are
available
here.
Use
it
when
you
want
to
monitor
the
recording
or
listen
to
a
performance
directly
taped
from
the
RT-707.
The
output
level
is
not
variable.
MIC
JACKS
€)
These
are
the
input
jacks
for
microphone
recording.
The
L
(left)
and
R
(right)
channels
can
be
used
independently.
Only
the
micro-
phones’
input
signals
are
recorded
if
the
REC/PLAY
connector
(DIN
specifications)
on
the
rear
panel
and
the
MIC
jacks
are
connected
at
the
same
time,
As
long
as
the
microphones
have
a
standard
6mm
diameter
plug,
you
can
use
either
a
low
impedance
(600-ohms)
or
high
impedance
(10
—
SOkohms)
type.
MIC
RECORDING
LEVEL
CONTROLS
Use
these
controls
to
adjust
the
recording
level
when
you
are
recording
with
a
microphone
(or
microphones)
or
when
you
are
using
the
rear
panel
REC/PLAY
comnector
(DIN
standard).
Use
the
outer
control
for
the
right
and
the
inner
control
for
the
left
channel.
Input
signals
from
both
the
MIC
jacks
and
the
REC/PLAY
connector
cannot
be
recorded
simultaneously.
LINE
RECORDING
LEVEL
CONTROLS
Adjust
the
recording
input
level
from
the
LINE
INPUT
terminals
‘on
the
rear
panel.
The
level
increases
as
the
controls
are
turned
to
the
right.
The
outer
control
is
for the
right
channel
and
the
inner,
for
the
left.
RECORDING
LAMP
(REC)
This
red
lamp
lights
up
during
recording.
Check
that
it
has
lit
up
before
recording.
MONITOR
SWITCH
Use
this
switch
to
monitor
your
recording.
TAPE:
Allows
you
to
listen
to
the
recorded
signals.
SOURCE:
You
can
listen
to
the
signals
before
recording
if
this
position
is
selected
(press
switch
once).
If
this
switch
is
switched
alternately
to
SOURCE
and
TAPE
during
recording,
you
can
compare
the
sound
signals
beforé
and
after
recording.
BIAS
SWITCH
This
selects
the
recording
bias
current
according
to
the
type
of
tape
used
for
recording.
Push
for
LH
tapes;
push
again
for
STD
tapes
(released
position).
STD:
For
standard
tapes.
LH:
For
low
noise
and
high
output
tapes.
EQ
SWITCH
This
selects
the
recording
equalization
characteristics
according
to
the
type
of
tape
used.
Select
same
position
for
playback
as
for
recording
according
to
the
characteristics
of
the
recording
tape.
Push
for
LH;
push
again
for
STD
(released).
STD:
For
standard
tapes.
1H:
—
For
low
noise
and
high
output
tapes.
TAPE
COUNTER
This
indicates
how
much
tape
has
been
recorded
or
played
back
and
how
much
there
is
left
over.
REPEAT
BUTTON
This
button
allows
you
to
reverse
the
tape
forward
for
reverse
playback
automatically.
If
you
remember
to
worrk
the
tape
counter
and
REPEAT
button,
then
the
tape
will
automatically
be
reversed
and
the
tape
deck
will
be
set
to
forward
playback
when
the
“0000”
display
on
the
tape
counter
gives
way
to
"9999"
during
reverse
playback.
Be
sure
to
release
this
button
when
you
do
not
require
repeated
playback.
COUNTER
RESET
BUTTON
Push
this
button
to
reset
the
tape
counter
to
“0000"
LEVEL
METERS
These
allow
you
to
read
out
the
levels
during
recording
and
play-
back.
When
the
MONITOR
switch
is
set
to
SOURCE,
they
indicate
the
input
signal
level,
and
when
set
to
TAPE,
they
indicate
the
playback
output
level.
APSTAN
This
rotates
when
the
power
is
switched
on,
Together
with
the
pinch
roller,
it
keeps
the
tape
at
its
rated
speed.
PITCH
CONTROL
KNOB
You
can
use
this
to
make
the
tape
travel
6%
faster
or
slower
than
the
normal
tape
speed
during
playback.
When
set
to
the
central
position,
the
tape
speed
is
19cm/s
or
9.5cm/s
(standard
values).
Turn
the
control
to
the
left
and
the
speed
drops
and
the
musical
steps
are
lowered;
conversely,
turn
it
to
the
right,
and
the
speed
rises
and
the
musical
steps
are
raised.
This
control
cannot
be
used
during
recording.
RT-707
REC
MODE
SWITCHES
(L.
R)
Depress
these
switches
when
recording.
L:
Use
this
switch
for
L
(left)
channel
recording.
R:
Use
this
switch
for
R
(right)
channel
recording.
For
stereo
recording,
make
sure
that
you
depress
both
switches.
7
TAPE
DIRECTION
SELECTOR
BUTTONS
These
buttons
allow
you
to
select
the
direction
of
tape
play
during
playback.
When
depressed,
the
button’s
lamp
will
light
up
to
indicate
the
direction
of
tape
play.
Forward
playback:
The
tape
runs
from
left
to
right.
Reverse
playback:
The
tape
runs
from
right
to
left.
When
you
are
recording,
you
cannot
change
the
direction
of
tape
play
even
by
depressing
this
button.
The
tape
will
always
run
ina
forward
direction.
PAUSE
BUTTON
This
temporarily
stops
the
tape
during
tape
play.
When
pressed
during
recording
or
playback,
the
tape
merely
stops.
When
pressed
again,
the
tape
starts
to
run.
This
button
does
not
work
during
fast
forward
or
rewind.
FUNCTION
BUTTONS
44
REWIND:
This
cause
the
tape
to
be
wound
at
a
high
speed
from
the
right
to
the
left
reel.
>P
FAST
FORWARD:
This
causes
the
tape
to
be
wound
at
a
high
speed
from
the
left
to
the
right
reel.
PLAY:
For
tape
playback,
or
recording,
push
this
button.
REC:
To
record,
press
this
button
together
with
the
PLAY
button.
@™
STOP:
This
stops
the
tape
and
releases
the
other
function
buttons.
NOTE:
©
The
function
buttons
will
not
return
to
their
preset
positions
if
the
power
is
turned
off.
©
The
tape
will
always
run
in
a
forward
direction
when
the
POWER
switch
is
depressed
to
the
ON
position.
©
If
you
depress
both
the
PLAY
and
REC
buttons
with
the
tape
set
to
the
reverse
playback
direction,
then
the
tape
will
sometimes
move
slightly
backwards
and
then
start
to
run
forwards.
Therefore,
when
recording,
make
sure
that
you
set
the
DIRECTION
button
to
the
forward
playback
position.
©
There
is
no
need
to
press
the
(j™)
stop
button
if
you
want
to
change
over
from
one
function
to
another.

4.
BLOCK
DIAGRAM
HEADPHONE
Amp.
METER
DRIVE
Amp.
PB.
HEAD
>
(FWwO)
NOTE:
The
number
which
are
circled
in
the
block
diagram
indicated
the
points
which
are
to
be
measured
in
the
level
diagram.
@
HEAD
PHONES
ca
LINE
OUTPUT
o]
MIC
INPUT
DIN
LINE
INPUT
i
©
CONTROL
Ass'y
INDICATOR
a
ig
5
Ped
0
|
|
Su
Si2|
gp.
ac
‘“
Su-3
a
s
baa
io
Sto
q™
Seg
foe
ee
AC
120V
CF
sO
Hz
SWITCHES
St
Se
S3
Sa
Se
St
Se
Sa
Sis
Se:
:
POWER
:
SPEED
+
MONITOR
=
BIAS
Ss:
E.G
RECORD
LEFT
»
RECORD
RIGHT
:
REW
:
FWD
Sto
=
Sit
Sr:
Sa:
Su:
PLAY
REC
PAUSE
Fwo
REVERSE
REPEAT
SHUT
OFF
RELAIES
RY301
:
RY202
:
RY
en
RY
oz
:
LAMPS
Pu
Plz:
Pla:
Pla:
REC
LEFT
REC
RIGHT
:
PLAY
DIRECTION
:
LEVEL
METER
LEFT
LEVEL
METER
RIGHT
FwD
INDICATOR
REVERSE
\NDICATOR

RT-707
5.
LEVEL
DIAGRAM
NOTES:
OdBu=1V
Frequency:
1kHz
(PLAYBACK)
The
level
measurement
points
are
indicated
on
the
block
diagram.
dBy
a4
©
vaby
©
-7aBv
@-1468v
-2074
LEVEL
-
60
(RECORDING
}
©-10aBv
-20dBv
20
(©
-3048
-30
@
}OdBv
@-a1aBv
-40
®
-46dBv
LEVEL
~90

6.
CIRCUIT
DESCRIPTIONS
The
block
diagram
is
shown
on
page
7.
Model
RT-707
is
an
open
reel
tape
deck
charac-
terized
by
direct
drive
4-track
2-channel
configu-
ration,
3
motors,
4
heads
autoreverse
The
sensor
touch
pushbuttons
used
in
most
3-
motor
tape
decks
necessitate
a
relatively
large
num-
ber
Of
relays
in
the
transport
control
electronics;
the
RT-707,
however,
uses
locking
type
pushbut-
tons
which
permit
simplified
circuit
construction
and
also
facilitate
automatic
unattended
recording
in
conjunction
with
a
timer.
6.1
POWER
SUPPLY
When
the
power
switch
S,
is
switched
on,
AC100V
is
supplied
to
the
capstan
motor
from
the
secon-
dary
side
of
the
power
transformer,
and
the
motor
begins
to
rotate.
A
DC
voltage
rectified
in
Dgo,
D4o2,
stabilized
in
the
stabilizer
formed
by
Q4o1,
Q4o2
and
ZD4o,,
is
supplied
to
the
control
circuit
(Fig.
1).
6.2
CONTROL
CIRCUIT
The
control
circuit
is
shown
in
Fig.
2.
Table
1
indicates
the
transistor
states
for
the
different
transport
modes.
@
Play
Function
(Fig.
2)
1.
When
the
play
button
S,0-,
is
pushed,
ground
connection
of
R497
is
interrupted
and
the
base
circuit
of
Q4o,
is
opened.
No
current
can
flow
through
Q4o4,
and
it
enters
OFF
state.
2.
+B
voltage
causes
current
to
flow
along
the
route
Daos
>
Qaog
>
R413
>
Raio,
whereby
Qao5
is
turned
ON.
3.
As
R47
is
connected
between
base
and
emitter
of
Qos,
this
transistor
is
turned
ON.
The
collector
current
of
Qu4o9
activates
brake
solenoid
SL,,
pinch
solenoid
SL,
and
play
relay
RY...
4.
+B
current
also
flows
along
path
Dao;
>
Qyos
>
Rai
>Raio,
whereby
Q4o;
becomes
ON.
5.
As
Rais
is
connected
between
base
and
emitter
of
Q4i0
,
base
current
can
flow
and
the
tran-
sistor
becomes
ON.
Q4io
collector
current
activates
PAUSE
solenoid
SL;.
Operation
of
brake
solenoid
SL,
releases
the
brakes
of
the
supply
motor
(SM)
and
take-up
motor
(TM).
Operation
of
the
pinch
solenoid
SL,
causes
the
pinch
roller
ta
be
pressed
against
the
capstan.
Operation
of
the
play
relay
RY¢o;
enables
AC
70V
from
the
secondary
side
of
the
power
transformer
(see
Fig.
1)
to
be
applied
to
the
supply
and
take-up
motors
through
slide
resistors
R,
and
R;.
Power
switch
}
Si
|
ACI20V
-~
?
60Hz
;
a
Ry6o1-2
~
a
10
Fig.
1

@
Rewind
(&
Fast
Forward)
Function
(Fig.
2)
1.
When
the
rewind
button
S3_-;
is
pushed,
+B
cur-
rent
flows
along
the
path
brake
solenoid
SL,
>
Dao7
>
Ss-3,
and
SL,
operates,
releasing
the
supply
and
take-up
reel
brakes.
As
shown
in
Fig.
1,
AC100V
is
applied
to
the
supply
motor
via
F.F.
button
S,.,
and
Rewind
button
S,-,
,
and
tape
rewind
begins.
.
AC100V
also
flows
to
the
take-up
motor
via
F.F.
button
S,.,
>
rewind
button
S,.,
>
slide
resistor
R,
>
play
relay
RY¢o,
.
The
slide
resis-
tor
serves
to
apply
the
proper
amount
of
back
tension
to
the
take-up
motor
in
rewind
mode.
.
In
F.F.
mode,
on
the
other
hand,
AC100V
from
the
secondary
side
of
the
power
trans-
former
is
applied
to
the
take-up
motor
through
F.F.
button
So.,.
AC100V
also
flows
to
the
supply
motor
via
the
route
formed
by
S,.;
>
play
relay
RY¢o:
>
slide
resistor
R,.
The
slide
resistor
serves
to
apply
the
proper
amount
of
back
tension
to
the
supply
motor
in
fast
forward
mode.
RT-707
©
Solenoid
Voltage
Control
Circuit
(Fig.
2)
When
transport
functions
are
switched,
operating
current
of
the
solenoids
must
be
temporarily
in-
creased
to
effect
the
switching
action,
but
current
must
be
reduced
again
immediately
to
avoid
over-
heating
of
the
solenoids.
1.
When,
for
example,
the
play
button
is
pushed,
a
surge
of
charge
current
(base
current
from
Q407)
flows
to
Caog,
and
Qao7
is
turned
ON.
2.
Brake
solenoid
SL,,
pinch
solenoid
SL,,
play
relay
RY
go,
and
pause
solenoid
SL;
are
con-
nected
as
loads
to
Q4o3.
As
explained
under
PLAY
FUNCTION,
above,
these
solenoids
operate
in
play
mode,
whereby
the
Q4o7
emit-
ter
current
becomes
the
Q4os
base
current,
turning
Q4o3
ON.
8.
As
soon
as
C4og
has
been
charged,
bias
of
Qso7
returns
to
the
normal
operating
value
deter-
mined
by
stabilization
in
Rais;,
ZDao2-
Table
1
|
Transport
Mode
Transistors
in
ON
state
Transistors
in
OFF
state
|
STOP
Q4o4
Q403, Q405+ Qa06, Qa09s
Qaro
PLAY
Q403,
Qaos,
Qa06,
Q409,
Qaio_|
Qaoa
FF/REW
Qaos
Q4031 Q4051
Qa06
Qao9»
Qaio
PAUSE
Qaos;
Qaos,
Qaoss
Qsi0
Qsoa,
Qso9
Capstan
Motor
Solenoid
use
Solencid
Sle
:
Pir
RY¢o1:
Play
Relay
59.3
510-2
cal
t
Fig.
2
44

@
Time
Lag
In
Switching
Functions
(Fig.
2)
When
the
transport
is
switched
from
rewind
(or
fast
forward)
directly
to
play
mode,
it
is
necessary
in
the
interest
of
tape
protection
to
bring
the
tape
to
a
standstill
for
a
certain
length
of
time.
Switchover
from
fast
forward
or
rewind
to
play
1.
In
F.F.
(or
rewind)
mode,
Q4o,
base
current
flows
via
the
route
formed
by
Rao9
>
Qaoa
>
R4o7
>
play
button
Syo-2,
and
Quaog
is
in
ON
state.
2.
Therefore
(and
because
the
Qao3
base
is
con-
nected
to
the
Qyoq
collector
via
R4os),
reverse
bias
is
applied
and
Qgo3
is
OFF.
8.
+B
voltage
causes
a
current
flow
through
R4o3
>
Caos
>
Raos
>
Daoa,
whereby
Caos
(timing
capacitor)
is
charged.
4.
When
the
Play
button
is
pushed,
the
F.F.
switch
S53
is
turned
off,
and
C4,
begins
to
discharge
via
D4o3
>
Raoo
>
Qaoa
>
Raoo-
AS
Qsoa
base
current
gradually
decreases,
its
internal
resistance
goes
up
and
Q4oq
attains
OFF
state.
5.
When
Qaoa
becomes
OFF,
Qyos, Qao6,
Qaog
and
Qsio
become
ON
(as
explained
under
PLAY
FUNCTION,
above).
6.
Therefore,
the
brake
solenoid
SL,
,
pinch
sole-
noid
SL,,
play
relay
RY¢o;
and
Q4i9,
operate
and
the
unit
enters
play
mode.
7.
The
required
stop
time
between
pushing
of
the
play
button
and
start
of
play
is
determined
by
the
discharge
time
of
Cao¢;
it
is
approximately
2
seconds.
@
Pause
Function
(Fig.
2)
1.
When
the
pause
button
S,.
is
pushed
while
the
transport
is
in
play
or
rec
mode,
potential
at
the
base
of
Qyoo
becomes
OV,
meaning
that
Qao9
becomes
OFF.
2.
Thereby
the
loads
on
Q4o9,
i.e.
brake
solenoid
SL,
and
pinch
solenoid
SL,
are
released;
sup-
ply
and
take-up
motor
brakes
are
applied
and
the
pinch
roller
retracted
from
the
capstan.
3.
Play
relay
RY¢o;
also
opens,
and
AC7OV
cur-
rent
flow
to
the
take-up
and
supply
motors
is
interrupted.
The
motors
stop,
the
transport
is
new
in
pause
mode.
4.
The
pause
indicator
LED
also
lights.
5.
When
pause
switch
S,,
is
released,
current
again
flows
through
the
base
of
Qyoo,
the
transistor
becomes
ON,
brake
solenoid
SL,
,
pinch
sole-
noid
SL,,
play
relay
RY,o;
and
pause
solenoid
12
SL;
operate,
and
play
or
rec
mode
is
resumed.
Refer
to
PLAY
FUNCTION,
below.
NOTE:
With
the
pause
switch
S,,
on,
Q,,.
remains
on,
and
+B
voltage
is
still
applied
to
pause
solenoid
SL,.
The
pinch
roller
is
therefore
retracted
only
about
2mm
from
the
capstan.
@
Record
Function
(Fig.
3)
1.
The
unit
is
put
into
recording
mode
when
the
play
(Sio-2)
and
rec
(S,,-3)
buttons
are
oper-
ated
at
the
same
time.
2.
+B
current
flow
is
as
follows;
rec
button
S,,-;
>
play
button
Syo-;
>
F.F.
button
Sy.
>
REW
button
S,.,
~
recording
switch
S,(S;)
>
D2
(D703)
>
speed
switch
S,.,
>
bias
switch
S,
>
OSC
assembly.
Current
is
also
supplied
to
the
rec
indicator
LED,
Dgo,-
3.
Output
from
the
bias
oscillator
is
supplied
to
the
recording
and
erase
heads.
4.
At
the
same
time,
recording
signal
current
(which
is
grounded
through
rec
relays
RY30o:
and
RY%3o2
in
other
modes)
is
supplied
to
the
recording
head
to
be
recorded
on
tape.
Relay
correspondences:
R3o;
left
channel,
R302
right
channel.
NOTES:
@
Functions
of
the
control
circuit
in
rec
mode
are
the
same
as
in
play
mode.
@
The
above
explanations
of
rec
functions
refer
to
stereo
recordings.

REW
OFF
PLAY
=
REC.
ofr
S82
See
9
Stor
St
t
RT-707
=
REC
Relay
L
Se:
REC
Left
:
REC
Relay
R
$7:
REC
Right
Spee
Laos,
Looe
:
Dummy
Coil
Bias
Den:
REC
IND.
Lamp
ON
6.3
DIRECTION
SWITCH
CIRCUIT
Fig.
4
shows
the
direction
switch
circuit
diagram.
@
Forward
Play
1.
When
the
power
switch
S,
is
turned
on,
current
caused
by
+B
flows
along
the
route
formed
by
reversing
relay
RYoo,
(and
forward
indicator
lamp
PL;)
>
direction
change
relay
RY¢o1-2
>
ground.
Relay
RYoo,
thus
operates,
causing
the
capstan
motor
to
rotate
in
forward
direction,
and
lighting
the
forward
indicator
lamp
in
the
FWD
direction
button.
.
If
now
the
play
button
is
pushed,
forward
play
will
begin.
@
Reverse
Play
1.
When
the
direction
change
switch
S,,
is
de-
pressed,
+B
will
flow
along
the
following
path:
rec
button
S,;-3
>
Reo:
+
direction
change
relay
RY¢o2
>
direction
change
switch
S,4
>
ground.
The
direction
change
relay
RY¢o2
operates,
changing
its
contact
points
for
reverse
direc-
tion.
This
interrupts
the
current
through
the
revers-
ing
relay
RY,
(and
FWD
indicator
lamp).
Due
to
the
contact
points
in
relay
RYo1,
polarity
in
the
main
motor
coil
is
reversed,
and
the
capstan
motor
begins
to
rotate
in
the
reverse
direction.
The
REV
indicator
lamp
lights.
Fig.
3
@
Auto
Reverse
Function
1;
Automatic
reversing
of
the
tape
travel
direc-
tion
can
be
effected
by
attaching
a
length
of
conductive
sensing
tape
near
the
tape
end.
As
the
sensing
switch
is
short-circuited
by
the
sensing
tape,
a
current
path
is
formed
for
+B:
rec
button
S,;-3
>
Reo;
>
direction
change
relay
RY¢o2
>
play
button
Sjo-.
>
sensing
switch
>
ground.
Thereby,
tape
travel direc-
tion
is
reversed,
because
the
direction
change
relay
RY
602
operates.
@
Repeat
Function
i.
When
the
repeat
button
S,,
is
engaged
and
the
tape
counter
reset
to
0000,
the
unit
is
ready
for
automatic
repeat
function.
First
play
the
tape
in
normal
forward
direction.
.
Sensing
tape
will
cause
automatic
reverse
in
travel
direction
(as
explained
above).
.
As
the
tape
reverses
past
the
0000
position
of
the
counter
and
the
counter
returns
to
9999,
the
tape
counter
switch
is
activated.
.
Action
of
the
tape
counter
switch
short-circuits
the
direction
change
relay
RY¢o2,
the
relay’s
contact
points
are
opened,
and
forward
play
resumes.
The
unit
will
thus
repeat
playing
the
section
between
0000
and
sensing
tape
indefinitely.
NOTE:
Automatic
resumption
of
forward
play
at
counter
reading
9999
will
also
take
place
if
the
unit
has
been
switched
to
reverse
play
manually,
i.e.
without
sensing
tape.
13

RY602
:
Direction
Relay
RYs0!
:
REV
Relay
PL3
:
FWD
IND.
Lamp
PLa
=
REV
IND.
Lamp
6.4
SWITCHING
CIRCUIT,
MUTING
CIRCUIT
Fig.
5
shows
the
switching
circuit
for
forward
play/
reverse
play
switchover,
as
well
as
the
muting
cir-
cuits
operative
during
switchover
and
when
the
power
to
the
unit
is
first
turned
on.
©
Forward
Play/Reverse
Play
Switching
Circuit
1.
+B
flows
along
the
route
REV
indicator
lamp
PL4
>
Ruiz
>
Rior
*
Qior
>
Rios
>
Ground.
Qio:
is
in
ON
state,
and
the
output
from
IC,
19,
enters
the
subsequent
amplifier
stage.
2.
The
base
of
Qio3
is
grounded
through
Rio
>
Rin
>
direction
change
relay
RY¢o2-2
>
ground,
so
Qio3
is
off
and
the
output
from
IC;192
cannot
enter
the
subsequent
amplifier.
The
signals
from
the
playback
heads
are
thus
con-
stantly
amplified
in
head
amps
IC,;o;
and
ICj102,
respectively,
but
the
signals
paths
are
switched
by
Q101+
Qio2
in
accordance
with
tape
travel
direction.
©
Muting
at
Time
of
Tape
Travel
Direction
Change
A
muting
circuit
interrupts
amplifier
output
during
the
time
that
the
tape
reversing
its
direction
of
travel,
is
not
moving
at
the
rated
speed
of
19
or
9.5cm/s.
1.
During
forward
play,
C,.;
remains
discharged
through
route
R,,,
>
direction
change
relay
RYoo2-1
>
Risa
>
Dios
>
ground.
2.
When
the
travel
direction
is
changed
from
forward
to
reverse
play,
+B
causes
a
charging
current
to
flow
to
C,,;
through
forward
indi-
cator
lamp
PL3
>
Ry
>
Ci2s
+
Dio2
>
Riss
>
Qiiz-
Quiz
is
ON,
while
Qi15
is
OFF.
3.
Consequently,
the
voltage
drop
across
Ri6
(which
is
the
load
on
Q;,s)
becomes
small.
The
positive
potential
at
the
Qio;
base
(from
14
a.
SENSING
SW
a
”.
NOTE:
The
reversing
relay
RYo,
is
located
inside
the
capstan
motor
assembly.
Fig.
4
R,;;)
is
cancelled
out,
the
base
obtains
positive
potential,
and
Qo;
becomes
ON.
By
reducing
the
impedance
between
collector
and
emitter,
the
output
from
the
IC’s
is
muted.
4.
When
C,.;
has
been
fully
charged,
Q,,7
base
current
stops
flowing.
Voltage
drop
across
Riso,
the
load
on
Q;;5,
becomes
large,
the
base
of
Qios
obtains
negative
potential
from
Rj\5.
This
increases
the
collector-emitter
impedance
of
Qios,
and
no
muting
of
the
IC
outputs
takes
place.
©
Muting
at
Time
of
Power
Switch-on
1.
When
the
power
is
switched
on,
current
flows
along
the
route
+B
(25V)
+
Dios
>
Quis
>
Ries
-
A
voltage
appears
across
Rj65
.
2.
This
voltage
across
Ris;
is
applied
to
Qii3
through
R35,
whereby
Q,,3’s
collector-emitter
impedance
drops
and
muting
of
the
line
out
signal
is
effected.
3.
Through
+B
(25V)
>
Ciro
>
Riso
>
Quis,
a
charging
current
flows
to
C,,9,
resulting
in
a
drop
in
Qj;
collector-emitter
impedance.
This
means
that
muting
by
Q,,;
is
dependent
upon
the
C,;9
and
C,,;
charging
currents.
Cy19
serves
for
brief
muting
while
the
power
is
being
switched
on,
whereas
C,,,;
causes
approx.
3
seconds
of
muting
after
switch-on.
4.
When
C,,5,
C2;
have
been
charged,
a
negative
potential
builds
up
through
Riaz
>
Riso
>
Qii3,
resulting
in
an
impedance
drop
between
Qii3
collector
and
emitter
and
thus
ending
the
period
of
muting.

tenor
MONITOR,
Tape
Qer,
Qios
RT-707
———
Lo
out
—{—
AMP.
Ass'y
(+8)
6.5
PLAYBACK
AMPLIFIER
(Fig.
6)
1.
The
playback
signal
from
the
playback
head
enters
IC,
,o;
through
C,y93.
The
amplified
output
from
IC,,9,
undergoes
playback
equalization
in
the
equalizer
formed
by
VRio1,
Riso9,
Riso7,
Cris.
.
The
difference
in
equalization
between
19cm
and
9.5cm/s
tape
speeds
is
obtained
by
varying
the
voltage
applied
to
the
gate
of
FET
Qiio
(0.4V
for
19cm/s,
-8.5V
for
9.5cm/s)
and
utilizing
the
resultant
change
in
the
FET’s
internal
impedance.
.
Downstream
from
ICj1o1,
the
signal
path
is
switched
by
Qo,
whose
function
has
been
2.
CONTROL
Assy
(+8)
(-B)
POWER
Fig,
5
explained
under
7.4,
Switching
Circuit,
Muting
Circuit,
above.
The
signal
is
then
amplified
in
the
direct
coupled
NPN-PNP
amplifier
(Qio7,
Qio9)
and
becomes
available
at
the
line
output
terminals.
.
A
portion
of
the
output
signal
undergoes
im-
pedance
conversion
in
Q,,,
and
matching
trans-
former
T,o;
and
becomes
available
at
the
phones
output
jack.
.
For
driving
the
level
meters,
output
from
Q,1;
is
amplified
in
Qjo9,
and
rectified
in
Djoo.,
Dyoos-
TAPE
ee
=
Fig.
6
15

6.6
BIAS
OSCILLATOR
(Fig.
7)
1.
16
Se-2
‘30s
L906
Sr2
REC.
HEAD
L
When
+B
(approx.
30V)
is
applied
to
Qs3o;,
Q30s,
&
positive
feedback
loop
is
established
through
the
oscillator
transformer
T3.:,
and
oscillation
begins.
.
From
the
secondary
side
of
TR3o,,
the
oscilla-
tion
signal
is
supplied
to
the
erase
and
record-
ing
heads.
.
The
oscillation
frequency
is
stabilized
against
temperature
fluctuations
by
means
of
thermis-
tor
TH39,
which
regulates
the
base
current
of
Q30s
,
Qs06
g
.
In
monaural
recording,
the
REC
(L)
switch
S.-2
or
REC
(R)
switch
S,_,,
respectively,
is
switched
to
a
dummy
coil
which
maintains
uniform
load
on
the
oscillator,
for
stable
opera-
tion.
(
aeeaat
:
2
”
1
1)
i
6
6.7
RECORDING
AMPLIFIER
(Fig.
8)
.
Input
from
the
microphone
jacks
passes
through
Co,
and
is
amplified
in
the
2-stage
direct
coupled
amplifier
formed
by
Qzo1,
Qro3
-
.
Output
from
this
mic
head
amp,
after
level
adjustment
by
VR2,,
enters
Qro5
-
Line
input
is
level
adjusted
in
VR203
and
then
enters
Q2o;.
Mic
and
line
inputs
can
thus
be
mixed,
with
independent
level
adjustments
for
each.
.
The
signal,
amplified
in
Q29s,
Q207
passes
through
VRjo2
and
enters
the
base
of
Q3;.
-
Q301
and
Q3o3
serve
to
obtain
the
current
required
for
driving
the
recording
head.
A
feedback
loop
(Q303
collector
>
R313,
C307
>
Rsis
>
Qso1
emitter
has
been
provided
to
obtain
+4dB
at
20Hz
of
bass
equalization.
.
To
achieve
the
different
amounts
of
treble
equalization
required
for
the
two
tape
speeds,
a
transistorized
switching
circuit
has
been
included.
Assuming,
for
instance,
that
low
noise
high
output
tape
is
being
used
at
19cm/s:
a
positive
voltage
is
applied
to
the
base
of
Q3o7,
its
internal
impedance
drops,
and
the
series
resonant
circuit
constituted
by
L3o,:,
Csi3,
functions.
-
From
Q3o3,
the
signal
enters
the
recording
head
via
L393, C325.
L393
and
C325
are
tuned
to
the
recording
bias
frequency,
reverse
bias
flow
in
the
circuit.
preventing
19cm/s
9.
5em/s
Fig.
8

6.8
FREQUENCY
GENERATOR
The
frequency
servo
generator
block
diagram
is
given
in
Fig.
9.
For
the
circuit
schematic,
please
refer
to
page
95.
One-shot
Multivibrator
_
Integration
Circuit
—
ary
aes
|
as
sd
Limiter
Amp
Differentiation
Circuit
The
construction
of
the
frequency
generator
(abbreviated
FG)
is
shown
in
Fig.
11.-The
rotor
is
mounted
to
the
flywheel
and
the
stator,
magnet
and
generation
coil
are
installed
to
the
motor
bracket.
The
magnetic
flux
from
the
magnet
flows
through
the
loop
stator
teeth
~
rotor
teeth
~
magnet.
When
the
motor
rotates
1
revolution,
the
rotor
and
stator
teeth
alignment
changes
as
illustrated
by
a
and
b
of
Fig.
10.
Therefore,
the
amount
of
magnet-
ic
flux
(magnetic
flux
density)
flowing
through
the
loop
changes.
An
AC
voltage
of
a
frequency
pro-
portional
to
the
number
of
times
the
magnetic
flux
density
changes
is
generated
in
the
genera-
tion
coil.
The
output
signal
of
this
FG
is
appro-
ximately
1360Hz,
150mV
at
a
tape
speed
of
19cm/s.
Rotor
teeth
Stator
teeth
Rotor
teeth
Stator
teeth
Fig.
10
Brake
Circuit
RT-707
'
|
Q
91
:
1
i
Stator
Generation
coil
Magnet
Stator
Fig.
11
17

@
Limiter
Amplifier
and
Differentiator
Circuit
The
limiter
amplifier
and
differentiator
circuit
are
shown
in
Fig.
12.
The
AC
signal
generated
by
the
FG
circuit
is
shaped
to
the
square
wave
shown
in
Fig.
17-2
(Fig.
12-a)
by
an
IC
limiter
amplifier.
The
output
of
this
amplifier
is
shaped
into
a
pulse
by
a
CR
differentiator
circuit
and
the
positive
pulse
of
Fig.
17-4
(Fig.
12-b)
is
extracted
by
means
of
a
diode
D,
(a)
t
7
(b)
C
OUtPUt
05)
C
Do
bf
pig
eT
@
One-shot
Multivibrator
Circuit
and
Integrating
Circuit
(Fig.
13)
The
positive
pulse
obtained
above
is
used
to
trigger
a
one-shot
multivibrator.
When
there
is
no
input
signal,
Qoo,
is
OFF
and
Qoos
is
ON
and
point
becomes
nearly
stable
due
to
the
voltage
drop
across
Ry,.
However,
when
a
positive
pulse
is
ap-
plied
to
the
input
of
the
multivibrator,
Qoos
is
turned
ON,
Qoos
is
turned
OFF
(Q,
collector
cur-
rent
doesn’t
flow)
and
the
voltage
of
point
@
rises
to
near
the
power
supply
voltage.
The
multi-
vibrator
remains
in
this
state
during
time
T,
deter-
mined
by
the
time
constant
of
C
and
R
and
then
returns
to
its
original
stable
state.
In
short,
positive
square
waves
equal
to
the
number
of
input
trigger
pulses
are
produced.
When
the
frequency
of
the
signal
generated
by
the
FG
circuit
changes
(motor
speed
changes),
the
spacing
T;
of
the
trigger
pulses
also
changes.
Looking
at
this
at
point
@),
the
output
is
different
for
the
time
interval
of
T,,
output
OV
as
shown
in
Fig.
17-5.
If
the
output
of
a
one-shot
multivibrator
is
passed
through
an
integrating
circuit
consisting
of
Rx
and
Cx,
when
the
closing
time
of
T,
is
long
as
illus-
trated
in
Fig.
17-6,
the
output
of
point
B
at
which
the
DC
has
changed
can
be
made
low
and
the
change
of
T,
(change
in
speed)
can
be
extracted
as
a
DC
voltage
change.
Moreover,
the
speed
(tape
speed)
may
also
be
changed
even
when
T,
is
changed
in
a
like
manner.
In
this
machine,
the
tape
speed
is
adjusted
by
changing
R.
Fig.
12
18
Trigger
pulse
input
"Fig,
13
©
Differential
Amplifier
The
DC
voltage
ADC
obtained
at
the
low-pass
filter
circuit
is
applied
to
the
differential
amplifier
of
Fig.
14
and
compared
with
the
reference
voltage.
The
difference
between
this
voltage
and
the
DC
voltage
obtained
at
the
correct
speed,
that
is,
the
voltage
component
produced
by
the
speed
error,
is
operated
differentially.
For
instance,
when
the
motor
speed
is
too
fast,
since
ADC
increases,
Ig,
increases,
the
voltage
of
point
A
rises,
Ig,
decreases,
and
AEo
also
de-
creases.
This
AEo
is
sent
to
the
drive
circuit.
Reference
voltage
Fig.
14
©
Drive
Circuit
The
drive
circuit
is
shown
in
Fig.
15.
Eo
of
the
differential
amplifier
is
the
input
of
Qoog.
When
AEo
is
reduced
(that
is,
when
the
speed
of
the
motor
is
fast),
the
collector
current
of
Qoos,
Qoog
and
Qojo
is
reduced
until,
finally,
the
internal
resistance
of
Qoo;
increases.
When
point
@)
has
become
positive,
the
current
path
from
the
AC
input
is
through
the
route
A
>
motor
winding
>
Dooi-2
+
Qs01
>
Door-3
>
®B)
and
when
point
(B
has
become
positive
it is
through
the
route
(B)
>
Dooi1
+
Qo01
>
Doora
>
motor
winding
>
@).
The
increase
in
the
internal
resist-
ance
of
Qo;
causes
the
motor
current
winding
cur-
rent
to
decrease
and
the
motor
speed
decreases
and
is
returned
to
an
accurate
speed.

+B
©
Brake
Circuit
The
brake
circuit
is
shown
in
Fig.
16.
Input
EA
of
Qo
is
the
collector
output
of
the
differential
am-
plifier
Qoo7
(Fig.
14).
Voltage
Ep
of
point
a
is
set
by
RA,
RB
so
that
it is
higher
than
Eg
at
the
rated
speed.
Consequently,
Qoi1,
Qoi2
and
the
SCR
are
turned
OFF
and
the
brake
is
not
operated.
If
it
is
assumed
that
the
tape
speed
has
been
switched
from
19cm/s
to
9.5cm/s,
for
example,
the
servo
circuit
detects
the
change
in
speed.
The
internal
resistance
of
Qoo;
of
Fig.
15
increases,
the
motor
winding
current
decreases
and
the
motor
speed
decreases.
Since
the
motor
is
unloaded
if
the
function
switch
on
the
tape
deck
is
set
to
a
posi-
tion
other
than
PLAY
(REC)
at
this
time,
it
is
rotated
by
the
inertial
energy
of
the
flywheel
and
the
rated
speed
is
not
reached
immediately
(this
machine
requires
about
10
seconds
to
reach
the
@
AC
input
/
\
©
Fig.
15
rated
speed).
The
increase
of
EA
when
the
speed
has
deviated
to
the
high
side
as
described
in
the
“Differential
amplifier’
section
is
utilized
to
im-
prove
on
this.
When
EA
>
Ep,
Qon,
Qo12
and
SCR
are
turned
ON,
DC
(pulsating)
flows
in
the
motor
winding
and
the
magnetic
brake
is
applied
to
the
motor
and
the
time
required
for
the
motor
to
drop
to
the
rated
speed
is
shortened.
The
brake
current
flows
through
the
following
route:
When
point
@
of
the
AC
input
has
become
posi-
tive:
@
>
motor
main
coil
>
motor
auxiliary
coil
>
Re
>
SCR
>
Doo-s
>B
When
point
(®)
has
become
positive,
the
SCR
acts
as
a
diode
and
reverse
current
doesn’t
flow
and
brake
current
doesn’t
flow.
AC
input
19

Frequency
too
low
(Rotation
too
slow)
Fig.
17-1
FG
Output
Fig.
17-2
Limiter
Output
Fig.
17-3
Differentiator
Output
Fig.
17-4
Trigger
Input
T3
——4
Fig.
17-5
One-shot
Multivibrator
Output
T
T
1
Te
1
Fig.
17-6
Integrator
Output
Too
low
Frequency
too
high
(Rotation
too
fast)
T3
—4
jo
Te’
4
T
Te!
Too
high
RT-707
Fig.
17
20

7.
DISASSEMBLY
7.1
BONNET
Remove
the
screws
1
~
8
on
the
each
side
of
the
bonnet,
then
remove
the
screws
9
~
10
as
shown
in
Fig.
18.
Fig.
18
7.2
REAR
PANEL
Remove
the
screws
1
~
9
to
detach
the
rear
panel,
then
remove
the
screw
10
for
ground
as
shown
in
Fig.
19.
Fig.
19
21
Other manuals for RT-707
2
Table of contents
Other Pioneer Tape Deck manuals

Pioneer
Pioneer RT-2022 User manual

Pioneer
Pioneer RT-909 User manual

Pioneer
Pioneer CT-970 User manual

Pioneer
Pioneer CT-F600 User manual

Pioneer
Pioneer CT-F850 User manual

Pioneer
Pioneer XC-IS21T User manual

Pioneer
Pioneer GT-X5 User manual

Pioneer
Pioneer CT-W505R User manual

Pioneer
Pioneer CT-980W User manual

Pioneer
Pioneer CT-9R User manual

Pioneer
Pioneer CT-200 User manual

Pioneer
Pioneer CT-A9 User manual

Pioneer
Pioneer CT-W704RS User manual

Pioneer
Pioneer CT-3 User manual

Pioneer
Pioneer CT-1060W User manual

Pioneer
Pioneer CT-F9191 User manual

Pioneer
Pioneer CT-770 User manual

Pioneer
Pioneer CT-F1050 User manual

Pioneer
Pioneer CT-520 User manual

Pioneer
Pioneer RT-909 User manual