Pioneer PDA-4001 User manual

1
<ARD1023>
Ja
IMPORTANT
The exclamation point within an equilateral
triangleisintendedtoalerttheusertothepresence
of important operating and maintenance
(servicing) instructions in the literature
accompanying the appliance.
CAUTION:
TO PREVENT THE RISK OF ELECTRIC SHOCK, DO
NOT REMOVE COVER (OR BACK). NO USER-SER-
VICEABLE PARTS INSIDE. REFER SERVICING TO
QUALIFIED SERVICE PERSONNEL.
Thelightningflashwith arrowhead symbol,within
an equilateral triangle, is intended to alert the
user to the presence of uninsulated "dangerous
voltage" within the product's enclosure that may
be of sufficient magnitude to constitute a risk of
electric shock to persons.
RISK OF ELECTRIC SHOCK
DO NOT OPEN
CAUTION
PDA-4001
赤外線軽減フィルター
IR REDUCTION FILTER
FILTRE DE RÉDUCTION INFRAROUGE
INFRAROTREDUKTIONSFILTER
FILTRO RIDUZIONE IR
INFRAROODREDUCTIEFILTER
FILTRO DE REDUCCIÓN DE INFRARROJOS
PDA-4002
保護フィルター
PROTECTION FILTER
FILTRE DE PROTECTION
SCHUTZFILTER
FILTRO DI PROTEZIONE
BESCHERMINGSFILTER
FILTRO DE PROTECCIÓN
取扱説明書
Operating Instructions
Mode d’emploi
Bedienungsanleitung
Istruzioni per l’uso
Gebruiksaanwijzing
Manual de instrucciones
日本語
English
Français
Deutsch
Italiano
Nederlands
Español

2
<ARD1023>
Ja
● パイオニアの製品をお買い求めいただきまして、まこと
にありがとうございます。
● ご使用の前に必ずお読みください。
取扱説明書に従って正しく安全にご使用ください。
● 取扱説明書は必ず保管してください。
「据付工事」について
¶本機は十分な技術・技能を有する専門業者が据付けを行
うことを前提に販売されているものです。据付け・取付
けは必ず工事専門業者または販売店にご依頼ください。
¶なお、据付け、取付けの不備、誤使用、改造、天災など
による事故損傷については、弊社は一切責任を負いませ
ん。
工事専門業者様へ
本製品の設置については、弊社発行のテクニカルマニュ
アルを熟読し、その内容を必ず守ってください。
指定外の組み立て、取り付け、使い方をされた場合、およ
び改造、天災などによる事故損傷については、弊社は一切
責任を負いません。
取扱上の注意
1. 本製品はパイオニアプラズマディスプレイ専用です。
2. 指定外のTV収納や改造および他の用途への使用はしな
いでください。
3. 組立て手順を守り、指定の箇所はすべてネジ止めしてく
ださい。
ディスプレイ取付け後に破損、転倒など思わぬ事故の原
因となることがあります。
■部品の確認
組立ての前に部品を確認してください。
D
4. 各部のネジをゆるめたりすると落下等の事故につながり
ますので、お手入れの際以外は絶対にゆるめないでくだ
さい。また、お手入れ後はネジを確実に締め付けてくだ
さい。
5. 異常や不具合が発見されたならば速やかに修理を工事専
門業者へ依頼してください。
1取付金具(4個) 2六角穴付ボタンボルト
M8×14(8個) 3ワッシャー(8個) 5飾りネジ(4個)
4フィルター(1枚)

3
<ARD1023>
Ja
2
2
2
33
3
3
1
2
1
2,32,3
11
D
1
1
5
4
5
受光部窓
イラストはPDP-V7です。
■取付手順
1. 矢印のホールリベット(8ヵ所)をコイン等で外します。 3. 取付金具の取付け状態(プラズマディスプレイ裏面より)
2. 六角穴付ボタンボルトとワッシャーを使い、取付金具を
プラズマディスプレイの下側に、外形に合わせて2個取
付けます。
4. フィルターの組立て
図のようにフィルターの受光部窓を下側にして置き、裏
側の保護フィルムをはがし、フィルターの上側2ヵ所に
取付け金具1を図のような向きにして飾りネジで取り
付けます。

4
<ARD1023>
Ja
D
D
2,32,311
2
3
5
2
3
5
5. フィルターの取付け
手順 4. で組み立てたフィルターをプラズマディスプレ
イの上側から取付け金具を引っかけるように取付けま
す。
このときフィルターの下側はプラズマディスプレイに取
付けられている取付け金具の外側になるように飾りネジ
で固定します。
必ず上側から取付けてください。
7. フィルター取付け状態(正面)
すべての取付けが終了しましたら、前面の保護フィルム
をはがしてご使用ください。
6. 取付金具の取付け状態(プラズマディスプレイ裏面より)
8. お手入れ
フィルターの表面は、反射防止を目的とした特殊なコー
ティング処理が施されているため、非常にデリケートで
す。お手入れは、ほこりを払い落とした後、柔らかい布
で軽くふき取ってください。ティッシュペーパーや固い
ものでふかないでください。
また、本フィルターのお手入れにベンジン、シンナーな
どの溶剤は絶対に使用しないでください。フィルターが
不透明になったり、変色したりします。
フィルターの内側が汚れた場合は、飾りネジを外すこと
により、フィルター自身を取り外すことができます。こ
の場合は必ず下側から飾りネジを外してください。
お手入れについては、フィルターに傷等をつけないよう
注意しながら、外側と同様に行ってください。
フィルターの取付けは、取外す時とは逆の手順で、必ず
上側の飾りネジから取付けてください。順序が入れ換わ
りますと、フィルターに傷を付けたり取付金具を変形さ
せる恐れがありますので十分に注意してください。ま
た、ネジは確実に締め付けてください。

5
<ARD1023>
Ja
■外観寸法
フィルター質量:3.6kg
フィルター質量+ディスプレイ質量:34.4kg
(PDP-V7取付時)
D
104 104590 73.3
718.2
3(フィルター厚さ)
707
908

6
<ARD1023>
En/Fr
÷We greatly appreciate your purchase of this Pioneer prod-
uct.
÷Be sure to read these instructions before using this prod-
uct. Follow these instructions carefully, and use the prod-
uct properly and safely.
÷Store these instructions in a safe place.
Installation
÷This product is sold with the understanding that it will
be installed by a specialist with the proper technical
skills. Be sure to have it installed by a specialist or your
store of purchase.
÷Pioneer will accept no responsibility for accidents or
damage due to improper installation, misuse, alteration
or natural disasters.
To the Installation Specialist
When installing this product, carefully read and follow the
instructions in the technical manual issued by Pioneer.
Pioneer will accept no responsibility for accidents or dam-
age due to improper assembly, improper installation, mis-
use, alteration or natural disasters.
Cautions on Handling
1. This product is designed exclusively for use with a Pio-
neer plasma display.
2. Do not use this product on other TVs, and do not alter it
or use it for other applications.
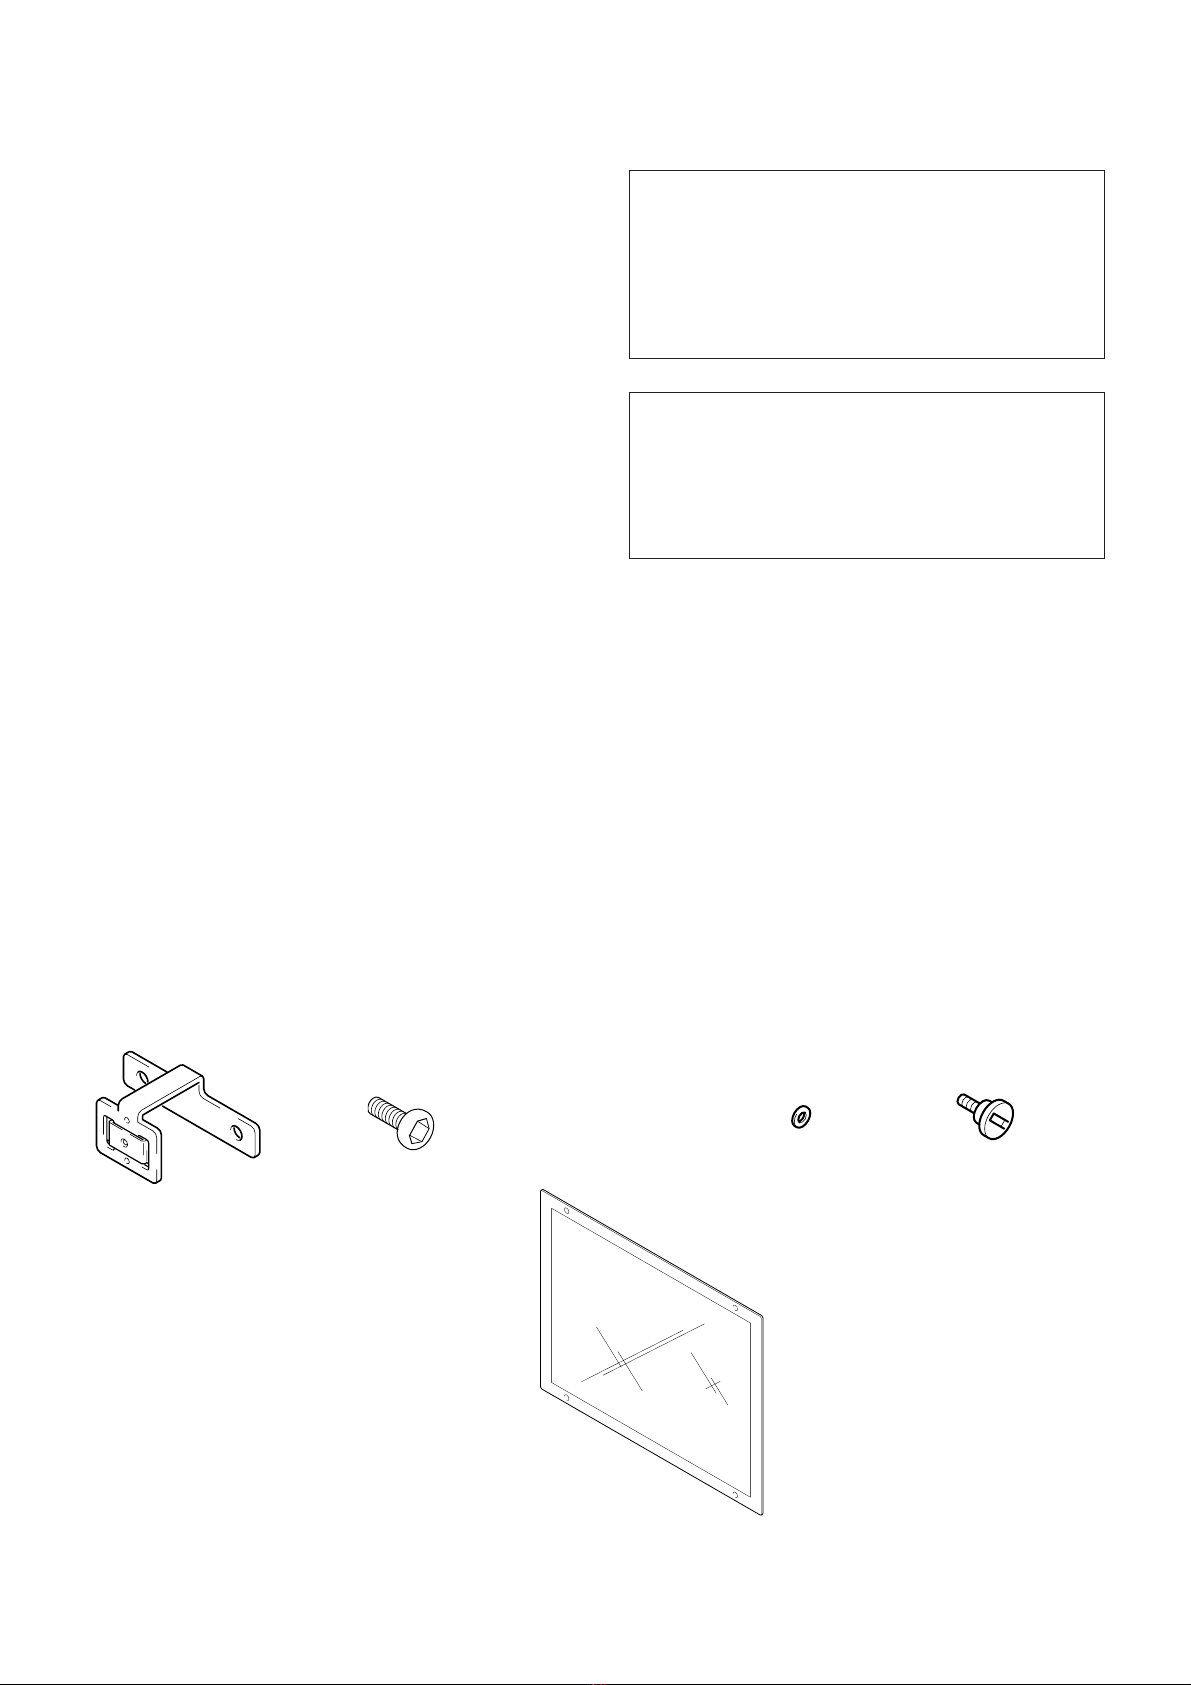
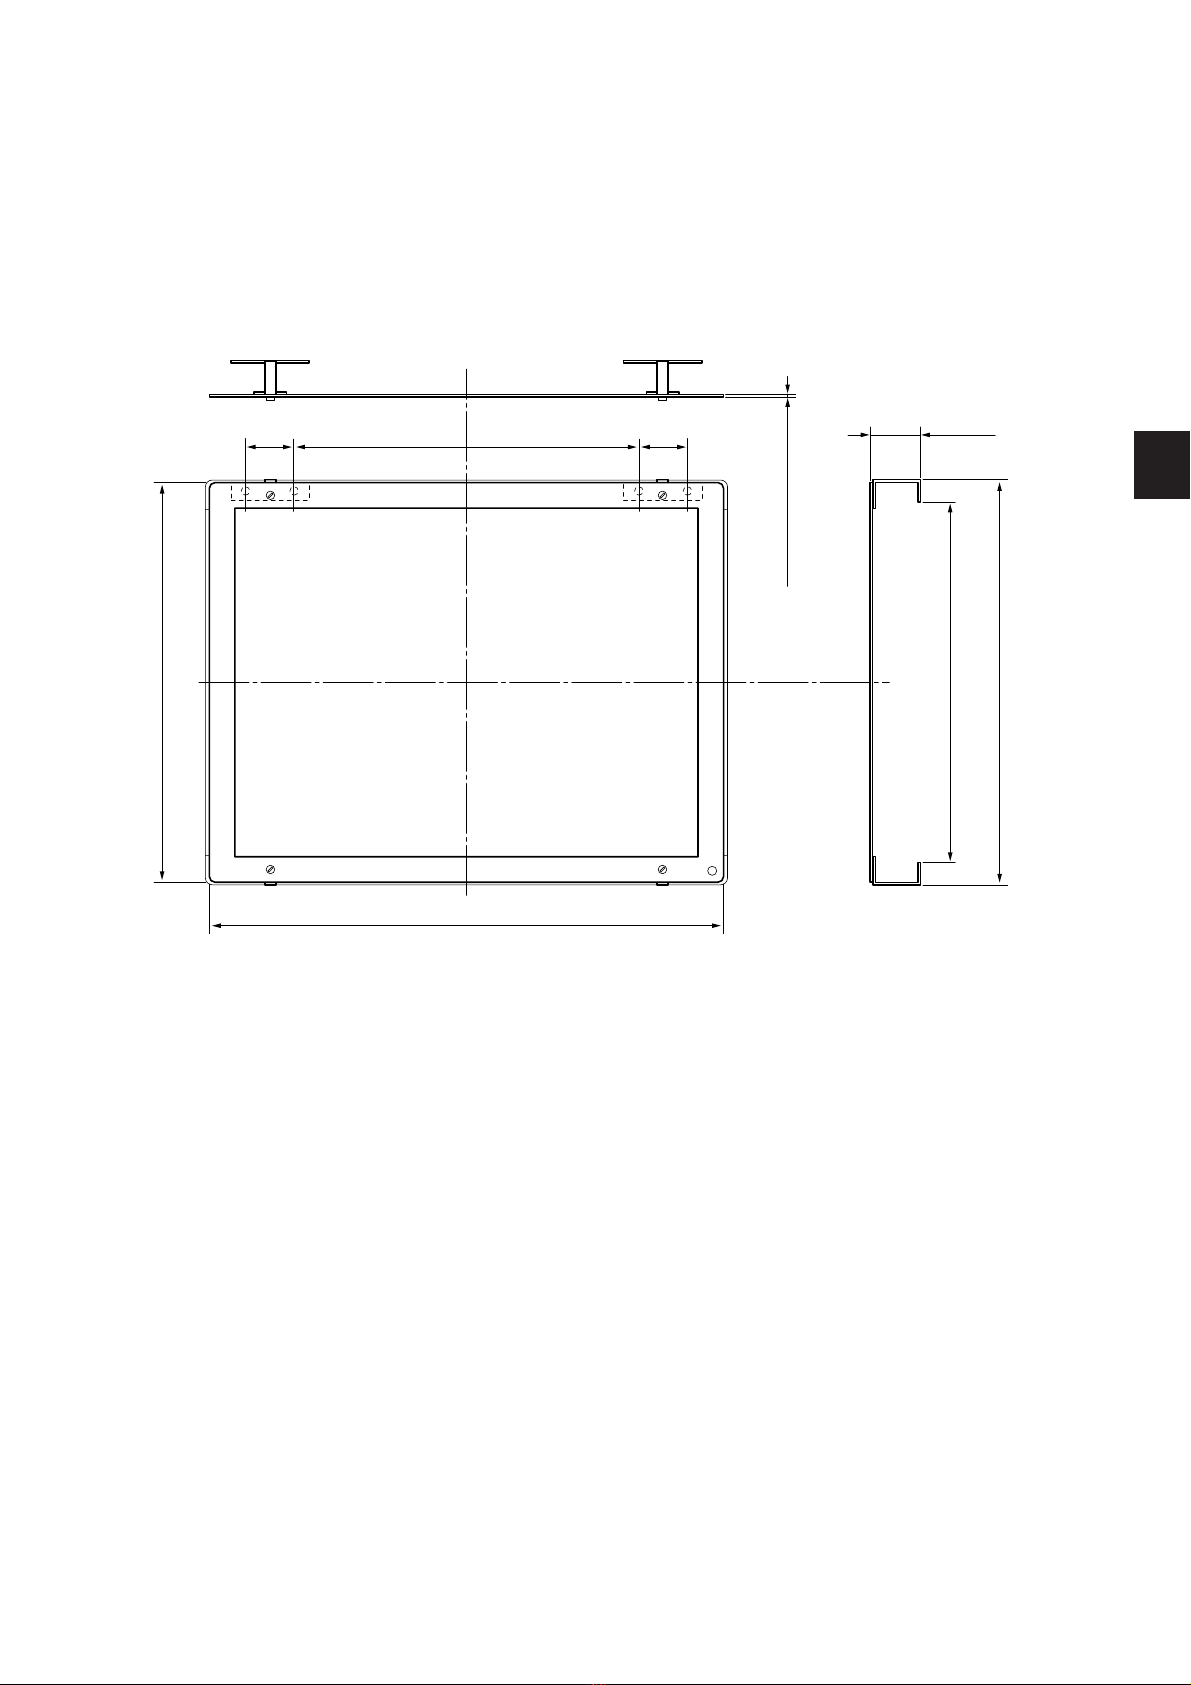
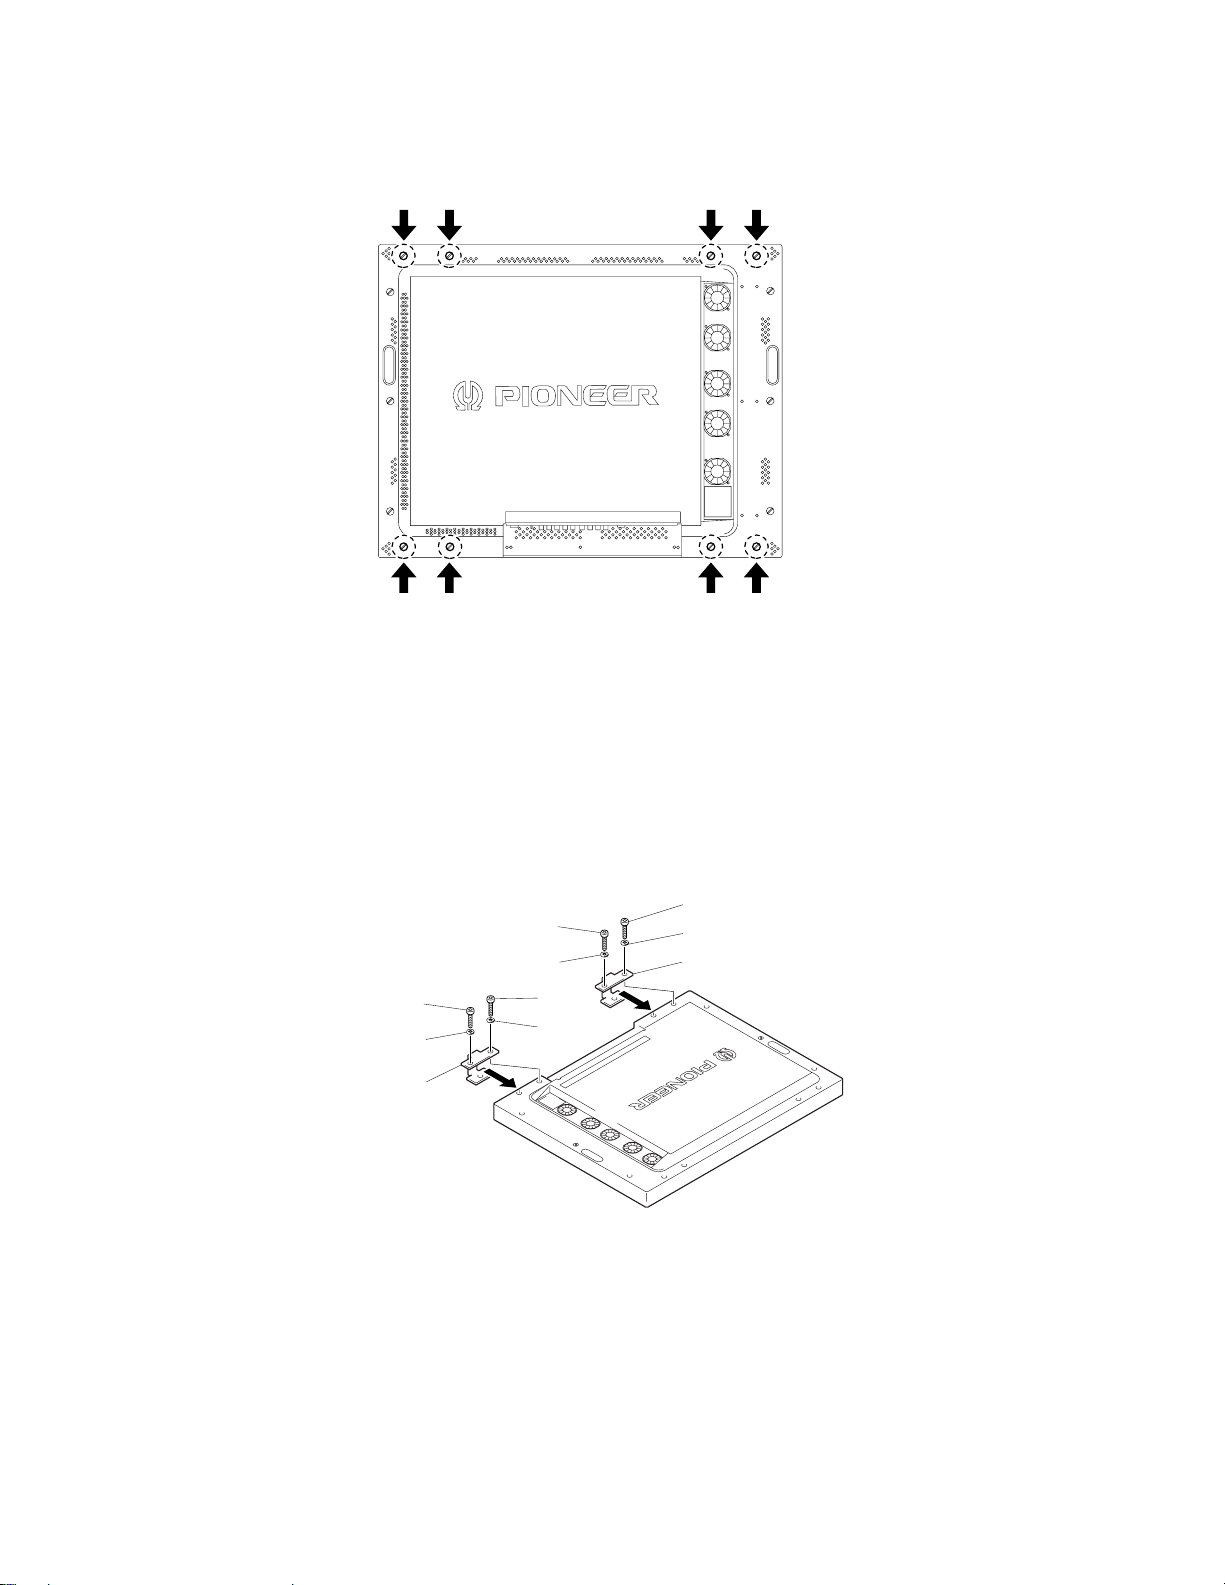
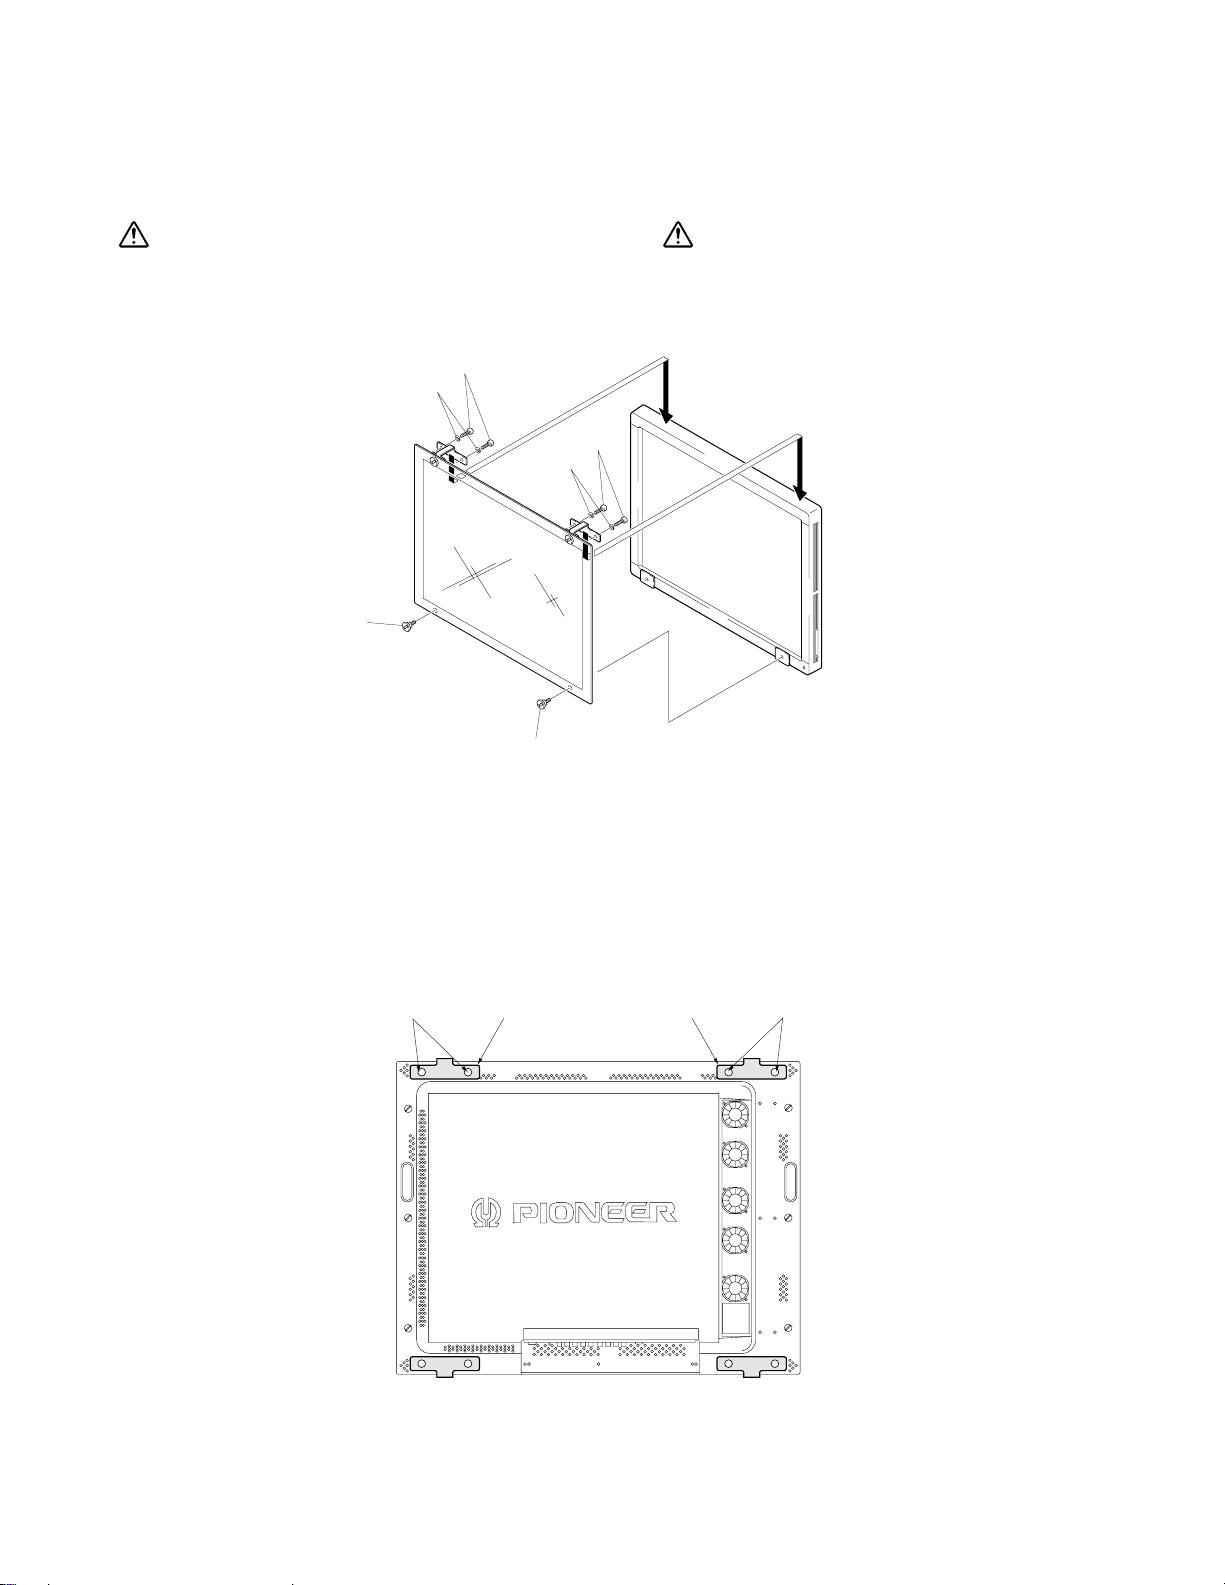
3. Heed the assembly procedures and fasten all specified
parts with screws.
Failure to do so may result in damage, tipping or other
accidents after installation of the display.
4. Never loosen screws other than for maintenance pur-
poses as doing so may result in dropping of the unit or
other accidents.
After maintenance, make sure that all screws are securely
tightened.
5. Should you discover any abnormalities or problems, con-
tact a specialist immediately for repairs.
÷Nous vous remercions vivement d’avoir porté votre choix
sur cet appareil Pioneer.
÷Lisez ce mode d’emploi avant d’utiliser l’appareil et
respectez scrupuleusement ses instructions. Veillez aussi
à utiliser l’appareil correctement et en toute sécurité.
÷Rangez ce mode d’emploi dans un endroit sûr.
Installation
÷Cet appareil est vendu dans l’intention d’être installé
par un spécialiste possédant les compétences tech-
niques appropriées. Confiez donc son installation à un
technicien qualifié ou à votre revendeur.
÷Pioneer ne pourra pas être tenu pour responsable des
accidents ou dommages résultant d’une installation ou
d’un usage incorrect de l’appareil, d’une altération de
celui-ci ou d’une catastrophe naturelle.
A l’attention du technicien installateur
Lorsque vous installez cet appareil, lisez et respectez
scrupuleusement les instructions du manuel technique
fourni par Pioneer.
Pioneer ne pourra pas être tenu pour responsable des ac-
cidents ou dommages résultant d’un montage, d’une in-
stallation ou d’un usage incorrect de l’appareil, d’une
altération de celui-ci ou d’une catastrophe naturelle.
Précautions de manipulation
1. Cet appareil est spécialement conçu pour être utilisé
exclusivement avec un écran plasma Pioneer.
2. Ne l’installez donc pas sur d’autres téléviseurs. Evitez
aussi de le modifier ou de l’utiliser à d’autres fins.
3. Respectez les procédures de montage et fixez toutes
les pièces spécifiées à l’aide des vis afin d’éviter
d’endommager l’appareil, d’entraîner sa chute ou de
provoquer un accident après son installation.
4. Ne desserrez jamais les vis, sauf en cas de maintenance.
En effet, vous risqueriez de provoquer la chute de
l’appareil ou tout autre accident.
Une fois la maintenance terminée, vérifiez si toutes les
vis sont correctement serrées.
5. En présence d’une anomalie ou d’un problème, faites
immédiatement réparer l’appareil par un technicien.

7
<ARD1023>
En/Fr
7Included Parts
Check that all the following parts are included before assem-
bling.
D
1
7Pièces fournies d’origine
Avant de monter l’appareil, assurez-vous que l’emballage
comprend toutes les pièces ci-dessous :
1Fittings (4)
2Button bolts with hexagonal holes M8 ×4 (8)
3Washers (8)
4Filter (1)
5Ornamental screws (4)
1Raccords (4)
2Boulons à tête ronde avec orifices hexagonaux M8 ×4
(8)
3Rondelles (8)
4Filtre (1)
5Vis décoratives (4)
23
4
5

8
<ARD1023>
En/Fr
2
2
2
33
3
3
1
2
1
7Installation Procedure
1. Use a coin, etc., to remove the hole rivets (8) indicated
by arrows.
This illustration is for the PDP-V401 or PDP-V401E.
Cette illustration s’applique au PDP-V401 ou au PDP-V401E.
2. Mount two fittings snugly on the bottom of the plasma
display using the button bolts with hexagonal holes and
washers.
7Procédure d’installation
1. A l’aide d’une pièce de monnaie ou d’un objet similaire,
déposez les rivets des orifices (8) désignés par des
flèches.
2. Fixez solidement deux raccords au bas de l’écran plasma
à l’aide des boulons à tête ronde avec orifices hexagonaux
et des rondelles.

9
<ARD1023>
En/Fr
2,32,3
11
D
1
1
5
4
5
Sensor window
Fenêtre de détection
3. Once mounted, the fittings should appear as shown on
the diagram below (seen from the rear of the plasma
display).
3. Une fois fixés, les raccords doivent apparaître de la
manière illustrée ci-dessous (vue de dos de l’écran
plasma).
4. Filter assembly
As shown on the diagram below, set the filter with the
sensor window at the bottom, peel off the protective
film from the back side, position the two remaining fit-
tings 1at the top of the filter in the direction shown on
the diagram, and mount them using the ornamental
screws.
4. Montage du filtre
Positionnez le filtre en orientant la fenêtre de détection
vers le bas, comme illustré sur le schéma ci-dessous,
détachez le film de protection situé au dos du filtre,
installez les deux derniers raccords 1sur le dessus du
filtre, dans la direction illustrée ci-dessous, puis fixez-les
à l’aide des vis décoratives.

10
<ARD1023>
En/Fr
D
2,32,311
2
3
5
2
3
5
5. Filter installation
Mount the filter assembled in step 4 to the plasma dis-
play by catching the fittings on the top of the display.
Fasten the filter in place with the ornamental screws in
such a way that the bottom of the filter is on the outer
side of the fittings mounted on the plasma display.
Be sure to mount from the top side first.
5. Installation du filtre
Installez le filtre assemblé au point 4 sur l’écran plasma
en saisissant les raccords situés sur le dessus de l’écran.
Fixez le filtre en place à l’aide des vis décoratives en
veillant à placer sa partie inférieure sur la face extérieure
des raccords montés sur l’écran plasma.
Veillez à fixer la partie supérieure en premier.
6. Once mounted, the fittings should appear as shown on
the diagram below (seen from the rear of the plasma
display).
6. Une fois fixés, les raccords doivent apparaître de la
manière illustrée ci-dessous (vue de dos de l’écran
plasma).

11
<ARD1023>
En/Fr
D
7. The filter should appear as shown on the diagram below
(seen from the front).
Once everything is mounted, peel off the protective film
from the front side.
7. Le filtre doit être monté de la manière illustrée ci-dessous
(vue de face).
Dès que toutes les pièces sont installées, détachez le
film de protection de la face avant du filtre.
8. Cleaning
The back side of the filter has a special coating designed
to prevent reflection. This coating is extremely delicate.
Clean by first removing the dust then wiping gently with
a soft cloth. Do not wipe with tissue paper or other hard
objects. In addition, never use benzene, thinner or other
solvents to clean the filter. Doing so may harm the filter’s
transparency or discolor it.
If the inner side of the filter is dirty, remove the orna-
mental screws, then remove the filter itself. Be sure to
remove the ornamental screws from the bottom first.
Clean the inner side of the filter in the same way as the
outer side, being careful not to scratch it.
Reinstall the filter using the removal procedure in the
opposite order, being sure to mount the ornamental
screws on the top first. Note that failure to follow the
proper procedure may scratch the filter or deform the
fittings.
Make sure that all screws are securely tightened.
8. Nettoyage
Le dos du filtre est équipé d’un revêtement spécial anti-
reflets qui est extrêmement délicat. Pendant le
nettoyage, éliminez d’abord les poussières, puis frottez
délicatement le filtre à l’aide d’un linge doux. N’utilisez
pas de mouchoir en papier ou autre objet dur. Ne nettoyez
jamais le filtre avec du benzène, du thinner ou tout autre
solvant, car vous risqueriez d’altérer sa transparence ou
de le décolorer.
Si la partie intérieure du filtre est sale, déposez les vis
décoratives, en commençant toujours par celles du bas,
puis retirez le filtre proprement dit. Nettoyez l’intérieur
du filtre de la même manière que l’extérieur en veillant à
ne pas le griffer. Remontez ensuite le filtre dans l’ordre
inverse du démontage et en serrant d’abord les vis
décoratives supérieures. Notez que si vous ne respectez
pas la procédure correcte, vous risquez de griffer le filtre
ou de déformer les raccords.
Vérifiez si toutes les vis sont correctement serrées.

12
<ARD1023>
En/Fr
7External dimensions
Filter weight : 3.6 kg
Filter weight + display weight (when installed on PDP-V401) : 34.4 kg
Filter weight + display weight (when installed on PDP-V401E): 35.2 kg
D
104 104590 73.3
718.2
3 (filter thickness)
707
908
En

13
<ARD1023>
En/Fr
7Dimensions extérieures
Poids du filtre : 3.6 kg
Poids du filtre + poids de l’écran (en cas d’installation sur le PDP-V401) : 34.4 kg
Poids du filtre + poids de l’écran (en cas d’installation sur le PDP-V401E) : 35.2 kg
D
104 104590 73.3
718.2
3 (Epaisseur du filtre)
707
908
Fr

14
<ARD1023>
Ge/It
÷Wir danken Ihnen für den Kauf dieses Pioneer-Produkts.
÷Lesen Sie vor Benutzung dieses Produkts unbedingt
diese Anleitung. Befolgen Sie diese Anleitung sorgfältig,
und verwenden Sie das Produkt sachgemäß und sicher.
÷Bewahren Sie diese Anleitung sicher auf.
Installation
÷Dieses Produkt wird unter der Voraussetzung verkauft,
daß es von einem Spezialisten mit den entsprechenden
technischen Fähigkeiten installiert wird. Lassen Sie das
Produkt unbedingt von einem Spezialisten oder von
Ihrem Fachhändler installieren.
÷Pioneer übernimmt keinerlei Haftung für Unfälle oder
Schäden aufgrund unsachgemäßer Installation,
Mißbrauch, Veränderung des Produkts oder
Naturkatastrophen.
An den Einbauspezialisten
Sie beim Einbau sorgfältig die Anleitungen im von Pioneer
herausgegebenen technischen Handbuch.
Pioneer übernimmt keinerlei Haftung für Unfälle oder
Schädenaufgrund unsachgemäßerInstallation, Mißbrauch,
Veränderung des Produkts oder Naturkatastrophen.
Vorsichtsmaßnahmen bei der
Handhabung
1. Diese Produkt wurde ausschließlich für die Verwendung
mit einem Pioneer-Plasmabildschirm entwickelt.
2. Verwenden Sie dieses Produkt nicht für andere
Fernsehgeräte, verändern Sie es nicht, und benutzen Sie
es nicht für andere Zwecke.
3. Befolgen Sie das Montageverfahren, und befestigen Sie
alle angegebenen Teile mit Schrauben.
Geschieht dies nicht, kann es nach Installation des
Bildschirms zu Beschädigungen kommen, das Gerät kann
umfallen, oder es kann zu anderen Beschädigungen
kommen.
4. Schrauben dürfen nur zu Wartungszwecken gelöst
werden, da sonst das Gerät herunterfallen oder es zu
anderen Unfällen kommen könnte.
Ziehen Sie nach Abschluß der Wartung alle Teile fest an.
5. Sollten Sie Störungen oder Probleme feststellen, wenden
Sie sich unverzüglich zwecks Reparatur an einen
Spezialisten.
÷Ci congratuliamo con voi per l’acquisto di questo prodotto
Pioneer.
÷Leggere attentamente le istruzioni prima di utilizzare
questo prodotto. Seguire attentamente le istruzioni ed
utilizzare il prodotto in modo corretto e sicuro.
÷Conservare le istruzioni in un luogo sicuro.
Installazione
÷Questo prodotto è venduto con il presupposto che sia
installato da uno specialista in possesso delle
conoscenze necessarie. Per l’installazione, rivolgersi ad
un incaricato del negozio in cui è stato acquistato
l’apparecchio.
÷La Pioneer non si assumerà alcuna responsabilità per
incidenti o danni dovuti ad installazione non corretta,
uso diverso da quello previsto, manomissione o eventi
di forza maggiore.
Avvertenze per l’installatore
In sede di installazione, leggere attentamente e seguire le
istruzioni contenute nel manuale tecnico pubblicato dalla
Pioneer.
La Pioneer non si assumerà alcuna responsabilità per
incidenti o danni dovuti ad installazione non corretta, uso
diverso da quello previsto, manomissione o eventi di forza
maggiore.
Precauzioni per la
movimentazione
1. Questo prodotto deve essere utilizzato soltanto con un
display al plasma Pioneer.
2. Non applicare questo prodotto ad altri televisori. Non
manometterlo e non utilizzarlo per applicazioni diverse.
3. Leggere le istruzioni di montaggio e serrare tutte le parti
specificate con le viti.
Una procedura errata può provocare danni, ribaltamento
o altri inconvenienti ad installazione del display avvenuta.
4. Per evitare la caduta dell’unità o altri incidenti non allentare
mai le viti, tranne che in sede di manutenzione.
Al termine della manutenzione, accertarsi che tutte le
viti siano saldamente serrate.
5. Se si manifestano anomalie o altri problemi, rivolgersi
immediatamente ad uno specialista per le necessarie
riparazioni.

15
<ARD1023>
Ge/It
D
1
1Beschläge (4)
2Rundkopfschrauben mit Innensechskant M8 ×4 (8)
3Unterlegscheiben (8)
4Filter (1)
5Zierschrauben (4)
23
4
5
7Mitgelieferte Teile
Kontrollieren Sie vor der Montage, ob folgende Teile
vorhanden sind.
7Elenco delle componenti
Controllare la presenza delle componenti sottoindicate prima
di procedere al montaggio.
1Raccordi (4)
2Bulloni ad esagono incassato M8 ×4 (8)
3Rondelle (8)
4Filtro (1)
5Viti ornamentali (4)

16
<ARD1023>
Ge/It
7Einbauverfahren
1. Entfernen Sie mittels einer Münze, o.ä., die durch Pfeile
angedeuteten Nieten (8).
2. Bringen Sie mit den Rundkopfschrauben mit
Innensechskant und den Unterlegscheiben zwei
Beschläge bündig an der Unterkante des
Plasmabildschirms an.
2
2
2
33
3
3
1
2
1
Diese Abbildung bezieht sich auf PDP-V401 oder PDP-V401E.
Questa figura si riferisce ai modelli PDP-V401 e PDP-V401E.
7Procedura per l’installazione
1. Utilizzare una monetina ecc. per togliere i rivetti dei fori (8)
indicati dalle frecce.
2. Montare i due raccordi senza gioco sul fondo del display
al plasma utilizzando i bulloni ad esagono incassato e le
rondelle.

17
<ARD1023>
Ge/It
2,32,3
11
D
1
1
5
4
5
Sensorfenster
Finestra del sensore
3. Nach erfolgter Montage sollten die Beschläge so
aussehen, wie in der Abbildung gezeigt (von der
Rückseite des Plasmabildschirms aus gesehen).
3. Una volta montati, i raccordi devono apparire come
illustrato nello schema sottoriportato (visto dalla parte
posteriore del display al plasma).
4. Montage des Filters
Drehen Sie den Filter, wie in der Abbildung gezeigt, so,
daß sich das Sensorfenster unten befindet, ziehen Sie
die Schutzfolie von der Rückseite ab, positionieren Sie
die beiden verbleibenden Beschläge 1oben auf dem
Filter, in der in der Abbildung gezeigten Richtung, und
befestigen Sie sie mittels der Zierschrauben.
4. Assemblaggio del filtro
Come illustrato nello schema sottoriportato, posizionare
il filtro con la finestra del sensore sul fondo, rimuovere la
pellicola protettiva dal lato posteriore, posizionare i due
raccordi rimanenti 1sulla parte superiore del filtro nella
direzione mostrata nello schema e fissarli con le viti
ornamentali.

18
<ARD1023>
Ge/It
D
2,32,311
2
3
5
2
3
5
5. Einbau des Filters
Bringen Sie den in Schritt 4 montierten Filter am
Plasmabildschirm an, indem Sie die Beschläge von oben
über den Bildschirm schieben.
Befestigen Sie den Filter mit den Zierschrauben so, daß
die Unterkante des Filters sich außen auf den am
Plasmabildschirm angebrachten Beschlägen befindet.
Befestigen Sie unbedingt zuerst die Oberseite.
5. Installazione del filtro
Montare il filtro assemblato come indicato al punto 4 sul
display al plasma afferrando i raccordi sulla parte superiore
del display.
Fissare il filtro in posizione con le viti ornamentali in modo
che il fondo del filtro si trovi sul lato esterno dei raccordi
montati sul display al plasma.
Applicare per prima la parte superiore.
6. Nach erfolgter Montage sollten die Beschläge so
aussehen, wie in der Abbildung gezeigt (von der
Rückseite des Plasmabildschirms aus gesehen).
6. Una volta montati, i raccordi devono apparire come
illustrato nello schema sottoriportato (visto dalla parte
posteriore del display al plasma).

19
<ARD1023>
Ge/It
D
8. Reinigung
Die Rückseite des Filters ist mit einer
Spezialbeschichtung versehen, die Reflexionen
verhindern soll. Diese Beschichtung ist äußerst
empfindlich. Reinigen Sie sie, indem Sie zunächst den
Staub entfernen und sie dann mit einem weichen Tuch
vorsichtig abwischen. Verwenden Sie auf keinen Fall
Küchenpapier oder andere harte Gegenstände.
Verwenden Sie zu Reinigung des Filters außerdem
niemals Benzin, Verdünner oder andere Lösungsmittel.
Die Transparenz des Filters könnte beeinträchtigt oder
er könnte entfärbt werden.
Sollte die Innenseite des Filters verschmutzt sein,
entfernen Sie die Zierschrauben und nehmen Sie dann
den Filter selbst ab. Entfernen Sie unbedingt zuerst die
unteren Zierschrauben.
Reinigen Sie die Innenseite des Filters auf die gleiche
Weise, wie die Außenseite, vermeiden Sie Kratzer.
Setzen Sie den Filter wieder ein, indem Sie in
umgekehrter Reihenfolge des Ausbauverfahrens
vorgehen, bringen Sie unbedingt die oberen
Zierschrauben zuerst an. Beachten Sie, daß bei
Nichtbefolgung des vorgeschriebenen Verfahrens der
Filter verkratzt oder die Beschläge verbogen werden
könnten.
Vergewissern Sie sich, daß alle Schrauben fest
angezogen sind.
8. Pulizia
La parte posteriore del filtro presenta uno speciale
rivestimentorealizzato perprevenire lariflessione. Questo
rivestimento è estremamente delicato. Pulirlo
rimuovendo prima la polvere, poi passando delicatamente
un panno umido. Non utilizzare un panno di carta o altri
oggetti duri. Non utilizzare inoltre benzene, diluente o
altri solventi per pulire il filtro, per non alterare la
trasparenza del filtro o farlo scolorire.
Se il lato interno del filtro è sporco, togliere le viti
ornamentali e smontare il filtro. Controllare di aver
rimosso prima le viti ornamentali dal fondo.
Pulire la parte interna del filtro procedendo come per la
parte esterna e prestando attenzione a non graffiare il
filtro.
Reinstallare il filtro procedendo nella sequenza inversa,
controllando di montare prima le viti ornamentali sulla
parte superiore. Notare che, se non si segue la procedura
corretta, si rischia di graffiare il filtro oppure deformare i
raccordi.
Accertarsi che tutte le viti siano saldamente serrate.
7. Der Filter sollte aussehen, wie in der Abbildung unten
gezeigt (von vorne gesehen).
Ziehen Sie nach vollständiger Montage die Schutzfolie
von der Vorderseite ab.
7. Il filtro deve apparire come illustrato nello schema
sottoriportato (visto dalla parte anteriore).
Dopo aver montato tutte le parti, rimuovere la pellicola
protettiva dal lato anteriore.

20
<ARD1023>
Ge/It
7Äußere Abmessungen
Gewicht des Filters: 3.6 kg
Gewicht des Filters + Gewicht des Bildschirms (bei Montage an PDP-V401) : 34.4 kg
Gewicht des Filters + Gewicht des Bildschirms (bei Montage an PDP-V401E) : 35.2 kg
D
104 104590 73.3
718.2
3 (Filterdicke)
707
908
Ge
This manual suits for next models
1
Table of contents
Popular Water Filtration System manuals by other brands

Veolia
Veolia Hydrotech Discfilter HPF2200 Series Operation and maintenance manual

Culligan
Culligan HF-360 Installation and operating instructions

Brita
Brita On tap Instructions for use

Beko
Beko BEKOMAT 31U Instructions for installation and operation

Kimseed
Kimseed Vacuum Separator operating manual

Magnetic
Magnetic NF 2 plus Instructions for use