TOOLS
13
TOOLS
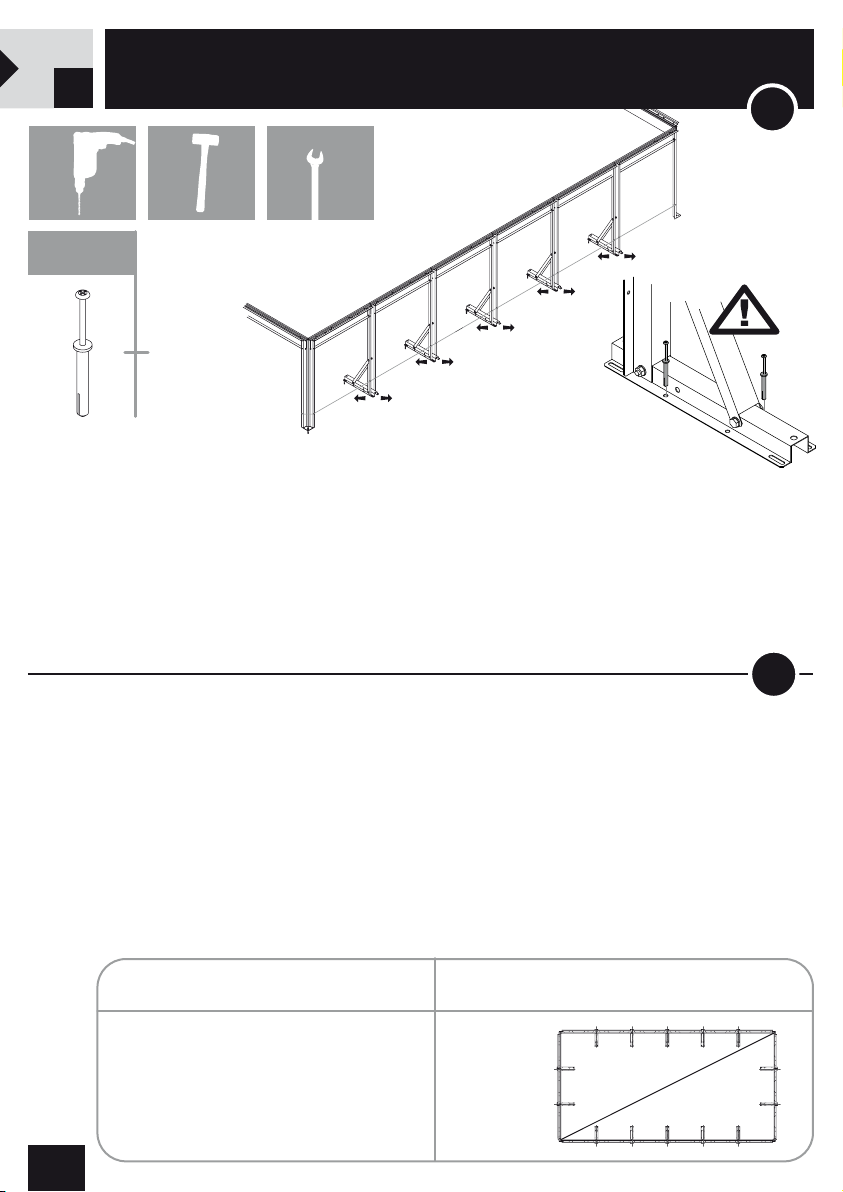
Utilizzando un filo teso tra i due piantoni ad angolo, procedere
ad allineare i piedi della struttura fino ad ottenere un lato dritto e tassellare.
Using a wire stretched between the two corner columns, align the foot structure
to obtain a straight side and fix it to the ground with anchors.
A l'aide d'un fil tendu entre les deux pieds d'angle, ajuster les pieds de la structure
jusqu'à ce que vous obteniez un alignement parfait et fixer avec les chevilles.
Befestigen Sie eine Schnur an den Eckpfosten auf der unteren Seite des Gestells.
Richten Sie die Gestellfüsse so aus, dass sie in einer Reihe stehen.
Befestigen Sie eine Gestellreihe mit Dübeln am Boden.
TOOLS
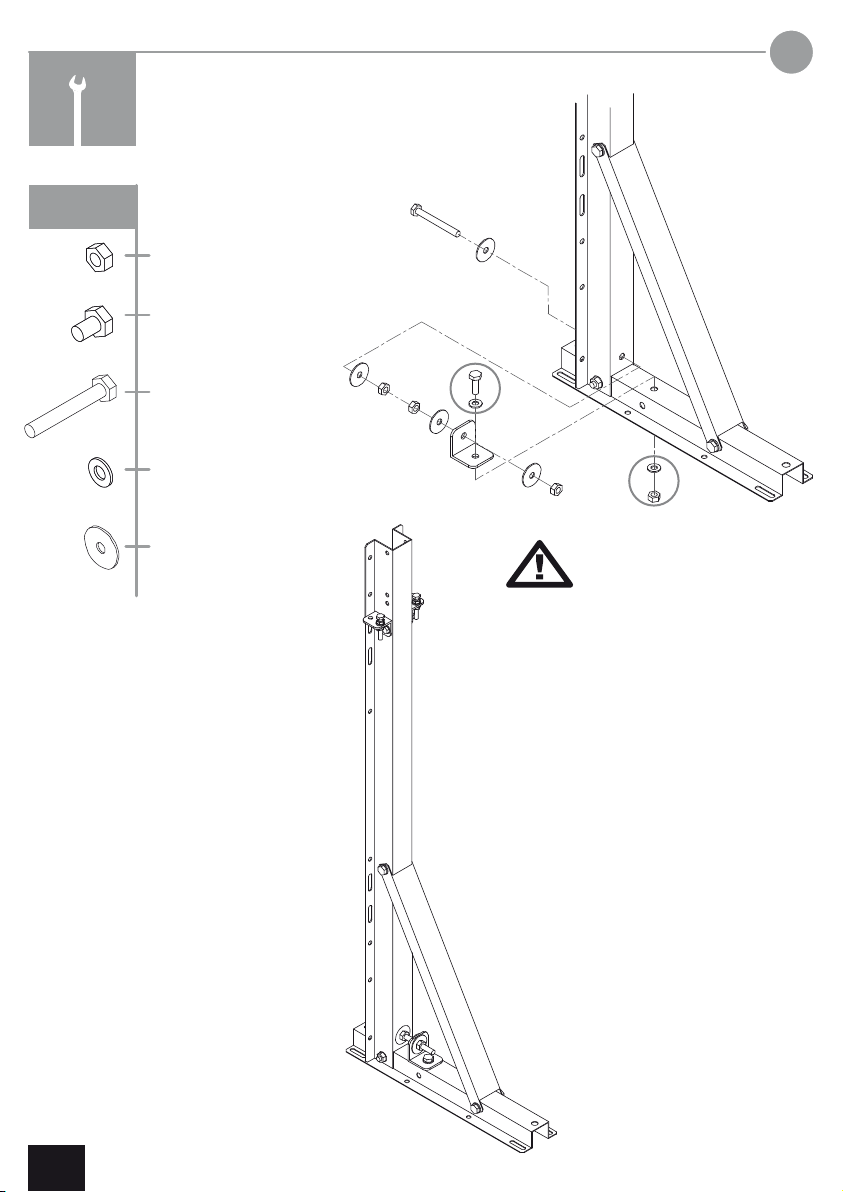
LEGENDA
ø 8 x 60
Misurando le due diagonali che devono essere uguali (come da misura in tabella),
regoliamo la posizione dei 4 angoli, in modo da ottenere i giusti riferimenti
per allineare i restanti 3 lati della piscina e tasselliamoli al fondo.
By measuring the two diagonals that must be the same (as in the table’s size)
adjust the position of the 4 corners, so you get the right references to align the remaining
3 sides of the pool. Then fix it to the ground with anchors.
Les deux diagonales doivent être parfaitement identiques (cf dimensions du tableau),
ajuster la position des 4 angles, afin d’obtenir les bonnes côtes de façon à pouvoir aligner
les 3 côtés restant et les fixer au sol avec des chevilles.
Messen Sie die beiden Diagonalen und richten Sie die Ecken so aus, dass die Diagonalen
gleich sind (siehe Tabelle).
SPECCHIO ACQUA DIAGONALE
water size - miroir d'eau - Wasserfläche diagonal - diagonale - Diagonale
m. 3 x 5 m. 5,831
m. 3 x 6 m. 6,708
m. 3 x 7 m. 7,616
m. 4 x 8 m. 8,944
m. 4 x 9 m. 9,849
m. 5 x 10 m. 11,18
ALLINEAMENTO STRUTTURA
Structure alignment
Alignement de la structure - Ausrichtung der Struktur
WOODY
RATTAN
DIVA
ALL
p. 08
2
1