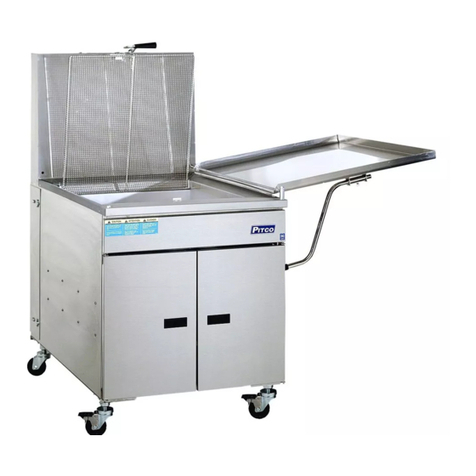
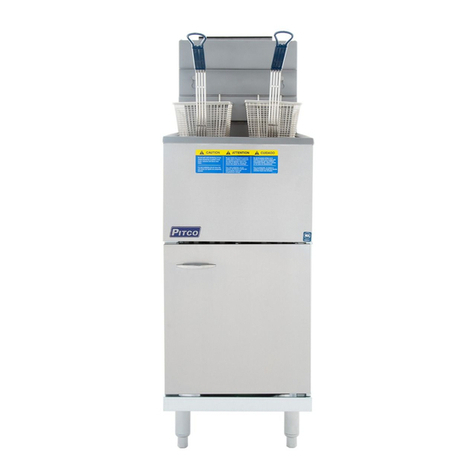
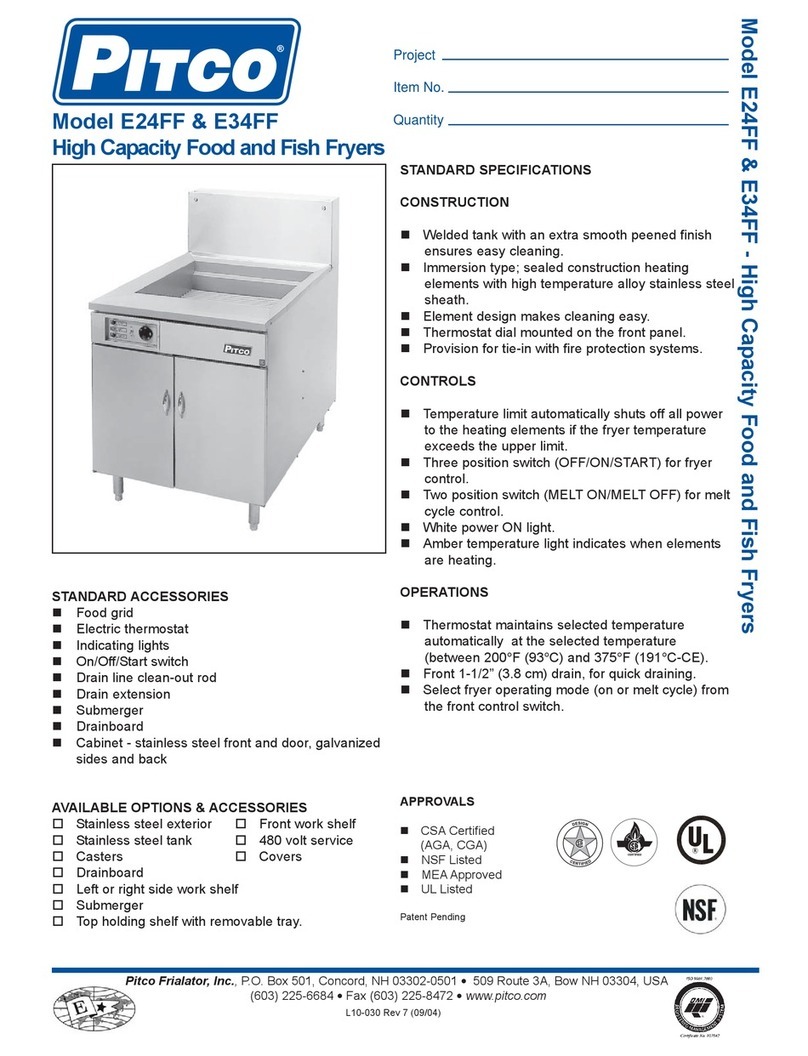
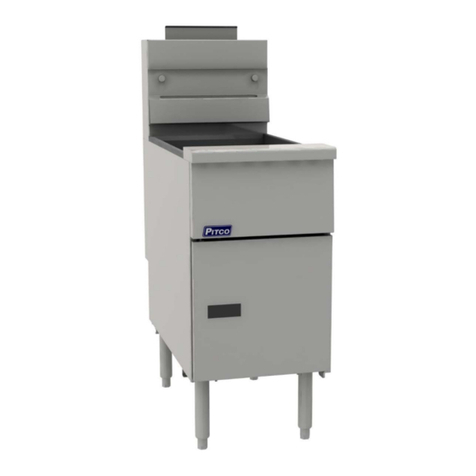
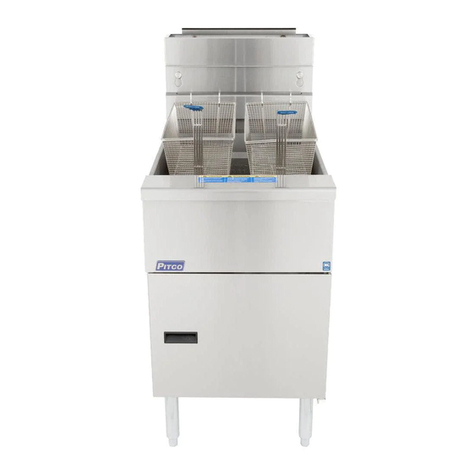
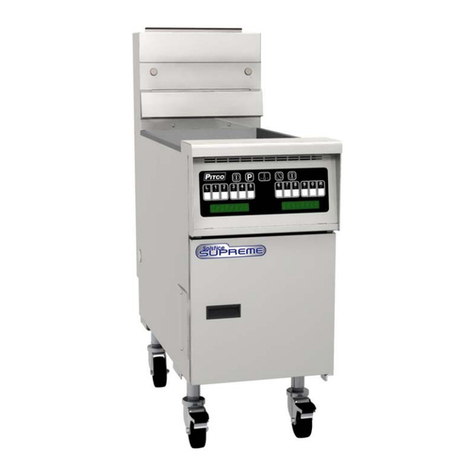
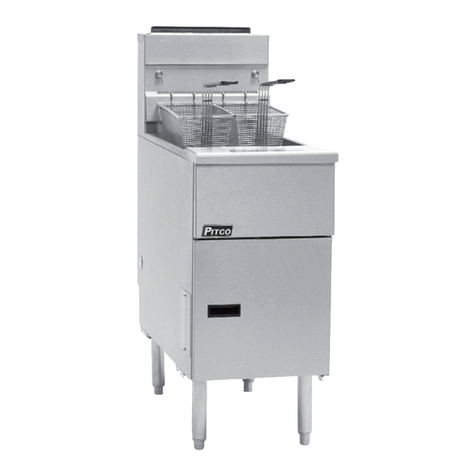
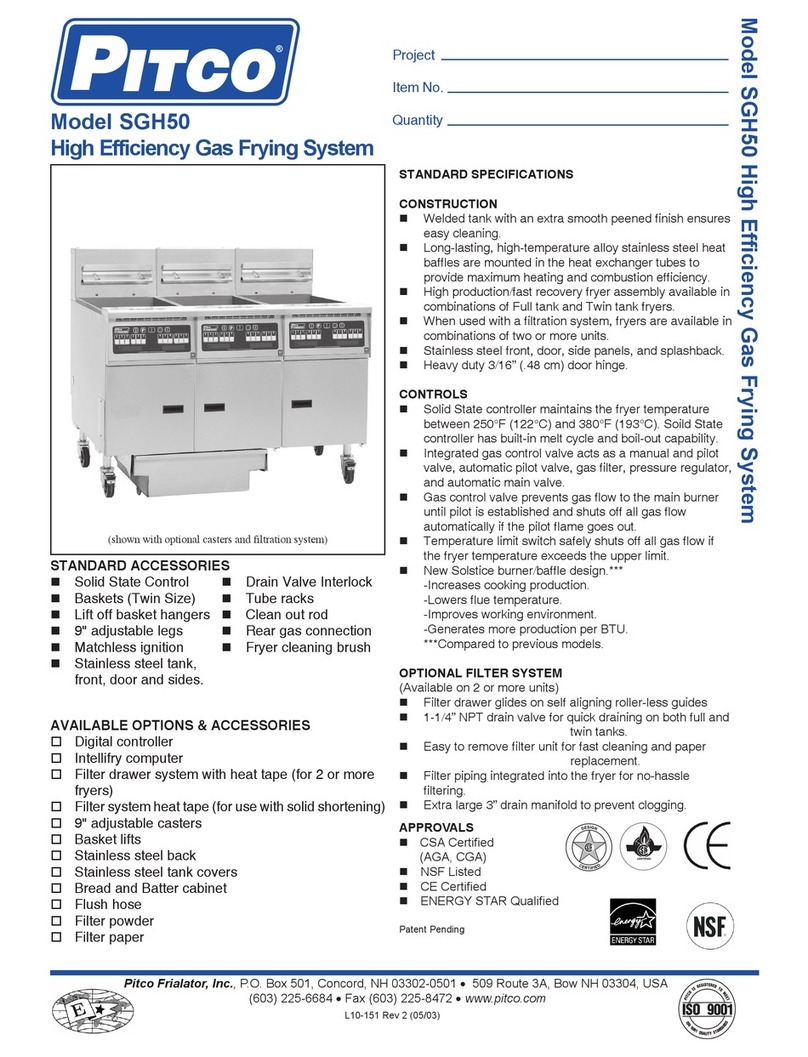
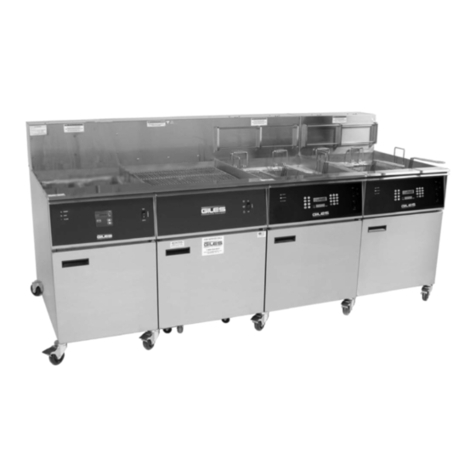
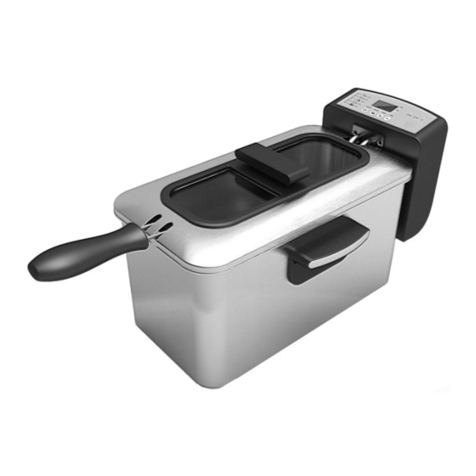
Pitco 14T User manual

Installation and Operation Manual
For Gas Fryers
NO OPTIONS/STAND ALONE
Covering Models
SG & SGF
14, 14R, 14T, 18, 18F,
24P, 24F, 34P, 34F & SGC
Pitco Frialator, Inc., P.O. Box 501, Jct I-89 & I-93 Concord, NH 03302-0501 • 509 Route 3A, Bow, NH 03304
(800) 258-3708 • (603) 225-6684 • FAX (603) 225-8497
www.pitco.com
ENGLISHFRANCAISESPANOL
®®

L20-195 rev 4 (07/02)
THIS MANUAL MUST BE RETAINED FOR FUTURE REFERENCE
FOR YOUR SAFETY
DO NOT store or use gasoline or other flammable vapors or liquids in the vicinity of this or
any other appliance.
WARNING
Improper installation, alteration, service or maintenance can cause property damage, injury
or death. Read the installation, operating and maintenance instructions thoroughly before
installing or servicing this equipment.
TO THE PURCHASER
Post in a prominent location the instructions to be followed in the event that an operator smells gas. Obtain this
information from your local gas supplier.
WARNING
There is an open flame inside the fryer. The unit may get hot enough to set near by materials on fire. Keep the
area around the fryer free from combustibles.
WARNING
DO NOT supply the fryer with a gas that is not indicated on the data plate. If you need to convert the fryer to
another type of fuel, contact your dealer.
WARNING
DO NOT use an open flame to check for gas leaks!
WARNING
Wait 5 minutes before attempting to relight the pilot to allow for any gas in the fryer to dissipate.
WARNING
Never melt blocks of shortening on top of the burner tubes. This will cause a fire, and void your warranty.
WARNING
Water and shortening DO NOT mix. Keep liquids away from hot shortening.
Dropping frozen liquid food into the hot shortening will cause violent boiling.
WARNING
Ensure that the fryer can get enough air to keep the flame burning correctly. If the flame is starved for air, it can
give off a dangerous carbon Monoxide gas. Carbon monoxide is a clear odorless gas that can cause suffocation.
WARNING
A cooker equipped with casters and a flexible gas line, must be connected to the gas supply with a quick
disconnect device. This quick disconnect must comply with ANSI Z24.41. To limit the movement of the cooker
without depending on the connector or quick disconnect, a restraining cable must also be installed.
NOTICE
Counter top must be constructed of a non-combustible material for SG14C counter top fryer installations.

1
L20-195 rev4(07/02)
CHECKINGYOURNEWFRYER
Your new fryer has been carefully packed into one crate. Every effort has been made to ensure that your fryer is delivered
to you in perfect condition. As you unpack your new fryer, inspect each of the pieces for damage. If something is damaged,
DO NOT sign the bill of lading. Contact the shipper immediately, the shipper is only responsible for 15 days after delivery.
Checkthepackinglistenclosedwithyourfryerto ensurethatyouhavereceivedallofthepartstothefryer. Ifyouaremissing
any parts, contact the dealer from whom the fryer was purchased.
CAUTION
To prevent equipment damage, don't tilt the fryer onto any two of it's casters or pull the unit by the flue vents.
Locate your Pitco Frialator warranty and fill in the serial number of the fryer and the date received. You will find the serial
number on the plate inside the door. Put your warranty card in a safe place for future reference. DO NOT return the card to
Pitco Frialator.
Leg/CasterInstallationandAdjustment
Installing the legs and leveling the fryer is done with a 7/16" wrench, socket, and a large pair of water pump pliers. The legs/
casters must be installed to provide the necessary height to meet sanitation requirements and assure adequate air supply to
the burner. Attach the legs by performing the following procedure.
a. Laythe fryeron itsside beingcareful notto damagethe flue by pulling on it. Protect theoutside ofthe fryerwith
cardboard or a drop cloth when laying it down.
b. Attach each leg/caster with the hex head cap screws supplied with the fryer. Each leg/caster requires four 1/4-
20 x 5/8" cap screws.
c. Mount the screws from the inside of the fryer with the nut on the outside. The nuts have lock washers attached
to them, therefore it is not necessary to use lock washers.
d. When all four legs/casters are mounted, stand the unit up being careful not to put too much weight on any one
leg/caster. Adjust the height and level the fryer by adjusting the leveling devices on the leg/caster with the water
pump pliers.
e. On units with casters, move the fryer to the desired location and lock the wheels using the locking devices on
the front of the casters.
WARNING
The fryer must be properly restrained to prevent movement or tipping. This restraint must prevent the fryer from
movementsthat wouldsplash hotliquidsonpersonnel,which couldcause severeburns orinjuries.
Always wear oil proof gloves when moving or handling equipment or hot liquids.
Installation Clearances
Thefryerneedsclearancearounditforproperoperation. Adequateclearancesallowforservicingandproperburneroperation.
The clearances shown below are for cooker installation in combustible and noncombustible construction.
Combustible Non-Combustible
Construction Construction
Back 6" 0"
Sides 6" 0"
Floor - Combustible 9" 9" (Needed for Combustion)
Counter top must be constructed of a non-combustible material for SG14C counter top fryer installations.
Gas Connection
Your fryer will give you peak performance when the gas supply line is of sufficient size to provide the correct gas flow. The
gaslinemustbeinstalledtomeetthelocalbuildingcodesorNationalFuelGasCodeANSIZ223.1LatestEdition. InCanada,
install the fryer in accordance with CAN/CGA-B149.1 or .2 and local codes. Gas line sizing requirements
can be determined by your local gas company by referring to National Fuel Gas Code, Appendix C, Table C-4 (natural gas)
and Table C-16 (propane). The gas line needs to be large enough to supply the necessary amount of fuel to all appliances
without losing pressure to any appliance. WARNING
NEVER supply the fryer with a gas that is not indicated on the data plate. Using the incorrect gas type will cause
improper operation. If you need to convert the fryer to another type of fuel, contact your dealer.
ENGLISH

2
L20-195 rev4(07/02)
Fuel Types - Each fryer is equipped to work with one type of fuel. The type of fuel with which the appliance is intended to
operate is stamped on the data plate attached to the inside of the door.
NOTICE
NEVERuseanadaptortomakeasmallergassupplylinefitthecookerconnection. Thismay
not allow proper gas flow for optimum burner operation, resulting in poor cooker perfor-
mance.
QuickDisconnectGasConnection
GasfryersequippedwithcastersmustbeinstalledwithconnectorsthatcomplywiththeStandardforConnectorsforMovable
GasAppliances, ANSIZ223.1LatestEdition,andAddendaZ21.69ALatest Edition. Thisconnectionshouldincludeaquick
disconnectdevicethatcomplieswiththeStandardforQuickDisconnectDevicesforUseWithGasFuel,ANSIZ223.1Latest
Edition. Wheninstallingaquickdisconnectyoumustalsoinstallameansforlimitingthemovementofthefryer. Thisdevice
willprevent thegasline orthequick disconnectfrombeing strained. Therestrainingdevice shouldbeattached tothecooker
on the back panel.
Fuel Supply Line Leak and Pressure Testing
The fuel supply system must be tested before the fryer is used. If the fuel line is going to be tested at a pressure greater than
(>)1/2PSIG (3.45kPa), makesure thatthe fryeris disconnectedfrom thefuel line. If the fuel line is tobe testedat apressure
equal to or less than (<) 1/2 PSIG (3.45 kPa), the fryer can be connected but the unit's gas valve must be shut. Test all gas
line connections for leaks with a solution of soap and water when pressure is applied.
ELECTRICALCONNECTION
Theelectricalserviceusedbythefryermustcomplywithlocalcodes. Iftherearenolocalcodesthatapply,refertotheNational
ElectricalCode(NEC),ANSI/NFPA70toinstalltheservice. InCanadarefertoCSAStandardC22.1andlocalcodes. Wiring
diagrams are provided inside the fryer control box.
VentilationandFireSafetySystems
Your new fryer must have proper ventilation to function safely and properly. Exhaust gas temperatures can reach as high
as1000°F. Therefore,itis very importantto installa fire safetysystem. Your ventilationsystem shouldbe designedto allow
foreasycleaning. Frequentcleaningoftheventilationsystemandthefryerwillreducethechancesoffire. Table1-2provides
a list of reference documents that provide guidance on ventilation and fire safety systems. This table is not necessarily
complete. Additionalinformationcanbe obtained fromthe CSA-International, 8501East PleasantValley Road, Cleveland,
OH44131.
Excessive ventilation causes drafts, which will interfere with the proper operation of the pilot and the burner. Leave at
least 18 inches of open space between the fryer's flue vent opening and the intake of the exhaust hood.
CAUTION
Ensurethat yourventilation systemdoesnotcausea downdraft atthe fryer'sflueopening.
Downdraftswillnotallowthefryertoexhaustproperlyandwillcauseoverheatingwhichmay
cause permanent damage. Damage caused by down drafts will not be covered under
equipment warranty. NEVER allow anything to obstruct the flow of combustibles or
ventilation exiting from the fryer flue. DO NOT put anything on top of the flue area.
NOTICE
NEVERconnecttheblowerdirectlytotheflueopenings. Thedirectflowofairwillcausepoor
temperaturerecovery,poorignition,inefficientoperationofthefryer,andcouldextinguish
thepilot.
GasLineRequirements
A properly installed gas supply system will deliver 7.0 ± 2.0" w.c. natural gas (12.0 ± 2.0" w.c. LP) to all appliances
connected to the line, operating at full demand.
NOTICE
Do NOT exceed 13.5” W.C. pressure as damage may occur to the gas valve.

3
L20-195 rev4(07/02)
LIGHTINGINSTRUCTIONS
a. Fill kettle before lighting.
b. Turn combination gas valve knob to “PILOT” position.
c. Depress valve knob and light pilot. With pilot burning, hold knob depressed for 60 seconds.
d. Release knob, pilot should remain lit.
e. DONOTTURN COMBINATION GASVALVEKNOBTOTHE“ON”POSITIONUNTILVESSELISFULLOF
WATERORSHORTENING. TURNINGTHEKNOBTO“ON”WITHVESSELEMPTYWILLDAMAGETHE
VESSELORCOMPONENTSANDVOIDWARRANTY.
f. Relighting - wait 5 minutes before attempting to relight the pilot to allow for any gas in the fryer to dissipate.
InitialCleaning
When the fryer is shipped, many of its parts are covered with a thin coat of oil for protection. Before the fryer is ready for
cookingitmustbecleaned. Thiswillremovetheoilcoatingandanyforeignmatterthatmayhaveaccumulatedduringstorage
and shipment. Perform the cleaning as described below.
a. Fill the vessel with water.
b. Turn the fryer gas valve knob to the “ON” position. Allow the fryer to bring the water to a low boil and add one
packet of Pitco fryer cleaner or a mild, low sudsing detergent and allow water to continue to boil for a minute,
making sure water does not boil over.
c. Turn the gas valve knob to the “PILOT” position and allow fryer to soak with the hot water for 15 minutes.
NOTICE
Donotleavethefryerunattendedduringcleaning. Neverletthewaterlevelgobelowthe"Min
Level"markon the backof the tank.
d. Using the fryer cleaning brush, scrub the inside of the fryer to remove protective coating.
e. When cleaning is complete, turn the gas valve knob to the “OFF” position and drain the water into a container
suitable for hot water and dispose of it.
f. When the tank has cooled, rinse it thoroughly with cool water. Continue to rinse the tank until the cleaner has
been rinsed, thoroughly from the tank.
g. Using a clean dry cloth, wipe out all of the water. Be very thorough removing the water, because any residual
water will cause hot oil to splatter out of the fryer. Close the drain valve and remove container.
CAUTION
Mildsteeltanks mustbewiped down/coatedwithoil tokeepthetankfromrusting.
h. Nowthatthetankisclean,youarereadytofillandoperatethefryer. Referto instructionsonaddingshortening
to the fryer.
DAILYCLEANING
should be performed to maintain peak operation and appearance.
a. Wipe up any shortening that spills onto the exterior of the fryer. This should be done with a clean soft cloth
while the oil is still warm.
b. Use warm water with a mild detergent to clean surfaces. Be careful not to get water in the shortening and to
remove any detergent from the fry tank.
c. Use a nonabrasive scouring powder or pad to clean stains if necessary.
d. Perform the weekly boil out cleaning of your fryer described below.
WEEKLYFRYERCLEANING
This cleaning should include a complete draining of the fryer and a boil out.
a. You will need a container large enough to hold 1 1/2 times the oil in one tank. This container should also be
able to withstand 4000 F oil temperatures.
b. Shut fryer gas system OFF completely before performing procedures to ensure unit does not come on during
any part of the cleaning operation.
c. Draintheoilfromthe fryer anddiscard or savefor reuse. Remove tuberack/mesh tube screensand remove any
large debris from the bottom of the fry tank. Once clean, return tube rack/mesh screens to the fry tank. Close
the drain valve and fill the fry tank with water and noncaustic detergent.
d. Relight gas system pilot, following the lighting instructions.
ENGLISH

4
L20-195 rev4(07/02)
WARNING
Gasunits installedwithcastersmusthave arestraining device. Thisdevice mustbeconnectedatall timesthat the
fryerisconnected tothegassupply. If itis disconnectedforany reason,it mustbe reconnected.
ThermostatCalibrationCheck
NOTICE
Thermostat calibration requires that the temperature of the fryer be raised above boiling.
Therefore,youwillneedtodrainthewaterfromthefryerandfillitwithoil. Beforeremoving
thewater,performthe initialcleaningofthefryer. Cleaningthe fryernowwillpreventyou
from having to drain the oil and refill with water later.
To perform the calibration check detailed below you will need a digital thermometer.
a. Place the tip of the thermometer in the shortening approximately 1" above the temperature sensors.
b. Setthethermostatat325°Fandwaitforthetemperaturereadingonthethermometertorise. Asthetemperature
rises toward 325°F watch the thermometer closely.
c. Iftheshorteningtemperature reaches 350°Fand the burnersDO NOTturn off, turnthe thermostatdown. Keep
lowering the thermostat setting until the burners go out.
CAUTION
Iftheburnersdonotturnoffatthelowestthermostat setting,thethermostatcouldbe
defective. Contact your representative immediately.
d. Letthefryercycle4to6timesbeforecheckingthetemperature. Comparethethermometertemperatureagainst
the thermostat setting. If the values are more than 5°F apart, calibrate the thermostat using the appropriate
calibration procedure in this manual.
THERMOSTATCALIBRATION
Millivoltthermostats
a. Set the thermostat dial to 325o F.
b. Remove the thermostat dial by pulling the knob straight out. DO NOT rotate the dial.
c. Hold the outside of the shaft so it does not move. Use the tip of a small, flat tip screw driver to scrape away
the sealing compound from the adjustment screw.
d. Turn the adjustment screw clockwise to lower the temperature setting and counterclockwise to raise the
temperature. One quarter turn changes the temperature approximately 25oF.
e. Turn the adjustment until the burners turn on at 325oF. Replace the knob and allow the fryer to cycle 4 to 6
times. Check the temperature of the thermometer against the thermostat dial. If it is greater than 5oF differ
ence, repeat the calibration procedure.
f. When the calibration is correct, remove the thermometer and replace the tube screen.
Filling the fryer with liquid shortening
a. Make sure the drain valve is completely closed.
b. Fill the fryer with oil to the "Oil Level" line marked on the back of the tank.
e. Turn the fryer gas valve knob to the “ON” position. Allow the fryer to bring the water to a low boil and add
one packetofPitcofryercleaneroramild,lowsudsingdetergentandallowwatertocontinuetoboilforaminute,
making sure water does not boil over.
f.. Turn the gas valve knob to the “PILOT” position and allow fryer to soak with the hot water for 15 minutes.
g. Using the fryer cleaning brush, scrub the inside of the fryer to remove protective coating.
h. When cleaning is complete, turn the gas valve knob to the “OFF” position and drain the water into a container
suitable for hot water and dispose of it.
i. When the tank has cooled, rinse it thoroughly with cool water. Continue to rinse the tank until the cleaner has
been rinsed, thoroughly from the tank.
j. Using a clean dry cloth, wipe out all of the water. Be very thorough removing the water, because any residual
water will cause hot oil to splatter out of the fryer. Close the drain valve and remove container.
k. Nowthatthetankisclean,youarereadytofillandoperatethefryer. Referto instructionsonaddingshortening
to the fryer.

5
L20-195 rev4(07/02)
FryerShut-Down
There are two shutdown modes of fryer operation, STANDBY and COMPLETE. The standby mode removes the ability for
the fryer's main burners to cycle. Complete shutdown turns off the gas supply to the fryer. Shut down the fryer by:
STANDBY TurnthethermostattoOFF. TurnthegasvalveclockwisetothePILOTposition. ThecookerisnowinStandby
and can remain this way for only brief periods of time. NEVER leave the cooker in standby overnight.
COMPLETE To completely shut down the cooker, push and turn the gas valve counterclockwise to the OFF position. The
fryer is now completely shut down and can be cleaned and filtered.
Filling the Fryer With Solid Shortening
a. Make sure the drain valve is completely closed.
b. Remove the screen covering the tubes.
c. Cut the shortening into cubes no larger than 1". ALWAYS pack the shortening below, between, and on top
of the burner tubes. DO NOT leave any large air gaps. Use care when packing the solid shortening in the tank.
DONOTbendorbreakthetemperaturesensorprobes. Ifthesearedamagedthefryerwillnotfunctionproperly.
d. Once the fryer is packed with shortening, the shortening must be melted.
e. Tomeltshortening,manuallypulsetheburnersONandOFFusingthethermostatuntiltheshorteningisliquidized
enough to cover the heat tubes. This will protect the tank and components from damage and extend the life
of the oil.
ENGLISH

6
L20-195 rev4(07/02)
IFMAINTENANCEISREQUIRED,CONTACTYOURLOCALFACTORYSERVICER,LOCALFACTORYREPRESENTA-
TIVE,ORTHEFACTORYTOOBTAINSERVICE.
TOPIC UNDERWRITERSLABORATORY NATIONALFUELGAS
DOCUMENT CODEDOCUMENT
EXHAUSTHOODS ANSI/UL710 ANSI/NFPA96
POWERVENTILATORS ANSI/UL705 ANSI/NFPA96
FILTERUNIT ANSI/UL586 ANSI/NFPA96
ANSI/UL900
TYPESOFFIREEXTINGUISHERS
ANDDETECTIONEQUIPMENT
CO2ANSI/UL154 ANSI/NFPA12
DRYCHEMICAL ANSI/UL299 ANSI/NFPA17
WATER ANSI/UL626 ANSI/NFPA13
FOAM ANSI/UL8 ANSI/NFPA11
SPRINKLERS ANSI/UL199 ANSI/NFPA13
SMOKEDETECTORS ANSI/UL268 ANSI/NFPA72
FIREDETECTIONTHERMOSTATS ANSI/UL521 ANSI/NFPA72

7
L20-195 rev4(07/02)
ENGLISH

8
L20-195 rev4(07/02)
Intheevent ofproblemswith orquestionsabout you
equipment,please contact thePitco Frialator Autho-
rizedService and Parts representative (ASAP) cov-
eringyouarea,throughtheNational Service Network
at:
(800)298-1862 US only, 24 hours
Intheevent ofproblemswith orquestionsabout you
order,pleasecontactthe Pitco Frialatorfactory,from
8:00a.m. - 5:00 p.m., Eastern StandardTime,Mon-
daythroughFriday,toll-freeat:
(800)258-3708 US and Canada only or
(603)225-6684WorldWide

Il y a Toujours Quelque Chose qui Mijote chez Nous !
Manuel d’Installation et de Fonctionnement
Pour Friteuses à Gaz
Modèles
SG et SGF
14, 14R, 14T, 18, 18F,
24P, 24F, 34P, 34F et SGC
Pitco Frialator, Inc., P.O. Box 501, Jct I-89 & I-93 Concord, NH 03302-0501 • 509 Route 3A, Bow, NH 03304
(800) 258-3708 • (603) 225-6684 • FAX (603) 225-8497
www.pitco.com
FRANCAIS
®
®

AVERTISSEMENT
Toute mauvaise installation, altération, réparation et tout mauvais réglage ou entretien risque
de provoquer des dégâts matériels, des blessures graves, voire la mort. Veuillez lire
attentivement les manuels d’installation, de fonctionnement et d’entretien avant d’installer ou
d’effectuer l’entretien de cet équipement.
CONSERVEZ CETTE NOTICEAFIN DE POUVOIR LACONSULTER ULTÉRIEUREMENT
POUR VOTRE SÉCURITÉ
NE PAS stocker de l’essence ni d’autres liquides ou vapeurs inflammables à proximité de cet
appareil ni de tout autre appareil.
AVISÀ L’ACHETEUR
Affichez en évidence les instructions à suivre si l’utilisateur sent une odeur de gaz. Cette information est disponible
auprès de votre fournisseur de gaz local.
AVERTISSEMENT
Il existe une veilleuse à flamme nue à l’intérieur de la friteuse. La machine peut chauffer à des températures très
élevées et risque d’enflammer des matériaux placés à proximité. Veillez à ce qu’il n’existe aucun élément combustible
autour de la friteuse.
AVERTISSEMENT
NE PAS alimenter en gaz la friteuse avec un gaz ne figurant pas sur la plaque signalétique. Si vous devez convertir la
machine afin de l’utiliser avec un gaz différent, contactez votre revendeur.
AVERTISSEMENT
NE JAMAIS approcher de flamme nue afin de rechercher une fuite de gaz!
AVERTISSEMENT
Attendre 5 minutes avant de tenter de rallumer la veilleuse afin de permettre à tout gaz à l’intérieur de la friteuse de se
dissiper.
AVERTISSEMENT
Ne jamais faire fondre les barres de matière grasse sur les tubes du brûleur. Ceci risque de provoquer un incendie et
annulera la garantie.
AVERTISSEMENT
NE PAS mélanger d’eau avec la matière grasse. Conserver tout liquide à l’écart de la matière grasse chaude. Tout
aliment surgelé tombant dans la matière grasse chaude entraînera une ébullition intense.
AVERTISSEMENT
Veiller à ce que la friteuse soit suffisamment alimentée en air afin que la veilleuse brûle correctement. Si la flamme
n’est pas suffisamment alimentée en air, elle dégagera un gaz dangereux, à savoir de l’oxyde de carbone. L’oxyde de
carbone est un gaz incolore et inodore qui peut provoquer l’asphyxie.
AVERTISSEMENT
Toute machine équipée de roulettes et d’un tuyau de gaz flexible doit être raccordée à une source de gaz par
l’intermédiaire d’un dispositif de déconnexion rapide. Cette prise à déconnexion rapide doit être conforme à la norme
ANSI Z24.41. Pour limiter au maximum le déplacement de la friteuse sans dépendre du connecteur ou du dispositif de
déconnexion rapide, un câble de sécurité doit être installé.
AVIS
Le comptoir doit être construit avec un matériau non-combustible pour les comptoirs destinés à accueillir des
friteuses SG14C.
L20-195 rev 4 (07/02) 10

11
L20-195 rev4 (07/02)
VÉRIFICATIONDELANOUVELLEFRITEUSE
Votre nouvelle friteuse a été emballée avec précaution dans une caisse. Tout a été prévu afin que la friteuse vous soit livrée
en parfaite condition. Lorsque vous déballez votre nouvelle friteuse, vérifiez toutes les pièces afin de vous assurer qu’elles
nesontpasendommagées.Siunedespiècesaétéendommagée,veuillezNEPASsignerleconnaissement(lettredetransport).
Contactez immédiatement le transporteur car ce dernier ne peut être tenu responsable que pendant les 15 jours suivant la
livraison.Vérifiezle bordereau d’expédition fourni avec la friteuse afindevousassurerquevousêtesenpossessiondetoutes
les pièces. Si des pièces s’avèrent manquantes, contactez le revendeur auprès duquel vous avez acheté la friteuse.
ATTENTION
Afind’éviterd’endommagerl’appareil,nepaspencherlafriteusesurdeuxdecesrouesnitirersurlecarneauou
conduitdefumée.
CherchezlagarantiePitcoFrialatoretinscrivez lenumérodesériesurlafriteuseetladatederéception.Lenumérodesériese
trouvesurlaplaqueàl’intérieurdelaporte.Conservezlagarantiedansunendroitsûrafindepouvoirlaconsulterultérieurement.
NEPASrenvoyer lacarte àPitcoFrialator.
InstallationetRéglagedesPiedsetdesRoulettes
Montezlespiedsetmettezlafriteuseàniveauàl’aided’unecléde7/16depo. etd’unepincemultiprises.Lespiedsetlesroulettes
doiventêtreinstalléesàunehauteursuffisanteconformeauxcodessanitairesetafinderépondreauxbesoinsenairdubrûleur.
Fixezlespiedscommesuit:
a. Placezlafriteusesursapartielatéraleenveillantànepastirersurleconduitdefuméeafindenepasl’endommager.
Lorsque vous placez la friteuse à terre, protégez l’extérieur de la machine avec du carton et une toile de protection.
b.Fixezchaquepiedàroulettesavecdesvisdefixationhexagonalesfourniesaveclafriteuse.Chaquepiedàroulettes
doit être fixé avec des vis de fixation de 1/4-20 x 5/8 de po.
c. Fixezlesvisàpartirdel’intérieurdelafriteuseenplaçantl’écrouàl’extérieur.Lesécrouscomportentdesrondelles
de sécurité, il n’est donc pas nécessaire d’utiliser de nouvelles rondelles de sécurité.
d. Après avoir monté les pieds à roulettes, redressez la machine afin de la placer debout en veillant à ne pas placer
trop de poids sur un des pieds à roulettes. Réglez la hauteur de la machine et mettez-la à niveau en réglant les
dispositifs de mise à niveau des pieds à l’aide des pinces multiprises.
e. Surles machines comportant des roulettes,déplacezlafriteusejusqu’àl’emplacementchoisietbloquezlesroues
à l’aide des dispositifs de blocage situés à l’avant des roulettes.
AVERTISSEMENT
Lafriteusedoitêtrefermementfixée.Pourévitertoutrisquedeblessuresgraves,fixezlafriteuseafinqu’ellenepuisse
êtredéplacéeoupenchéeetrisquerd’éclabousserlepersonnelavecdel’huilebouillante.Veillezàtoujoursporterdes
gantsétanchesàl’huilelorsquevoustransportezoudéplaceztoutappareilouliquidechaud.
Distancesde Sécurité
Il doit y avoir un espace suffisant autour de la friteuse afin d’assurer son bon fonctionnement. Cet espace est nécessaire pour
accéder à cette dernière et effectuer toute réparation nécessaire et afin d’assurer le bon fonctionnement du brûleur. Les
dimensionsindiquéesci-dessoussontpourl’installationdel’appareildansunenvironnementcombustibleetnon-combustible.
Construction Construction
Combustible Non-Combustible
Dos 6po(15cm) 0
Côtés 6po(15cm) 0
Sol - Combustible 9 po (23 cm) 9 po (23 cm) (Nécessaire à la Combustion)
Le comptoir doit être construit avec un matériau non-combustible pour les comptoirs destinés à accueillir des friteuses SG14C.
L’espace autour de la friteuse doit non seulement être suffisant afin que l’appareil fonctionne à plein rendement, mais il doit
également y avoir une distance de 50 cm devant la friteuse afin de pouvoir retirer ou installer le bac ou module de filtrage.
Raccordement du gaz
Votre friteuse offre un rendement optimal lorsque le tuyau d’alimentation en gaz est d’une taille suffisante afin de permettre
undébitdegaz adéquat. Letuyau degazdoitêtreinstallé conformément auxcodes dubâtiment devotre localitéet àla norme
ANSI Z223 de la dernière édition du Code national d’installation des appareils à gaz. Au Canada, installez la friteuse
conformémentauxnormesCAN/CGA-B149.1ou2etàlaréglementationlocale.Latailledutuyaudegazpeutêtredéterminée
parlacompagniedugazdevotrelocalitéenseréférantauCodenationald’installationdesappareilsàgaz,paragrapheC,tableau
C-4(gaznaturel)ettableauC-16(propane).Letuyaudegazdoitêtresuffisammentlargeafind’alimenterpleinementtousles
appareils sans qu’il ne se produise une perte de pression au niveau de ces derniers.
AVERTISSEMENT
NEJAMAISalimenterengazlafriteuseavecungaznefigurantpassurlaplaquesignalétique.L’emploidetoutautre
gazentraîneraundysfonctionnementdelamachine.Sivousdevezconvertirlamachineafindel’utiliseravecungaz
différent,contactezvotrerevendeur.
FRANCAIS

12
L20-195 rev4 (07/02)
Types de carburants: Chaque friteuse est équipée afin de fonctionner avec un seul type de carburant. Le type de carburant
destiné à cet appareil est indiqué sur la plaque signalétique fixée à l’intérieur de la porte.
AVIS
NEJAMAISutiliserunadaptateurafinderaccorderuntuyaudegazpluspetit.Vousrisquezdenuireaurendement
delamachineenaubonfonctionnementdubrûleurenempêchantundébitdegazoptimal.
Raccorddegazàdéconnexionrapide
LesfriteusesàgazàroulettesdoiventêtreinstalléesavecdesraccordsconformesàladernièreéditiondelanormeANSIZ223.1
et de l’addenda Z21.69A consacrée aux raccords pour appareils à gaz mobiles. Ce raccord doit comporter un dispositif à
déconnexionrapideconformeàladernièreéditiondelanormeANSIZ223.1pourlesdispositifsàdéconnexionrapideutilisés
avec des appareils à gaz. Lorsque vous installez un dispositif à raccord rapide, il vous faut également installer un dispositif
limitant le déplacement de la friteuse. Ce dispositif évitera que le tuyau ou le raccord à déconnexion rapide ne se tende
excessivement. Le dispositif de retenue doit être fixé à la friteuse, au dos du panneau arrière.
Fuiteauniveaudutuyaud’alimentationengazetvérificationdelapression
Lecircuitd’alimentationdoitêtretestéavantd’utiliserla friteuse.Sivouscompteztesterletuyaud’alimentationengazàune
pressionsupérieureà1/2PSIG(3.45kPa),veillezàcequecedernieraitétédébranchédelafriteuse.Sivouscompteztesterle
tuyau d’alimentation en gaz à une pression égale ou inférieure à 1/2 PSIG (3.45 kPa), la friteuse peut être raccordée mais la
commandedegazdelafriteusedoitêtrefermée.Unefoislapressionrétablie,testeztouslestuyauxdegazafindevousassurer
qu’ils ne comportent aucune fuite avec le l’eau savonneuse.
RACCORDEMENTÉLECTRIQUE
L’alimentationélectrique delafriteusedoitêtreconformeauxcodesdevotre localité.Enl’absencederéglementationlocale,
reportez-vousauCodeélectriquenationaldesÉtats-Unis(NEC)etauxnormesANSI/NFPApourl’installationélectrique.Au
Canada,reportez-vousàlanormeCSAC22.1etàlaréglementationdevotrelocalité.Lesdiagrammesdecâblagessontvisibles
à l’intérieur de la boîte de commande de la friteuse.
VentilationetSystèmesdeSécuritécontrelesIncendies
Votrenouvellefriteusedoitêtrecorrectementventiléeetfonctionnerentoutesécurité.Latempératuredesgazd’échappement
peutatteindre 1000°F (538°C).Parconséquent, il estindispensabled’installer unsystème deprotectioncontre lesincendies.
Votre système de ventilation doit être conçu afin de pouvoir être facilement nettoyé. Nettoyez fréquemment le système de
ventilationet lafriteuse afinderéduire lesrisques d’incendie.Les tableaux 1et 2offrent uneliste de documentsde référence
surlaventilationetlessystèmesdeprotectioncontrelesincendies.Cettelisten’estpascomplète.Ilvousestpossibled’obtenir
desinformationssupplémentairesauprèsdel’CSA-International,8501EastPleasantValleyRoad,Cleveland,OH44131.
Touteventilationexcessiveentraîneradescourantsd’air.Cecinuiraaubonfonctionnementdelaveilleuseetdubrûleur.Laissez
un espace d’au moins 18 po. (45 cm) entre le carneau ou conduit de fumées de la friteuse et l’entrée de la hotte d’aspiration.
ATTENTION
Veilleràcequelesystèmedeventilationneprovoquepasderupturedetirageauniveaudel’ouverture
ducarneaudelafriteuse.Touterupturedetirageempêcheralafriteused’évacuercorrectementla
fuméeetlesgazetentraîneraunesurchaufferisquantd’endommagerlamachinedefaçonirréversible.
Aucundégâtprovoquéparunerupturedetirageneseracouvertparlagarantiedel’appareil.NE
JAMAISlaisserquoiquecesoitpouvantgênerledébitdescombustiblesoudelaventilationsortant
duconduitdefuméedelafriteuse.NERIENplacersurledessusduconduitdefumée.
AVIS
NEJAMAISdirigerleventilateurdirectementsurlesouverturesduconduitdefumée.Toute
ventilationdirectenuiraàl’efficacitédelafriteuse,gêneral’allumageetrisquerad’éteindrela
veilleuse.
Critèresd’InstallationdesConduitesdeGaz
Uncircuitd’alimentation en gazdoitfournirde pression de7.0+2.0 po. decolonne d’eau,avecgaznaturel (12.0 + 2.0po. de
colonne d’eau pour le gaz de propane liquide) à tous les appareils raccordés à la conduite et fonctionnera à plein rendement.
AVIS
NEPASdépasserunepressionde13.5po.decolonned’eaucarvousrisquezd’endommagerlacommandedegaz.

13
L20-195 rev4 (07/02)
INSTRUCTIONSD’ALLUMAGE
a. Remplissezla machineavant del’allumer.
b. Tournez la commande de gaz jusqu’à “PILOT” (veilleuse).
c. Appuyez sur le bouton de la commande et allumez la veilleuse. Pendant que la veilleuse brûle, maintenez le
bouton appuyé pendant environ 60 secondes.
d. Relâchez le bouton, la veilleuse devrait demeurer allumée.
e. NEPASRÉGLERLEBOUTONDELACOMMANDEDEGAZ MIXTE
SUR«ON»(MARCHE)AVANTQUELAFRITEUSENESOITREMPLIED’EAUOUDEMATIÈRE
GRASSE.LEFAITDEPLACERLEBOUTONSUR«ON»(MARCHE)ALORSQUELAFRITEUSEEST
VIDE,ENDOMMAGERAL’APPAREILETLESÉLÉMENTSASSOCIÉSETANNULERALAGARANTIE.
f. Rallumage - attendre 5 minutes avant de tenter de rallumer la veilleuse afin de permettre à tout gaz à l’intérieur
de la friteuse de se dissiper.
NettoyageInitial
Lorsque la friteuse est expédiée, elle comporte de nombreuses pièces recouvertes d’une fine pellicule d’huile afin d’assurer
leurprotection.Avantquelafriteusenesoitprêteàêtreutilisée,elledoitêtrenettoyée.Vousretirerezainsil’huileettoutrésidu
s’étantaccumulélorsdel’entreposageetl’expéditiondelamachine.Nettoyezlamachineensuivantlesindicationssuivantes:
a.Remplissez lafriteuse avecde l’eau.
b. Réglez la commande de gaz de la friteuse sur “ON”.
Laissez la friteuse chauffer l’eau jusqu’à ébullition puis versez un sachet de nettoyant Pitco pour friteuse ou un
détergent peu moussant et laissez l’eau bouillir pendant encore une minute, en veillant que le mélange ne déborde pas.
c. Réglez la commande de gaz sur “PILOT” (veilleuse) et laissez la friteuse tremper dans l’eau chaude pendant
15 minutes.
AVIS
Nepaslaisserlafriteusesanssurveillancelorsdunettoyage.Nejamaislaisserleniveaud’eau
tomberendessousdelamention“MinLevel”(niveauminimum)audosdelacuve.
d. Utilisezlabrosseànettoyerpourfriteuse,frottezl’intérieurdelafriteuseafinderetirerlerevêtementprotecteur.
e. Après avoir nettoyé la friteuse, réglez la commande de gaz sur “OFF” (arrêt) et purgez l’eau dans un récipient
pour eau chaude et jetez le contenu.
f. Après quela cuveaitrefroidie, rincez-lacomplètementavec del’eau froide. Continuezà rincerlacuve jusqu’à
ce que le nettoyant ait complètement disparu.
g. Àl’aided’unchiffonsecetpropre,essuyeztoutetraced’eaurestante.Veillezàbienessuyertoutel’eau.Eneffet,
toute présence d’eau dans l’huile risque de provoquer une ébullition intense et des éclaboussures hors de la
friteuse.Fermezle robinetde purgeetretirez le récipient.
ATTENTION
Toutecuveenaciernormaldoitêtreessuyéeetprotégéeavecunefinepelliculed’huileafin
d’éviterqu’ellenerouille.
h. À présent que la cuve est propre, la friteuse peut être remplie et utilisée. Reportez-vous aux instructions afin
d’ajouter la matière grasse à la friteuse.
NETTOYAGEQUOTIDIEN
Nettoyezvotrefriteusetouslesjoursafinqu’ellefonctionneàsonrendementoptimaletconservesabelleapparence.
a. Essuyez toute trace de matière grasse sur l’extérieur de la friteuse. Nettoyez à l’aide d’un chiffon pendant que
l’huile est encore chaude.
b. Utilisezdel’eauchaudeetunnettoyantpeupuissantpournettoyezlasurface.Veillezànepaslaisserd’eauentrer
en contact avec l’huile et retirez toute trace de détergent à l’intérieur de la cuve.
c. Utilisez une poudre à récurer non-abrasive ou un tampon afin de nettoyer toute tâche rebelle.
d. Procédez au nettoyage par ébouillantage comme indiqué ci-dessous.
NETTOYAGEHEBDOMADAIREDELAFRITEUSE
La friteuse doit également être complètement vidangée et purgée puis chauffée jusqu’à ébullition.
a. Vousaurez besoind’un récipientcapable decontenir une foiset demi(1 1/2)la contenance enhuile dela cuve.
Ce récipient doit également également être capable de supporter des températures d’huile de 4000F (2040C).
b. Fermezcomplètement (OFF)lecircuit degazde lafriteuseavant decommencerafin d’éviterquela machinene
se mette en marche pendant une phase quelconque du nettoyage.
FRANCAIS

14
L20-195 rev4 (07/02)
c. Vidangezl’huiledelafriteuseetjetez-laouconservez-laafindelaréutiliserplustard.Retirezlestamisdestubes
de filtrage ainsi que tout débris de grosse taille demeurant au fond de la cuve. Après avoir nettoyé les tamis des
tubes de filtrage, remettez-les en place. Fermez le robinet de purge et remplissez la cuve avec de l’eau et un
détergent non-corrosif.
d. Rallumez la veilleuse du circuit de gaz en suivant les instructions d’allumage.
e. Réglezlacommandedegazdelafriteusesur“ON”.Laissezlafriteusechaufferl’eaujusqu’àébullitionpuisversez
unsachet denettoyantPitco pourfriteuseou undétergentpeu moussantetlaissez l’eaubouillirpendant encore
une minute, en veillant à ce que le mélange ne déborde pas.
f. Réglez lacommandedegazsur“PILOT”(veilleuse)etlaissezlafriteusetremperdansl’eau chaude pendant15
minutes.
g. Utilisezlabrosseànettoyerpourfriteuse,frottezl’intérieurdelafriteuseafinderetirerlerevêtementprotecteur.
h. Après avoir nettoyé la friteuse, réglez la commande de gaz sur “OFF” (arrêt) et purgez l’eau dans un récipient
pour eau chaude et jetez le contenu.
i. Aprèsque la cuveait refroidie,rincez-lacomplètement avecdel’eau froide.Continuez à rincerla cuvejusqu’à
ce que le nettoyant ait complètement disparu.
j. Àl’aided’unchiffonsecetpropre,essuyeztoutetraced’eaurestante.Veillezàbienessuyertoutel’eau.Eneffet,
toute présence d’eau dans l’huile risque de provoquer une ébullition intense et des éclaboussures hors de la
friteuse.Fermezle robinetde purgeetretirez le récipient.
k. À présent que la cuve est propre, la friteuse peut être remplie et utilisée. Reportez-vous aux instructions afin
d’ajouter la matière grasse à la friteuse.
AVERTISSEMENT
Toutefriteuseàgazàroulettesdoitêtreéquipéed’undispositifderetenue.Cedispositifdesécuritédoitêtreraccordéà
toutmomentlorsquelafriteuseestraccordéeàlaconduited’arrivéedegaz.Sipouruneraisonquelconqueellen’est
pasraccordée,raccordez-la.
Vérificationdel’ÉtalonnageduThermostat
AVIS
L’étalonnage du thermostat nécessite que la température de la friteuse soit supérieure à la
températured’ébullition.Parconséquent,vousdevrezpurgerl’eaudelafriteuseetlaremplacer
pardel’huile.Avantderemplacerl’eau,procédezaunettoyageinitialdelafriteuse.Lefaitde
nettoyerlafriteusemaintenantvouséviteradepurgerl’huileetderemplird’huileànouveaula
friteuseplustard.
Poureffectuerl’étalonnageindiquéci-dessous,munissez-vousd’unthermomètrenumérique.
a. Placezlapointeduthermomètredanslamatièregrasseenviron1po.(2,5cm)au-dessusdessondesdetempérature.
b. Réglezlethermostatsur325°F(163°C)etattendezquelatempératures’élève.Aufuretàmesurequelatempérature
s’élèvevers325°F(163°C),surveillezattentivementlethermomètre.
c. Silatempératuredelamatièregrasseatteint350°F(176°C)etquelesbrûleursNES’ÉTEIGNENTPAS,baissez
le thermostat. Continuez à baisser le thermostat jusqu’à ce que les brûleurs s’éteignent.
ATTENTION
Silesbrûleurs nes’éteignent pas lorsquele thermostat setrouve sur sonréglage le plusbas, le
thermostatestsansdoutedéfectueux.Contactezvotredistributeurimmédiatement.
d. Laissezlafriteuseeffectuer4à6cyclesavantdevérifierlatempérature.Comparezlatempératureduthermomètre
et le réglage du thermostat. Si les valeurs diffèrent de plus de 5°F (2°C), étalonnez le thermostat en suivant les
instructions d’étalonnage de ce manuel.
ÉTALONNAGEDUTHERMOSTAT REMARQUE
Silethermostatnecontrôlepaslatempérature,vérifierlesconnexionsentrelethermostatetlacommandedegaz.
Thermostatsmillivolts
a. Réglezle thermostatsur 325°F(163°C).
b. Retirez le cadran du thermostat en tirant tout droit sur le bouton. NE PAS tourner le cadran.
c. Tenez l’extérieur de l’axe de façon à ce qu’il ne bouge pas. Utilisez la pointe d’un tournevis à lame plate

15
L20-195 rev4 (07/02)
pour retirer en grattant le mastic d’étanchéité de la vis de réglage.
FRANCAIS
d. Tournez la vis de réglage dans le sens de aiguilles d’une montre afin d’abaisser la température et dans le sens
inverse pour l’élever. Un quart de tour change la température d’environ 25°F (10°C).
e. Tournez la vis de réglage jusqu’à ce que les brûleurs atteignent 325°F (163°C). Replacez le bouton et laissez
la friteuse effectuer 4 à 6 cycles. Comparez la température du thermomètre et le réglage du thermostat. Si les
valeurs diffèrent de plus de 5°F (2°C), répétez la marche à suivre pour l’étalonnage de ce manuel.
f. Après avoir étalonné le thermostat, retirez le thermomètre et replacez le tamis du tube.
RemplirlaFriteusedeMatièreGrasseLiquide
a. Assurez-vous que le robinet de purge est complètement fermé.
b. Remplissez la friteuse d’huile jusqu’au repère du niveau d’huile (“Oil Level”) indiqué au dos de la cuve.
RemplirlaFriteusedeMatièreGrasseenBloc
a. Assurez-vous que le robinet de purge est complètement fermé.
b. Retirez le tamis recouvrant les tubes.
c. Coupezlamatièregrasseencubesnedépassantpas1po(2,5cm)delarge.VeillezàTOUJOURSplacerlamatière
grasse sous, entre et sur le dessus des tubes des brûleurs. NE PAS laisser de gros espaces d’air. Faites attention
àNEPASplierni rompre les sondesde température. Eneffet, si cesdernières sont endommagées,la friteuse ne
pourra fonctionner correctement.
d. Après avoir rempli la friteuse de matière grasse, faites fondre la matière grasse.
e. Pourfairefondrelamatièregrasse,allumez(ON)etéteignez(OFF)lesbrûleursàl’aideduthermostatjusqu’àce
que la matière grasse se liquéfie suffisamment et recouvre les tubes. Ceci protégera la cuve et les éléments et
allongeraladurée d’utilisationdel’huile.
ÉteindrelaFriteuse
Ilexistedeuxmodesd’arrêtdelafriteuse,STANDBY(enattente)etCOMPLETE(complet).Lemoded’arrêtenattenteempêchera
auxbrûleursdes’allumeretdes’éteindre.Lemoded’arrêtcompletcoupel’arrivéedegazàlafriteuse.Éteignezlafriteuseen:
STANDBY(enattente)
Réglezlethermostatsur“OFF”(arrêt).Tournezlacommandedegazdanslesensdesaiguillesd’unemontrejusqu’à“PILOT”
(veilleuse).Lamachineestàprésentenmoded’attenteetnepourrademeurerainsiquependantunebrêvepériode.NEJAMAIS
laisser la machine demeurer en mode d’attente toute une nuit.
COMPLETE(complet)
Pourcomplètementéteindrelamachine,appuyezettournezlacommandedegazdanslesenscontraireàceluidesaiguillesd’une
montre jusqu’à “OFF” (arrêt). La friteuse est à présent complètement éteinte et peut être nettoyée et filtrée.

16
L20-195 rev4 (07/02)
ARTICLE DOCUMENTUNDERWRITERS DOCUMENTDUCODE
LABORATORIES NATIONALPOUR
GAZCOMBUSTIBLE
HOTTED’EXTRACTION ANSI/UL710 ANSI/NFPA96
VENTILATEURS ANSI/UL705 ANSI/NFPA96
UNITÉDEFILTRAGE ANSI/UL586 ANSI/NFPA96
ANSI/UL900
TYPESD’EXTINCTEURS
ETMATÉRIELDEDÉTECTION
CO2ANSI/UL154 ANSI/NFPA12
EXTINCTEURÀPOUDRE ANSI/UL299 ANSI/NFPA17
EXTINCTEURÀEAU ANSI/UL626 ANSI/NFPA13
EXTINCTEURÀMOUSSE ANSI/UL8 ANSI/NFPA11
ARROSEURSAUTOMATIQUES ANSI/UL199 ANSI/NFPA13
DÉTECTEURSDEFUMÉES ANSI/UL268 ANSI/NFPA72
THERMOSTATDEDÉTECTION ANSI/UL521 ANSI/NFPA72
INCENDIE
POURTOUTEMAINTENANCEOURÉPARATION,CONTACTEZUNRÉPARATEURAGRÉÉDEL’USINE,UNREPRÉSEN-
TANTDEL’USINEOUL’USINEELLE-MÊME.

17
L20-195 rev4 (07/02)
FRANCAIS

18
L20-195 rev4 (07/02)
Veuillez contacter votre représentant agréé Pitco
Frialatorsivousavezdesproblèmesoudesquestions
concernantvotreéquipementparl’intermédiairedu
réseaudeserviceaprès-ventenationalau:
(800)298-1862uniquement,24H/24H
Veuillezcontacterl’usinePitcoFrialatorsivousavez
des problèmes ou des questions concernant votre
commande de 8:00 heures à 17:00 heures, heure
normaledel’EstdesÉtats-Unisdulundiauvendredi.
Veuillezappelezsansfraisle:
(800)258-3708États-UnisetCanadauniquementou
(603)225-6684partoutailleurs
This manual suits for next models
12
Table of contents
Languages:
Other Pitco Fryer manuals

Pitco
Pitco VF35 User manual

Pitco
Pitco SE Series User manual

Pitco
Pitco Frialator SG 18 User manual

Pitco
Pitco SE Series User manual

Pitco
Pitco SGH50 User manual

Pitco
Pitco Frialator SG 14 User manual

Pitco
Pitco 24F User manual

Pitco
Pitco E14B Instruction Manual

Pitco
Pitco E14X User manual

Pitco
Pitco SG18S User manual