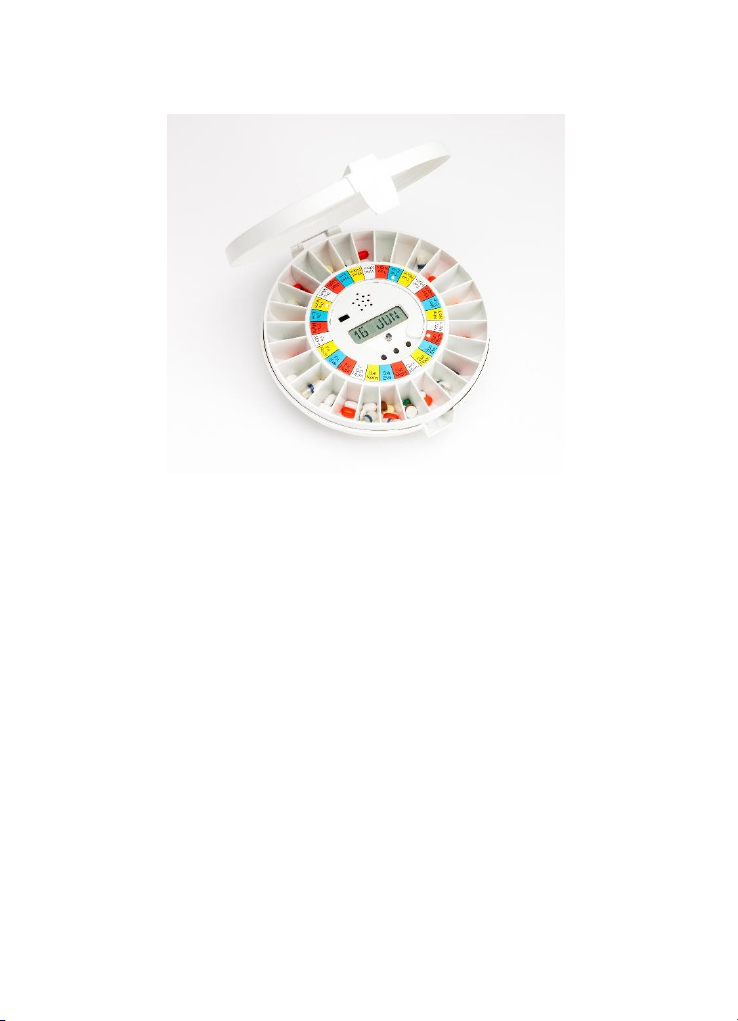
Pivotell Advance User manual

Pivotell® Advance
Automatic Pill Dispenser
Instructions
V11 102016
SW-16
Note: When opening for the first time, the lid is unlocked.
The key and battery case securing screw can be found inside the dispenser.

PIVOTELL® ‘ADVANCE’
AUTOMATIC PILL DISPENSER
Introduction:
The Pivotell® Advance Automatic Pill Dispenser reminds the user by means of an alarm and flashing
light when to take their medication. It will make the correct dose available at the correct time of
day or night, whilst keeping secure all other pills. Medication is dispensed from an internal tray
containing 28 sections.
Maximum number of daily alarm settings - 24.
The dispenser incorporates a number of important new features which are designed to help both
the user remain compliant with their medication regime and further support their family members,
carers and pharmacists:
SECURITY – When operating in ‘SECURE’ mode a self-locking shutter over the lid opening prevents
access to the medication tray except at the time that medication is programmed to be available.
This prevents the possibility of the user double dosing or tampering with the medication tray.
When the dispenser lid is closed the shutter locks making the medication tray inaccessible. At the
dosage time the tray will advance clockwise a half section releasing the shutter. The alarm sounds
and the light flashes to alert the user.
The medication can be accessed by turning the dispenser over and pouring the pills into the hand
or suitable container. The shutter will swing open as the dispenser is tilted allowing the medication
to fall out.
When the dispenser ‘beeps’ (at approx. 135°) the alarm will be cancelled and the dispenser can be
returned to the upright position.
2.

Introduction (Contd)
SECURITY (contd)
When operating in ‘SECURE’ mode the shutter in the lid of the Pivotell Advance dispenser is
always locked except at the dosage time and subsequent ‘AFTER’ time (i.e the time set for the
alarm to continue).
The dispenser detects when the medication has been dispensed and locks the shutter 2 minutes
after dispensing by rotating a further half section thereby preventing access to the tray.
The shutter will also lock if medication is not dispensed within the programmed alarm time set
by the ‘AFTER’ time. This time can be set from 5 minutes to 5 hours.
This function eliminates the possibility of the user taking two doses within a short time and
thereby potentially double-dosing.
Note: The user has the option of switching the SECURE function ‘OFF’ if preferred.
DISPLAY
The LCD display is visible though the lid allowing the user and carer to view:
•the date and time
•the time that the next dose is due
•number of doses remaining
•the battery level
When the dispenser is horizontal the display shows the Date and the Time in sequence.
At the alarm time ‘TAKE MED’ is displayed.
When tilted forward slightly (between 15 and 40 degrees) the display will show in sequence:
NEXT DOSE 16:30 MON || DOSES LEFT 9 || B (battery level) 75% || DATE: 26 MAR 2014
(the values shown above are examples only).
When only 4 doses remain the horizontal display will additionally show DOS 04. After this dose
has been dispensed DOS 03, DOS 02, DOS 01 and finally DOS 00 will be displayed in sequence
with the DATE and CLOCK.
When the battery capacity is less than 20% the horizontal display will show LOWBATT in
sequence with the DATE and CLOCK.
This LCD display feature enables the user, carers and family members to make a visual check on
the status of the dispenser without having to open it.
3.

USING THE DISPENSER FOR THE FIRST TIME
1. Open the lid as illustrated –place an
index finger in the lid opening and press
in the catch with a thumb. Lift the lid.
The key and battery case securing screw
can be found in one of the pill
compartments.
2. Open the lid to the battery box beneath
the dispenser and activate the dispenser
by removing the battery isolating strip.
(note the correct battery polarity + / - )
To avoid excessive battery drain it is
important that the clock is set soon after
either the isolating strip is removed, or the
batteries are replaced.
DISPENSER SETTINGS
The dispenser is set using the three buttons:
Button 1 is used for moving to the next function
Buttons 2 and 3 are used to change the settings in each function
There are two setting menus :-
Menu A:-To access press Button 1
Functions: CLOCK DATE DOSES ALARMS
Menu B:- To access press and hold Button 3 until ‘BEFORE’ is displayed
Functions: BEFORE AFTER SOUND LIGHT FILLED BATT
SECURE HOURS DLS START STOP RECORD
After completion of settings in Menu A or B press button 1 and hold down for three seconds to
restore to normal operation.
If there is no programming activity in Menu A the display will automatically return to
normal after 25 seconds.
If there is no programming activity in Menu B the display will return to normal after 5 minutes.
4.
Figure 1.
Figure 2.
+-
+
++
--
-

Menu A (accessed through Button 1)
Note: To ensure correct operation it is most important that both the ‘Clock’ and the ‘Date’ are
set before the dispenser is used. When the dispenser is activated the display will prompt
the setting of the Clock and then the Date.
CLOCK:
Press Button 1 until ‘CLOCK’ is visible on the display.
Set the correct time by pressing Buttons 2 or 3. You can fast forward or reverse the time by
pressing and holding down these buttons.
DATE:
Press Button 1 again - ‘DATE’ is visible on the display.
Wait a few seconds. YY will displayed.
Using buttons 2 and 3: Set the Year (YY) then press 1
Using buttons 2 and 3: Set the Month (MM) then press 1
Using buttons 2 and 3: Set the Date (DD) then press 1
DOSES:
‘DOSES’ will be displayed
Wait a few seconds and then adjust the number of doses per day using buttons 2 and 3.
Press button 1
ALARMS:
‘ALARMS’ will be displayed.
Set the 1st ( 1 ) alarm time using buttons 2 or 3.
Press Button 1 again for the 2nd (2) alarm time and repeat the procedure for all subsequent
alarm times required (Maximum 24 daily).
Press and hold down button 1 for a few seconds to exit the menu and revert to normal operation.
5.

MENU B (Accessed through Button 3)
To access the functions in this Menu press and hold down button 3 until ‘BEFORE’ is
displayed on the screen. The individual functions in this menu can then be accessed by
pressing button 1 repeatedly.
‘BEFORE’ - Taking medication before the pre-set alarm time
It is possible to allow medication to be taken up to 5 hours before the normal pre-set alarm
time. To set this function go to ‘BEFORE’.
Press Buttons 2 or 3 to set the time required
If this function has been set the user may access their medication in advance by turning the
dispenser upside down (through 180°) and then upright twice in succession. The dispenser will
then rotate one step and the next dose will become available.
NB: If medication is taken before the normal time, the dispenser will not activate again until
the following medication is due.
If this function is not required set at 00.00.
AFTER
The length of time the alarm will sound / light will flash can be adjusted by the ‘AFTER’
function. This also controls the time that the shutter will remain unlocked.
Press Button 1 until ‘AFTER’ is displayed.
Select the required alarm duration by pressing Buttons 2 and 3 (minimum 5 minutes /
maximum 5 hours)
The alarm will sound and light flash every 5 seconds for the first minute, every 8 seconds up to
1 hour and thereafter sound every minute and light every 16 seconds until either the
medication is dispensed or the AFTER limit is reached, maximum 5 hours.
SOUND
There are four alarm sounds available. To choose the alarm sound:
Press Button 1 repeatedly until ‘SOUND’ is displayed.
Choose your preferred sound 01 02 03 or 04 by pressing Buttons 2 or 3.
Should no sound be required set at 00.
LIGHT
Press Button 1 repeatedly until ‘LIGHT’ is displayed.
If the light is not required press button 2 once – ‘OFF’ will be displayed
If the light is required press button 3 once – ‘ON’ will be displayed.
FILLED (the number of doses placed in the medication tray when filled)
This function is enables the display warning ‘DOSES LEFT’
Press button 1 until ‘FILLED’ is displayed
Set the number of doses placed in the medication tray when filled using buttons 2 and 3.
When no doses remain the display will show ‘ - - - - ‘.
BATT (Battery type)
It is possible to use both Alkaline and rechargeable NiMH batteries.
Press Button 1 repeatedly until ‘BATT’ is displayed.
Using buttons 2 and 3 set at either ALC for Alkaline and NIMH for rechargeable NIMH
batteries.
6.

SECURE
The Pivotell Advance Dispenser can be set to operate in two modes:
Secure On: Press Button 2.
The shutter in the lid of the dispenser is always locked except during the programmed alarm time.
The shutter will lock again 2 minutes after medication has been dispensed.
The shutter will also lock when the ‘AFTER’ time has expired, thus preventing the possibility of the
user taking this dose a short time before the next dose is due.
Secure Off: Press Button 3
When the dispenser is refilled with medication and is re-set the tray will move forward a half
section, locking the shutter and thereby allowing secure transport of the medication to the user’s
home. After the first dose, the medication tray will always move one complete position at each
alarm time leaving the shutter unlocked.
HOURS
24hr / AM-PM clock settings
The dispenser is pre-set to display the time with the 24 hour clock.
To change this to 12 hour AM/PM setting:
Press Button 1 repeatedly until ‘HOURS’ is displayed.
Choose AM/PM or 24hrs by pressing buttons 2 or 3.
DLS (Daylight Saving)
To enable the dispenser to automatically adjust for daylight saving (GMT/BST) press Button 1 until
DLS is displayed.
Using Buttons 2 and 3 set at ‘EU’ for European Daylight Saving or ‘US’ for American Daylight Saving.
Set at ‘OFF’ to disable this function.
START DELAY
It is possible to delay the time at which the dispenser will start to operate.
This function is useful if the dispenser is being filled, for example, by a pharmacy and is not being
delivered to the user until a later date.
To activate this function press Button 1 until ‘START’ is displayed.
Set the Year (YY) Month (MM) Date (DD) and Hour (HH) that you wish the dispenser to activate
following the same procedure as for setting the DATE (see Menu 1 above). The time (HH) should be
in advance of the first dose to be dispensed for the user.
If the function is not required do not set.
STOP
It is possible to stop the dispenser’s operation at a future date and time. This function is useful if
two or more dispensers are being used by a user in sequence and ensures that only one dispenser is
active at one time.
To activate this function press Button 1 until ‘STOP’ is displayed.
Set the Year (YY) Month (MM) Date (DD) and Hour (HH) that you wish the dispenser to stop
operating following the same procedure as for setting the ‘DATE’ (see Menu 1 above).
The time (HH) should be set after the last dose to be dispensed for the user.
If this function is not required set the year (YY) to 99
RECORD
The dispenser will record the actual times the previous 28 medications were dispensed.
Press Button 1 until ‘RECORD’ is displayed – the time that the last medication was taken is
displayed. Press Buttons 2 or 3 for the previous medication times to be shown.
7.

FILLING THE DISPENSER
1.Time Discs
Three day / time discs are supplied which comprise:
Two printed discs for 1 up to 4 medication prompts per day (use either side) and one blank disc for
more than 4 medication prompts per day.
The blank discs should be completed by hand indicating the medication times.
Place the appropriate disc for the dosage in question on top of the tray. Locating pins are provided
on the medication tray with corresponding holes in the time discs for accurate positioning. (see
figure 4 below)
2.Medication (also see note on page 10 under ‘Medication’)
Remove the tray from the dispenser.
Place the correct dosage in each section of the tray. Note: if a pill is inadvertently dropped in the
incorrect compartment, a pair of tweezers can be helpful to easily remove the pill.
Figure 3.
4. Pharmacy label carrier:
4.1 Enter the medication details in the space
provided on the pharmacy label carrier and, if
appropriate, attach the pharmacy labels in the
spaces provided. (see Figure 5)
3. Replace the tray in the dispenser
After filling, place the tray in the dispenser
positioned so that the compartment with
the first dose to be taken by the user (in this
example, Monday evening) is positioned to
the right of the opening (see figure 3 ).
If the dispenser is set to operate in ‘SECURE’
mode, press Button 2 until ‘TRAY Z’ is
displayed. The tray will then move forward
one half section to the correct position.
Close the lid.
8.
Figure 4.
Pharmacy label carrier
with retaining case.
First dose
Figure 3.

LOCK
The dispenser can be locked with the key
supplied. Turn the key a quarter of a turn
clockwise to lock, anti-clockwise to unlock.
Please note that the lock is a simple device
intended as an additional barrier only.
BATTERY COVER SCREW
A screw is provided to prevent inappropriate access to the batteries (should this be necessary).
Place the screw in the hole in the battery cover securing clip and tighten. The screw must be
removed when the batteries need replacing. It should then be replaced.
9.
RE-SETTING THE ‘DOSES LEFT’ DISPLAY
Each time medication is dispensed the number of ‘DOSES LEFT’ displayed will reduce by one
(see page 3) .
When the tray is re-filled it is important to reset the ‘DOSES LEFT’ to the actual number of doses
placed in the medication tray (see FILLED above).
Replace the tray in the dispenser in the correct position (see figure 3 above) and press Button 2
until ‘TRAY Z’ is displayed. If the dispenser is operating in SECURE mode the tray will move forward
one half section.
Close the lid.
The number of ‘DOSES LEFT’ displayed will now be the same as the number entered in ‘FILLED’ .
4.2 Stick the label carrier to the battery case
cover using the re-posable glue spot
provided on the rear of the label carrier (first
remove the glue spot cover).
4.3 Clip the retaining case over the pharmacy
label carrier as shown. (see figure 5)
Figure 5.
Figure 6.

GENERAL INFORMATION
Test function
The rotation, light and sound functions can be tested and demonstrated by pressing and holding
all three buttons until TEST is displayed.
Press button 1 to test the light.
Press button 3 to start a whole alarm-sequence:
1. The display will show ‘DEMO’, the tray will move one half section to the open position, the
alarm will sound and the light will flash.
2. ‘TAKE MED’ will be displayed for 20 seconds
3. Pick the dispenser up and turn it over to demonstrate dispensing the medication
after which ‘CLOSE’ will then be displayed and the tray will move forward one half
section to the closed position.
4. If the dispenser is not picked up, after 20 seconds ‘CLOSE’ will be displayed and the tray
will again move forward one half section to the closed position.
Press and hold button 1 to leave the TEST function.
Dispenser left upside down
If the dispenser is upside down when the alarm occurs, the alarm will sound as normal but
the internal tray will not move until the dispenser is turned upright. If more than one alarm time
has passed whilst the dispenser has been upside down the dispenser will present the correct
medication for that time.
For example: Daily Doses 4 / Alarm Times: 0800 1200 1700 21.00
The dispenser is left upside at 0805 and placed upright at 1630. At 1200 the alarm will sound but
the tray will not rotate. At the 1700 alarm time the tray will rotate two positions and present the
1700 medication (the 1200 medication will move around out of sight and be inaccessible).
Fault handling:
The alarm will sound continuously in the event of the dispenser failing to rotate
properly. This might be caused by an obstruction between the body of the
dispenser and the internal tray. In this event the display will show ‘ERROR 01’ or ‘ERROR 04’ or
‘ERROR 08’. This can be cleared by pressing Button 3. Any obstruction should be removed. More
information on error codes can be found on www.pivotell.co.uk
Medication:
There are some pills which are not suitable for these dispensers including, for example, those that
are life critical or those which should not be exposed to the air. For advice please check with your
pharmacist or doctor.
Telecare Enabled Pivotell Advance Dispensers - Dose Not Taken Alert:
The audible alarm can be set to sound for a minimum of 5 mins to up to 5 hours from the dosage
time (known as the 'After' time). In the event that a dose has not been dispensed after half of the
'After‘ time has elapsed a 'Dose Not Taken' alert will be transmitted.
This gives the responder time to contact the user before the dispenser shutter locks at the end of
the 'After' time. (see - Page 3 - Security) In the event that the dose has still not been dispensed
after all of the 'After' time has elapsed a second alert will be transmitted.
10.

Batteries:
Batteries ( 4 x AA Alkaline) are supplied with the dispenser when new. AA Batteries
will last up to 12 months in normal use.
To avoid excessive battery drain it is important that the clock is set soon after either the isolating
strip is removed, or the batteries are replaced.
Battery life can be checked by tilting the dispenser forward (see page 3 above –DISPLAY):
3. At full charge a reading of 100% will be shown.
4. At a reading of less than 20% the battery warning indicator ‘LOWBATT’ will initiate
5. At a reading of 0% the unit will not operate. ‘ERROR 10’ will be shown on the display.
Rechargeable batteries may be used –ensure that the BATT function in Menu B is set to NIMH.
Remember when changing batteries to insert them to correct way around. (See figure 2 and the
guide marked in the battery case.)
Cleaning: Dispenser - wipe with a damp cloth. Internal tray –may be washed in
warm water or in a dish washer (max. 70C)
Transport: If for any reason the dispenser is despatched by Royal Mail, courier
or other carrier, it is important that all batteries are removed from the dispenser.
Technical data:
Dimensions -Length 190mm Width 180mm Height 56mm
Weight - 390g excl. batteries 490g incl. batteries
Compartment volume - 11 ml per compartment
Power supply - 6V -4 x AA Alkaline or 4 x AA NiMH batteries
Battery life - > 1 year
The box also includes:-
Pharmacy Label Carrier and Clip
Three reversible day/time discs
4 x AA Alkaline Batteries
Key, Battery cover securing screw
11.
Pharmacy filling:
Many pharmacies will fill Pivotell dispensers.
For the suggested Standard Operating Procedure for pharmacy filling of
the Pivotell Advance dispenser, ask your pharmacist to contact Pivotell.
The new Pharmacy Filler tray
is now available for easier
Pharmacy filling of dispenser
trays.
Ask your Pharmacist to
contact Pivotell on
01799 550979.

Pivotell Ltd, P.O Box 108, Saffron Walden, CB11 4WX
Tel: 01799 550979 Fax: 01799 550838
E-mail: [email protected]
www.pivotell.co.uk
Copyright: Pivotell Ltd Patent No: SE 535 462 C2
Important Notice:
Pivotell® Automatic Pill Dispensers are aids designed to assist the user remember to take their
medication. They are not suitable for everyone and assessment is very important.
Pivotell® do not accept responsibility for faults or other consequences arising from any misuse of
the dispenser, for example, damage from dropping, moisture, liquids and heat, insertion of foreign
objects, forced or unauthorised opening of the dispenser. As with all electronic devices, do not
leave in direct sunlight.
It is the user’s responsibility to ensure that medication is taken as prescribed.
Full Terms and Conditions are available on our website : www.pivotell.co.uk
Table of contents
Other Pivotell Medical Equipment manuals