Pixel PXUTVKT User manual

Prior to starng the installaon process we recommend the following:
1. Mounng the Case
Determine the best locaon to mount the protecve case. It is recommended to install the case in an area that
does not block the driver’s vision.
2. Power Source
Find a power source, such as a fuse box, that is connected to the vehicle auxiliary power. It is recommended to
disconnect all vehicle power before starng the installaon.
3. Audio Opons
Locate the audio input for your sound system and determine which audio connecon type works best for your
installaon and audio requirements. If you are installing a Bluetooth Dock follow the instrucons included with
the dock to pair audio.
4. Antenna Locaon
Locate a clear spot on the roof or the vehicle with no obstrucons from the sky while the vehicle is moving. The
antenna cannot be installed on a lower part of the vehicle, as signal may be blocked as the vehicle moves in
different direcons.
It is recommended to leave all cables lose unl the installaon is complete to ensure all wires will reach the locaon
of the protecve case and mount.
PXUTVKT - Satellite Radio UTV Kit
Installaon Instrucons
Pixel Technologies, Inc. | www.pixelsatradio.com | contactus@pixelsatradio.com | (800) 595-0845 | Page 1
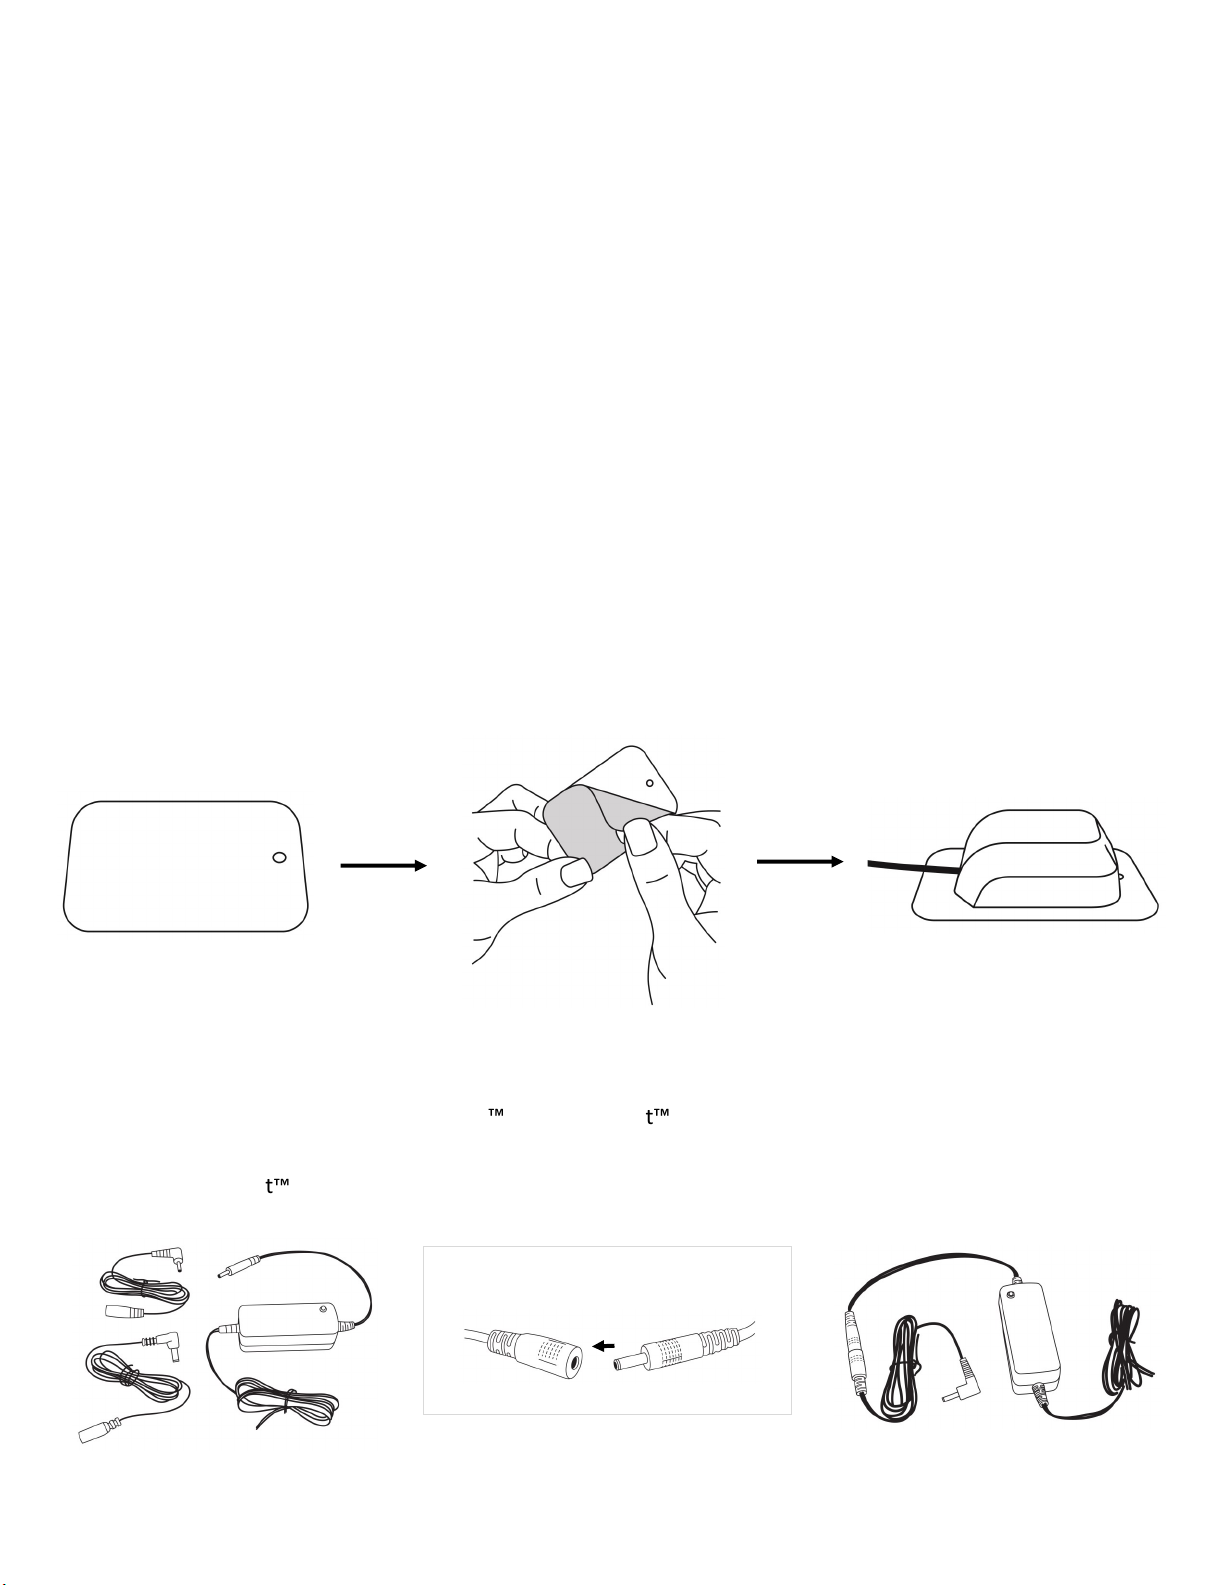
Package Includes
Included in the kit is the SXVD1 universal SiriusXM vehicle docking cradle. The docking cradle works with older Sirius
and XM receivers and newer SiriusXM plaorm receivers. Below is a list of compable receivers.
· OnyX, EZ, PLUS, EZR
· Xpress, EZ, R, RC, RCi
· EDGE, MiRGE, TOUR
· Delphi Roady XT, SKYFI 3
· Sportster 5 & 6
· Sleo 10, 100, 2
· Starmate 3, 4, 5, 6, 7, 8
· Stratus 3, 4, 5, 6, 7
(1) Protecve Case with Zipper
(1) SiriusXM Magnec Antenna with metal plate
(1) SiriusXM Vehicle Dock
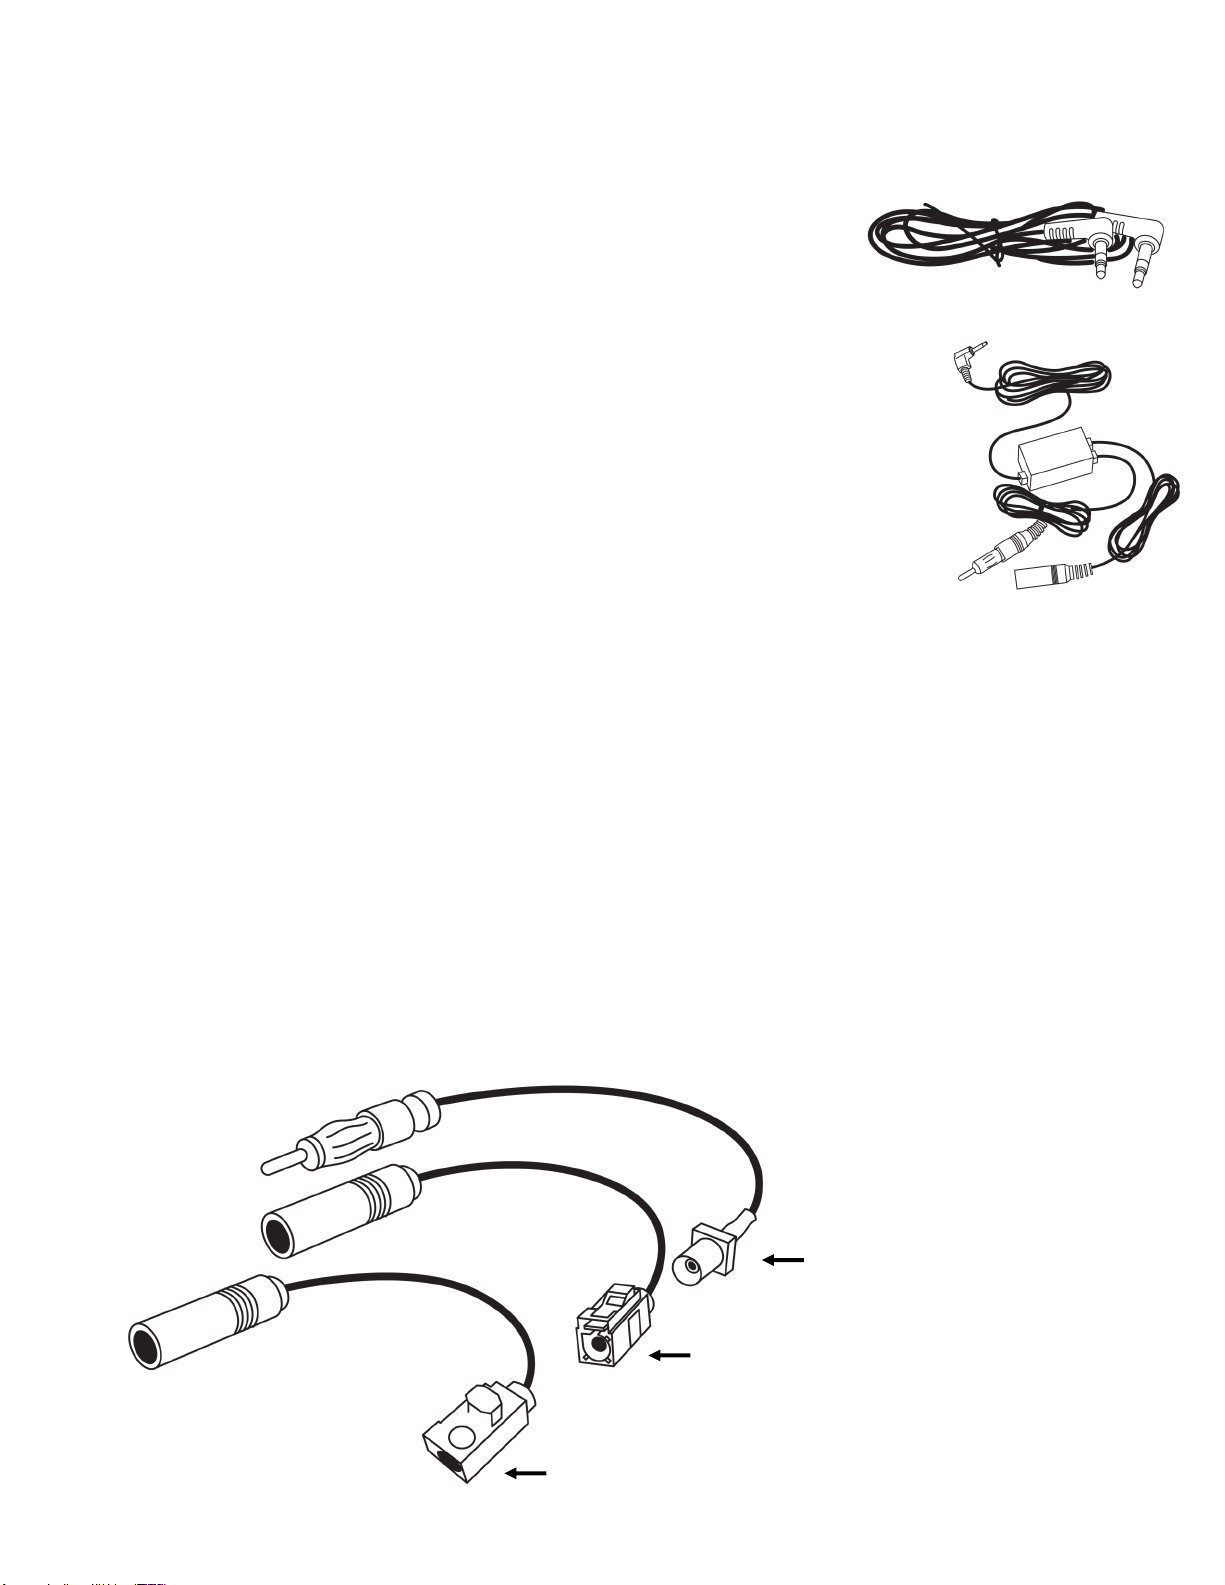
(1) Hardwired Power Adapter
(1) RIDE COMMAND® Antenna Adapter Kit
(1) FMDA25 Direct Audio Adapter
(1) Mul-Angle Mount
(1) AMPs to Dual T-Notch Adapter Plate with Screws
Compable Satellite Radio Receivers

SiriusXM Radio Antenna Installaon
To receive signal, the antenna must be installed on the roof of the vehicle with maximum clearance and no
obstrucons while the vehicle is moving.
1. Run the antenna cable from the antenna, either inside the roll cage pipe tubing or along the outside, securing
the antenna cable with cable es (not supplied). Be sure not to over ghten the cable es as the stress could
cause damage to the antenna wire.
2. Bring the antenna connecon to the locaon of the protecve case. Be sure to leave a couple of inches of play in
the cable to allow for movement of the receiver.
The antenna requires a ground plane for opmal recepon. If you have an aluminum or plasc roof, a metal plate
has been provided to sck to the surface of the roof. This will allow the magnet inside the antenna to create a
ground-plane around the antenna and opmize signal recepon.
Metal Plate Installaon
1. Locate the metal plate in the packaging.
2. Peel the paper covering the scky side. It is recommended to clean the surface with alcohol before applying.
3. Place the plate on the roof at least 3 inches from the edge of the surface.
Pixel Technologies, Inc. | www.pixelsatradio.com | contactus@pixelsatradio.com | (800) 595-0845 | Page 2
Included in the package is a hardwired power adapter. Find a power source on the vehicle, either in a fuse box or an
auxiliary power source. The hardwired power adapter comes with two interchangeable cables, one for older Sirius
and XM receivers and one for newer SiriusXM PowerConnect receivers. For installaons with an older 5 volt
Sirius or XM receiver (smaller p connector), use the cable with the smaller connector p. For installaons using the
supplied PowerConnect docking cradle, you will use the cable with the larger p on the connector.
Connect the cables
Adapter fully assembled
Connecng Power

There are three audio opons included with the kit. Only one opon is required. If installing a Bluetooth dock, refer
to the pairing instrucons provided with the dock.
A) Auxiliary Cable
Included in the kit is an auxiliary cable for audio. Connect the auxiliary cable to
the aux input on the sound system, headset or power speaker system. Run the
auxiliary cable to the locaon of the mount and leave the cable loose.
B) FMDA25 Wired FM Relay
For standard sound systems (without Polaris Ride Command), the wired FM relay can be
wired directly to the AM/FM antenna port on your vehicle. The relay acts as a “by-pass”
allowing the satellite radio receiver to take over an FM staon eliminang stac. Refer
to the supplied installaon instrucons in the FMDA packaging if selecng this opon.
C) Polaris Ride Command Direct Connecon
This opon ulized the FMDA25 and a set of adapter connectors supplied in the kit.
Below are the installaon instrucons for setup with a Polaris Ride Command system.
Please note: The diagrams used in this instrucon sheet references a 2019 Polaris® Turbo S. It is important to
note that your installaon may be different from what is pictured in the instrucons.
C) Polaris Ride Command Installaon Instrucons
Step 1) Select the Correct Antenna Adapter
Included in the kit are two FAKRA antenna adapters that are used to connect the FMDA25 to the Ride Command
antenna system. For vehicles prior to 2020, use the blue colored adapter. For vehicles manufactured in 2020 and
newer, use the cable with the black FAKRA connector.
Blue for vehicles prior to 2020
Black for 2020 vehicles and newer
Universal antenna adapter cable
Pixel Technologies, Inc. | www.pixelsatradio.com | contactus@pixelsatradio.com | (800) 595-0845 | Page 3
Audio Opons

Step 2) FMDA25 Setup with Adapters
Locate the FMDA25 in the kit. The FMDA25 allows the AM/FM signal to pass-thru to the Ride Command system.
1. Connect the RCA-FKA adapter cable into the female socket on the TO VEHICLE FM ANTENNA port on the
FMDA25
2. Connect the PRC-FKA (or V2 RIDECO per step 1) to the TO VEHICLEL FM RADIO port on the FMDA25
1
2
3
RCA-FKA
Installaon without AM/FM Antenna
If there is no AM/FM antenna installed in the vehicle, the
RCA-FKA antenna adapter is not needed and the port labeled
TO VEHICLE FM ANTENNA should be le open.
PRC-FKA or V2 RIDEOCO
Pixel Technologies, Inc. | www.pixelsatradio.com | contactus@pixelsatradio.com | (800) 595-0845 | Page 4

Step 3) AM / FM Antenna Port
Locate the AM / FM antenna connector on the vehicle. The locaon may vary based on the year and model of
your vehicle. In our example, it is the connect on the right of the connecon cluster shown below. Refer to the
vehicles owners manual for assistance locang the antenna port.
1
2
3
Step 4) Connect the FMDA25 to the Vehicle AM/FM Antenna Port
Plug the connecon from the FMDA25 labeled
"TO VEHICLE FM RADIO" into the RideCommand®
Antenna port. Make sure the connector is pushed all
the way down and the FAKRA connectors snaps in.
If the vehicle has an AM/FM antenna, connect the
aqua colored connector on the port labeled
“TO VEHICLE FM RADIO”. Make sure the connector is
pushed all the way down and the FAKRA connectors snaps in.
Pixel Technologies, Inc. | www.pixelsatradio.com | contactus@pixelsatradio.com | (800) 595-0845 | Page 5

Mount and Case Installaon
Locate the mul-angle pedestal mount in the kit. Find a locaon to mount the base, such as the dash or other
surface, that does not block the drivers vision while operang the vehicle. Fasten the mount to the dash or other
surface using four heavy duty screws. The case will slide down over the two slots on the back of the case.
Be sure to have the opening in the case facing downwards.
Protecve Case Back of Case
Pedestal Mount
Secure to surface
Connecng to the Docking Cradle
Aer compleng the previous steps feed all cables through the
opening in the boom of the case. Locate the SiriusXM docking
cradle in the kit and follow the instrucons below to connect each
cable to the dock.
Connect the power adapter to the power
port on the docking cradle (PWR).
Connect the antenna wire to the
antenna port (ANT).
If using AUX, connect the cable
to the AUDIO port.
If using the using the FMDA25, locate the cable labeled
"TO SIRIUS RADIO" and connect the cable into the FM Port
on the docking cradle.
Pixel Technologies, Inc. | www.pixelsatradio.com | contactus@pixelsatradio.com | (800) 595-0845 | Page 6

Power Up and Tune Radio
Aer connecng the antenna, power, and audio to the receiver
docking cradle, you will need to tune the radio to an empty FM
radio channel.
To find an empty FM channel in your area visit:
hps://www.siriusxm.com/frequency
If there is stac, we recommend to select a different FM channel.
Pixel Technologies, Inc. | www.pixelsatradio.com | contactus@pixelsatradio.com | (800) 595-0845 | Page 7
The installaon is now complete. You are ready to acvate the receiver with SiriusXM service.
Subscribe to SiriusXM Radio Programming
Follow these steps to subscribe your SiriusXM receiver. Once you have successfully acvated the receiver, you will
be able to tune to other channels.
1. Make sure your receiver is turned on, receiving the SiriusXM signal, and tuned to Preview Channel 1 so that you
can hear the SiriusXM audio.
2. Make a note of your Radio ID. You can find it by swiping to Sengs and tapping About, by tuning to channel 0,
on a label on the side boom of the box, and on the label on the back of the receiver.
3. NOTE! The Radio ID does not use the leers I, O, S, or F.
4. To subscribe:
· Online: www.siriusxm.com/acvatenow to access or set up an online account, subscribe to the service,
and acvate your receiver.
· Phone: Call 1-866-587-4225 - Acvaon usually takes 10 to 15 minutes aer you have completed the
subscripon process, but may take up to an hour. We recommend that your receiver remains on unl
subscribed. Once subscribed, the receiver will receive and you can tune to the channels in your
subscripon plan.
Acvang SiriusXM Service
Other Pixel Radio manuals