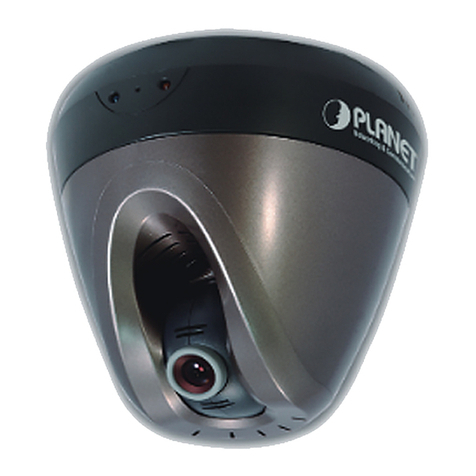
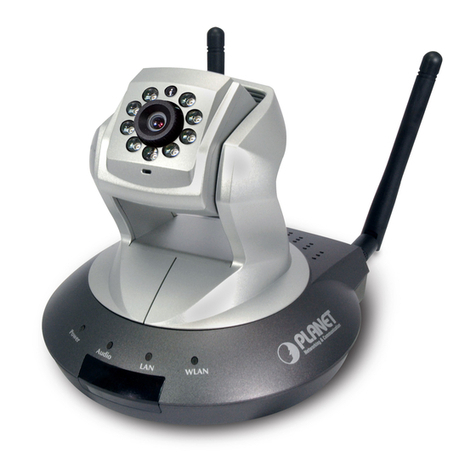
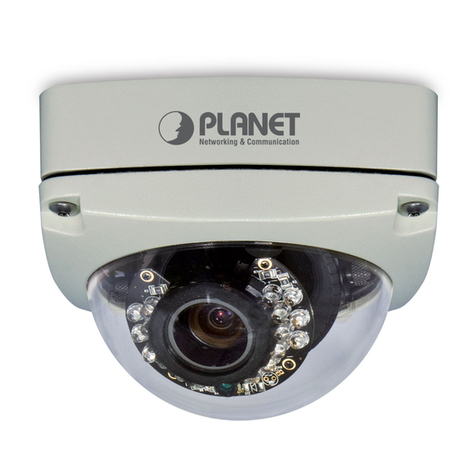
Planet ICA-151 User manual

Dual Mode CMOS Internet Camera
ICA-151
User’s Manual

Copyright
Copyright (C) 2007 PLANET Technology Corp. All rights reserved.
The products and programs described in this User’s Manual are licensed products of PLANET
Technology, This User’s Manual contains proprietary information protected by copyright, and this
User’s Manual and all accompanying hardware, software, and documentation are copyrighted.
No part of this User’s Manual may be copied, photocopied, reproduced, translated, or reduced to
any electronic medium or machine-readable form by any means by electronic or mechanical.
Including photocopying, recording, or information storage and retrieval systems, for any purpose
other than the purchaser's personal use, and without the prior express written permission of
PLANET Technology.
Disclaimer
PLANET Technology does not warrant that the hardware will work properly in all environments and
applications, and makes no warranty and representation, either implied or expressed, with respect
to the quality, performance, merchantability, or fitness for a particular purpose.
PLANET has made every effort to ensure that this User’s Manual is accurate; PLANET disclaims
liability for any inaccuracies or omissions that may have occurred.
Information in this User’s Manual is subject to change without notice and does not represent a
commitment on the part of PLANET. PLANET assumes no responsibility for any inaccuracies that
may be contained in this User’s Manual. PLANET makes no commitment to update or keep current
the information in this User’s Manual, and reserves the right to make improvements to this User’s
Manual and/or to the products described in this User’s Manual, at any time without notice.
If you find information in this manual that is incorrect, misleading, or incomplete, we would
appreciate your comments and suggestions.
FCC Warning
This equipment has been tested and found to comply with the limits for a Class A digital device,
pursuant to Part 15 of the FCC Rules. These limits are designed to provide reasonable protection
against harmful interference when the equipment is operated in a commercial environment. This
equipment generates, uses, and can radiate radio frequency energy and, if not installed and used in
accordance with the Instruction manual, may cause harmful interference to radio communications.
Operation of this equipment in a residential area is likely to cause harmful interference in which
case the user will be required to correct the interference at his own expense.
CE mark Warning
The is a class A device, In a domestic environment, this product may cause radio interference, in
which case the user may be required to take adequate measures.
Trademarks
The PLANET logo is a trademark of PLANET Technology. This documentation may refer to
numerous hardware and software products by their trade names. In most, if not all cases, these
designations are claimed as trademarks or registered trademarks by their respective companies.
WEEE WarningTo avoid the potential effects on the environment and human health as a result of
the presence of hazardous substances in electrical and electronic equipment, end
users of electrical and electronic equipment should understand the meaning of the
crossed-out wheeled bin symbol. Do not dispose of WEEE as unsorted municipal
waste and have to collect such WEEE separately.
Revision
User’s Manual for PLANET Dual Mode CMOS Internet Camera
Model: ICA-151
Rev: 1.0
Part No.: EM-ICA151
ICA-151 User Guide
2
Table of Contents
1. Introduction.................................................................................................................. 4
1.1 Package Contents................................................................................................... 4
1.2 System Requirements............................................................................................. 5
1.3 Features.................................................................................................................. 5
1.4 Application............................................................................................................... 6
1.5 Outlook.................................................................................................................... 6
1.5.1 Front Panel................................................................................................. 7
1.5.2 Rear Panel.................................................................................................. 8
1.6 Technical Specifications.......................................................................................... 9
2. Installation.................................................................................................................. 10
2.1 Hardware Installation ............................................................................................ 10
2.2 Software Quick Configuration................................................................................ 10
3. Viewing live video...................................................................................................... 17
3.1 Connecting ICA-151 on your LAN......................................................................... 17
3.2 Connecting ICA-151 via Internet........................................................................... 19
3.3 General Options.................................................................................................... 21
4. Web Management ...................................................................................................... 22
4.1 Setup..................................................................................................................... 24
4.1.1 System ..................................................................................................... 24
4.1.2 Network .................................................................................................... 26
4.1.3 DDNS ....................................................................................................... 28
4.2 Video & Audio........................................................................................................ 29
4.2.1 Video & Audio........................................................................................... 29
4.2.2 Video Access............................................................................................ 31
4.2.3 User Database.......................................................................................... 33
4.3 Event..................................................................................................................... 34
4.3.1 Motion Detection....................................................................................... 34
4.3.2 E-Mail ....................................................................................................... 35
4.3.3 FTP........................................................................................................... 37
4.3.4 HTTP........................................................................................................ 38
4.3.5 Event Trigger............................................................................................ 39
4.4 Administration ....................................................................................................... 41
4.4.1 Maintenance............................................................................................. 41
4.4.2 Status........................................................................................................ 43
4.4.3 Log ........................................................................................................... 45
Appendix A --- Streaming Video / Audio Solution....................................................... 46
Appendix B --- Enable ActiveX options on your PC.................................................... 47
Appendix C --- Bandwidth Estimation.......................................................................... 48
Dual Mode CMOS Internet Camera
3

1. Introduction
With the experience accumulated from the IP surveillance product design, PLANET proudly
introduce our Dual Mode CMOS Internet Camera, the ICA-151, to you. The ICA-151 is an
all-functioned network camera that could express high quality video and audio to any corner
in the world.
Inside ICA-151, there is a build-in microprocessor which is dedicated for video and audio
processing. With this microprocessor, the ICA-151 could deliver MPEG-4 and M-JPEG
video streaming at the same time, manipulate the audio captured by its microphone or even
play the sound sent out by the remote administrator. Furthermore, the ICA-151 also
supports the cell phone user. The 3GPP feature lets the administrator watch the video just
by clicking on a few buttons on his cell phone.
ICA-151 could work with Cam Viewer, a multi-camera video surveillance application that
enables you to set up a comprehensive and effective surveillance system quickly and easily.
The Cam Viewer works with PLANET network cameras and video server to provide video
monitoring, recording and event management functions.
The thin, light, fancy and fashion style makes the ICA-151 suit for many occasions. You
could use it for home security purpose or as a professional surveillance camera. You might
just put it on your desktop or mount it on the ceiling of your office.
1.1 Package Contents
Please inspect your package. The following items should be included in the package:
z1 x ICA151
z1 x Camera Stand
z1 x Power Adapter
z1 x CD-Rom
z2 x Quick Installation Guide
ICA-151 User Guide
4

1.2 System Requirements
Network Interface 10/100 Base-TX Ethernet
Monitoring System Recommended for Internet Explorer 6.0 or later
System Hardware · CPU: Pentium 4, 1.5GHz or above
· Memory Size : 512 MB or above
· VGA card resolution : 1024 x 768 or above
· Network bandwidth: In VGA resolution mode, minimum
upload bandwidth is 1Mbps.
Optional:
. Sound Card
. Microphone (for PC)
. Speaker (for PC and ICA-151)
1.3 Features
zMultiple Video and Two Way Audio Supports
Enhanced MPEG-4 and Motion-JPEG Video Compression maximize image quality while
minimizing bandwidth requirement. G.726 Audio Compression is the most popular audio
compression standard. It is able to synchronize with video streams. The two way audio
communication allows user to use IP camera as intercom.
zMotion Detection & E-mail Alerts
User may set up 4 motion-detection regions, each with adjustable size and sensitivity. When
motion is detected at the specified regions, the system can send an E-mail alert or FTP upload
with a video image or files attached.
zSupport most Popular Internet Services
DDNS (Dynamic DNS) makes Internet connection easier - when your Internet Gateway uses a
dynamic IP address; NTP (Network Time Protocol) would calibrate the system clock from an
Internet Time Server, ensuring the time stamp on video accurate.
zUser-Friendly Design
ICA-151 has streamlined design, attractive for indoor use. It supports both Desktop Stand and
Wall Mounting for flexible installation. And it features web-based management interface, with
minimal setup effort.
zCam Viewer Support
A Windows surveillance utility, Cam Viewer, is provided for monitoring and recording video on the
remote PC. It supports up to 64 videos simultaneously, multiple layout, motion detection, instant
& scheduled recording ... etc.
Dual Mode CMOS Internet Camera
5

1.4 Application
Remote Monitoring applications
1.5 Outlook
ICA-151 User Guide
6

1.5.1 Front Panel
The front panel of ICA-151 is shown below.
Microphone
ACT
PWR
LAN
LED Definition
LED Status LED Description
Off No power.
On Power on.
PWR
Blinking The Power LED will blink during start up (15 ~ 20 sec).
Off Camera is not capturing video.
ACT Blinking Camera is capturing video.
Off LAN is not connected or camera is not sending/receiving data.
LAN Blinking Data is being transmitted or received via the LAN connection.
Dual Mode CMOS Internet Camera
7

1.5.2 Rear Panel
The rear panel of ICA-151 is shown below.
PWR LAN
AUDIO OUT
Port Definition
PORT PORT Description
AUDIO OUT An external speaker can be plugged in.
PWR
n
nect the supplied power adapte
r
.
LAN
n
nect your Camera to a 10/100Base-TX hub or switch.
Reset
s
et to manufacturer default valued and reboot.
When pressed and held over 10 seconds, the settings of IP Camera
will be set to the default values.
Upon completion, the PWE LED will blink three times.
Bottom Panel of ICA-151
ICA-151 User Guide
8

1.6 Technical Specifications
Hardware
Image Sensor CMOS, 1/6” VGA Resolution
Lens F2.8 Fixed Focus
Effective Range:0.2M to infinity
Video
Video Codec MPEG-4 / M-JPEG Dual Stream
Resolution 640x480
320x240
160x120
Frame Rate Up to 30 fps @ all resolution
Image Control AWB, AGC, Contrast, Brightness
3GPP 160x120@15fs, MPEG-4 for mobile phone viewing
Audio
Audio Codec G.726 ADPCM
Microphone/Speaker Two Way Audio, built-in Microphone and external Speaker
Network and Configuration
LAN RJ-45, Ethernet 10/100 Base T
Supported Protocols TCP/IP, SMTP, HTTP, DHCP, NTP, RTSP/RTP, UPnP
E-mail Notification Triggered by motion detection
Motion Detection Area 4 Area definable
Hardware
Power Adapter 5V DC, 1A
Dimensions(H x W x D) 135 x 107 x 55 mm
Weight 235g without stand , 386g with stand
Dual Mode CMOS Internet Camera
9

2. Installation
The followings are instructions for setting up the ICA-151. Refer to the illustration and follow
the simple steps to quickly install.
2.1 Hardware Installation
1. Connect an Ethernet cable
Connect one end of an Ethernet cable to the LAN port located on the camera’s rear panel
and connect the other end to the network device (hub or switch).
2. Attach the external power supply
Attach the provided power adapter to the camera’s connector labeled "PWR" on the rear
panel.
3. Check the LEDs
a. The Power LED will turn on briefly, and then start blinking during startup. After startup is
completed, the Power LED will remain ON.
b. The LAN LED will be ON.
2.2 Software Quick Configuration
Initial setup should be performed by using the supplied Windows-based Setup Wizard as
follows:
1. Insert the bundled product CD into CD-Rom drive to launch the autorun program.
2. After the CD’s menu displaying, click the “Setup Wizard” hyperlink on the menu to start
the configuration process.
Note:
If the CD’s menu does not appear, click “Start” on the task bar and select “Run” to type “X:\Utility\
SetupWizard \SetupWizard.exe”, assume X is your CD-Rom drive.
ICA-151 User Guide
10

3. The welcome screen appears. Click on “Setup Camera” button to start the wizard.
4. After clicking the setup camera button, it will auto search for the cameras on your
network. Click on to continue.
Dual Mode CMOS Internet Camera
11

5. The next screen below will list the camera on your network. Select it from the list on the
left side, the current settings table will be displayed on the right side. Click on to
continue.
6. The administrator login window will pop up. If the Administrator Name and Administrator
Password have been set, you will be prompted to enter them. If using the default values,
please enter “admin” for both the name and the password. Click on “OK” to continue.
ICA-151 User Guide
12

7. On the following Camera Settings screen, you can fill and configure the Device Name,
Description, Time Zone, Local Date and time here. Click on to continue.
8. You can choose “Fixed IP Address” or “Dynamic IP Address” here.Click on to
continue.
Note:
1. Fixed IPAddress is recommended, and can always be used.
2. Dynamic IP Address can only be used if your LAN has a DCHP Server.
Dual Mode CMOS Internet Camera
13

9. If you chose to use Fixed IP Address, the following TCP/IP Settings screen will be
displayed. You can configure the IP Address, Subnet Mask, Default Gateway, Primary
and secondary DNS. Click on to continue.
10. The next screen below will display all details of the camera. Click on to continue if
those settings are correct, or click on back to modify any incorrect values.
ICA-151 User Guide
14

11. In this confirmation window below, click on “OK” to confirm that you want to save the
new settings. If you want to cancel your changes, please click on “Cancel”.
12. After confirming, the wizard will start to save the new settings as below screen.
Dual Mode CMOS Internet Camera
15

13. When the saving process is completed, the prompt window will be displayed as below
screen. Click on “OK” to finish.
14. The setup wizard now is completed. Click on “Exit” to close the setup wizard.
After modifications, you may now connect the camera with the new configuration via web
browser.
ICA-151 User Guide
16

3. Viewing live video
3.1 Connecting ICA-151 on your LAN
After finishing the Setup Wizard, all LAN users can view live video by using the Internet
Explorer. This Chapter has details of viewing live video on your LAN.
1. Start the Web browser.
2. In the Address box, please enter "http://address”. The “address” is the LAN IP address
which up to your new configuration from Setup Wizard.
Note:
The LAN IP address of factory default setting is “192.168.0.20”.
3. When you connect, the following home page will be displayed.
4. Click on “View Video”.
Note:
If the Administrator has restricted access to known users, you will then be prompted for a username
and password.
Dual Mode CMOS Internet Camera
17

5. The first time you view the camera, you will be prompted to install an ActiveX component
as below. You must install this ActiveX component in order to view the video stream
in Internet Explorer. Click on "Install" to install.
6. After installing, you will be able to view the live video stream in its own window as below.
Note:
1. Video will start playing automatically. There may be a delay of a few seconds while the video
stream is buffered.
2. There are a number of options available on this screen, accessed by select list, button or icon.
The details are described in Chapter 3.3 – General Options.
ICA-151 User Guide
18

3.2 Connecting ICA-151 via Internet
To establish a connection from your PC to the camera via Internet, please obtain the
following information from the Administrator of the camera you wish to connect:
•Internet IP Address or Domain Name of the camera.
•Port number for HTTP connection.
•Login (username, password) if required.
Note:
You can NOT connect to a camera via the Internet unless the camera Administrator has configured
the camera and the Internet Gateway / Router used by the camera. Dial-up connections are NOT
supported.
The following has details of viewing live video via Internet.
1. Start the Web browser.
2. In the Address box, please enter “http://address:port”. The “address” is public IP address
or public domain name, and “port” is the port number.
3. When you connect, the following home page will be displayed.
Dual Mode CMOS Internet Camera
19

4. Click on “View Video”.
Note:
If the Administrator has restricted access to known users, you will then be prompted for a username
and password.
5. The first time you view the camera, you will be prompted to install an ActiveX component
as below. You must install this ActiveX component in order to view the video stream
in Internet Explorer. Click on "Install" to install.
6. After installing, you will be able to view the live video stream in its own window as below.
Note:
1. Video will start playing automatically. There may be a delay of a few seconds while the video
stream is buffered.
2. There are a number of options available on this screen, accessed by select list, button or icon.
The details are described in Chapter 3.3 – General Options.
ICA-151 User Guide
20
Other manuals for ICA-151
3
Table of contents
Other Planet IP Camera manuals

Planet
Planet ICA-108W User manual

Planet
Planet ICA-500C User manual

Planet
Planet ICA-120 User manual

Planet
Planet ICA-HM125 User manual

Planet
Planet ICA-107 User manual

Planet
Planet ICA-HM131 User manual

Planet
Planet RS-21 KLMR User manual

Planet
Planet ICA-4150 User manual

Planet
Planet ICA-3150 User manual

Planet
Planet ICA-107 User manual

Planet
Planet ICA-650 User manual

Planet
Planet ICA-HM317 User manual

Planet
Planet ICA-120 User manual

Planet
Planet ICA-HM350 User manual

Planet
Planet ICA-H610 User manual

Planet
Planet ICA-HM100 User manual

Planet
Planet ICA-HM120 User manual

Planet
Planet ICA-3350P User manual

Planet
Planet ICA-700 User manual

Planet
Planet ICA-3260 User manual