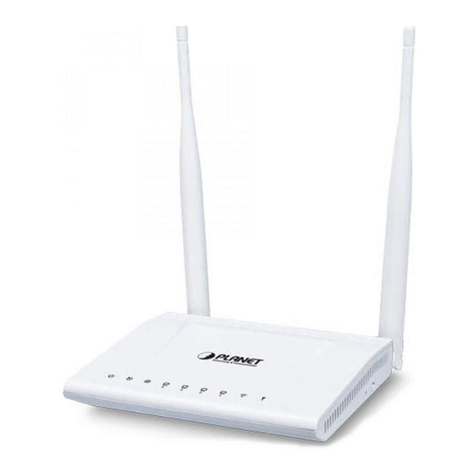
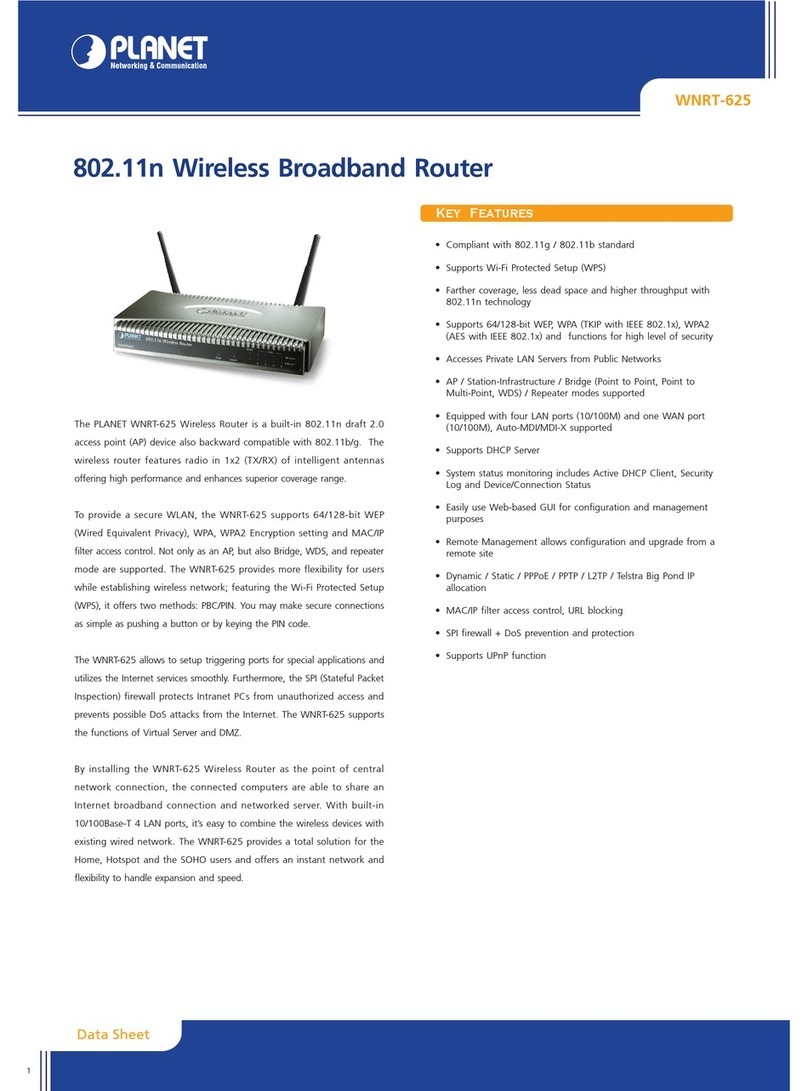
Planet VIP-281SW User manual

- 1 -
User’s Manual
VIP-281SW
802.11n Wireless VoIP Router

- 2 -
parately.
Copyright
Copyright (C) 2011 PLANET Technology Corp. All rights reserved.
The products and programs described in this User’s Manual are licensed products of PLANET Technology, This
User’s Manual contains proprietary information protected by copyright, and this User’s Manual and all
accompanying hardware, software, and documentation are copyrighted.
No part of this User’s Manual may be copied, photocopied, reproduced, translated, or reduced to any electronic
medium or machine-readable form by any means by electronic or mechanical. Including photocopying, recording,
or information storage and retrieval systems, for any purpose other than the purchaser's personal use, and without
the prior express written permission of PLANET Technology.
Disclaimer
PLANET Technology does not warrant that the hardware will work properly in all environments and applications,
and makes no warranty and representation, either implied or expressed, with respect to the quality, performance,
merchantability, or fitness for a particular purpose.
PLANET has made every effort to ensure that this User’s Manual is accurate; PLANET disclaims liability for any
inaccuracies or omissions that may have occurred.
Information in this User’s Manual is subject to change without notice and does not represent a commitment on the
part of PLANET. PLANET assumes no responsibility for any inaccuracies that may be contained in this User’s
Manual. PLANET makes no commitment to update or keep current the information in this User’s Manual, and
reserves the right to make improvements to this User’s Manual and/or to the products described in this User’s
Manual, at any time without notice.
If you find information in this manual that is incorrect, misleading, or incomplete, we would appreciate your
comments and suggestions.
CE mark Warning
The is a class B device, In a domestic environment, this product may cause radio interference, in which case the
user may be required to take adequate measures.
WEEE Warning
To avoid the potential effects on the environment and human health as a result of the presence of
hazardous substances in electrical and electronic equipment, end users of electrical and electronic
equipment should understand the meaning of the crossed-out wheeled bin symbol. Do not dispose of
WEEE as unsorted municipal waste and have to collect such WEEE se
Trademarks
The PLANET logo is a trademark of PLANET Technology. This documentation may refer to numerous hardware
and software products by their trade names. In most, if not all cases, their respective companies claim these
designations as trademarks or registered trademarks.

- 3 -
Revision
User’s Manual for PLANET 802.11n Wireless VoIP Router:
Model: VIP-281SW
Rev: 1.0 (2011, February)
Part No. EM-VIP-281SW_v1

- 4 -
TABLE OF CONTENTS
Chapter 1 Introduction..............................................................................................6
Overview.............................................................................................................6
Package Content................................................................................................7
Physical Details..................................................................................................7
Physical Interface & Button.................................................................................................... 8
Chapter 2 Preparations & Installation......................................................................9
Physical Installation Requirement....................................................................9
Keypad commands .............................................................................................................. 10
Chapter 3 Network Settings ...................................................................................13
Configuring and monitoring your Router from web browser.......................13
Overview on the web interface of Router............................................................................. 13
Manipulation of Router via web browser.............................................................................. 13
Network Oprtation Mode ...................................................................................................... 14
WAN Interface Setup ........................................................................................................... 15
LAN Interface Setup............................................................................................................. 21
Chapter 4 Wireless Settings...................................................................................23
Basic Settings ...................................................................................................................... 23
Advanced Settings ............................................................................................................... 25
Security Setup...................................................................................................................... 27
Access Control..................................................................................................................... 30
WDS Settings....................................................................................................................... 30
Site Survey........................................................................................................................... 31
WPS Settings ....................................................................................................................... 31
Wireless Schedule ............................................................................................................... 34
Chapter 5 Firewall Settings ....................................................................................35
Port Filtering......................................................................................................................... 35
IP Filtering ............................................................................................................................ 35
MAC Filtering ....................................................................................................................... 36
Port Forwarding.................................................................................................................... 37
URL Filtering ........................................................................................................................ 37
DMZ ..................................................................................................................................... 38
QoS ...................................................................................................................................... 38
Chapter 6 SIP Settings............................................................................................39
Phone 1 / Phone 2 ............................................................................................................... 39
Tone ..................................................................................................................................... 49
Other .................................................................................................................................... 51
SIP QoS ............................................................................................................................... 52
Chapter 7 Management...........................................................................................53
- 5 -
Status ................................................................................................................................... 53
Statistics ............................................................................................................................... 53
DDNS ................................................................................................................................... 54
Time Zone Setting................................................................................................................ 55
Denial-of-Service.................................................................................................................. 55
SNMP Management............................................................................................................. 56
Log ....................................................................................................................................... 57
Upgrade Firmware ............................................................................................................... 58
Auto Config .......................................................................................................................... 58
Save / Reload Settings ........................................................................................................ 60
Password Setup................................................................................................................... 61
Chapter 8 Utility.......................................................................................................62
Ping Watchdog Setup .......................................................................................................... 62
Ping Test .............................................................................................................................. 62
Traceroute ............................................................................................................................ 63
Reboot.................................................................................................................................. 63
Logout .................................................................................................................................. 63
Appendix A Voice communication samples...................................................64
Peer to peer (P2P) mode ..................................................................................................... 64
Case 2: (Peer-to-Peer mode) VIP-281SW Port 1 to Port 2 communications ...................... 65
Case 3: SIP Proxy mode...................................................................................................... 66
Case 4: Call Forward Feature.............................................................................................. 69
Case 5: VIP-281SW register with IPX-1900 via WAN port .................................................. 71
Case 6: VIP-281SW register with UMG-2000 via WAN port ............................................... 74
Appendix B The method of featured voice operation guide.........................76
Call Transfer......................................................................................................................... 76
3-Way Conference ............................................................................................................... 76
Call Waiting .......................................................................................................................... 76
Switch the Default Proxy...................................................................................................... 76
Auto Update firmware by manual (Keypad)......................................................................... 77
Appendix C Frequently Asked Questions List...............................................78
Appendix D Router Specifications..................................................................79

Chapter 1
Introduction
Overview
Integrating the cutting edge of Internet Telephony and VoIP Router manufacturing experience, PLANET
now introduces the latest member of PLANET Wireless VoIP Router family: the VIP-281SW.
The VIP-281SW provides not only high-quality voice communications and wired Internet sharing
capabilities but also the Access Point (AP) function for flexible wireless communication. With advanced
router and VoIP DSP processor technology, the VIP-281SW is able to make calls via SIP proxy voice
communications plus the IP sharing and the QoS mechanism.
By applying the VIP-281SW, home users and companies are able to save installation cost and extend
the VoIP network from their previous investments in telephones, conferences and speakerphones. The
VIP-281SW is equipped with two telephony interfaces, so users may register to different SIP proxy
servers and establish up to 2 concurrent VoIP calls for more flexibility in the voice communications. The
VIP-281SW can also be the bridge between traditional analog telephones and IP network with an
extremely affordable investment.
With built-in IEEE 802.11b/g/n wireless network capability, the VIP-281SW allows any computer and
wireless enabled network client connect to it without additional cabling. The 802.11n wireless
capability gives users the highest speed of wireless experience ever. With an 802.11n compatible
wireless adapter installed in your PC, the files can be transferred at up to 300Mbps. The radio coverage
is also doubled to offer the high speed wireless connection even in a wide space of your office or house.
To secure the wireless communication, the VIP-281SW supports most up-to-date encryption: WEP,
WPA-PSK and WPA2-PSK. In addition, the VIP-281SW supports WPS configuration with PBC/PIN
type for users to connect to a secured wireless network easily.
Product Features
•IEEE 802.11b/g/n wireless standard compliant
•Multi-mode: AP, AP-Client Mode
•Smart QoS mechanism to ensure the voice quality
•Auto-Provision feature for flexible, ease-of use system integration
•NAT Router, Port Forwarding, DMZ
•IP ToS (IP Precedence) / DiffServ
•Voice prompt for machine configurations
•Supports 64/128-bit WEP, WPA, WPA-PSK, WPA2, WPA2-PSK and 802.1x encryption
VoIP Features
•SIP 2.0 (RFC3261) compliant
•Up to 2 concurrent VoIP calls
•Voice codec support: G.711, G.729 AB, G.723, G.276, GSM and G.722
- 6 -
11

•T.38 FAX transmission over IP network (G.711 Fax pass-through)
•In-band and out-of-band DTMF Relay (RFC 2833)
•3-Way conference calls
•Call Waiting / Forward / Transfer / Hold / Resume
•Caller ID Detection / Generation: DTMF, BELLCORE, ETSI, BT, NTT
•Voice processing: VAD, CNG, Dynamic Jitter Buffer, G.168 Line Echo Cancellation
•SNMP v1/v2 and Auto Provision management
Package Content
The contents of your product should contain the following items:
802.11n Wireless VoIP Router
Power adapter
Quick Installation Guide
User’s Manual CD
RJ-11 cable x 2
RJ-45 cable x1
Antenna x2
Physical Details
The following figure illustrates the each panel of VIP-281SW
Front Panel of VIP-281SW
Rear Panel of VIP-281SW
- 7 -

Physical Interface & Button
Front Panel LED Indicators
LED State Descriptions
PWR ON
Off
Router is power ON
Router is power Off
WAN
ON
Flashing
Off
Router network connection established
Data traffic on cable network
Waiting for network connection
LAN
ON
Flashing
Off
LAN is connected successfully
Data is transmitting
Ethernet not connected to PC
WPS ON
Off
The Wi-Fi Protected Setup function is starting.
The Wi-Fi Protected Setup function is close
WLAN Flashing
Off
Transmitting or receiving data through the Wireless LAN
Wireless LAN is no function
Phone
ON
Flashing
Off
Telephone Set is On-Hook
Ring Indication
Telephone Set is Off-Hook
Reset Button - Pressing 1 second to reboot machine.
- Pressing 5 seconds to reset to the factory default setting
WPS Button
- Pressing 3 seconds to start the WPS function 2 minutes for client
connection.
- Pressing 10 seconds to enable or disable the wireless function.
Rear Panel Indicators
1 WAN
RJ-45 connector for Internet access, connected directly to
Switch/Hub through straight CAT-5 cable.
2 LAN RJ-45 connector, to maintain the existing network structure,
connected directly to the PC through straight CAT-5 cable
3 FXS
RJ-11 connector, connected directly to the analog phone.
4 12V DC 12V DC Power input outlet
5 Antenna
Used to connect the external antenna for accessing to 802.11b/g/n
wireless network
Í
Note
1. Machine LAN port default IP is http://192.168.0.1. Press
RESET button on front panel over 5 seconds will reset the
VoIP Router to factory default value. (Except speed dial and
call forward settings)
2. Using the power supply that is not the one included in package
will cause damage and void the warranty for this product.
- 8 -

2
Chapter 2
Preparations & Installation
Physical Installation Requirement
This chapter illustrates basic installation of Wireless VoIP Router (“Router” in the following term)
•Network cables. Use standard 10/100Base-TX network (UTP) cables with RJ-45 connectors.
•TCP/IP protocol must be installed on all PCs.
For Internet Access, an Internet Access account with an ISP, and either of a DSL or Cable modem
Administration Interface
PLANET Router provides GUI (Web based, Graphical User Interface) and utility for machine
management and administration.
Web configuration access
You will connect to SIP Router via your web browser automatically. Router will prompt for logon
username / password, please enter: admin / admin to continue machine administration.
Router will prompt for logon username/password, please enter: admin / adminto continue machine
administration.
- 9 -

The default IP address of LAN port is 192.168.0.1. (The WAN port is DHCP client mode.) You also
could open your web browser, and insert http://192.168.0.1 in the address bar of your web browser to
logon Router web configuration page.
To start Router web configuration, you must have one of these web browsers installed on computer for
management
•
Microsoft Internet Explorer 6.00 or higher with Java support
Please locate your PC in the same network segment
(192.168.0.x) of Router. If you’re not familiar with TCP/IP
please refer to related chapter on user’s manual CD or
consult your network administrator for proper network
configurations.
Í
Note
Keypad commands
The Router series phone adapters support telephone keypad configurations, please connect analog
telephone set and refer to the following table for machine network configurations.
IVR Menu Choice Machine operation Parameter(s) Notes
#111#
Set DHCP client None
WAN port will change to
DHCP Client
#112xxx*xxx*xxx*
xxx#
Setup Static IP Address
Use the * (star) key
when entering a decimal
point.
DHCP will be disabled and
system will change to the
Static IP type.
#113xxx*xxx*xxx*
xxx#
Set Network Mask
Use the * (star) key
when entering a decimal
point.
Must set Static IP first.
#114xxx*xxx*xxx*
xxx#
Set Gateway IP Address
Use the * (star) key
when entering a decimal
point.
Must set Static IP first.
#115xxx*xxx*xxx*
xxx#
Set Primary DNS Server
Use the * (star) key
when entering a decimal
point.
Must set Static IP first.
#190#
Unlock None
Must unlock the protect
function before carry out
the firmware update
(#160#).
#195#
Save Network Settings None
Must save network
settings after set up
network settings via
keypad.
- 10 -
,

- 11 -
#198#
Factory Reset None
The system will be reset to
factory default value and
reboot automatically.
Following keypad commands can be used to display the network settings enabled on Router via voice
prompt.
IVR Menu Choice Machine operation Notes
#120#
Check LAN port IP Address
IVR will announce the current IP address of
the LAN port.
#126#
Check WAN port IP Address
IVR will announce the current IP address of
the WAN port.
#121#
Check network connection Type
IVR will announce if DHCP in enabled or
disabled. (WAN port)
#122#
Check the Phone Number
IVR will announce current enabled VoIP
number. (WAN port)
#123#
Check Network Mask
IVR will announce the current network mask
of the Router. (WAN port)
#124#
Check Gateway IP Address
IVR will announce the current gateway IP
address of the Router. (WAN port)
#125#
Check DNS Server Setting
IVR will announce the current setting in the
DNS field. (WAN port)
#128#
Check Firmware Version
IVR will announce the version of the
firmware running on the Router.
Following keypad commands can be used to set up the main function .
IVR Menu Choice Machine operation Parameter(s) Notes
#130+first
priority codec
Set First Priority Codec
01: G.711 u-Law, 02:
G.711 a-Law, 03: G.729,
04: G.723 6.3K, 05:
G.723 5.3K, 06: G.726
16K, 07: G.726 24K, 08:
G.726 32K, 09: G.726
40K, 10: GSM-FR, 11:
G.722
You can set the codec you
want to the first priority.
For example: #13001#
Set G.711 u-Law to the first
priority codec
#133#
Set Speaker Voice Gain 00~31, 32: Mute
For example: #13305#
Mic Voice: 5
#134#
Set Mic Voice Gain 00~31, 32: Mute
For example: #13410#
Mic Voice: 10
#138#
Enable call waiting None Enable Call waiting

- 12 -
#139#
Disable call waiting None Disable Call waiting
#140+Forward
type+Forward
Phone Number#
Forward Settings
Forward Type:
1: Immediate Forward
2: Busy Forward
3: No answer Forward
For example: #1401101#
Immediate Forward to 101
#141#
Disable Forward Settings None
#150#
Select Default Realm 0: Realm 1, 1: Realm 2
For example: #1501#
Set Default Proxy to Realm 2
#160#
Update firmware None
Update firmware
Must unlock the protect
function (#190#) before carry
out the firmware update.

3
Chapter 3
Network Settings
Configuring and monitoring your Router from web browser
The Router integrates a web-based graphical user interface that can cover most configurations and
machine status monitoring. Via standard web browser, you can configure and check machine status
from anywhere around the world.
Overview on the web interface of Router
With web graphical user interface, you may have:
More comprehensive setting feels than traditional command line interface.
Provides user input data fields, check boxes, and for changing machine configuration settings
Displays machine running configuration
To start Router web configuration, you must have one of these web browsers installed on computer for
management
Microsoft Internet Explorer 6.00 or higher with Java support
Manipulation of Router via web browser
Log on Router via web browser
After TCP/IP configurations on your PC, you may now open your web browser, and input
http://192.168.0.1 (Default LAN port IP address) to logon Router web configuration page.
Phone Adapter will prompt for logon username/password: admin / admin
- 13 -
Enter the IP address of the Router
which by default is 192.168.0.1

- 14 -
Router login prompt screen
When users login the web page, users can see the general information like company…etc in this main
page.
VoIP Router main page
Network Oprtation Mode
You can setup different modes to WAN and LAN interface for NAT, Bridging and Wireless ISP function

NAT
In this mode, the device is supposed to connect to internet via
ADSL/Cable Modem. The NAT is enabled and your PC in LAN port
shares the same IP to ISP through WAN port. The connection type
can be setup in WAN page by using PPPOE, DHCP client, PPTP
client, static IP or L2TP.
Bridge
In this mode, all Ethernet ports are bridged together and NAT function
is disabled. All the LAN port related function and firewall are not
supported.
Wireless ISP
In this mode, all Ethernet ports are bridged together and the wireless
client will connect to ISP access point. The NAT is enabled and PCs in
Ethernet ports share the same IP to ISP through wireless LAN. You
must set the wireless to client mode first and connect to the ISP AP in
Site-Survey page. The connection type can be setup in WAN page by
using PPPOE, DHCP client, PPTP client, static IP or L2TP.
WAN Interface Setup
This page is used to configure the parameters for Internet network which connects to the WAN port of
your Gateway. Here you may change the access method to static IP, DHCP, PPPoE, PPTP or L2TP by
click the item value of WAN Access type.
- 15 -

Connection Type Description – Static IP
- 16 -
Check to enable UPnP function
Enable UPnP
Default : Disable
Static IP Set WAN interface as Static IP mode.
WAN IP Address of the Router
IP Address
Default : 192.168.0.1
WAN mask of the Router
Subnet Mask
Default : 255.255.255.0
Gateway Address of the Router
Default Gateway
Default : 192.168.0.254
Set MTU (maximum transmission unit) size
MTU Size
Default : 1412
Set three alternatives Domain Name Server for WAN interface.
DNS1/ 2/ 3
Default : Null
To clone the MAC by manual input.
Clone MAC Address
Default : 000000000000 (Null)

Connection Type Description – DHCP Client
- 17 -
Check to enable UPnP function
Enable UPnP
Default : Disable
Check to enable the IGMP Proxy function
Enable IGMP Proxy Default : Enable
If accept ICMP response via WAN port
Enable Ping Access on WAN Default : Enable
If accept be accessed to Web Management Interface via WAN
port
Enable IPSec pass through on
VPN connection
Default : Enable
Check to enable PPTP pass through function
Enable PPTP pass through on
VPN connection Default : Disable
Check to enable L2TP pass through function
Enable L2TP pass through on
VPN connection Default : Disable

Connection Type Description – PPPoE
- 18 -
DHCP Client Set WAN interface as DHCP mode.
Select to attain DNS automatically from server or user wants to
set DNS manually.
Attain DNS Automatically
/
Set DNS Manually
Default : Set DNS Manually

After confirming the modification you’ve done, please click on the Apply button to apply settings
effective and the Router will be reload page automatic by itsely, that you must to afresh enter the final
modification IP address for logon web management.
Connection Type Description – PPTP/L2TP
- 19 -
PPPoE Set WAN interface as PPPoE mode.
Set user name of PPPoE connection
User Name
Default : Null
Set password of PPPoE connection
Password
Default : Null
Set Service Name of PPPoE for description
Service Name
Default : Null
Set PPPoE connection type to be Continuous/ Connect on Demand/
Manual. If user set type as Continuous, Router will keep trying to
connect to server when PPPoE disconnect. If user set type as Connect
on Demand, please set following idle time, Router will check
connection after this time. If user set type as Manual, Router will only
connect or disconnect by press Connect or Disconnect manually.
Connection Type
Default : Continuous
Set PPPoE connection idle time for Connect on Demand.
Idle Time
Default : 5

PPTP Set LAN interface as PPTP/L2TP mode.
Set IP type if Dynamic IP or Static IP at PPTP/L2TP connection.
Mode
Default : Dynamic IP
WAN IP Address of the Router at Static IP type.
IP Address
Default : 0.0.0.0
WAN Mask of the Router at Static IP type.
Subnet Mask
Default : 0.0.0.0
Gateway of the Router
Gateway
Default : 0.0.0.0
Set PPTP/L2TP Server IP address.
Server IP Address
Default : 0.0.0.0
Set user name of PPTP/L2TP connection
User Name
Default : Null
Set password of PPTP/L2TP connection
Password
Default : Null
- 20 -
Í
Note
for the WAN environment setting. If the “Connect Type” is
“PPPoE”, the Utility Tool can NOT find the device.
Please be noticed that the Utility Tool is only designed
Table of contents
Other Planet Wireless Router manuals

Planet
Planet WRT-410A User manual

Planet
Planet WNRT-620 User manual

Planet
Planet VDR-300NU User manual

Planet
Planet WDRT-1200AC User manual

Planet
Planet WNRT-632 User manual

Planet
Planet XRT-411 User manual

Planet
Planet FRT-401 User manual

Planet
Planet XRT-501 User manual

Planet
Planet WMRT-414 User manual

Planet
Planet WDRT-731U User manual

Planet
Planet XRT-401E User manual

Planet
Planet WNRT-617G User manual

Planet
Planet WNRT-617G User manual

Planet
Planet WAP-4050 Assembly instructions

Planet
Planet WNAP-7200 User manual

Planet
Planet WNRT-630 User manual

Planet
Planet WDRT-750AC User manual

Planet
Planet WNRT-625 User manual

Planet
Planet ADW-4100 User manual

Planet
Planet WRT-405 User manual