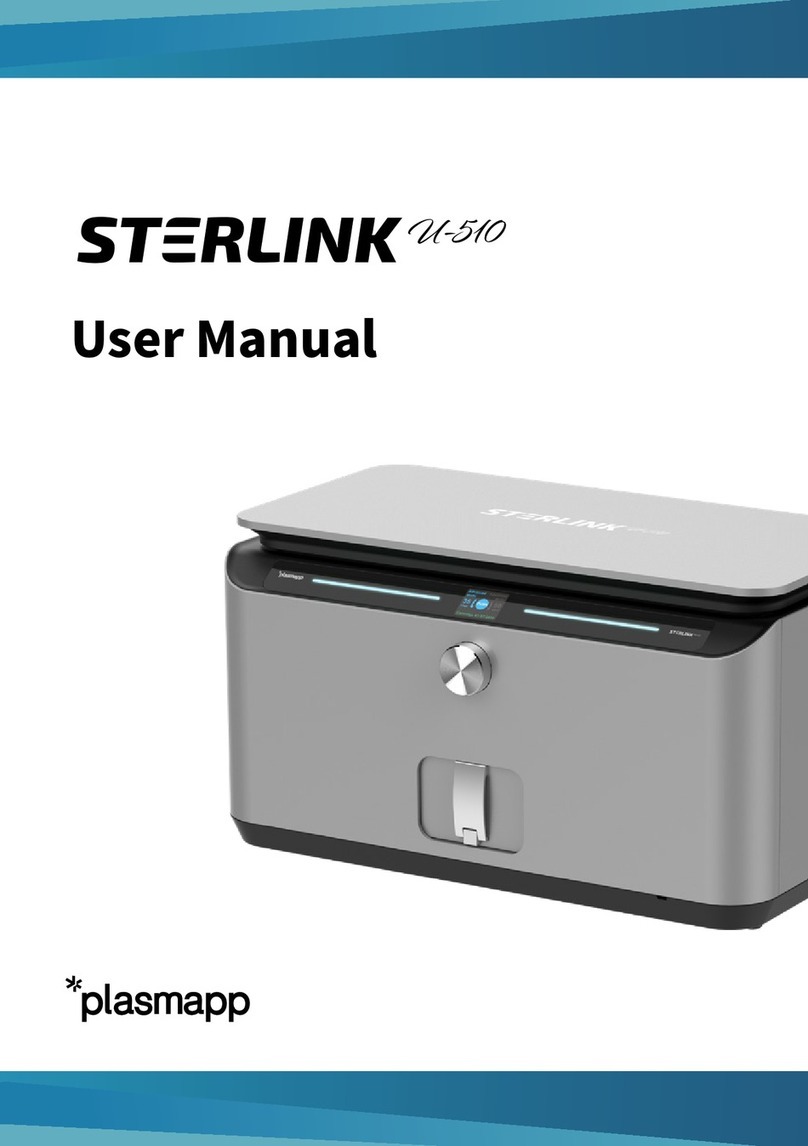
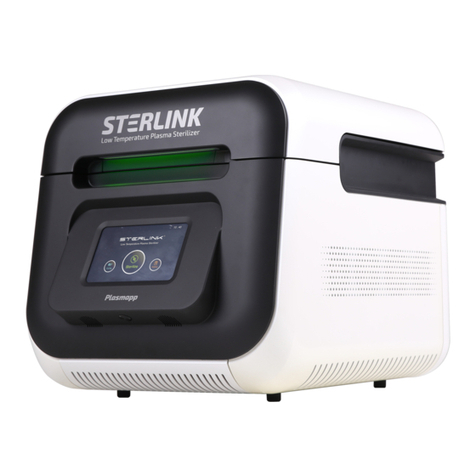
Plasmapp STERLINK mini User manual

PLA-UM-SMU-001
Language: EN
STERLINK mini User manual 1
STERLINK mini
User Manual
Low Temperature Plasma Sterilizer
Language: KR □ EN ■ FR □ DE □ IT □ ES □ HU □ GR □ AT □ CZ □ SE □ PL □ NO □ BE □ JA □ PT □
STERLINK mini Sterilization System
Document Number : PLA-UM-SMU-001

Rev. 02 (May 2023)
Plasmapp Co., Ltd.
STERLINK mini User Manual
2
User Manual
Plasmapp Co., Ltd.
(41061) 102, Cheombok-ro, Dong-gu, Daegu, Republic of Korea
Plasmapp’s Customer Service Center +82-1544-0508
Plasmapp International Customer Support
(Contact your local Plasmapp Customer Support Representative)
www.plasmapp.com
ⓒ2023 Plasmapp Co., Ltd. All rights reserved.
Other products mentioned in this publication are the trademarked by their respective owners.
Reproduction, adaptation, or translation of this publication without prior written permission is prohibited.
Printed in Republic of Korea.

Rev. 02 (May 2023)
Plasmapp Co., Ltd.
STERLINK mini User Manual
3
Table of Contents
CHAPTER 1. INTRODUCTION 6
1.1. How to Use This Manual 6
1.2. Contact Us 6
1.3. Contact Information 7
1.3.1. Manufacturer 7
1.3.2. Customer Service Center 7
CHAPTER 2. SAFETY INFORMATION 8
2.1. Personal Safety and First Aid 8
2.2. Personal Protective Equipment 9
2.3. Warnings, Cautions and Notes 10
2.4. Symbols 10
CHAPTER 3. STERILIZER OVERVIEW 13
3.1. Intended Use 13
3.2. Sterilization Processes 13
3.3. Sterilization cycle 14
3.4. Sterilizer Systems and Accessories 15
3.5. Sterilant cassettes 18
CHAPTER 4. PREPARATION OF MEDICAL DEVICES 20
4.1. Indications for Use 20
4.2. Items Applicable to the Sterilizer 20
4.3. Things that Cannot Be Processed by the Sterilization System 20
4.4. Material compatibility 202
4.5. Instructions for Preparing the Items to Be Sterilized 22
4.6. Cleaning, Rinsing, and Drying 22
4.7. Packaging and loading 23

Rev. 02 (May 2023)
Plasmapp Co., Ltd.
STERLINK mini User Manual
4
4.7.1. Packaging 23
4.7.2. Loading 23
CHAPTER 5. OPERATION 25
5.1. Before Use 25
5.2. Start-up and Preheating 26
5.3. Preparations for Loading 27
5.4. Cassette loading 28
5.5. Starting the Sterilization Cycle 29
5.6. Progress and Completion of the Cycle 31
5.7. Cancellation of the Sterilization Cycle 32
5.8. Handling Sterilized Loads 33
5.8.1. Inspecting chemical indicator 34
5.8.2. Processing self-contained biological indicator 34
CHAPTER 6. ACCESS LEVELS AND ADMINISTRATOR TASKS 36
6.1. Overview 38
6.2. Access levels 38
6.3. Additional Utilities Menu 397
CHAPTER 7. REPORTS AND DATA 39
7.1. Reports 39
7.2. Data 43
CHAPTER 8. MAINTENANCE 42
8.1. Manual maintenance 44
8.1.1. Cleaning the exterior/interior of the sterilizer 44
8.1.2. Replacing the label-printer paper 43
8.1.3. Routine sterilizer maintenance 454
8.2. Sterilant cassettes 46
8.3. Shipping, Long-Term Shutdown, and Disposal of the Sterilizer 46

Rev. 02 (May 2023)
Plasmapp Co., Ltd.
STERLINK mini User Manual
6
Chapter 1. Introduction
1.1. How to Use This Manual
A user of the STERLINK mini Sterilization System must read the ‘Safety Information’, ‘Preparation
of Medical Devices,’ and ‘Operation’ sections before using it. ‘Chapter 1 Introduction’ describes the
components of this user manual. ‘Chapter 2 Safety Information’ provides information on safety and
stability when using the sterilizer. ‘Chapter 3 Overview of the Sterilizer’ summarizes the information
on the sterilizer and its components. ‘Chapter 4 Preparation of Medical Devices’ describes the method
of preparing and packing medical devices. ‘Chapter 5 Operation’ describes how to use the sterilizer
properly, and how to ensure optimum sterilization performance.
If you are responsible for controlling and supervising the STERLINK mini Sterilization System, you
must read the entire user manual. It is recommended that you carefully read the sections after Chapter
5. ‘Chapter 6 Access Privileges and Tasks Performed with Administrative Privileges’ describes the
tasks and options available only to administrators with access privileges. ‘Chapter 7 Reports and Files’
describes how to manage the sterilization information provided by the sterilizer. ‘Chapter 8
Maintenance’ and ‘Chapter 9 Troubleshooting’, and ‘Attachments’ are included for your reference. Be
sure to keep this manual in a location where you can quickly and easily find the information you need
just in case a problem arises.
1.2. Contact Us
If you have any questions about the operation of the STERLINK mini Sterilization System or would
like to know whether certain types of medical devices are sterilized safely, please contact our customer
service center at +82-1544-0508 in Korea. Internationally, contact your local Plasmapp customer
support representative. You may also visit our website at http://plasmapp.com.

Rev. 02 (May 2023)
Plasmapp Co., Ltd.
STERLINK mini User Manual
7
1.3. Contact Information
1.3.1. Manufacturer
Company Name
Plasmapp
Add.
(41061) 102, Cheombok-ro, Dong-gu, Daegu, Republic of Korea
Phone
+82-1544-0508
Website
http://plasmapp.com
1.3.2. Customer Service Center
Company Name
Plasmapp
Add.
(06611) 59, Seocho-daero 77-gil, Seocho-gu, Seoul, Republic of Korea
Phone
+82-1544-0508
e-mail

Rev. 02 (May 2023)
Plasmapp Co., Ltd.
STERLINK mini User Manual
8
Chapter 2. Safety Information
Plasmapp places the highest importance on user safety, and this chapter provides the information that
can help you use the sterilizer system safely. Before using the sterilizer, you should read and
understand the safety information and instructions specified in this chapter. You should be well
acquainted with the warnings, cautions, and notes stated in this user manual. The information set forth
herein will help ensure your safety and achieve the best performance from the sterilizer.
2.1. Personal Safety and First Aid
WARNING! HYDROGEN PEROXIDE IS CORROSIVE.
Concentrated hydrogen peroxide is corrosive to skin, eyes, nose, throat, lungs, and the
gastrointestinal tract. Always wear latex, PVC (vinyl), or nitrile gloves while removing
items from the sterilizer following any cancelled cycle or error occurrence. Residual
hydrogen peroxide may be present. If the contact occurs, immediately flush skin with large
amounts of water. If symptoms are severe or persist, consult a doctor immediately.
WARNING! HYDROGEN PEROXIDE IS AN OXIDIZER.
Avoid allowing hydrogen peroxide to contact organic materials, including paper, cotton,
wood, or lubricants. Concentrated hydrogen peroxide is a strong oxidizer and mayreact with
organic materials, causing ignition and fire.
WARNING! RISK OF EYE INJURY.
Direct hydrogen peroxide contact with eyes can cause irreversible tissue damage. If there is
a contact with eyes, immediately rinse eyes thoroughlywith a large amount ofwater. Consult
a physician immediately.
WARNING! RISK OF SKIN INJURY.
Direct contact between the skin and hydrogen peroxide can cause severe irritation. If the
contact occurs, immediately flush skin with large amounts of water. If symptoms are severe
or persist, consult a physician immediately.

Rev. 02 (May 2023)
Plasmapp Co., Ltd.
STERLINK mini User Manual
9
WARNING! RISK OF RESPIRATORY IRRITATION.
Inhalation of hydrogen peroxide vapor may cause severe irritation to the lungs, throat, and
nose. If inhaled, move to a location with fresh air for breathing. If your symptoms are severe
or if they persist, contact your doctor immediately.
WARNING! CONCENTRATED HYDROGEN PEROXIDE IS TOXIC.
Ingestion of hydrogen peroxide may be life-threatening. If swallowed, drink plenty of water
immediately to dilute. Do not try to induce vomiting. Please consult a doctor immediately if
the symptoms are severe or persist.
WARNING! STERILIZATION SURFACES.
At the end of a cycle, the interior of the sterilizer may be hot. Do not touch the inside of the
chamber or door with your bare or gloved hands. Allow the sterilizer to cool before touching
interior surfaces.
2.2. Personal Protective Equipment
CAUTION! HYDROGEN PEROXIDE MAY BE PRESENT.
Wear latex, PVC (vinyl), or nitrile gloves whenever handling a load after a cycle cancellation
or error occurrence. Hydrogen peroxide liquid may be present on the load or in the chamber.

Rev. 02 (May 2023)
Plasmapp Co., Ltd.
STERLINK mini User Manual
10
2.3. Warnings, Cautions and Notes
Warnings and cautions are accompanied by symbols surrounded by a triangle and are
printed in the text in boldface italics. Warnings indicate events or conditions that can
result in serious injury or death. Cautions indicate events or conditions that can result in
severe damage to the equipment.
Note are accompanied by a check mark and are printed in italics. Notes highlight specific
information about the proper use and maintenance of the STERLINK mini Sterilizer System.
2.4. Symbols
REFER TO INSTRUCTION MANUAL
WEAR SAFETY GLOVES
WARNINGS AND CAUTIONS
Warnings and cautions are indicated in the triangle symbol
WARNING SIGNS
HOT SURFACES PRESENT
Do not touch the surface without any suitable protective equipment
HAZARDOUS CHEMICAL PRESENT
Be sure to wear personal protective equipment

Rev. 02 (May 2023)
Plasmapp Co., Ltd.
STERLINK mini User Manual
11
HAZARDOUS CHEMICAL PRESENT
Be sure to wear personal protective equipment
HAND CRUSH HAZARD
Keep your hands away from the device during the operation
ELECTRIC SHOCK HAZARD
NO PUSHING
NO SITTING
NO STEPPING ON SURFACE
POWER ON
POWER OFF
PROPECTIVE EARTH (GROUND)
MANUFACTURER
DATE OF MANUFACTURING

Rev. 02 (May 2023)
Plasmapp Co., Ltd.
STERLINK mini User Manual
12
EXPIRY DATE
SERIAL NUMBER
TEMPERATURE LIMIT
HUMIDITY LIMIT
CAUTION
THE EQUIPMENT SHOULD NOT BE DISPOSED OF IN THE NORMAL
WASTE STREAM
UNIQUE DEVICE IDENTIFIER
BATCH CODE
KEEP AWAY FROM SUNLIGHT
DO NOT RE-USE

Rev. 02 (May 2023)
Plasmapp Co., Ltd.
STERLINK mini User Manual
13
Chapter 3. Overview of the Sterilizer
3.1. Intended Use
The STERLINK mini sterilizer system is a low temperature sterilizer using sterilant of hydrogen
peroxide to inactivate microorganisms for a broad range of metal and nonmetal medical devices.
This sterilizer offers an effective, safe, fast, economical, easy–to-use, reliable, and flexible
sterilization method.
Before operating the sterilizer, please review the Chapter 4 “Load preparation” in which
recommended materials and lumen sizes are described. When selecting reusable medical devices to
be processed in this sterilizer system, reprocessing information should be obtained from the
manufacturer of the medical device in accordance with international norms (such as ISO 17664 or
AAMI TIR 12).
▪Product ratings and specifications
Items
Specifications / Conditions
Voltage
120 VAC
Rated frequency
60 Hz
Maximum power consumption
1.0 kVA
Operating temperature
10 - 40 ℃
Humidity conditions
Relative humidity 30 - 85 %
Barometric conditions
70 - 106 kPa
Replaceable fuse
Fuse 125 V / 15A
3.2. Sterilization Processes
As a healthcare professional, you are probably already familiar with the general principles of
sterilization. However, special attention is required when handling the STERLINK plus Sterilizer
System, which adopts its own method that is different from other existing sterilizers.
It sterilizes medical devices by diffusing hydrogen peroxide vapor into chamber. It can quickly
sterilize medical devices and materials without leaving toxic residues, and does not damage the
medical devices that are sensitive to heat and moisture.
It can be used on both metallic and non-metallic medical instruments, and it can also sterilize medical
instruments with hard-to-reach spaces (limited diffusion spaces), such as forceps. For more details,

Rev. 02 (May 2023)
Plasmapp Co., Ltd.
STERLINK mini User Manual
14
refer to ‘Chapter 4 Preparation of Medical Devices’.
The sterilizer consistently guarantees a Sterility Assurance Level (SAL) of 10-6 as defined by the US
Food and Drug Administration (FDA) and International Standards, provided that the materials and
geometrical requirements in accordance with the instructions in this user manual are met.
The pre-validation has shown that this sterilizer can reach a SAL of 10-6, including lumens, under
worst-case conditions. For additional technical information related to validation, please contact
Plasmapp or your local Plasmapp Customer Support Representative.
3.3. Sterilization cycle
The STERLINK mini sterilizer is designed to be operated in chamber modes, which is a combined
cycle of the Smart Ready (SR™), Sterilization and Smart Complete (SC™) process. The sterilizer
is designed to operate only with the sterilant cassettes of STERLOAD™ mini. Each cassette has
individual barcode which will be scanned by the sterilizer to start the sterilization cycle
automatically according to the barcode identifying of the cassettes. This automatic scan step reduces
the user error and reliability of sterilization.
The optimized heating and drying process is provided in the SR™ process, during which the
pressure of the vaporizer and chamber is independently controlled, to obtain the venting and
pumping pressure curves.
The sterilization process consists of the two consecutive identical sterilization phases, and the
critical process parameters are controlled to be identical. The validation of the sterilization process
is performed by using the half-cycle overkill method to demonstrate the 10-6 SAL. In the SC™
process the sterilizing agent is removed before the sterilized medical devices can be removed from
the chamber. To ensure user safety, an independent pressure sensor measures the residual sterilant
and an optimized completion process is performed. The following table provides a brief description
for sterilization cycle mode.
Sterilization cycle time for CHAMBER mode
Mode
Sterilant cassette
Cycle and minimum cycle time (unit: min)
SR™ / SC™
Sterilization
Total Cycle Time
CHAMBER
STERLOADTM
mini
8
10
18
Sterilization process – Phase 1
∎ Injection: The hydrogen peroxide is transferred from the cassette into the vaporizer and chamber.

Rev. 02 (May 2023)
Plasmapp Co., Ltd.
STERLINK mini User Manual
15
∎ Diffusion: Pressure in the chamber is increased in order to supply hydrogen peroxide to the
surfaces of the devices and into the lumens of the load.
∎ Plasma purification / Vacuuming: The pressure within the chamber is decreased to eliminate the
residual sterilant from the chamber. Power is applied to the plasma source to break the residual
hydrogen peroxide into reactive species that recombine to form water vapor and oxygen.
Sterilization process – Phase 2
The steps in the Phase 1 are repeated.
3.4. Sterilizer Systems and Accessories
Optional accessories are available for use with the STERLINK mini Sterilization System. The
following figure shows the sterilizer system including the sterilizer cart and label-printer accessories.
Fig. 3.1 STERLINK mini sterilizer

Rev. 02 (May 2023)
Plasmapp Co., Ltd.
STERLINK mini User Manual
16
Fig. 3.2 Main sterilizer of STERLINK mini
Fig. 3.3 Pump module of STERLINK mini
Fig. 3.4 STERLINK mini dedicated power cable

Rev. 02 (May 2023)
Plasmapp Co., Ltd.
STERLINK mini User Manual
17
This device supplies power to the power socket on the rear of the main sterilizer using the dedicated
power connection line for STERLINK mini, and provides protection against electric shock by
connecting the grounding conductor to ground. The power of the pump unit is supplied through the
power connection line fixed on the rear of the main sterilizer. In order to use the device, the supplied
pipe must be plugged into the one-touch fitting on both the main sterilizer and pump module.
This STERLINK system can be used with a sticker type label-printer as an accessory which is for
user convenience in managing the history of sterilization cycle information. The label printer and
the main sterilizer can be connected using a USB cable to the USB B port on the rear side of main
sterilizer. The USB B port is only used when using label printer. The label printer receives power
using the separately provided printer power adapter. For the detailed information about the report,
please refer to the Chapter 7 featuring “Reports and Data”.
Fig. 3.5 Label Printer & Label Sticker Roll for the STERLINK mini Sterilization System
Fig. 3.6 Dedicated cart for STERLINK mini sterilization system
Moreover, the mobility of the sterilizer can be improved by means of a dedicated cart. The main
sterilizer can be placed on the cart, and the pump module can be hidden inside the cart. The label-

Rev. 02 (May 2023)
Plasmapp Co., Ltd.
STERLINK mini User Manual
18
printer can be placed in the drawer of the cart and can be moved easily using the handle.
3.5. Sterilant cassettes
The STERLINK mini system has one mode (CHAMBER mode) which is automatically initiated
by the sterilizer according to the barcoded printed on the STERLOAD™ mini sterilant cassettes.
The barcode contains information of the type and date of manufacture of the sterilant cassette.
Figure 3.7 Sterilant cassette of STERLOAD™ mini
Each cassette has two cells of sterilant which each cell contains precisely measured amount of
hydrogen peroxide solution, and the two cells are used for repeating the same sterilization phases
WARNING! ELECTRIC SHOCK HAZARD
To avoid the risk of electric shock, this product must only be connected to a power supply
with protective ground.
WARNING! USE OF PRINTER & CABLE
Use of accessories, cables other than those specified or provided by the manufacturer of this
equipment could result in decreased electromagnetic compatibility of this equipment and result
in improper operation.
WARNING! INSTALLATION POSITION.
Use of this equipment adjacent to or stacked with other equipment should be avoided because
it could result in improper operation. If such use is necessary, this equipment and the other
equipment should be observed to verify that they are operating normally.
Barcode and date of manufacture

Rev. 02 (May 2023)
Plasmapp Co., Ltd.
STERLINK mini User Manual
19
for one sterilization cycle. When the sterilization cycle is completed or stopped, the used cassettes
should be handled with wearing protective gloves and must be disposed according to the right
regulation. Please refer to the Chapter 5 featuring “Operation” to have more information on how to
use the cassette.
CAUTION! CHECK EXPIRY DATE.
When you use the sterilant cassettes (STERLOAD™ mini), check the expiry date. If the date
is expired, dispose and use new available sterilant cassettes.
CAUTION! HYDROGEN PEROXIDE MAY BE PRESENT.
Wear latex, PVC (vinyl), or nitrile gloves whenever handling a load after a cycle cancellation
or error occurrence. Hydrogen peroxide liquid may be present on the load or in the chamber.

Rev. 02 (May 2023)
Plasmapp Co., Ltd.
STERLINK mini User Manual
20
Chapter 4. Preparation of Medical Devices
4.1. Indications for Use
The STERLINK mini sterilizer with STERLOAD™ mini is a vaporized hydrogen peroxide
sterilizer intended for use in the terminal sterilization of cleaned, rinsed, and dried reusable metal
and nonmetal medical devices used in healthcare facilities. A pre-programmed sterilization lumen
cycle operates at low pressure and low temperature and is thus suitable for processing medical
devices sensitive to heat and moisture.
The STERLINK mini chamber mode can sterilize:
∙Instruments with diffusion-restricted spaces such as the hinged portion of forceps and
scissors
∙Medical devices with a single stainless-steel lumen with*:
An inside diameter of 1.6 mm or larger and a length of 200 mm or shorter
* It can sterilize medical devices with lumen structure up to five and the maximum weight allowed
for sterilization is 1.54 lbs.
WARNING! BE SURE TO UNDERSTAND THE STERILIZATION PROCESSES.
Before processing item(s) in the sterilizer, make sure you know how the STERLINK plus
sterilization process will affect the item(s). If you have questions, or if you are in doubt
about the materials in your device, contact the medical device manufacturer or your local
Plasmapp customer support representative for more information.
WARNING! BREACH OF WARRANTY.
Improper use may cause damages to the equipment, and such damages will not be covered
by the manufacturer's warranty.
The STERLINK plus Sterilization System is also suitable for the sterilization of both non-surgical and
surgical instruments such as dentures, endoscopes, orbital implants, prostheses for bone marrow percutaneous
amputation and surgical equipment, etc.
Table of contents
Other Plasmapp Laboratory Equipment manuals
Popular Laboratory Equipment manuals by other brands

Metrohm
Metrohm 873 Biodiesel Rancimat manual

Sigma
Sigma 6-16KS operating manual

Emerson
Emerson Branson Sonifier quick start guide

Helmer Scientific
Helmer Scientific QuickThaw DH2 Operation manual

Markes International
Markes International HiSorb Agitator U-HSAG-20 Instructions for use

Human
Human HumaRock user manual

Waters
Waters Xevo TQ-S Operator's, overview and maintenance guide

IKA
IKA Lab Disc IKAMAG operating instructions

NoiseKen
NoiseKen ESS-2000AX instruction manual

Okolab
Okolab UNO-T manual

SP Scientific
SP Scientific VirTis BenchTop Pro Series Operator's manual

Healthmark
Healthmark FIS-007HB Instructions for use