NoiseKen ESS-2000AX User manual

INSTRUCTIONMANUAL
ELECTROSTATICDISCHARGESIMULATOR
MODEL
ESS-2000AX
NOISE LABORATORY CO., LTD.
Edition 1.02
AEC00231-00E-0C

NOTICE
•The contents of this booklet are subject to change without prior notice.
•No part of this booklet may be reproduced or transferred, in any form, for any purpose,
without the permission of Noise Laboratory Co., Ltd.
•The contents of this booklet have been thoroughly checked. However, if a doubtful point,
an error in writing or a missing is found, please contact us.
•Noise Laboratory Co., Ltd. shall have no liability for any trouble resulting from the misuse or
improper handling of this product regardless of the contents of this booklet or arising from
the repair or remodeling of this product by a third party other than Noise Laboratory Co.,
Ltd. or its authori ed person.
•Noise Laboratory Co., Ltd. shall have no liability for any trouble resulting from the
remodeling or modification of this product.
•In no event shall Noise Laboratory Co., Ltd. be liable for any results arising from the use of
this product.
•Trademarks, company names, and similar that appear in this document are trademarks or
registered trademarks of their respective companies. This document does not use the TM
and symbols.

1
1. CHECK PACKAGE CONTENTS
Before using the instrument, please check that none of the associated items are
missing.
Item Quantity
A: Main unit ····················································· 1
B: AC power cable ·········································· 1
C: Instruction Manual (this document) ··············· 1
A
C
B

2
The instrument may only be used by trained EMC technicians
(electrical technicians)
There is a risk of death or serious injury, and of the emission of
electromagnetic noise that exceeds the stipulated limits. Please use
the instrument in conjunction with appropriate measures for dealing
with electromagnetic noise such as a Faraday cage or shielded room
.
Do not use the instrument for any purposes other than the
EMC testing purposes described in this instruction manual
Failure to follow this rule risks death or serious injury.
The instrument may not be used by people fitted with
electronic medical devices such as pacemakers and such
people may not enter the testing site while the instrument is
operating
Failure to follow this rule risks death or serious injury.
The instrument may not be used in a location where fire is
prohibited or there is a risk of explosion
Failure to follow this rule risks igniting a fire due to an electrical
discharge.
se an AC power cable that is certified for use under the
safety rules of the country in which the instrument is being
used.
Failure to follow this rule risks fire or electric shock. The supplied AC power
cable is intended for Japan and North America. If the instrument is used in a
country other than these, use a cable that is certified for use under the safety
rules of that country.
2. IMPORTANT SAFETY PRECAUTIONS
The Important Safety Precautions explain rules that must be followed to prevent
any risk of harm or injury to the user of the instrument or to other people.
Before setting up the test site, connecting the equipment,
or starting testing, please read the Chapter entitled "Basic
Safety Precautions for the Safe Use of the Simulator" which
contains additional safety advice.

3
3. APPLICATION FORM FOR INSTRUCTION MANUAL
To: Noise Laboratory Co., Ltd. via sales agent
We place an order for an instruction manual.
Model Name
ESS-2000AX
Serial No.
Applicant Address
Cut
Line
Company Name
Department
Contact Person
Phone No.
FAX No.
Cut off this page "PURCHASE ORDER FOR INSTRUCTION
MANUAL" from this volume and
keep it for future use with care.
When an INSTRUCTION MANUAL is required, fill in the above Application F
orm and mail
or fax it to your nearest sales agent of Noise Laboratory or Noise Laboratory.
Cut
Line
The address
, company name, individual's name, and other personal
information (henceforth referred to as personal information ) entered in
the app
lication form will only be used for the purpose of sending the
Instruction
Manual and will not be shown or passed to any third party
without a valid reason.
Noise Laboratory Co., Ltd.
will manage customer's personal information in
an appropriate manner.

Memorandum
4

5
4. TABLE OF CONTENTS
1. CHECK PACKAGE CONTENTS ...................................................................................................... 1
2. IMPORTANT SAFETY PRECAUTIONS .............................................................................................. 2
3. APPLICATION FORM FOR INSTRUCTION MANUAL ...................................................................... 3
4. TABLE OF CONTENTS ..................................................................................................................... 5
5. PREFACE ........................................................................................................................................ 7
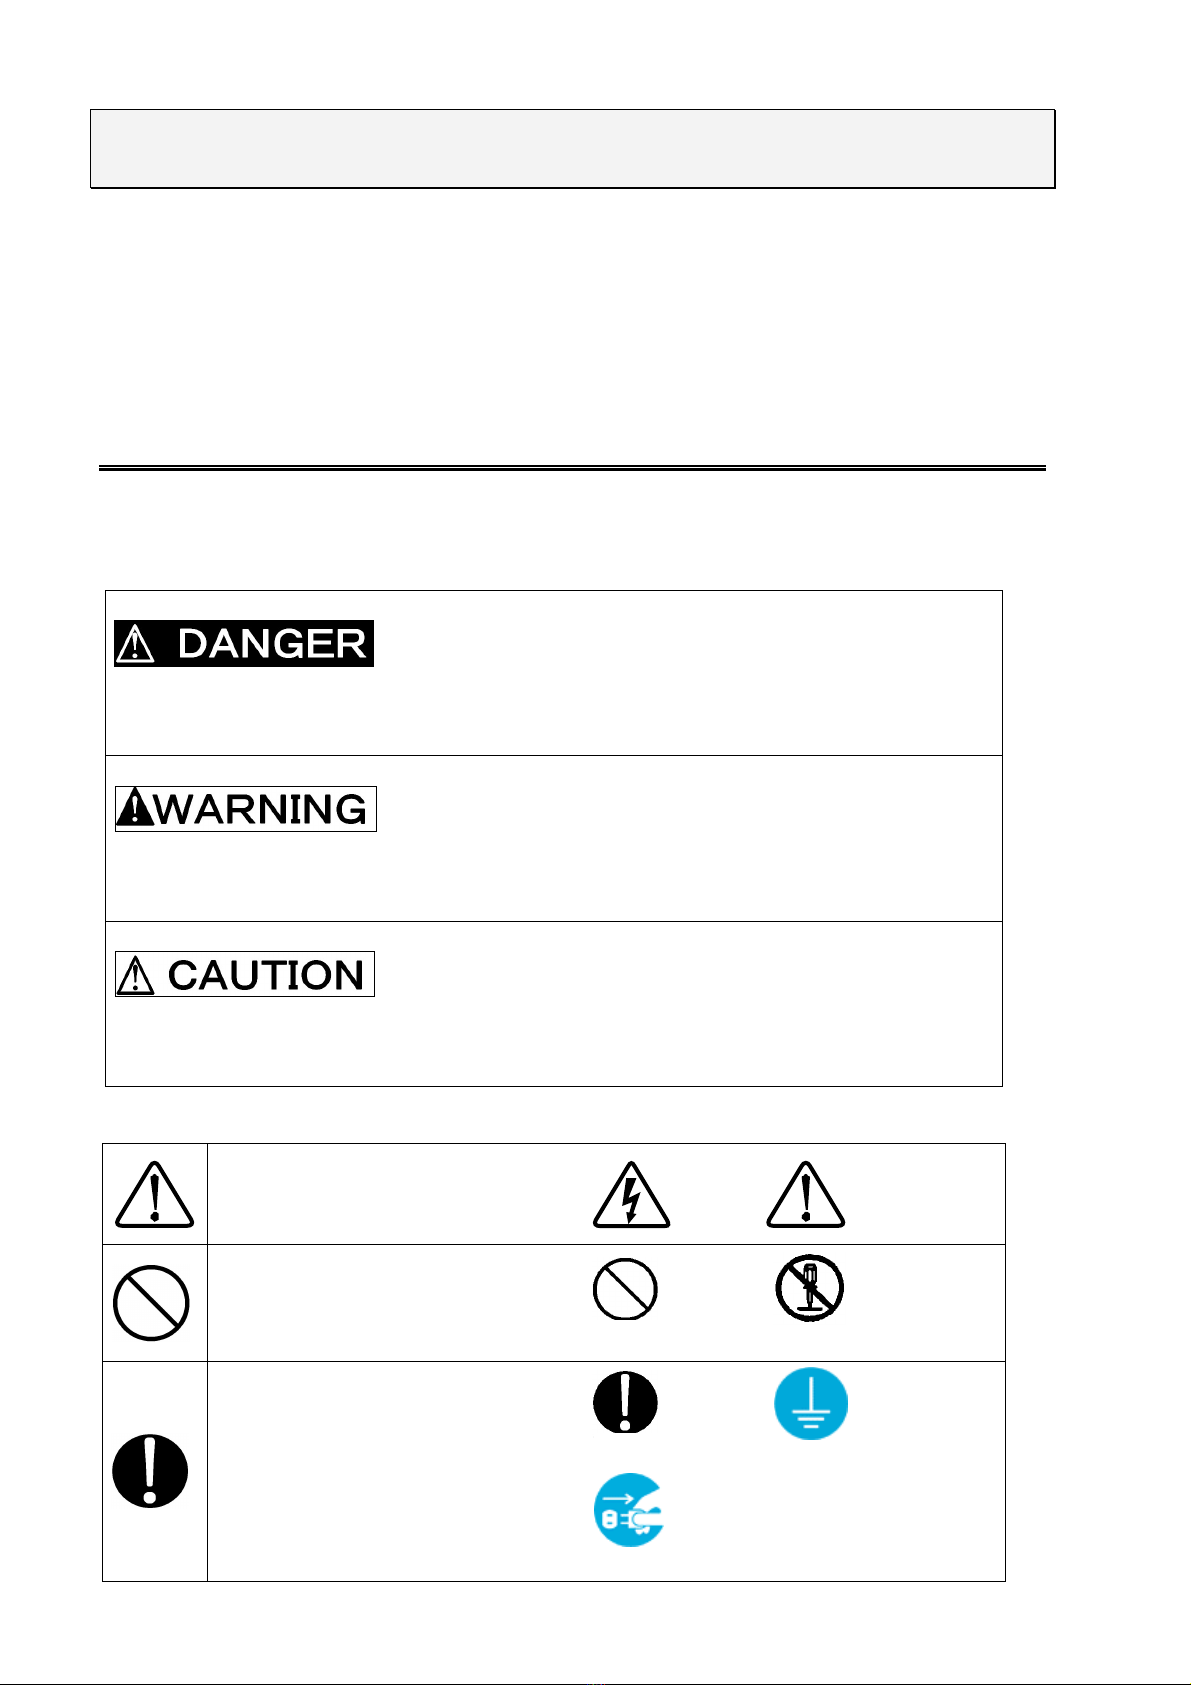
6. BASIC SAFETY PRECAUTIONS FOR THE SAFE USE OF THE SIMULATOR ........................................ 8
6-1. Meaning of Safety Symbols ................................................................................................. 8
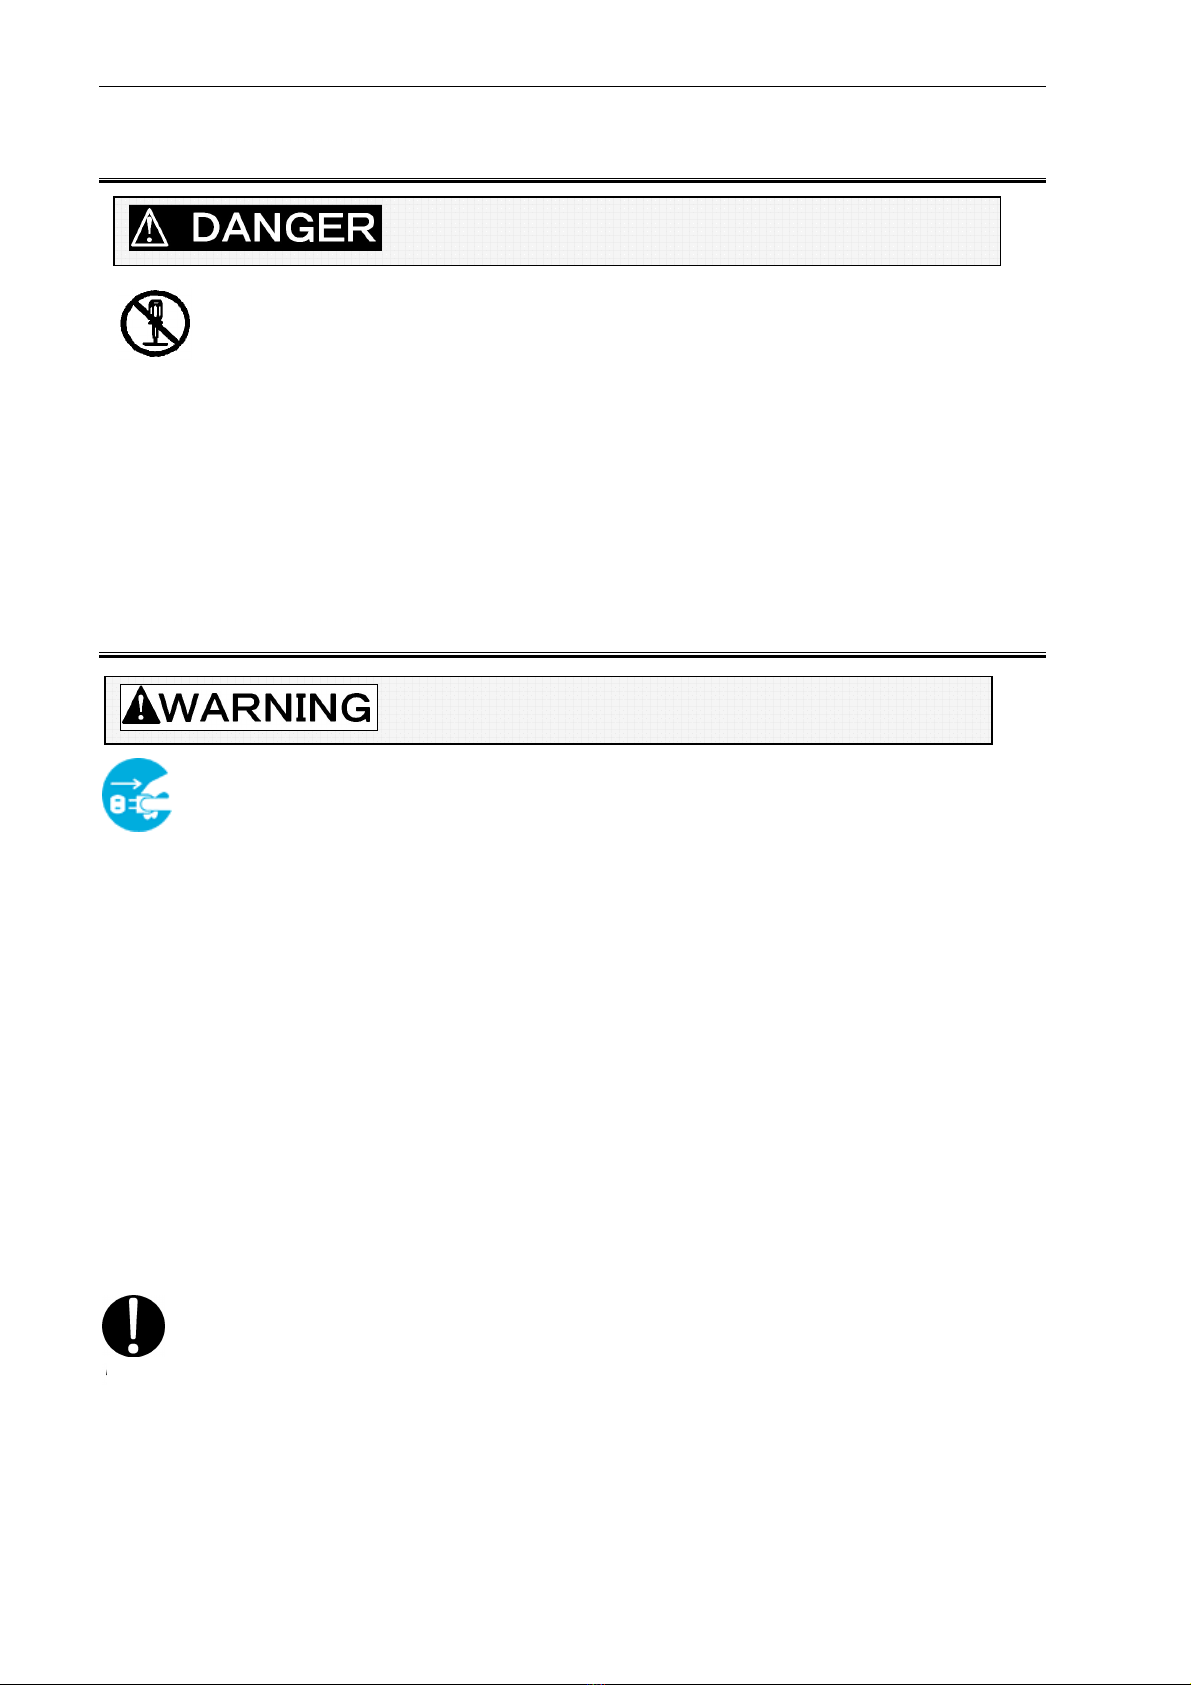
6-2. DANGER Alerts ..................................................................................................................... 10
6-3. WARNING Alerts ................................................................................................................... 10
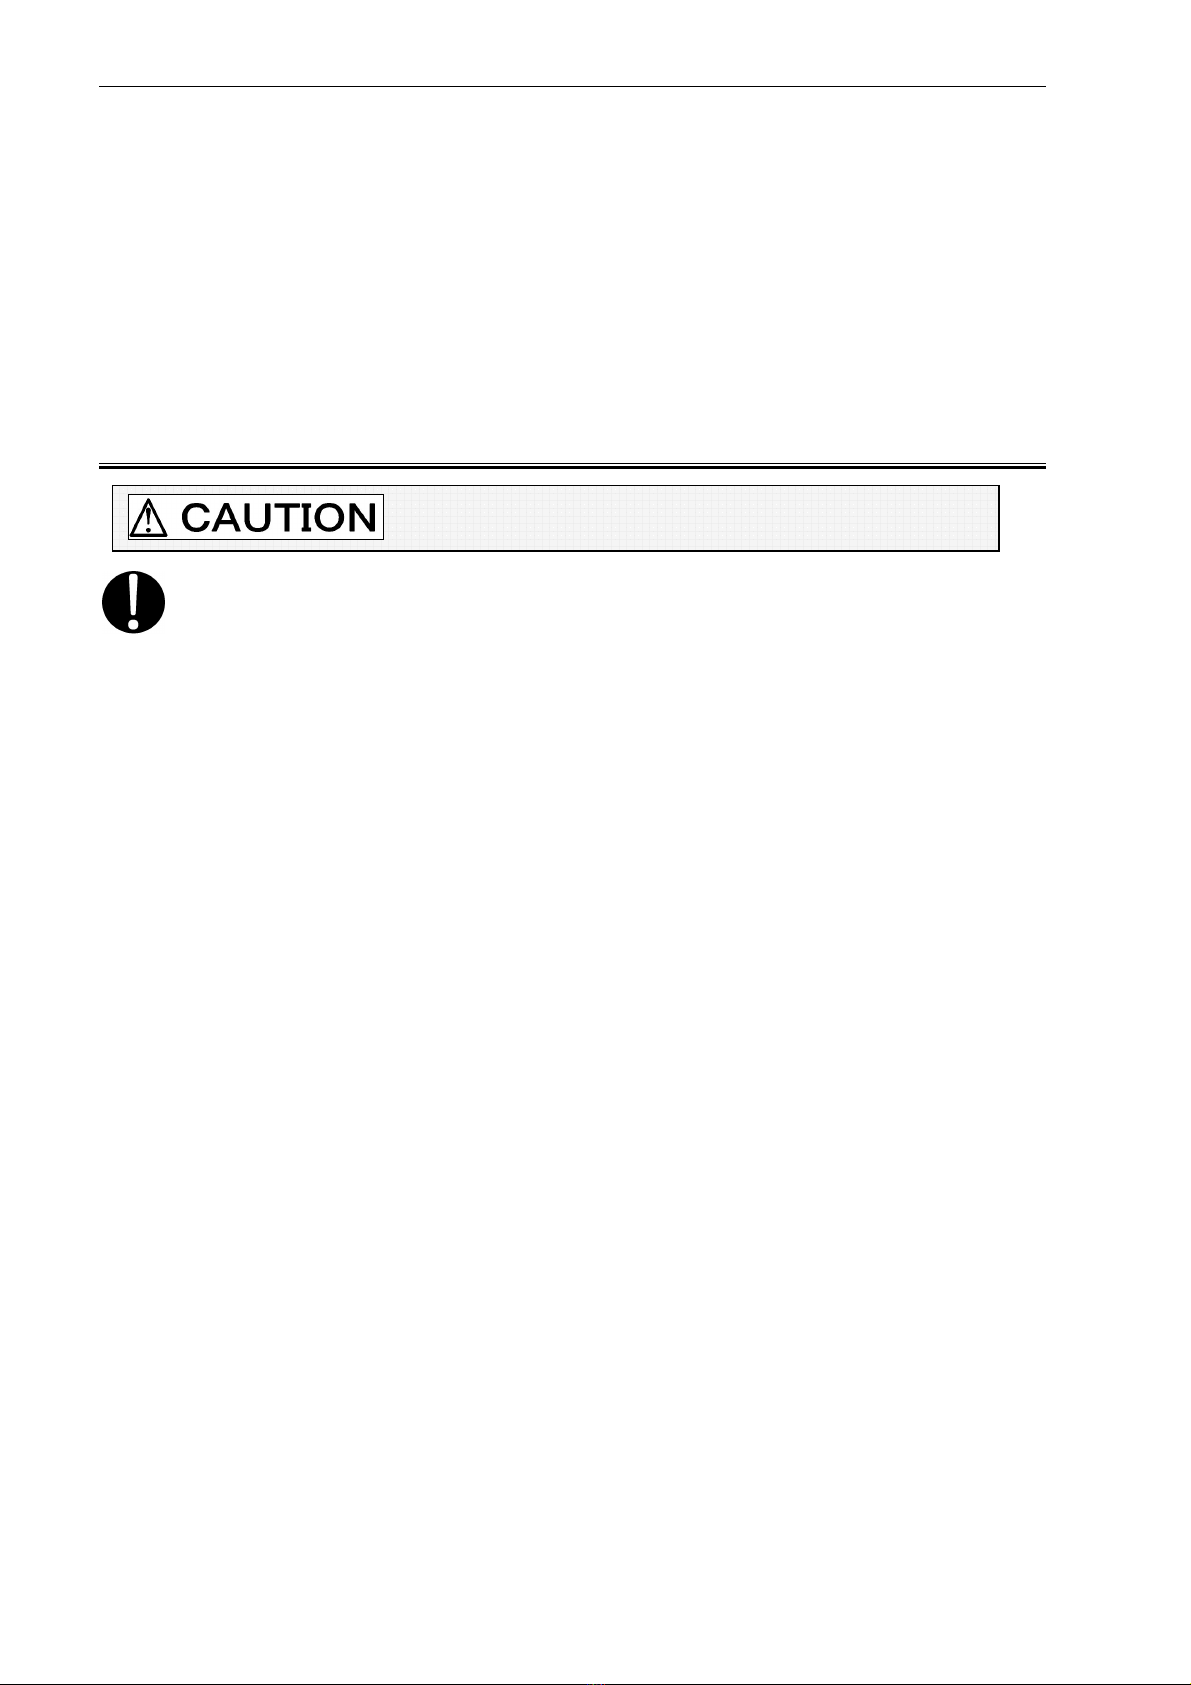
6-4. CAUTION Alerts .................................................................................................................... 12
7. POINTS TO NOTE REGARDING CONSUMABLES ITEMS ............................................................... 14
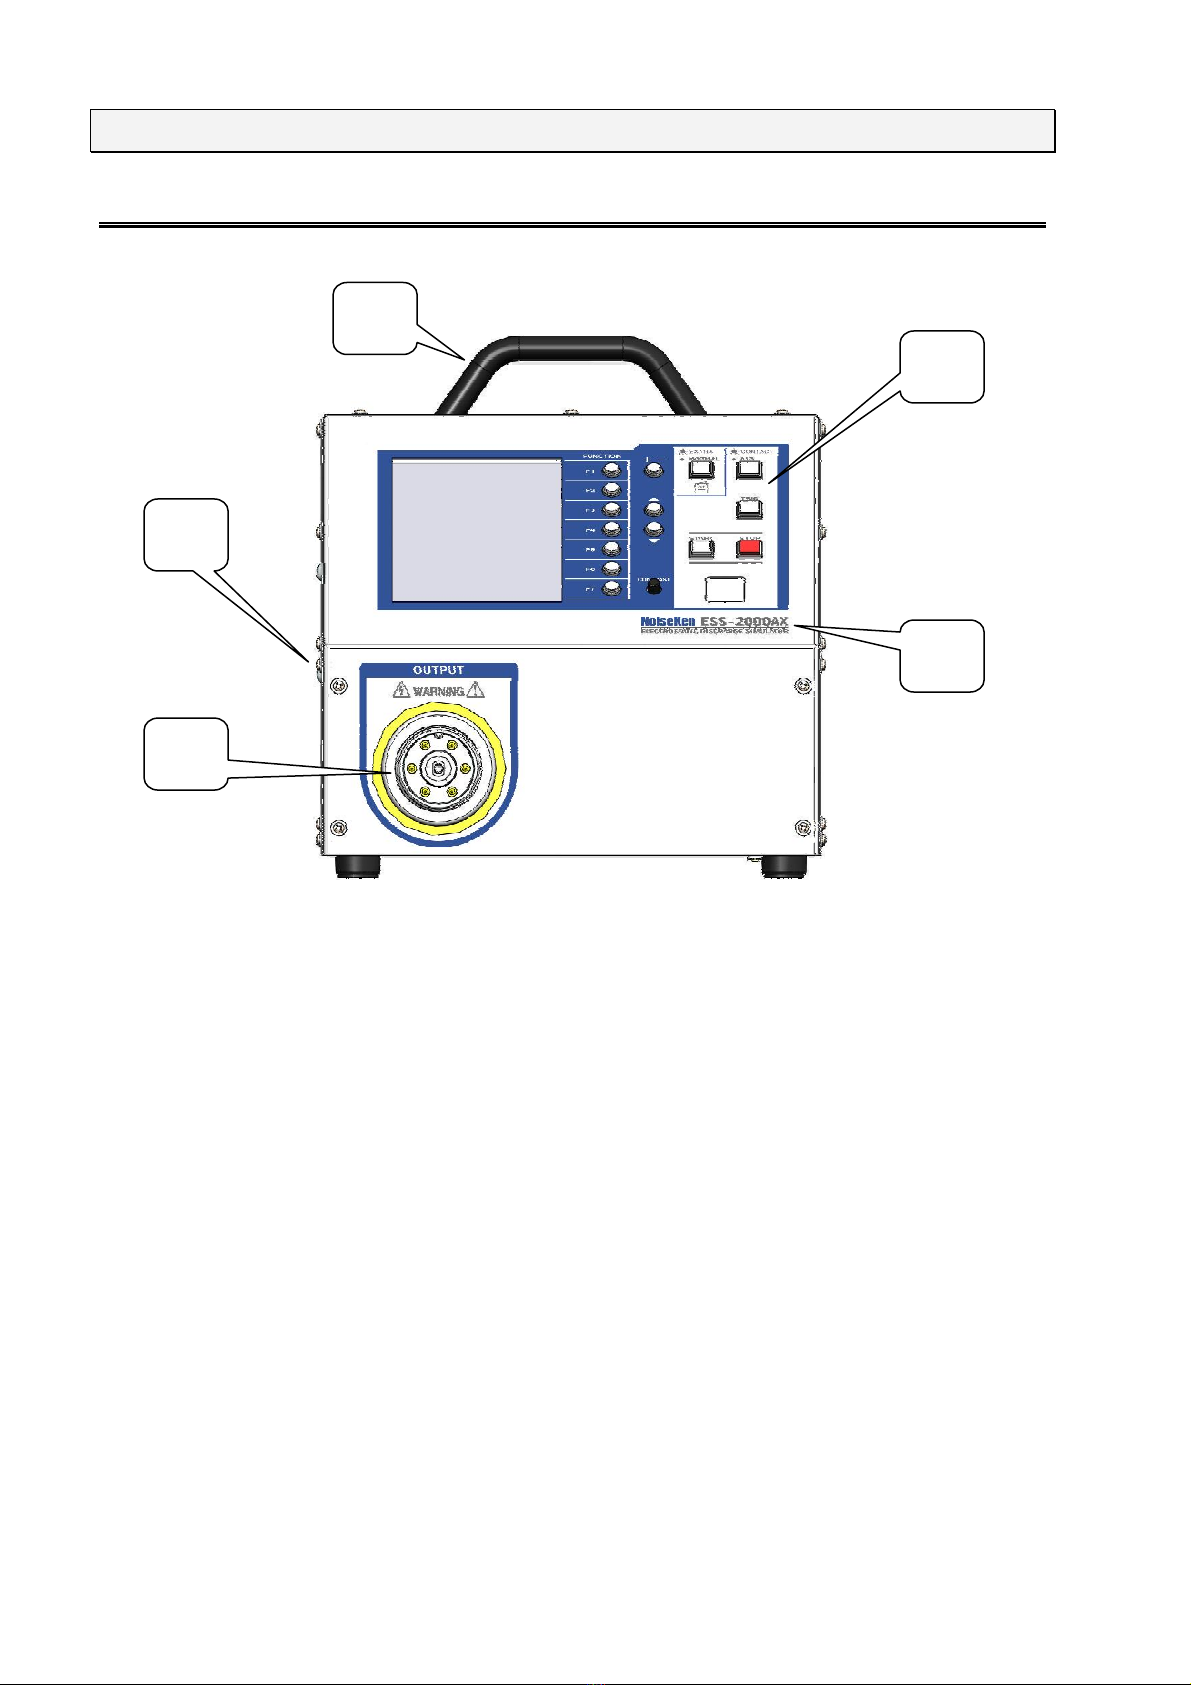
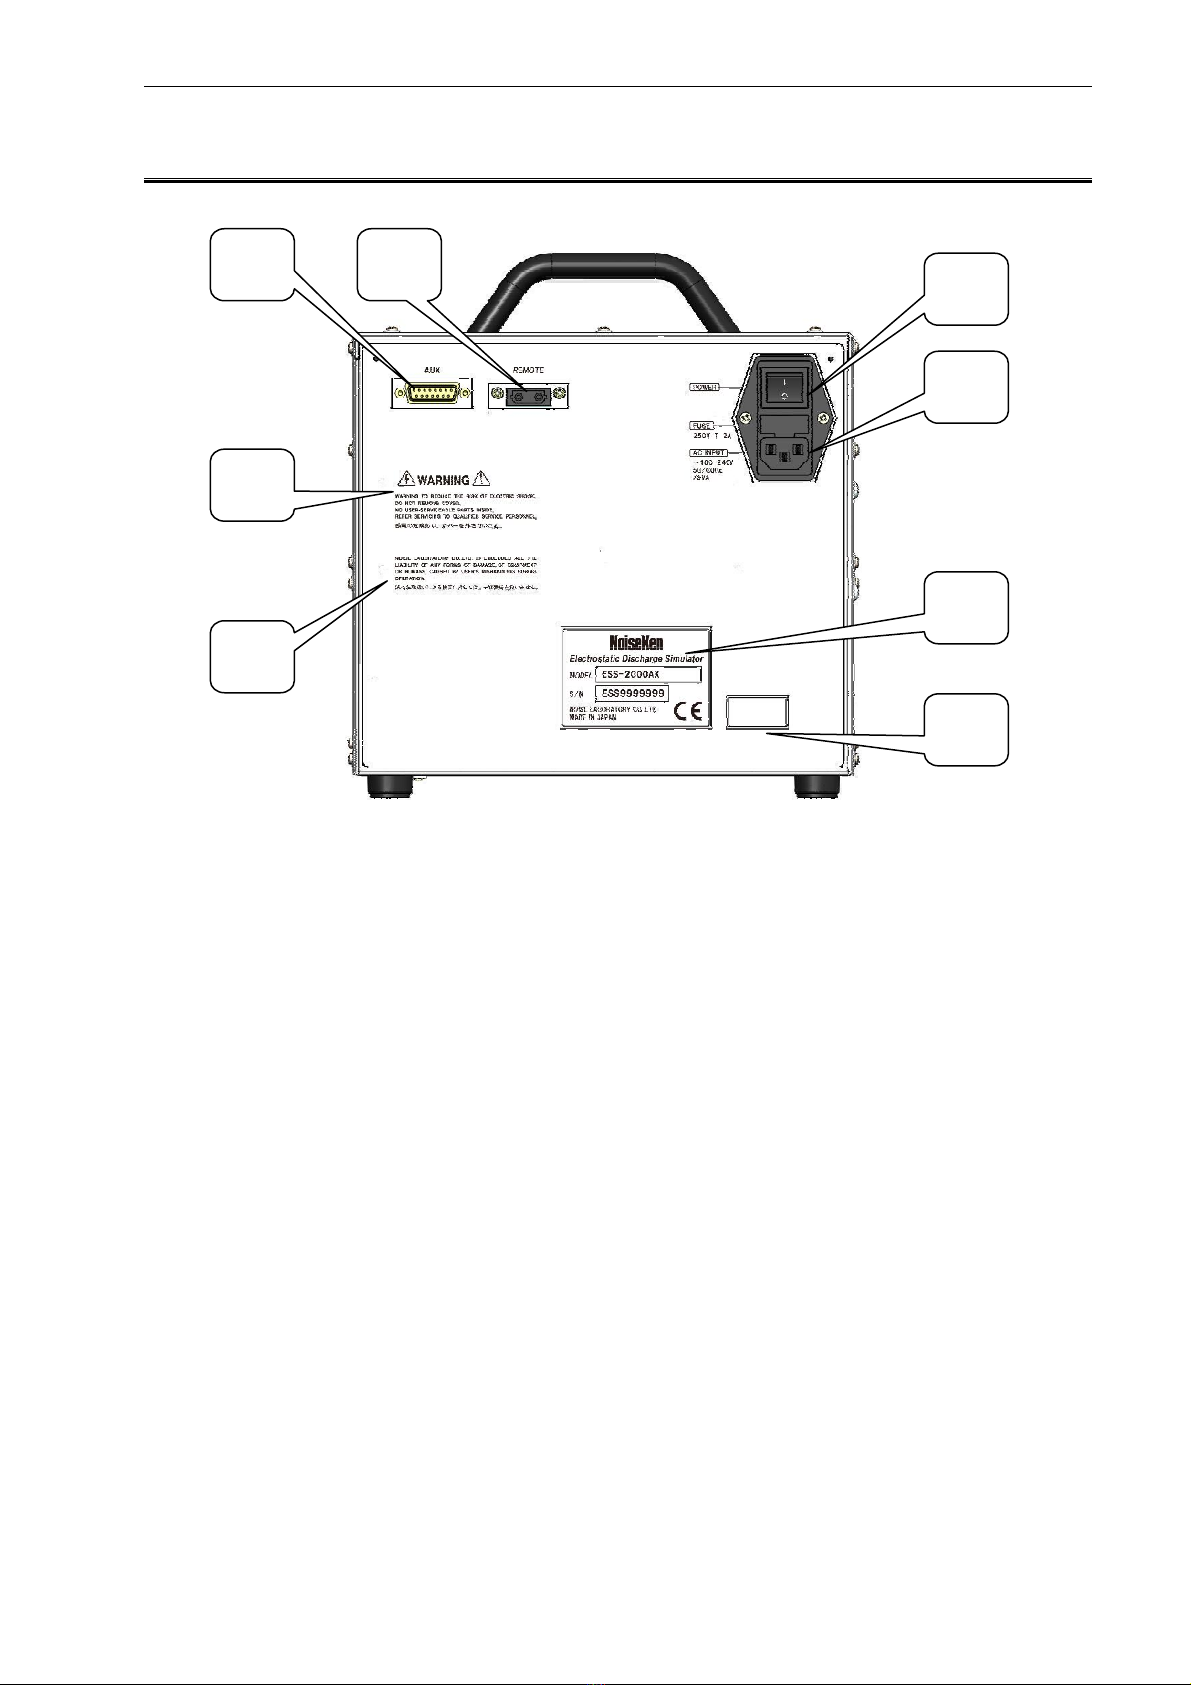
8. NAME AND FUNCTION OF EACH PART ...................................................................................... 16
8-1. Main Unit (Front Panel) ....................................................................................................... 16
8-2. Main Unit (Rear Panel) ........................................................................................................ 17
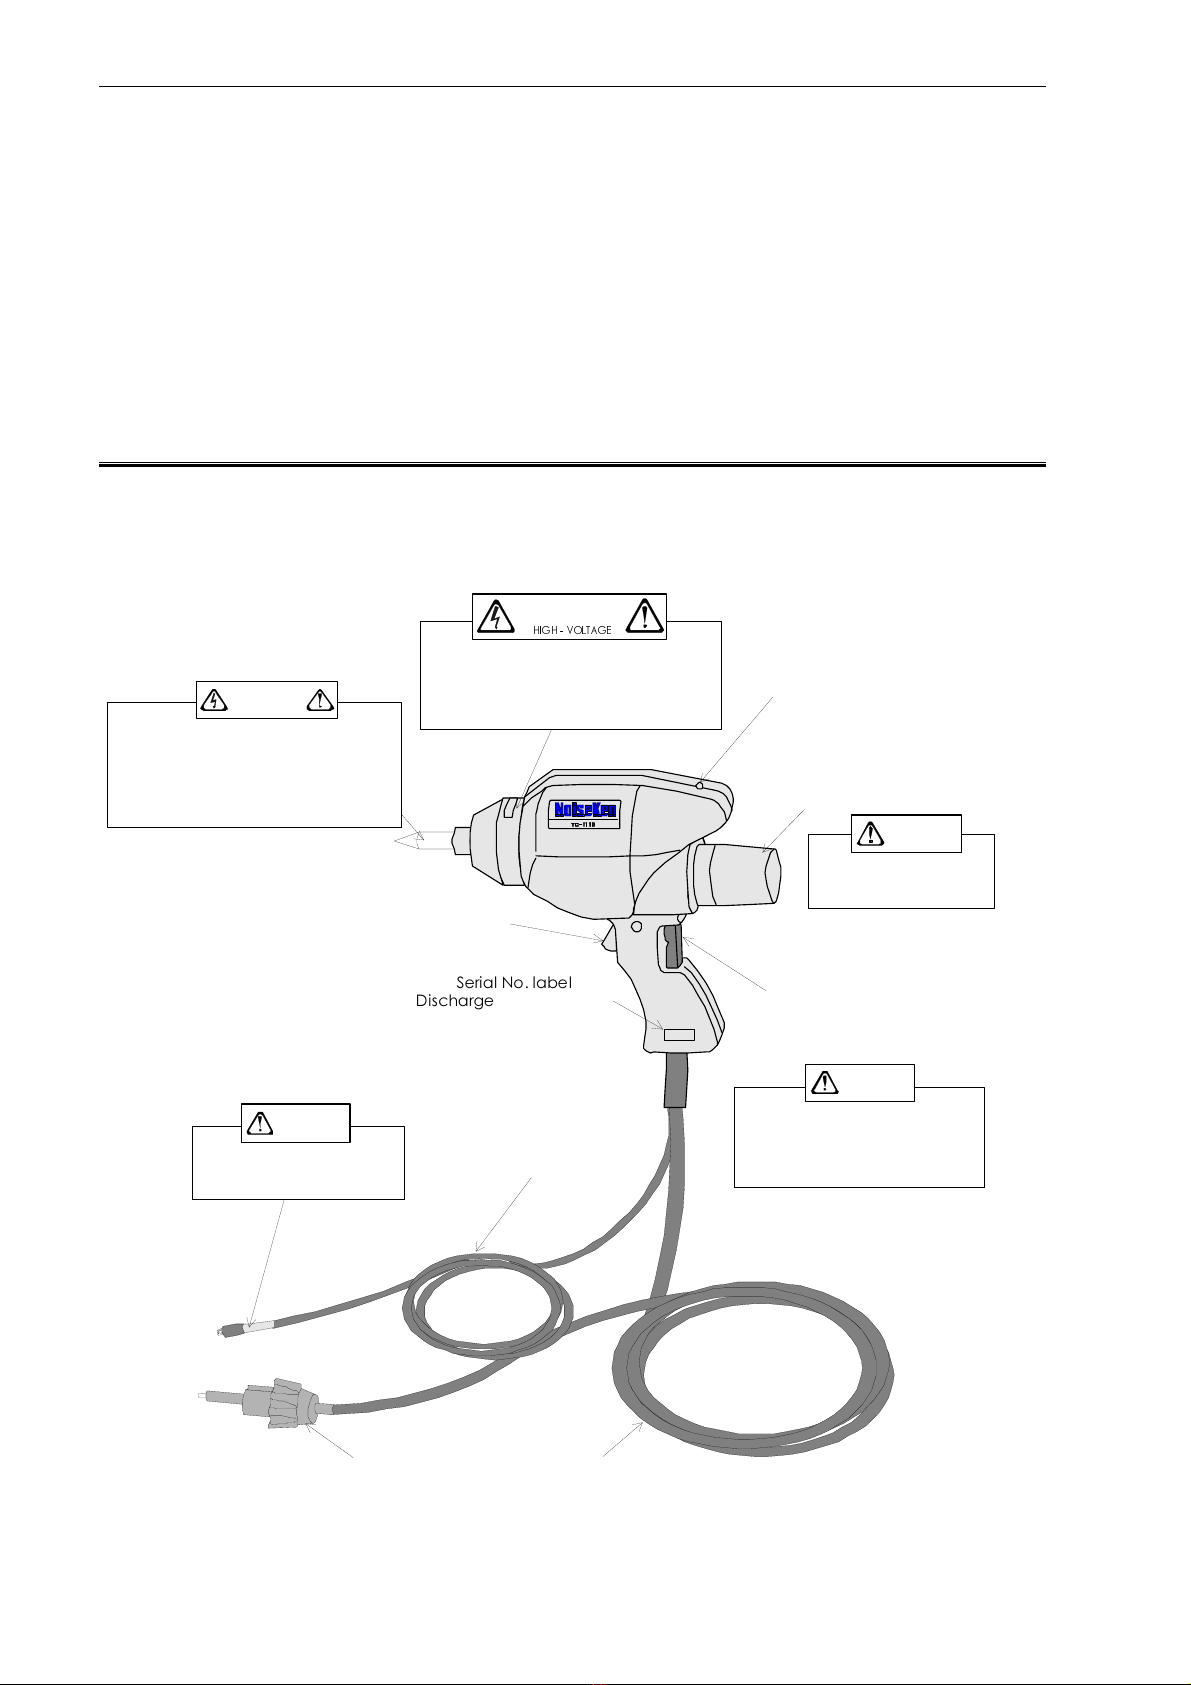
8-3. Discharge Gun ..................................................................................................................... 18
8-4. Operation Panel .................................................................................................................. 19
9. RADIATION LE EL MODE FUNCTION .......................................................................................... 21
9-1. Points to Note When Using the Radiation Level Mode Function ................................. 21
9-2. Differences Between Normal Mode (NORMAL) and Extra Mode (EXTRA) ................ 21
9-3. How to Use the Radiation Level Modes ........................................................................... 22
9-4. How to Select Extra Mode (EXTRA) ................................................................................... 23
10. CONNECTIONS ........................................................................................................................... 24
10-1. Connecting the Discharge Gun ....................................................................................... 24
10-2. Connecting the AC Power Cable .................................................................................... 25
11. OPERATION ................................................................................................................................. 27
11-1. Turning the Power On or Off .............................................................................................. 27
11-2. Menu Screen ........................................................................................................................ 27
11-3. IEC Standard Test Mode ..................................................................................................... 29
11-4. Manual Test Mode .............................................................................................................. 32
11-5. Sequence Mode ................................................................................................................. 37
11-6. Utility Mode ........................................................................................................................... 41
12. BACKGROUND KNOWLEDGE ABOUT ELECTROSTATIC TESTING ............................................... 44
13. AUXILIARY INTERFACE ................................................................................................................ 46
13-1. AUX Connector .................................................................................................................... 46
13-2. Optical Communication Connector ............................................................................... 47
14. ERROR DISPLAY ........................................................................................................................... 48

4. TABLE OF CONTENTS
6
15. SPECIFICATIONS .......................................................................................................................... 49
16. WARRANTY ................................................................................................................................... 50
17. MAINTENANCE ............................................................................................................................ 52
18. CONTACTING TECHNICAL SUPPORT .......................................................................................... 53

7
5. PREFACE
We thank you ery much for your purchase of the Computer-controlled Electrostatic
Discharge Simulator Model: ESS-2000AX.
It is recommended that the contents of this manual be thoroughly understood and used
as a ready reference for operation.
This Instruction Manual was prepared so that any person who can obser e the
prescribed instruction method and operating precautions may safely handle and
fully utilize this computer-controlled electrostatic simulator (Model ESS-2000AX).
Keep this Instruction Manual by your side or other proper location so that it may be
readily a ailable when using the ESS-2000AX.
The ESS-2000AX is an electrostatic simulator for performing electrostatic discharge
immunity test in accordance with the IEC 61000-4-2 and ISO 10605 standards.
Electrostatic testing is performed by connecting an electrostatic discharge gun (TC-815R
or TC-815ISO) which is sold separately.
Notice
The fonts, layout, and similar in the screens shown in this manual may differ from the actual
screens and parts of actual screens may be omitted. Also, some screens have been
changed to make them clearer to understand in the printed manual.

8
6. BASIC SAFETY PRECAUTIONS FOR THE SAFE USE OF
THE SIMULATOR
The Basic Safety Precautions explain rules that must be followed to prevent
damage to property or injury to the user of the instrument or to other people.
The symbols below are used to indicate the level of injury or damage that
may result if the instrument is used in a way that ignores these precautions.
Please take careful note of the meanings of these symbols before proceeding
to read this manual.
6-1. Meaning of Safety Symbols
The following symbols indicate the level of injury or damage that may result if
the instrument is used incorrectly in a way that ignores the associated
precautions.
This symbol indicates that failure to comply with the associated precaution
is highly likely to result in the risk of death or serious injury .
This symbol indicates that failure to comply with the associated precaution
may result in death or serious injury .
This symbol indicates that failure to comply with the associated precaution
may result in damage but that only physical damage is likely to occur .
The following symbols indicate the nature of the associated precaution.
Indicates a warning
(a situation where
caution is required).
Indicates a prohibition
(an action that is not
allowed to occur).
禁止 分解禁止
Indicates an instruction
(an action that must
always be taken).
強制
必ずアース線を接続必ずアース線を接続
コンセントから電源プラグを抜くコンセントから電源プラグを抜く
Prohibited
Disassembly
Prohibited
Unplug from Mains Power
Safety Rule Always earth correctly

6. BASIC SAFETY PRECA TIONS FOR THE SAFE SE OF THE SIM LATOR
9
The following symbols indicate the nature of the associated warnings or
cautions that relate to the use of the instrument.
Indicates a risk of electric shock.
Indicates that caution is required and that you
should refer to the instruction manual.
Indicates a warning, a risk of electric shock, that
caution is required, and that you should refer to
the instruction manual.
Indicates a warning, a risk of electric shock, that
caution is required, and that you should refer to
the instruction manual.
Warning text
Do not remove the cover because of the risk of
electric shock.
Warning relating to the use of the instrument
Noise Laboratory Co., Ltd. accepts no liability for
damage resulting from misuse of the instrument.
Indicates that you should read the instruction
manual.

6. BASIC SAFETY PRECA TIONS FOR THE SAFE SE OF THE SIM LATOR
10
6-2. DAN ER Alerts
分解禁止
Do not disassemble or modify
Do not remove the cover
Failure to comply with the precaution may result in death or serious injury and
possible consequences include fire and electric shock
.
For inspection or repair of internal components, please contact your sales agent or the
Noise Laboratory repair and calibration center.
6-3. WARNIN Alerts
コンセントから電源プラグを抜くコンセントから電源プラグを抜く
Stop using the instrument immediately if any of the following problems occur
Unit emits smoke and an unusual smell
Water or other foreign material has got inside the unit
Unit is dropped or damaged
AC power cable is damaged (possibly exposing or disconnecting the wires, etc.)
Continuing to use the instrument in a faulty condition risks causing fire, electric shock, or
similar.
Disconnect from the power supply immediately and unplug the AC plug from the
socket.
After confirming that no more smoke is being emitted, send the instrument to your sales
agent or the Noise Laboratory repair and calibration center for repair. Repairing the
instrument yourself is dangerous and should never be attempted.
Turn the power switch to "Off" on the instrument before connecting or
changing any of the cables
Failure to comply with this rule may result in electric shock or misoperation.
Disassembly
Prohibited
Unplug from Mains Power
Safety Rule

6. BASIC SAFETY PRECA TIONS FOR THE SAFE SE OF THE SIM LATOR
11
強制
Only use the instrument with a power supply voltage and frequency that is
within the indicated range (AC 100V to 240V, 50Hz/60Hz)
Using the instrument with a power supply voltage or frequency outside the indicated
range may result in fire or electric shock.
Firmly insert the AC power cable plug into the socket
Failing to fully insert the plug may result in heating or the build-up of dust leading to fire,
electric shock, or similar.
Plugging too many cables into the same power outlet may also cause cables to
overheat leading to fire, electric shock, or similar.
必ずアース線を接続必ずアース線を接続
Plug the AC power cable into a socket that has a protective earth terminal
The AC power cable provided with the instrument has a three-pin plug that connects to
the power supply and protective earth terminal.
The protective earth on the three-pin plug connects via the AC power cable to the
metal parts on the instrument.
Because this provides protection from electric shock, ensure that you plug the power
supply cable into a socket that has a properly earthed protective earth terminal.
Using the instrument without a protective earth connection may result in electric shock.
Do not insert objects into the instrument or its connectors
Inserting metallic or flammable items into the ventilation slits, connectors, or other
openings may result in fire, electric shock, or similar.
Do not touch the tip of the discharge gun while the instrument is operating
Failure to comply with this rule may result in electric shock or injury.
Do not aim at a person during testing
This is very dangerous and may result in unexpected injury so should never be
attempted.
Do not install in a location that obstructs access to the power supply, STOP,
and other switches
Failure to comply with this rule may prevent you from reacting quickly when a problem
occurs and may result in fire or electric shock.
Do not use the AC power cable for any purpose other than this instrument
The supplied AC power cable is only intended for use with this instrument. Do not use it
for any purpose than this instrument. Use on any other electrical equipment risks
overheating leading to fire, electric shock, or similar. Similarly, using an AC power cable
from another electrical device may prevent the instrument from operating at its
intended level of performance and may result in overheating if the current carrying
capacity of the cable is insufficient, leading to fire, electric shock, or similar.
Safety Rule
Always earth correctly
Prohibited

6. BASIC SAFETY PRECA TIONS FOR THE SAFE SE OF THE SIM LATOR
12
Do not damage the AC power cable
Damage to the AC power cable may result in fire, electric shock, or similar.
Take particular care in relation to the following precautions.
Do not manipulate the AC power cable
Do not bend the AC power cable excessively
Do not twist the AC power cable
Do not pull the AC power cable
Do not locate the AC power cable close to a heater
Do not place heavy objects on the AC power cable
6-4. CAUTION Alerts
If condensation appears after the instrument is moved from a cold to a warm
location, allow to dry naturally before using
Using the instrument while condensation is present may result in electric shock, faults, or
fire.
Clean the AC plug periodically
Allowing dust or dirt to accumulate between the AC plug and socket and absorb
moisture may reduce the electrical insulation and result in fire. Periodically unplug the
AC plug from the mains socket and clean off any dirt or dust using a dry cloth.
Clean the high-voltage input and output connectors periodically
Allowing dust or dirt to accumulate between the high-voltage input connector and
high-voltage output connector and absorb moisture may reduce the electrical
insulation and result in fire.
Periodically unplug the AC plug from the mains socket, wait for five or more seconds,
then unplug the high-voltage input connector from the high-voltage output connector
and blow dehumidified air into the high-voltage output connector to clean out any dust
or dirt.
Also clean off any dirt or dust on the high-voltage input connector using a dry cloth.
If the instrument becomes dirty, clean with a dry cloth
Never use ben ene, thinner or other solvents as these may degrade the exterior surface
or printed text.
If the exterior, operation panel, or other parts of the instrument become dirty, wipe with
a dry soft cloth. If the dirt is difficult to remove, moisten the cloth with water or apply a
small quantity of a neutral detergent to the cloth. Wipe dry after using these to clean the
instrument.
Ensure that the safety warning labels are always visible
If the safety warning labels become dirty or start to peel off, please reattach them for
safety.
If the labels are lost, please contact your sales agent or the Noise Laboratory repair and
calibration center for replacements.
Safety Rule

6. BASIC SAFETY PRECA TIONS FOR THE SAFE SE OF THE SIM LATOR
13
Do not use the instrument with other than a recommended discharge gun
Using the instrument with other than a recommended discharge gun may result in poor
operation and abnormal test results.
Do not apply static electricity to the instrument itself
Failure to comply with this rule may cause the instrument to become faulty.
Do not install the instrument in any of the following locations
Installing the instrument in any of the following locations may result in fire, electric shock,
and similar.
Humid or dusty environments
Locations where the instrument is likely to become hot such as close to a heater or
exposed to direct sunlight
Locations where the instrument is likely to get wet such as next to a window
Do not block the ventilation slits or use in a location with poor ventilation
Do not block the ventilation slits on the instrument. Blocking the ventilation slits causes
heat to build up inside the unit which may lead to fire. Take particular note of the
following precautions.
Do not lie the unit face up, on its side, or upside down
Do not position in cramped locations with poor ventilation
Allow a gap of at least 10cm from walls and similar when installing
Do not unplug the high-voltage input connector by pulling on the cable
Failure to comply with this rule may damage the cable, resulting in faults or fire.
Hold by the high-voltage connector when unplugging.
Do not operate the instrument or insert or remove the AC plug or high-voltage
input connector if you have wet hands
Failure to comply with this rule may result in electric shock or faults.
Do not place water-filled containers on the instrument
If the water is spilt and gets inside the instrument it may result in fire or electric shock.
Do not drop or subject to strong physical shocks
Failure to comply with this rule may result in faults.
Do not knock or scratch with hard objects
Such actions may damage the exterior coating or LCD panel.
*
If this instrument becomes faulty during normal use, it will be repaired in
accordance with the terms of the warranty. However, please note that Noise
Laboratory Co., Ltd. and its sales agents accept no liability for any compensation
for losses or similar, or damage to the EUT (Equipment Under Test) or other
peripheral equipment, caused by faults in the instrument, deterioration of
consumables, or other external causes.
Prohibited

14
7. POINTS TO NOTE REGARDING CONSUMABLES ITEMS
Secondary Battery for Memory Backup
The instrument contains a secondary battery used to maintain memory data while
the power is turned off.
The secondary battery is a consumable item. The secondary battery deteriorates
with repeated charging and discharging and the charging capacity steadily falls
with normal use.
If the memory backup fails to function even when the battery is charged, the cause
may be deterioration of the secondary battery. In this case, please contact your
sales agent or the Noise Laboratory repair and calibration center to arrange
replacement. Do not attempt to repair the instrument yourself as this is very
dangerous.
The secondary battery may go flat resulting in loss of memory backup if the
instrument remains unused for two months or more. If the memory backup fails to
function, the stored settings and display settings when the power is turned on revert
to their defaults.
If you want to maintain a memory backup over a long period, please leave the
power to the instrument turned on for approximately 24 hours once every two
months. (The actual recharging time may vary depending on the operation
conditions and environment.)
* Please note that Noise Laboratory Co. Ltd. accepts no liability for loss of backup
data due to battery wear, fault, misoperation, or other reason.
Please make a note of important settings information beforehand.
High-Voltage Relay
The main unit and discharge gun contain high-voltage relays.
The high-voltage relays are consumable items. The electrical contacts in the
high-voltage relays deteriorate with use and this can result in poor electrical
connections, contact welding, or insulation failure occurring during normal use.
If you experience problems such as being unable to apply a static discharge after
starting a test or a static discharge occurs as soon as a high voltage is output, the
cause may be deterioration of a high-voltage relay. In this case, please contact
your sales agent or the Noise Laboratory repair and calibration center. Do not
attempt to repair the instrument yourself as this is very dangerous.

7. POINTS TO NOTE REGARDING CONS MABLES ITEMS
15
LCD Display
The instrument contains a CFL (cathode fluorescent lamp) backlit LCD display.
The CFL is a consumable item. The amount of light produced will reduce with normal
use, although the rate of deterioration may vary depending on the operating
conditions and environment.
If the display becomes dark and difficult to view, the cause may be deterioration of
the CFL. In this case, please contact your sales agent or the Noise Laboratory repair
and calibration center to arrange replacement. Do not attempt to repair the
instrument yourself as this is very dangerous.
Fuse
The instrument contains fuses.
A fuse holder is located in the AC inlet on the rear panel (See Chapter 8-2) and the
fuse can be replaced by the user.
Please replace with a fuse of the following type.
Rated voltage 250V/Rated current 2A Slow-blow fuse
Recommended fuse: Littelfuse 218.002P
Quantity: 2
If unable to obtain the correct fuse, please contact your sales agent or the Noise
Laboratory repair and calibration center.
Fuse box
P
Pu
ul
ll
l
t
to
o
O
OP
PE
EN
N
Figure 7-1 Fuse Box

16
8. NAME AND FUNCTION OF EACH PART
8-1. Main Unit (Front Panel)
Figure 8-1 Main Unit (Front Panel)
[1] Model name
The product name and model name of the instrument and the company logo.
[2] High-voltage output connector
Connector with a maximum output voltage of 30.5kV. The discharge gun connects to
this connector.
[3] Operation panel
LCD display and operating switches. See Chapter 8-4 for details.
[4] Carrying handle
Use this to carry or transport the instrument.
[5] Gun holder attachment holes (side)
Used to attach the gun holder (sold separately).
[3]
[4]
[5]
[2]
[1]

8. NAME AND F NCTION OF EACH PART
17
8-2. Main Unit (Rear Panel)
Figure 8-2 Main Unit (Rear Panel)
[6] AUX connector
A D-SUB 15-pin connector. Used to connect to external devices.
See Chapter 13-1 for details.
[7] Optical communications connector
The instrument can communicate with a PC via optical fiber. Please contact the
marketing department at Noise Laboratory Co. Ltd. for details.
[8] Power switch
Used to turn the power on and off.
[9] AC inlet (with internal fuse box)
Inlet used to plug in the supplied AC power cable. Includes an internal fuse.
If replacing the fuse, please replace with a fuse of the following type.
Rated voltage 250V/Rated current 2A Slow-blow fuse
Recommended fuse: Littelfuse 218.002P
[10] Warning text
Indicates a warning, a risk of electric shock, that caution is required, and that you should
refer to the instruction manual. Also includes a warning not to open the cover due to the
risk of electric shock.
[8]
[9]
[11]
[12]
[7]
[6]
[10]
[13]

8. NAME AND F NCTION OF EACH PART
18
[11] Serial number label
Contains the model name, serial number, and other information.
[12] Inspection certification
Label certifying that the instrument passed the Noise Laboratory delivery inspection.
[13] User warning
Noise Laboratory Co., Ltd. accepts no liability for damages resulting from incorrect
operation.
8-3. Discharge un
Please refer to the instruction manual for the discharge gun for more details.
Figure 8-3 Discharge Gun
TC
TCTC
TC -
--
-1110
11101110
1110
Serial No. label
Discharge gun serial No.
CR unit cap
Includes charging capacitor
and discharge resistor
Do not remove when
high voltage is on.
High-voltage input connector
Connect to high voltage output
on main unit
High-voltage cable
Line for high voltage and signals between
main unit and discharge gun
robe stand attachment holes
Holes to attach probe stand
As the inner walls of these
holes contain a switch, poling
a stick into the holes may fire
the trigger.
Ground cable
rovides a return path for
the electrostatic
discharge current
Always connect to the
ground plane.
Trigger switch
Switch to initiate static
discharge.
High voltage indicator lamp
Lights up when high voltage is on
Discharge tip
Two different discharge tips are
provided: for contact discharge and
air discharge tests respectively
Generates high voltage during
testing
To prevent electric shocks, do not
touch or bring into contact with
metals or other conductors.
Waveform forming unit (cap unit) for IEC
* Do not remove this part as it may affect
the performance of the main unit
This part is charged to a high voltage
To prevent electric shocks, do not
touch or bring into contact with
metals or other conductors.
Ground clip
Ground cable contact
Warning
WARNING
HIGH - VOLTAGE
Warning
Warning
Warning
Table of contents
Other NoiseKen Laboratory Equipment manuals

NoiseKen
NoiseKen FNS-AX4-A20 User manual

NoiseKen
NoiseKen ESS-801GL User manual

NoiseKen
NoiseKen LSS-6330-A20 User manual

NoiseKen
NoiseKen LSS-6330 Series User manual

NoiseKen
NoiseKen LSS-6330-B63A User manual

NoiseKen
NoiseKen LSS-6330TEL User manual

NoiseKen
NoiseKen LSS-6330-A20A User manual

NoiseKen
NoiseKen 13-00005A User manual

NoiseKen
NoiseKen IJ-4050 User manual

NoiseKen
NoiseKen EPS-02Hv2 User manual