Español
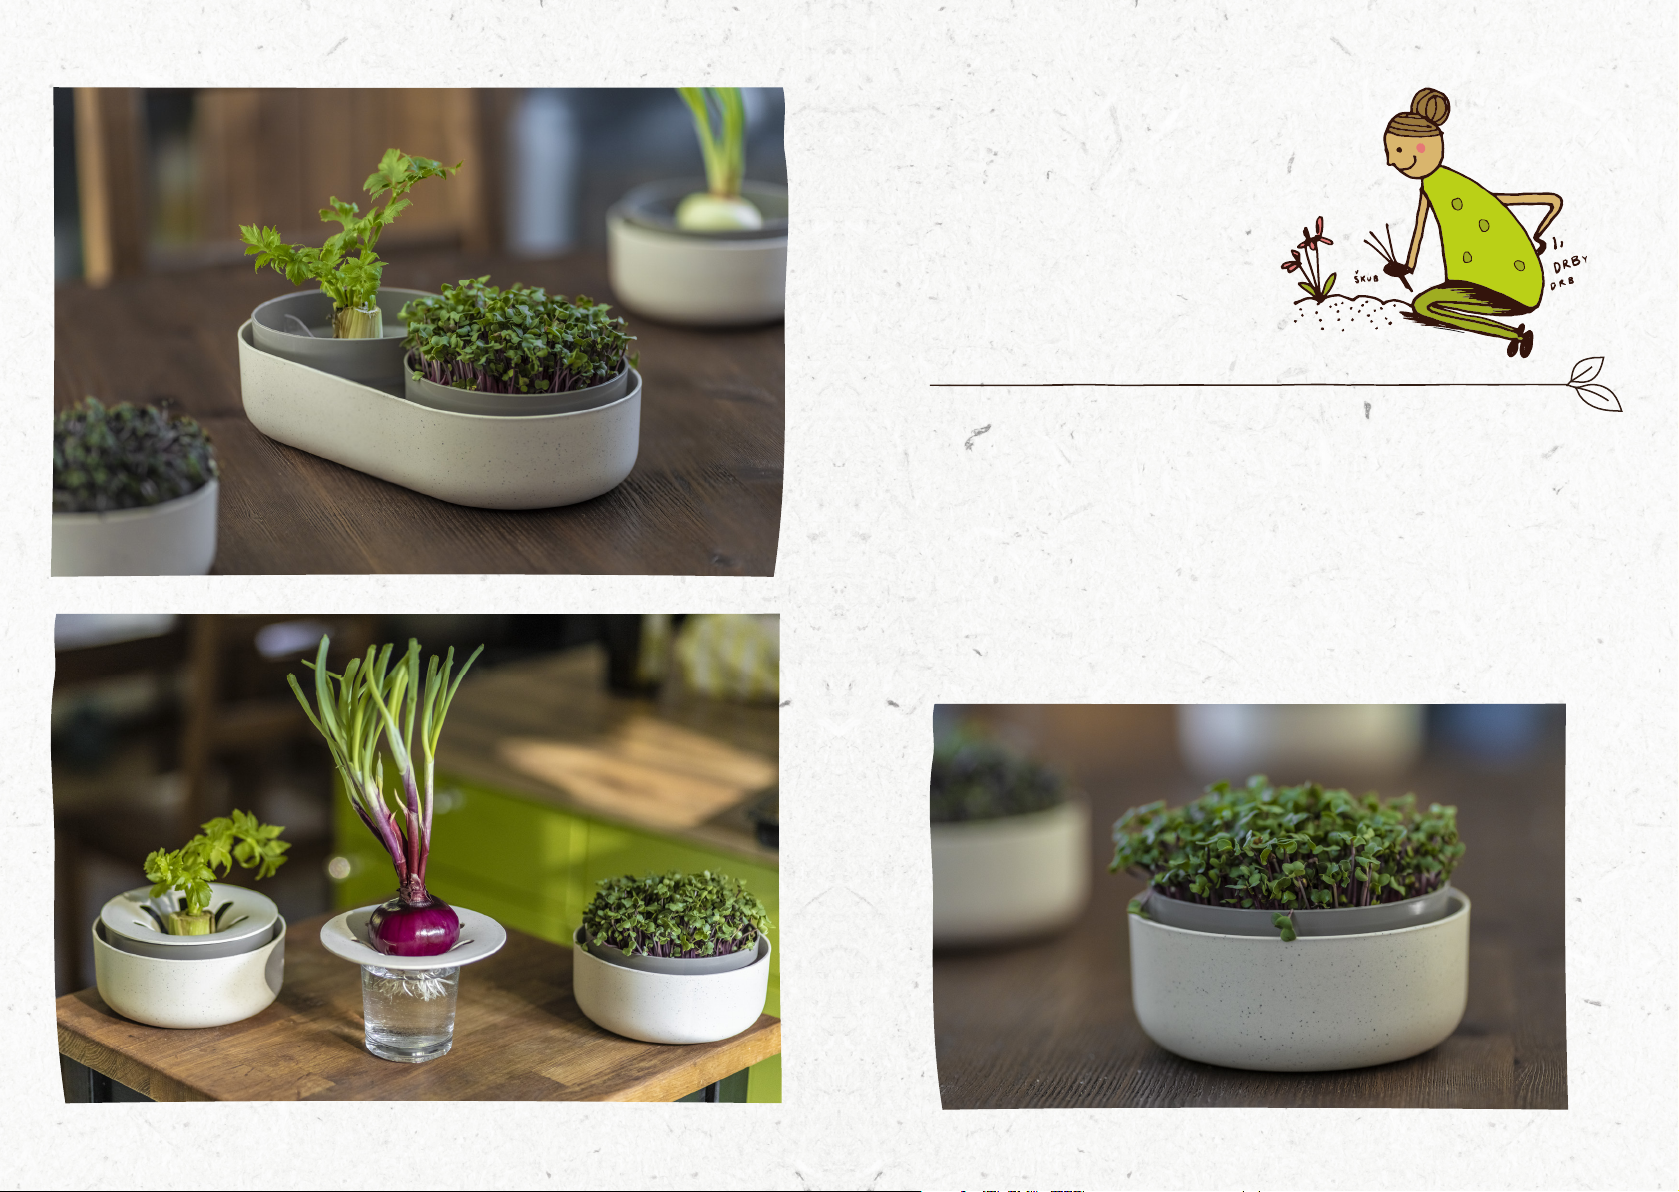
Cultivo de microgreens con perlan
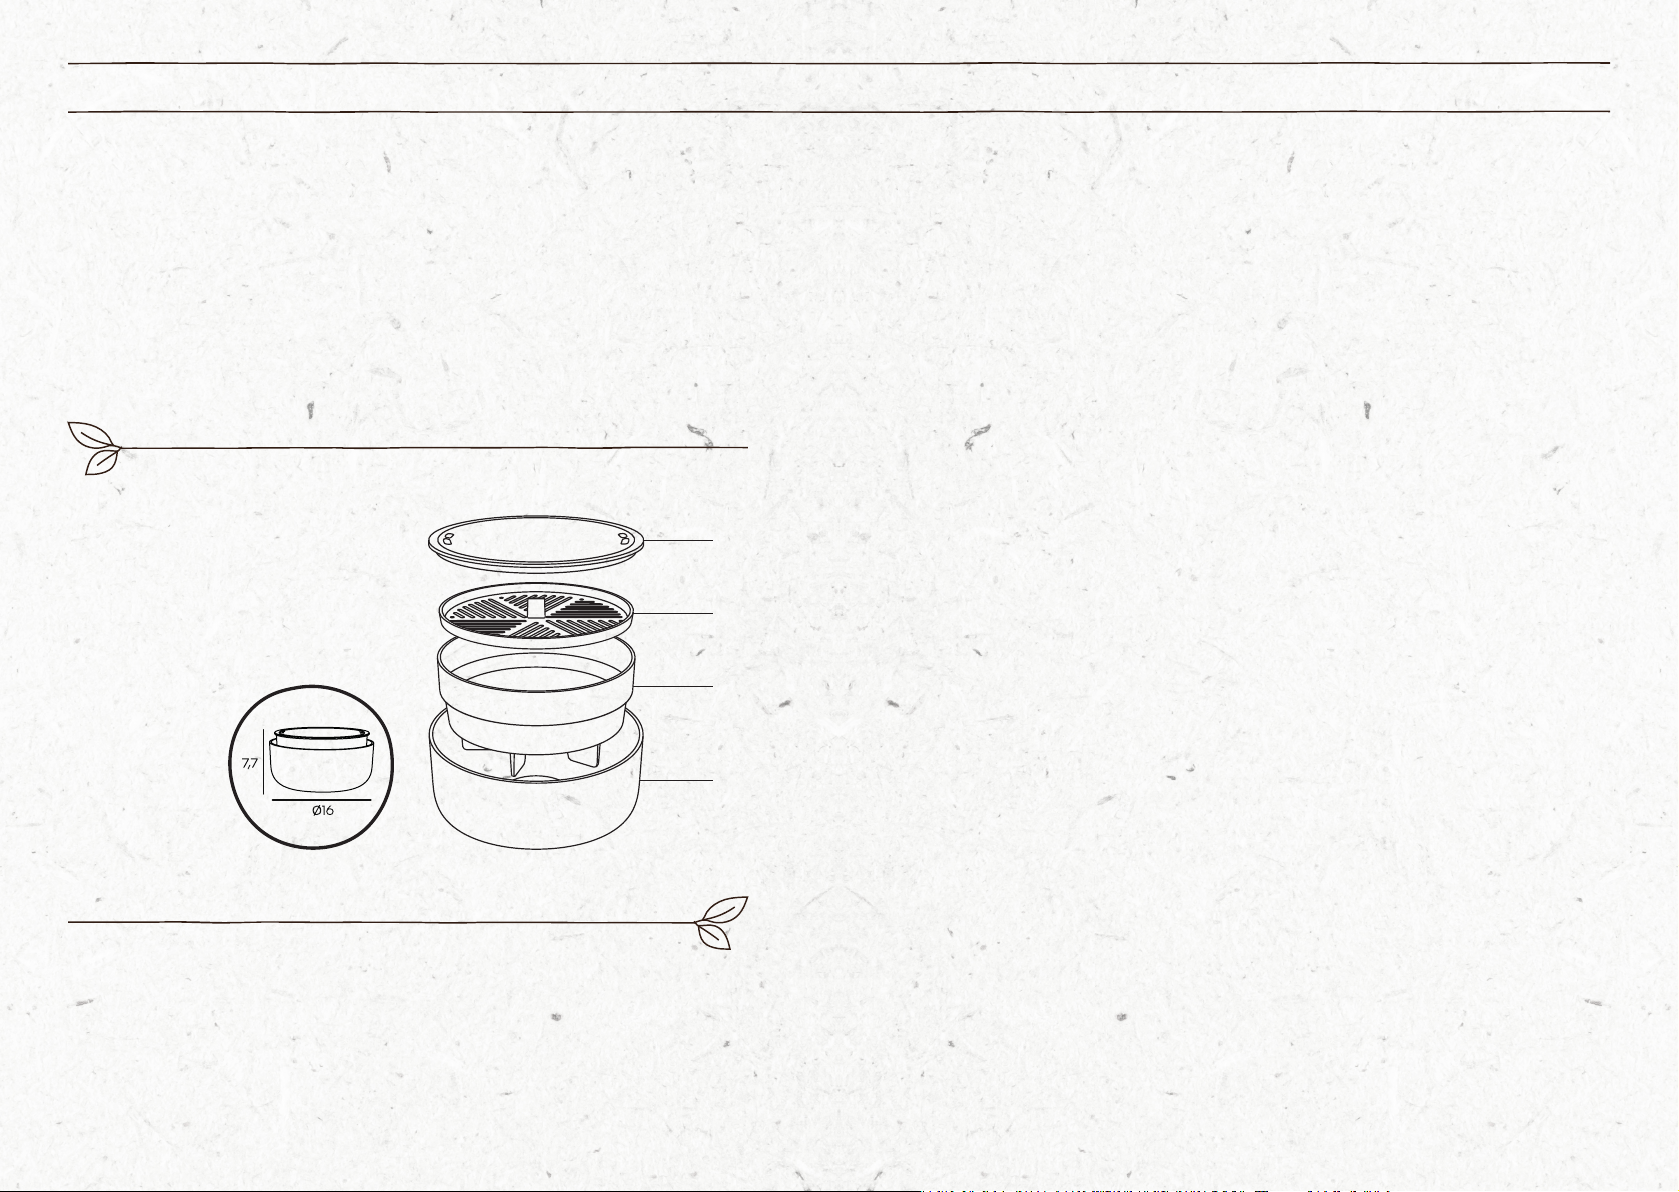
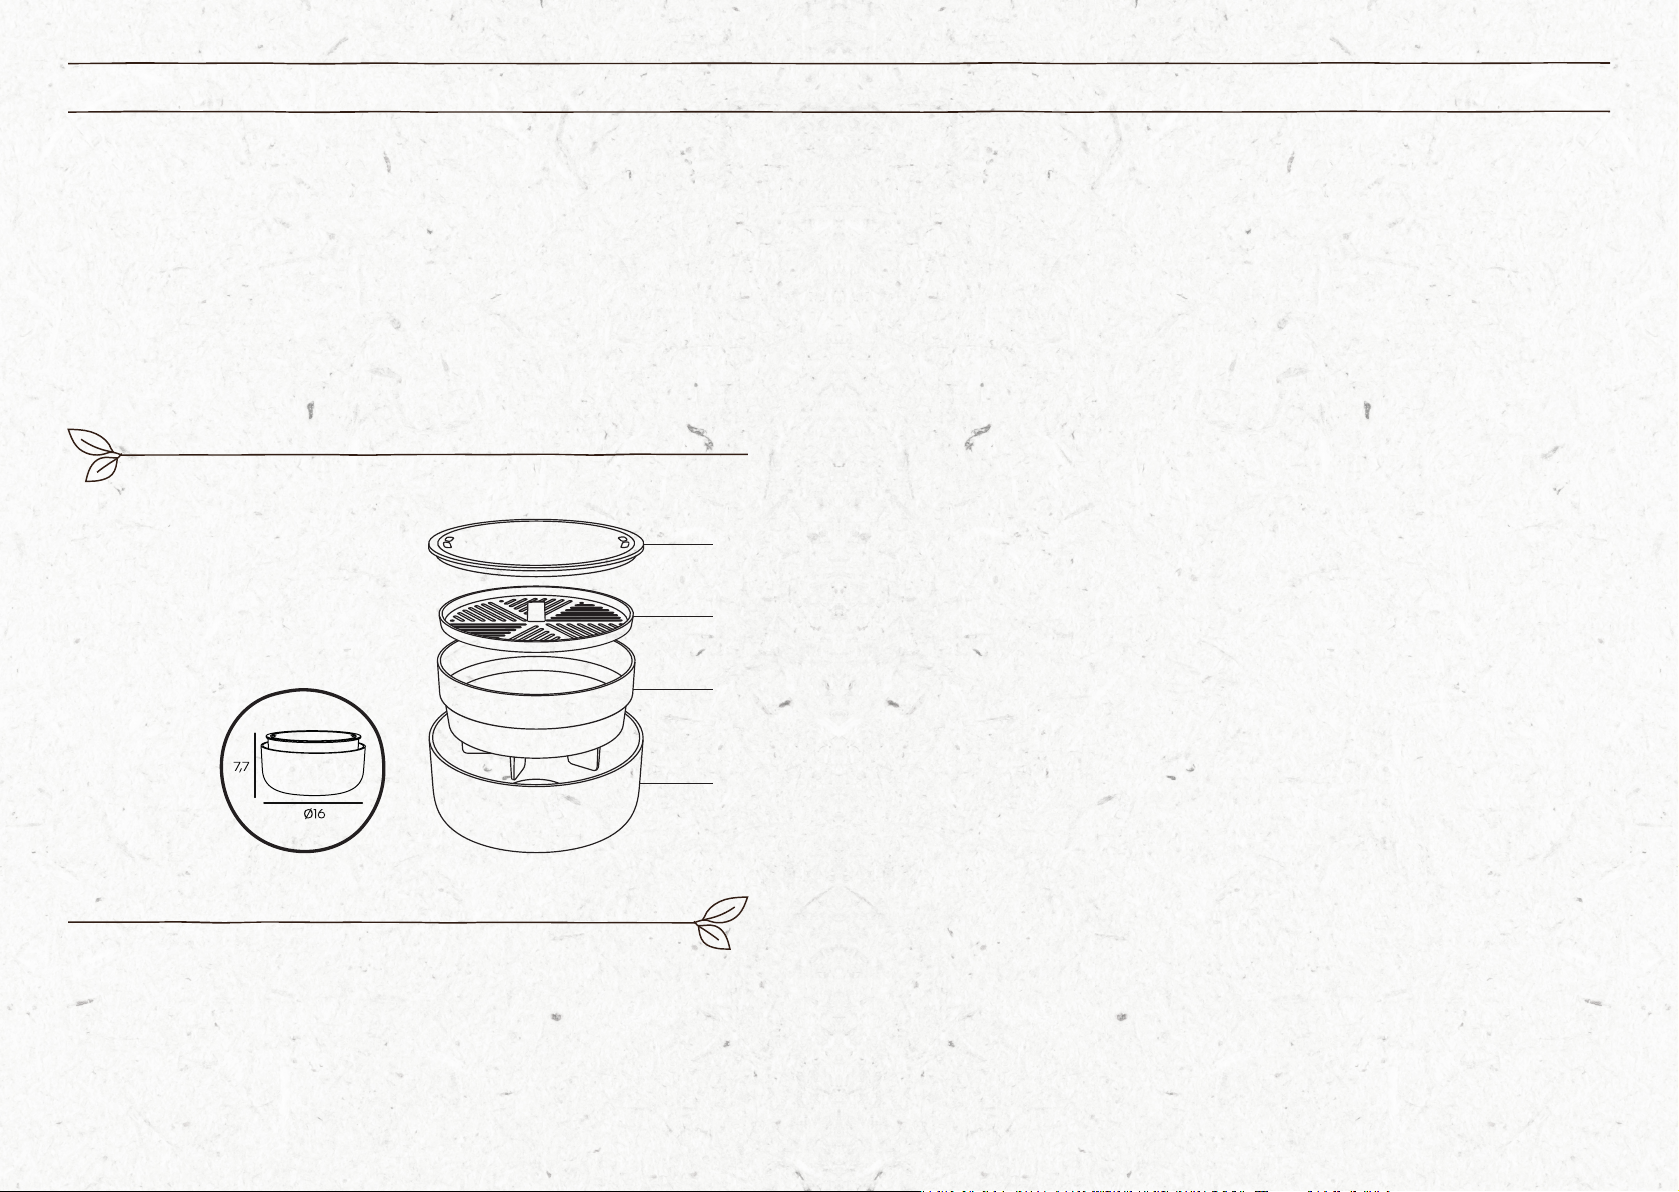
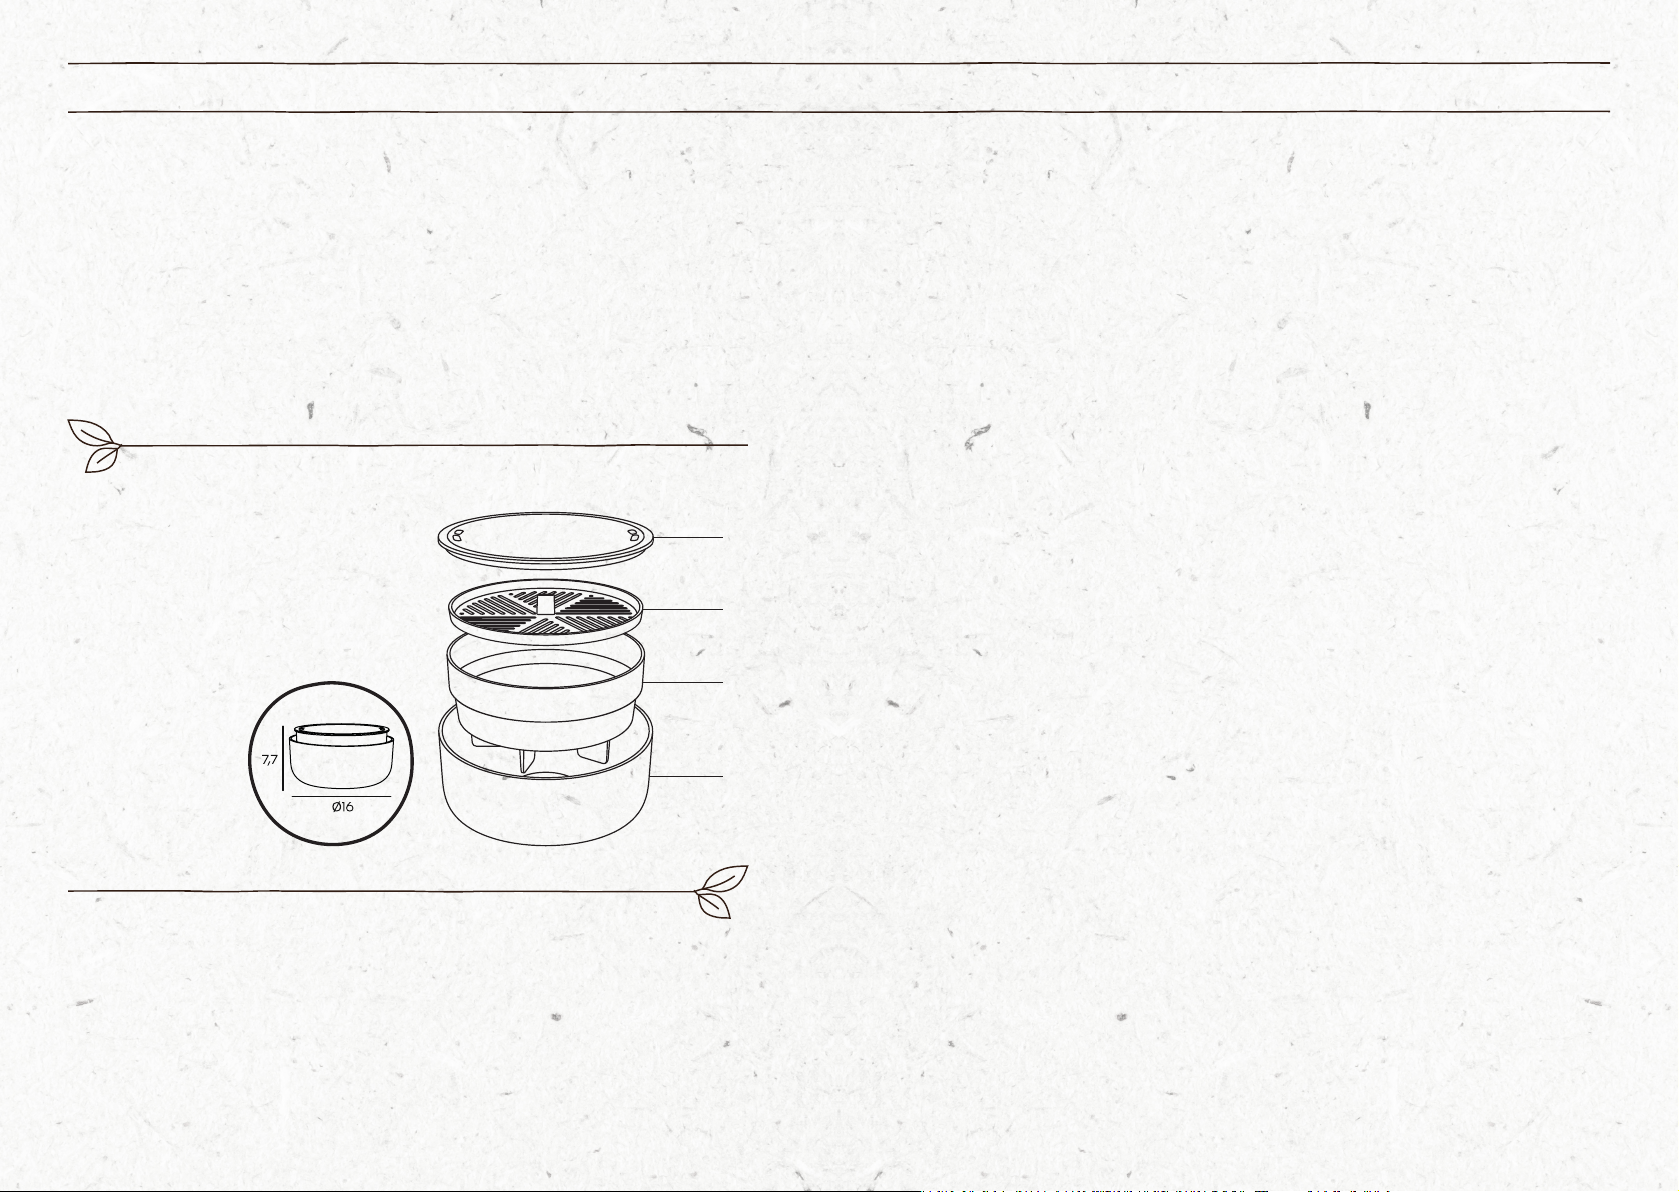
1) inserte un colador profundo (C) en el platillo (D)
2) inserte el colador poco profundo (B) en el colador profundo (C)
3) coloque el perlan en un colador poco profundo (B)
4) rocíe el perlan para que se moje
5) espolvoree las semillas para que se distribuyan uniformemente por
toda la superficie del perlan
6) si usa sus propias semillas, le recomendamos que use aproximadamente
5 g en la superficie del colador poco profundo (B) (aproximadamente una
cucharadita colmada) y cierre con la tapa
7) rocíe las semillas regularmente varias veces al día, aproximadamente
2-4 veces - mantenga el perlan húmedo
8) cierre siempre la tapa después de rociar en los primeros días
9) tan pronto como la planta alcance la altura del borde del colador
profundo (C), no cierre más la tapa
10) en 6-10 días, las plantas estarán listas para el consumo, recomendamos
cortarlas aproximadamente 1 cm por encima del perlan
11) para facilitar el corte, se puede sacar todo el colador poco profundo (B) del
colador profundo (C)
12) la temperatura óptima para la germinación y el crecimiento es + 18 - 24°C
13) perlan se puede compostar odesechar colocándolo en un cubo
de basura biológica
Cultivo de microgreens con gel
1) inserte un colador profundo (C) en el platillo (D)
2) inserte el colador poco profundo (B) en el colador profundo (C)
3) vierta el gel en un recipiente de unos 300 ml
4) vierta 170 ml de agua sobre el gel
5) mezcle bien
6) espere 5 min, se formará un gel espeso
7) después de que se acabe el tiempo, transfiera el gel aun colador
poco profundo (B)
8) extiéndalo uniformemente en un colador poco profundo (B) y alise el gel
9) espolvoree uniformemente un paquete de semillas sobre una capa
alisada de gel
10) si usa sus propias semillas, le recomendamos que use aproximadamente
5 g por superficie del colador poco profundo (aproximadamente una
cucharadita colmada)
Continúe cultivando de acuerdo con puntos siguientes
11) cubra el conjunto con microgreens con una tapa durante
aproximadamente 48 horas, se creará un microclima dentro del contenedor,
aparecerán pelusas/pelos finos en las plantas pequeñas = raíces finas
12) después de 48 horas, abra la tapa y coloque el conjunto ala luz natural
13) la temperatura óptima para la germinación y el crecimiento
es de + 18 - 24°C
14) rocíe las semillas regularmente, varias veces al día,
aproximadamente 2-4 veces - mantenga el gel húmedo
15) en 6-10 días las plantas están listas para el consumo, corte las
plantas uniformemente con el borde superior del colador profundo
16) el gel con restos de plantas se puede compostar odesechar
colocándolo en un cubo de basura biológica
¿Qué significa que el producto fue fabricado: con café molido?
La apariencia resultante del producto fue creada mezclando el material original
y una mezcla de café molido (10 %), que es responsable de la granulosidad visual
y la sutil coloración.
Adecuado para los siguientes tipos de semillas:
Berro, rúcula, rábano, col, brócoli, colinabo, mostaza... (algunas semillas
deben remojarse antes de comenzar el proceso de cultivo - es ideal seguir la
información en el paquete de las semillas)
Mantenimiento y limpieza:
Éste es un producto que no requiere un mantenimiento especial. Lave todas las
piezas con agua caliente y detergente, luego enjuáguelas y séquelas bien. Lave
y seque bien los tazones después de usarlos. El juego también se puede lavar en
lavavajillas hasta una temperatura de 50 °C.
Material:
El producto está fabricado con material apto para el contacto con alimentos
y LIBRE DE BPA.
Disposición:
Entregue todos los componentes del producto para su eliminación ecológica.
La eliminación debe realizarse de acuerdo con la ley.
Garantía:
El producto tiene una garantía de 24 meses apartir de la fecha de venta.
La garantía se proporciona sólo en casos justificados de garantía, en caso de
defectos de material ofabricación. La garantía sólo es válida si el producto se
utiliza de acuerdo con las instrucciones de funcionamiento.
15