Platinum Health Tranquilo Premium User manual


Product description..................................................................................................3
Scope...................................................................................................................... 3
Components and parts............................................................................................4
Precautions..............................................................................................................5
Warnings..................................................................................................................5
The Charger.............................................................................................................6
Charging Instructions...............................................................................................6
Instructions...............................................................................................................7
Preparations before use...........................................................................................7
Handset....................................................................................................................8
To use......................................................................................................................8
Emergency stop.......................................................................................................9
Maintenance.......................................................................................................... 9
Technical Data bath lift...........................................................................................10
Warranty............................................................................................................... 11
Troubleshooting......................................................................................................12
2
Table of contents

hygiene. These aids compensate, in
whole or in part, for restricted or lost
physical functions. The goal of using
such aids is to enable their users to be
independent of help and to give them
more privacy.
Product description:
EURUNI is grateful that you decided
to buy a product made by us.
Our
bath-lift will make your life easier by
assisting you in and out of the bath.
Also, it is easily transportable so it can
be used at home or away.
Bath lifts are used to lower and raise a
user
in
the
bath.
Their
use
is
recommended if the physical mobility of
a
person’s
upper
and/or
lower
To achieve the in & out bath assist, a
extremities
is
significantly
reduced
watertight
electro-mechanical
system
making it difficult to get into or out of the
bath or to sit down and stand up safely.
In these cases, the use of a bathlift is a
great help to re-gain independence and
privacy in the bathroom.
lifts the seat above the upper rim of the
tub and locks the back rest into place to
prevent unintentional tilting. The user
can then sit on the seat and then at a
touch and hold of a button, the user can
lower into the tub and tilt the back rest
back for a comfortable bath. When the
user is done, they can raise the bath lift
above the tub at a touch and hold of a
button.
For additional safety, intelligent logic in
the electro-mechanical system prevents
lowering the bath lift if there is not
enough power to raise the bath lift.
To achieve portability, the bath lift is
constructed
of
high
quality, sturdy,
lightweight, and recyclable plastic.
The
seat can be lowered to 8 cm or 3.1
inches and the back rest can be
dismantled from the seat.
Scope
Bathing aids assist users with their daily
3

Components and parts
LED
2.
3.
4.
5.
6.
7.
8.
9.
Linear actuator
Back rest
Safety pin
Chair seat
Side flaps
Scissor rods
Base
Suction cups
10. Slides
11. Locking parts
12. Handle
13. Charger
Please confirm all the above parts
are included when you unpack the
bath lift.
Contact your supplier
promptly for assistance it there are
any parts missing.
1.
Handset with low battery warning
4

Precautions
Warnings
1.
Before your first use, carefully
1.
2.
3.
4.
Do NOT overload;
read and follow the instructions
for an ideal user experience;
Store the user instructions in a
safe, convenient and easily
accessible location in case it is
needed for future use or contact
information;
Do NOT stand on the bath lift;
Do NOT face back rest when using;
Do NOT install on a steeper surface
than 5-degree grade;
2.
5.
6.
Do NOT use if parts are damaged;
Do NOT use for other purposes
other than a bath-lift;
3.
4.
Charge the handset before first
use and if the bath lift has not
been used for one month;
7.
8.
Do NOT let children use without
adult supervision;
Do NOT obstruct moving parts with
your body or any other object while
in use.
Ensure that the bath-lift fits the
user –weight, volume, cognitive
ability, joint abilities;
9.
Do
NOT
attempt
to
repair
5.
6.
Use only inside of standard
bathtub;
equipment;
10. Do NOT place objects in the
Prior to each use, check all the
parts for damage or malfunction,
do not use if there is any issue.
scissors
fork
near
(such
as
toothbrush, razor, etc);
11. Do NOT place or store handset near
to any heat source –ONLY room
temperature;
7.
8.
Have
every
an
annual
by
inspection
year
professional
technician.
Prior to each use, inspect the
sucker and chair for cleanliness.
Remove any dirt or foreign
substance.
Make sure that the battery is fully
charged before use! The voltage
rating on the charging unit must be
compatible with the voltage of your
power supply. For example, 220V-
240V in Europe, and 110V in the USA.
9.
Ensure the concentrations of
bath oils, bath salts and other
bath supplies will not damage
bath lift structure.
10. User should always exercise
caution when using the bath lift
by moving slowly on and off the
bath lift.
11. Please only use the intended
handset with the bath lift.
5

The Charger
1.
2.
Only use the included charger or the
replacement charger provided by
your dealer;
Do not charge near water, heat or
any other source that could harm
the battery;
3.
4.
Charge immediately when the LED
low battery light is on;
The charging LED indicator is red
while charging and green when the
battery is fully charged.
Typically
takes 2 hours: 30 minutes to charge;
Do NOT use charger for any other
purposes other than charging the
handset;
5.
6.
Do NOT open the handset
Charging Instructions
1. Disconnect the handset from the with
bath lift;
2. Ensure the handset, connectors and
the charger are dry;
3. Connect the handset's female plug to
charger’s male plug;
4. Plug charger into the correct wall
outlet;
5. When the charging is complete,
unplug charger from the wall;
6. Disconnect handset from charger;
7. Reconnect handset to bath lift.
6

INSTRUCTIONS
Preparations before use:
1.
Please confirm there are no
parts damaged or lost before
using;
2.
3.
Ensure the six suction cups are
secured to the bath lift;
Ensure
there
are
no
obstructions that prevents the
bath lift to execute full operation
such as a shower head;
4.
5.
Confirm the bathtub meets the
relevant standards;
If needed, seek assistance to
place and secure bath lift to the
bathtub;
6.
7.
Ensure the ground is dry with no
obstacles
to
prevent
some
accidental falls while installing
the bath lift;
Place the bath lift inside the
bathtub where there is enough
space for the back rest to tilt
backwards;
8.
9.
Ensure that the six suction cups
are seated and fully secured to
the bathtub;
Ensure that the male plug of
bath lift and the female plug of
the handset are totally dry, and
then securely connect them;
10. Ensure the handset cable is
completely out of the way of the
bath lift or anything else that it
can become entangled with.
7

Handset
2.
3.
With one hand hold the back rest
at the grip and with your other
hand tilt the back rest until it rests
against the base plate.
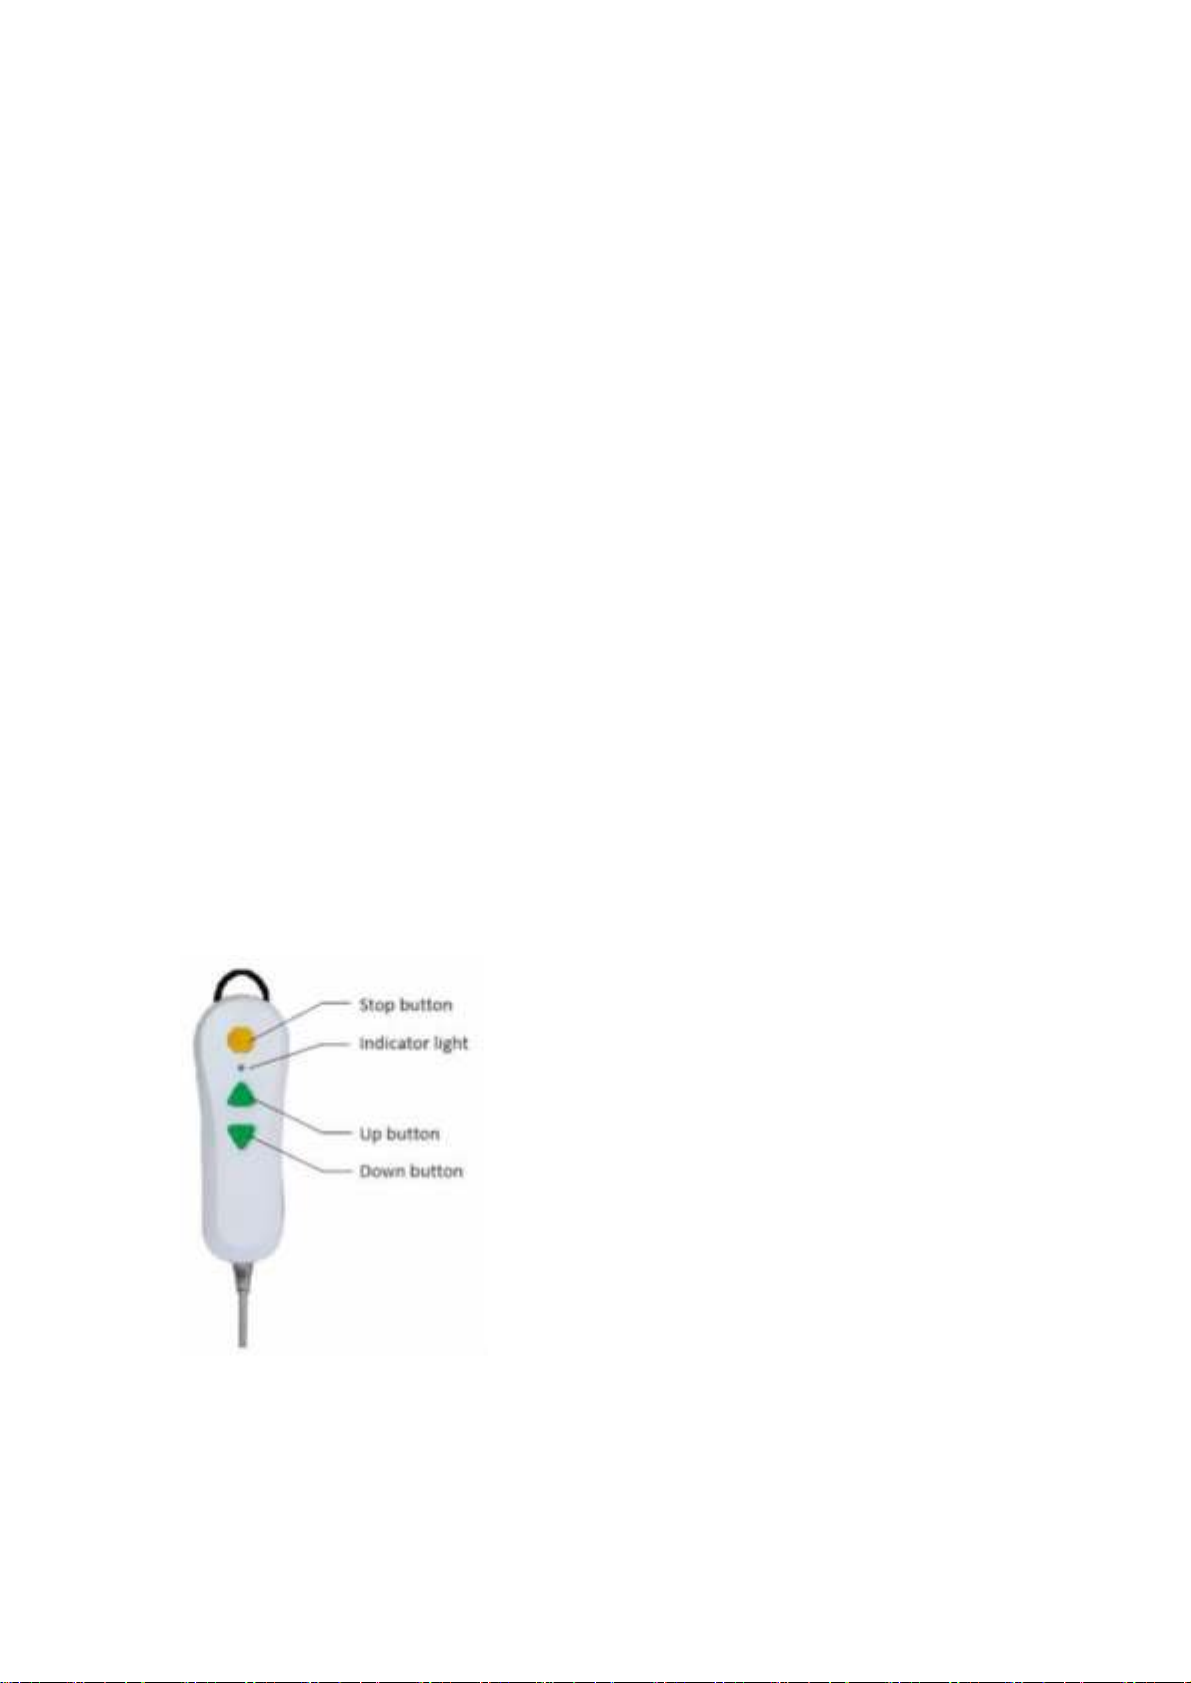
1. Check handset LED before each
use;
2. If the handset indicator lights,
please charge it immediately;
3. Please ensure that the bath water
temperature is comfortable;
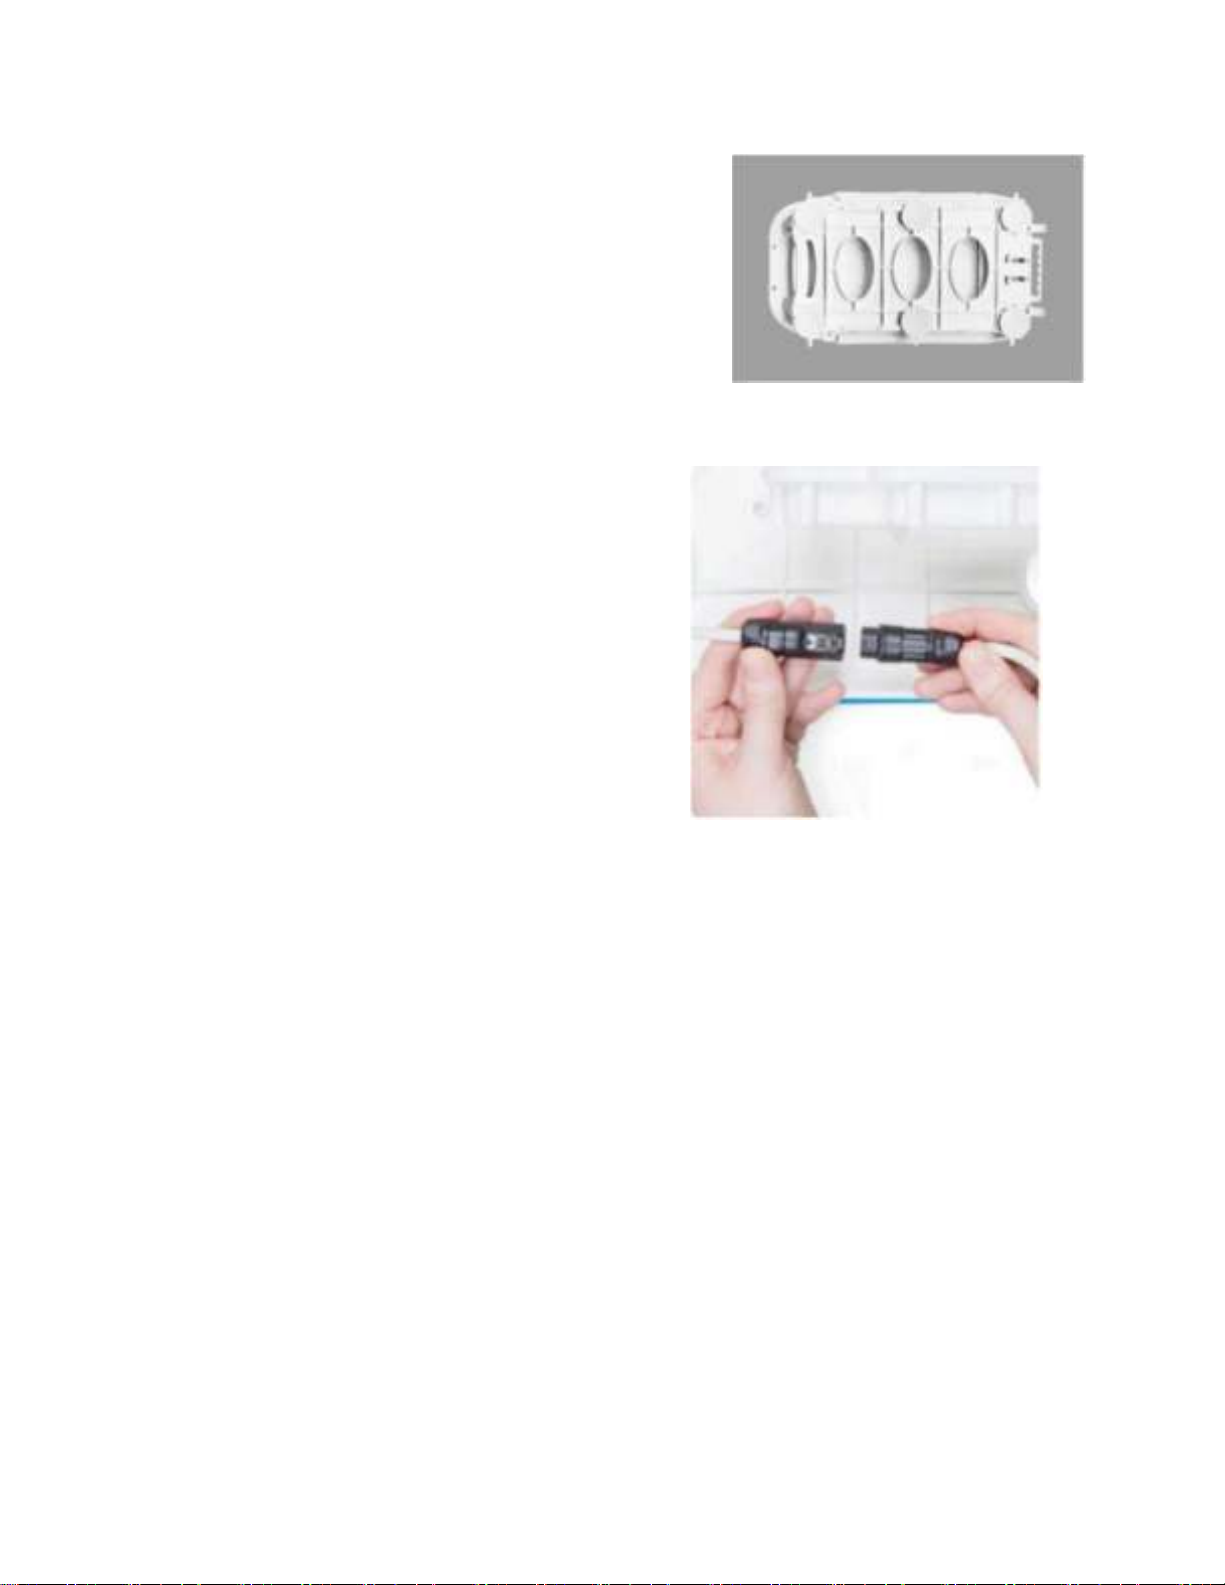
Insert the integrated drive unit at
the bottom of the backrest into the
bearing block of the seat.
4. The UP button on the handset will
cause the bath lift to rise, the
DOWN button will cause the bath
lift to lower, the STOP button will
cause the bath lift to stop motion;
5. The buttons on the handset are
textured to assist persons with
visual impairments;
Sit on and use:
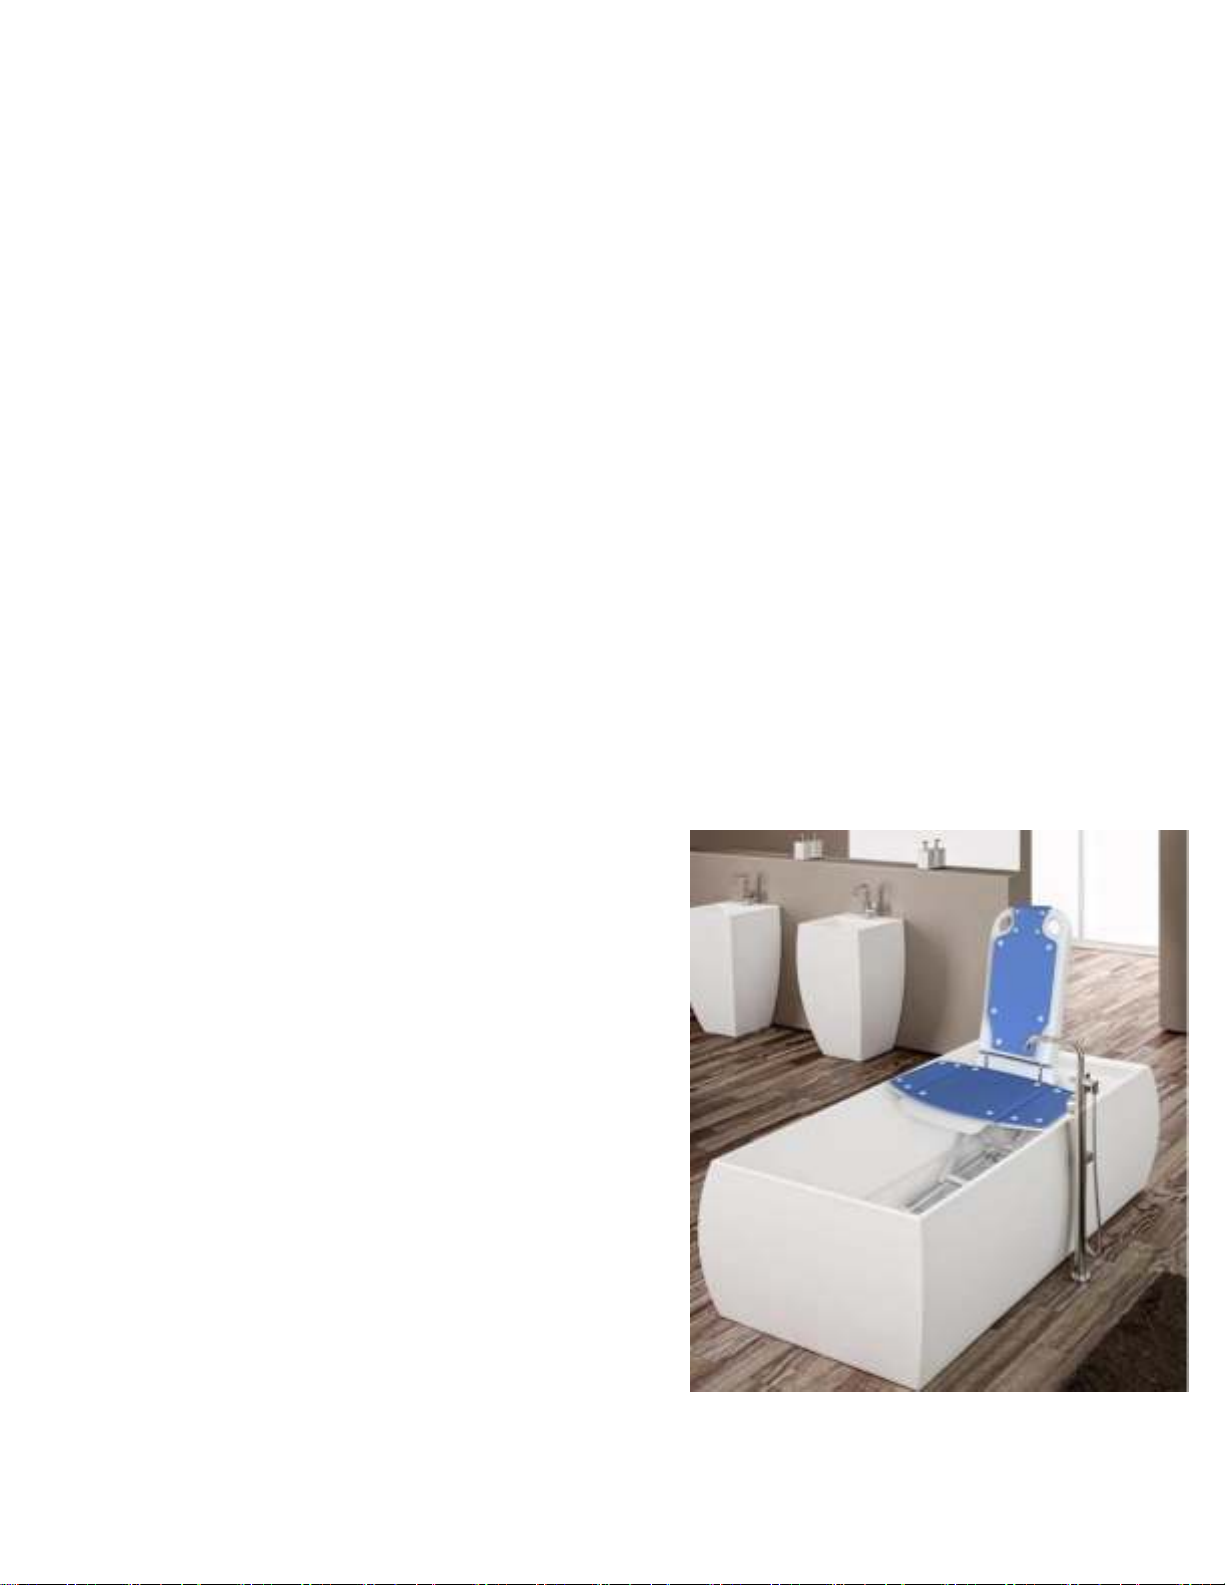
1. Use the handset to move the bath
lift all the way up so the back rest is
at 5 degrees and the side flaps are
over the sides of the bathtub;
2. Sit on the side plate with your back
towards the opposite side;
3. While in that position slide into the
center of the seat;
6. Some bath lifts require that the
user push and hold the handset
buttons for operation;
4. Rotate your upper torso and put
your feet in the tub;
7. The back rest can recline to 45
degrees when the bath lift is fully
lowered;
5. Use the handset to lower the bath
lift into the tub, while lowering
ensure your feet are ad other
objects are not obstructing the
motion of the bath lift;
8. For the bath lift to rise, the back
rest must be at 90 degrees to
ensure safety.
6. Use the handset down button to
adjust the back rest to the desired
resting angle up to 45 degrees.
7. When bath is complete, use the
handset to raise the back rest and
then the bath lift.
8. Place feet outside tub.
9. Rotate upper torso and slide over
to the side flap.
Always use handset during regular
operation
To use:
Assemble back rest to seat:
1.
Place the back rest on the back of
the seat;
8

Bath Lift Lowered Position
Maintenance
1.
After each use, rinse with warm
water. Use wash cloth or brush to
remove excessive dirt or grime.
Do NOT use detergents on or soak
handset or linear actuator in water.
2.
3.
Only
clean
handset
while
connected to the bath lift NOT
disconnected or connected to the
charger.
4.
Ensure that bath lift is fully dry
before storing;
5.
6.
Only handwash;
Do NOT wash the charger, only
wipe with a dry cloth.
Bath Lift Raised Position
Emergency stop
1. In the event of an emergency and
an immediate stop is needed, push
the STOP button.
2. If the STOP button is pressed, the
down function is disabled until the
bath lift is raised to its maximum
height, which will reset the system
9

Overall length(with backrest in a reclined
position)
985mm(38.8in)
Overall width(seat incl. side flaps)
725mm(28.5in)
Width of seat
400mm(15.7in)
Depth of seat
500mm(16.7in)
Overall length of seat
590mm(23.2in)
Sitting height min
80mm(3.1in)
Sitting height max
487mm(19.2in)
Height of backrest
650mm(25.6in)
Width of backrest
350-360mm(13.8in-14.2in)
Backrest adjustment
5°-max45°
Width of baseplate
310mm(12.2in)
Length of baseplate
612mm(24.1)
Load capacity max
140kg(308.6 lb)
Total weight (excl. hand control)
9.6kg(21.2 lb)
Total weight (incl. hand control)
10.1kg(22.3 lb)
Weight of hand control incl. battery
0.5kg(1.1 lb)
Weight of drive unit
3.6kg(7.9 lb)
Weight of seat unit
6.0kg(13.3 ib)
Duration of lifting/lowering movement each
under 105kg load,
lifting:90s,lowering:50s
Operating voltage
14.8V
Storage battery(lithium-ion)
14.8V /2.2Ah
Automatic shutdown
max. 30min
Power input
16.8V
Bath Lift folded size
10

Warranty
Our warranty for the EURUNI Bath Lift will be in accordance with legal stipulations and/or
regulations valid in the different countries. The warranty applies to Commercial and
Domestic applications, subject to the conditions stated here. In the event of any
part/product developing a manufacturing fault or design fault within the warranty period,
replacement parts will be supplied free of charge. In all instances the warranty is
provided to the first-time purchaser or user only. The warranty is not transferable to
another user, whosoever the product is passed on or sold.
11
manufacturing faults will be remedied free of charge by way of replacement or repair.
Our guarantee will become invalid in the event of unauthorized manipulation of any
kind. Guarantee claims can only be accepted if the device is returned to the supplier
in a non-dismantled condition. Any further claims are excluded unless in the case of
contradicting mandatory national stipulations. We are not to be held liable for any
indirect or direct damage or consequential damage, loss or expenses in connection
with the use or inability to use the device for a specific purpose. Tacit agreements
concerning the use or suitability for a specific purpose are expressly excluded.
EURUNI grants a guarantee of three years on the frame of this product
and three years on the hand control with charger. Excluded from this guarantee are
wear parts as covers and suction cups. Damage due to natural wear or improper
handling is excluded from our guarantee. Damage caused by material or

●Troubleshooting
Error
Possible cause
Remedy
Lift does not move
·Battery is flat
·Contacts on hand control are contaminated
·Hand control is not connected properly
–Charge battery
–Unplug hand control; wipe contacts with a
dry cloth and plug hand control in again
–Check plug-type connections
Lift stops repeatedly
·Battery is flat
·Excessive lifting load
·Jack plug not fully plugged
–Charge battery
–Reduce lifting load (note max. load ratings,
see type label on the bathlift)
–check jack plug connection
Battery does not charge
·Not connected to mains power
·Contaminated contacts
–Connect battery charger to mains power
–Wipe contacts with dry cloth
Hand control does not function
·Jack plug not plugged infully
–Ensure jack plug is fully plugged in correctly
Important remarks concerning troubleshooting:
1. If the linear actuator becomes disconnected as shown in “Picture 1”, manually
adjust the linear actuator so it mates correctly as shown in “Picture 2”.
2. If troubleshooting does not solve the issue, please contact your dealer
immediately.
Picture1
Picture 2
12
Table of contents
Other Platinum Health Personal Care Product manuals