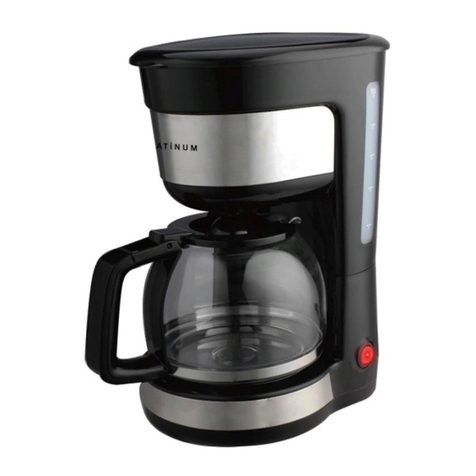
Platinum 6960467 CM4605T User manual

INSTRUCTION MANUAL
3 IN I COFFEE MAKER
MODEL: 6960467(CM4605T)
EAN:6001001782777
INDOOR HOUSEHOLD USE ONLY
Please save and read this instruction manual carefully before use.

1
INTRODUCTION
Thank you for purchasing our “Platinum” Coffee Maker. Each unit has been manufactured to ensure
safety, reliability, and ease of use. Before use, please read these instructions carefully and keep
them for future reference.
IMPORTANT SAFEGUARDS
When using your “Platinum” Coffee Maker, basic precautions should always be followed, including
the following:
!This appliance is not intended for use by persons (including children) with reduced physical,
sensory or mental capabilities, or lack of experience and knowledge concerning the use of this
product, unless they are supervised or have been given instruction concerning use of the appliance
by a person responsible for their safety.
!Children should be supervised to ensure that they do not play with the appliance.
!Always ensure that the voltage on the rating label corresponds to the voltage in your home.
!Check the power cord and plug regularly for any damage. If the cord or the plug is damaged, it
must be replaced by the manufacturer or a qualified person in order to avoid an electrical hazard.
!This appliance is intended for household use only. Industrial or commercial use will void the
warranty, and the supplier can not be held responsible for injury or damage caused when using the
appliance for any other purpose than that intended.
!Incorrect operation and improper use can damage the appliance and cause injury to the user.
!Do not use the appliance if it has been dropped or damaged in any way. In case of damage, take
the unit in for examination and/or repair by an authorized service agent.
!To reduce the risk of electric shock, do not immerse or expose the motor assembly, plug or the
power cord to water or any other liquid.
!Never immerse the unit in water or any other liquid for cleaning purposes.
!Remove the plug from the socket by gripping the plug. Do not pull on the cord to disconnect the
appliance. Always unplug the unit when not in use, before cleaning or when adding or removing
parts.
!The use of accessory attachments that are not recommended or supplied by the manufacturer may
result in injuries, fire or electric shock.
!Do not let the cord hang over the edge of a table or counter. Ensure that the cord is not in a
position where it can be pulled on inadvertently.
!Do not allow the cord to touch hot surfaces and do not place on or near a hot gas or electric burner
or in a heated oven.
!Use of an extension cord with this appliance is not recommended. However, if it is necessary to
use an extension lead, ensure that the lead is suited to the power consumption of the appliance to
avoid overheating of the extension cord, appliance or plug point. Do not place the extension cord
in a position where it can be pulled on by children or animals or tripped over.
!This appliance is not suitable for outdoor use. Do not use this appliance for anything other than its
intended use.
!Do not carry the appliance by the power cord.
ENGLISH

2
ENGLISH
!Do not touch hot surfaces directly. Use handles or knobs.
!Do not leave this appliance unattended during use. Always unplug the unit when not in use.
Allow it to cool before putting on or taking off parts, and before cleaning the appliance.
!Always operate the appliance on a smooth, even and stable surface. Do not place the unit on a
hot surface.
!The manufacturer does not accept responsibility for any damage or injury caused by the improper
or incorrect use of the appliance, or by repairs carried out by unauthorized personnel.
!In case of technical problems, switch off the machine and do not attempt to repair it yourself.
Return the appliance to an authorized service facility for examination, adjustment or repair.
Always insist on the use of original spare parts. Failure to comply with the above mentioned
precautions and instructions, could affect the safe operation of this machine.
!This appliance is intended to be used in household and similar applications such as:
-Staff kitchen areas in shops, offices and other working environments;
-Farm houses;
-By clients in hotels, motels and other residential type environments;
-Bed and breakfast type environments.
!Never use the coffee maker in the environment of high temperature, high magnetic field and
humidity, do not place the coffee maker on or hot surface or beside fire or another electrical
appliance, such as on the top of refrigerator, avoid to be damaged. And also never place another
objects on the top of coffee maker.
!Be careful not to get burned by the steam.
!Some parts of appliance are hot when operated (such as stainless decorated plate, drip tray shelf,
top cover, steam tube and froth nozzle and so on), so do not touch with hand directly. Only use
the handle or knob.
!Clean and maintain the coffee maker regularly according to the section of “Cleaning and
maintenance” to ensure the quality of coffee and the using life of appliance. And add lubricant oil
on the running parts regularly.
!If you do not want to use the appliance for a long time, firstly clean all the detachable components,
and dry them for storage.
!During the coffee maker is on the states of making coffee, making hot water and making steam,
never open the side door to remove the component and shut off the power. The detail operation
refers to the operation manual.
!When the appliance prompts trouble, never operation the appliance, do not place the foreign
object into the brewer.
!Never use the detergent or hot water for cleaning the brewing component, to avoid the running
component is lack of lubricant oil and the component will be distortion as the high temperature.
!The container is designed for use with this appliance, it must never be used on a range top.
!Do not set a hot container on a wet or cold surface.
!Do not use a cracked container or a container having a loose or weakened handle.
!Do not clean container with cleansers, steel wool pads, or other abrasive material.
!Do not let the coffee maker operate without water.

3
ENGLISH
KNOW YOUR COFFEE MAKER
SPECIFICATIONS
Capacity
:
1.5L
Voltage
:
AC 220-240V / 50Hz
Wattage
:
1850W
Cord
:
3-pin grounded plug. (to reduce risk of electric shock)
USING YOUR COFFEE MAKER
You must read all instructions before using.
!Remove all packing material and please check carefully, making sure that your Coffee Maker is
in good condition. It must have no cracks on the unit and no damage to the cord/plug. Do not
discard any packaging until all accessories have been found.
!You must confirm that the voltage indicated on the Coffee Maker corresponds with the voltage in
your home.
!To ensure the first cup of coffee tastes excellent, you should rinse the coffee maker with warm
water as follows:

4
ENGLISH
1. Pour 1500ml water into water tank, and then replace its cover.
2. Set nylon funnel in the funnel support (add no coffee ground). Place a paper filter in the funnel.
3. Set steel mesh into metal funnel (no coffee in steel mesh). Pull the press bar backward, make
sure the tube on the funnel aligns with groove in the appliance, then insert the funnel into the
appliance from the “Insert” position and release the press bar, and you can fix them into coffee
maker firmly through turning it counter-clockwise until it is in the “lock” position.
4. Place carafe on keeping warm plate and put jug (your cup) on removable shelf.
5. Plug the power cord into the outlet, press down the ON/OFFbutton, the indicator will be
illuminated. The appliance will begin working. You may stop brewing by pressing the button to 0
position at any time, the indicator will turn off. The appliance will continue brewing once pressing
ON/OFFbutton again.
6. Press down ON/OFFfor espresso coffee, the yellow indicator is illuminated, you should press
the pump control button, when there is water flowing out and close the pump button, the internal
heat element starts working, the coffee maker begins to be pre-heated. When the green is
illuminated, the pre-heating is finished. Press the pump control button again and water will flow
out.
7. When water is not dripping out any more, you can pour the water in each container out, and then
clean them thoroughly, now you can start brewing.
Note: There may be noise when pumping the water the first time, which is normal, for the appliance is
releasing the air in the appliance. After about 20s, the noise will disappear.
TO USE YOUR COFFEE MAKER
MAKE DRIP COFFEE
1. Open the tank cover, pour proper amount of drinking water into water tank according to the gauge.
Then close the tank cover.
2. Open the top cover and place the funnel into the funnel support. Make sure it is assembled
correctly. Put the filter in correctly.
3. Add coffee powder into the filter with a measuring spoon. A spoon of coffee powder can make a
cup of top-grade coffee, but you can adjust according to your taste. Close the top cover.
4. Insert the carafe on keeping warm plate horizontally.
5. Plug the power cord into the outlet, press down ON/OFFbutton, the indicator will be illuminated.
The appliance will begin working. You may stop brewing by pressing the ON/OFFbutton again at
any time.
Note: At any time, you can take out carafe to serve, but the time cannot exceed 30 seconds.

5
Fig.1
ENGLISH
6. When the process is finished, if you do not want to serve immediately, keep the switch on, the
coffee can be kept warm in the keeping warm plate until the power is cut off manually. For an
optimum coffee taste, serve it just after brewing.
PRE-HEATING
To make a cup of good hot espresso coffee, we recommend you pre-heat the appliance before
making coffee, including the funnel, filter and cup, so that the coffee flavour can not be influenced by
the cold parts.
1. Open the tank cover and fill the tank with water according to the gauge. Replace the tank cover.
2. Look at the scale on the steel mesh, select the one-cup or two –cup mesh, set steel mesh into
metal funnel, pull the press bar backward, make sure the tube on the funnel aligns with the groove
in the appliance, then insert the funnel into the appliance from the
“Insert” position and release the press bar, and you can fix them on
the coffee maker firmly through turning it counter-clockwise until it
is in the “lock” position. (See Fig. 1).
3. Place an espresso cup (your cup) on removable shelf.
4. Then connect the appliance to power supply. Make sure the steam
control knob is in the off position.
5. Press down ON/OFFbutton for espresso coffee, the yellow indicator will be illuminated, turn the
/ button to the position. Hold the pump control button on the “P” position, when there is
water flowing out, close the pump immediately. The purpose of the step is to pump the water of
the tank into the housing.
6. When the green light is illuminated, you should press the pump control switch to the “P” position
again, there will be hot water flowing out. When the green lamp is extinguished, close the pump.
The pre-heating of the appliance is finished.
MAKE ESPRESSO COFFEE
1. Remove the metal funnel by turning it in clockwise. Set steel mesh into metal funnel. Add coffee
powder to the steel mesh with a measuring spoon, a spoon of coffee powder can make about a
cup of top-grade coffee, then press the coffee powder lightly with the tamper and remove the
excess coffee powder on the edge.
2. Pull the press bar backward, make sure the tube on the funnel aligns with the groove in the
appliance, then insert the funnel into the appliance from the “Insert” position and release the press
bar, and you can fix them on coffee maker firmly by turning it counter-clockwise until it is in the
“lock” position. (See Fig. 1).
LOCKINSERT

6
ENGLISH
3. Pour out the hot water in the cup. Then place the hot cup (your cup) on removable shelf.
4. At the time, the green light is illuminated, if the green lamp is extinguished, wait for a moment,
once the green lamp is illuminated, you should press the pump control switch to the “P” position,
wait for a moment, there will be coffee flowing out.
Note1: While brewing coffee or making steam, it is normal for the green light to be off, it only means
that the heater is heating up to keep the temperature at the standard range.
Note2: In case no coffee flows out after a considerable period, you may turn the steam knob
controller to the ON position, when there is water flowing out from the steam tube,
immediately turn the steam knob controller to the OFF position, after a while, coffee will flow
out from the coffee outlet.
5. You should press down the ON/OFFbutton manually once the desired coffee is obtained or the
colour of coffee becomes noticeably lighter, the yellow and green indicators go out and the coffee
maker stops working; your coffee is ready now.
WARNING: Do not leave the coffee maker unattended while making the coffee, and you need
to operate it manually sometimes!
6. Once finished making the coffee, you can take the metal funnel out by turning it clockwise, then
pour the coffee residue out with the steel mesh pressed by press bar.
7. Let them cool down completely, then rinse under running water.
MAKE CAPPUCCINO
You get a cup of cappuccino when you top up a cup of espresso with frothing milk.
Note: While making steam, the metal steel must be assembled in position.
Method:
1. Prepare espresso first with a container that is big enough, as indicated in “MAKE ESPRESSO
COFFEE”, make sure that the steam controller is in the off position.
2. Press down and hold the / button on the position, waiting until the green indicator is
illuminated.
3. Fill a jug with about 100 grams of milk for each cappuccino to be prepared, you are recommended
to use whole milk at refrigerator temperature (not hot!).
Note: In choosing the size of jug, it is recommend that the diameter not be less than 70 ± 5 mm. And
bear in mind that the milk doubles in volume, so make sure the jug is tall enough.
4. Insert the frothing device 2mm deep into the milk.
5. Turn the steam controller slowly counter-clockwise slowly, steam will come out from the
adjustable steam outlet. To get better effect, move the cup constantly up and down.
Note:Never turn the steam controller rapidly, as the steam will accumulate rapidly and may
increase the risk of explosion.
6. Once the required volume is reached, you can turn the steam controller to the off position and
press the / button to stop generating the steam.
Note: Clean the frothing device with a wet sponge immediately after steam stops generating,
but take care not to get burned!
7. Pour the frothed milk into the espresso prepared, now the cappuccino is ready. Sweeten the taste
as desired, sprinkle the froth with a little cocoa powder.

7
ENGLISH
Note1: after making frothed milk, remember to clean the steam tube to prevent it from being jammed
at the next use., The cleaning method is as follows: First, press the espresso coffee/frothing to select
button to position and dip the steam tube into a cup; Second, turn on the steam controller and press
the pump control button to the P position, and there will be water flowing out from the steam tube and
funnel.
Note2: after making steam for each time, we recommend you allow the maker to cool down at least
for 5 min before making coffee again. Otherwise your Espresso coffee may acquire a burnt odor, but
if you want to make coffee immediately, follow the next steps: First, press the espresso
coffee/frothing to select button to position and dip the steam tube into a cup; Second, turn on the
steam controller and press the pump control button to the P position, and there will be water flowing
out from steam tube and funnel; after the green lamp is turned off, close the pump, then turn the
steam controller to the off position. When the green lamp is illuminated, you can start to brew coffee
again.
8. Press the ON/OFFbutton once to cut off the power source.
PRODUCING STEAM TO HEAT LIQUIDS OR FROTH MILK SEPARATELY
The steam tube can be used to froth milk separately and make hot beverages like drinking chocolate,
water or tea.
Method:
1. Open the tank cover, add drinking water to the water tank according to the gauge.
2. Close the water tank cover, then connect the appliance to power outlet.
3. Make sure that the steam control knob is in the off position.
4. Press down the ON/OFFbutton, and the yellow indicator will be illuminated, you should press
the pump controller, when there is water flowing out and close the pump, the internal heat
element starts working, the coffee maker begins to be pre-heated.
5. Press down the / button, waiting until the green indicator is illuminated, it shows that the
pre-heating is finished.
6. Dip the steam tube into the liquid to be heated or the intended froth milk. Turn the steam controller
counter-clockwise slowly to start making steam.
7. When the required temperature is reached (the ideal is 60ºC) or the frothing milk is obtained, you
can turn the steam controller to the off position.
8. Press the ON/OFFbutton once to cut off the power supply.
CARE AND CLEANING
1. Cut off the power supply and let the coffee maker cool down completely before cleaning.
2. Clean housing of coffee maker with a moisture-proof sponge often.
Note: Do not clean with alcohol or a solvent cleanser. Never immerse the housing in water for
cleaning.
3. Detach the metal funnel by turning it clockwise, get rid of any coffee residue inside, then you can
clean it with a cleanser, but at the end you must rinse it with clear water.
4. Clean all the detachable attachments with water and dry them thoroughly.

8
ENGLISH
CLEANING MINERAL DEPOSITS (for the section of making espresso coffee)
1. To make sure your coffee maker operates efficiently, internal piping is clean and you get the
maximum flavor in your coffee, you should clean away the mineral deposits every 2-3 months.
2. Fill the tank with water and descaler to the MAX level (the ratio of water and descaler is 4:1, the
detail refers to the instruction of descaler. Please use “household descaler”, you can use the citric
acid (obtainable from chemist’s or drug stores) instead of the descaler (the one hundred parts of
water and three parts of citric acid).
3. According to the program of pre-heating, put the metal funnel (no coffee powder in it) and carafe
(jug) in place. Brew water per “PRE-HEATING”.
4. Press down ON/OFFbutton for espresso coffee, the yellow indicator will be illuminated, you
should press the pump control switch, press the / button to the position, when there is
water flowing out and close the pump, and wait for a moment, the coffee maker begins to be
heated.
5. When the green lamp is illuminated, it shows the heating is finished. Press the pump control
button to the “P” position and make two cups coffee (about 2Oz). Then close the pump and wait
for 5s.
6. Press the / button to the position, waiting until the green indicator light turns on. Make
steam for 2min, then turn the steam controller to the off position to stop making steam. Press the
ON/OFF II to the “0” position to stop the unit immediately, leave the descalers deposit in the unit
at least 15 minutes.
7. Restart the unit and repeat steps 4-6 at least 3 times.
8. Then pressing the / button to position, when the green lamp is illuminated, press the
pump control button to “P” position to brew until no descaler is left.
9. Then brew coffee (with no coffee powder) with tap water, at the MAX level, and repeat steps 4 to
6 3 times (it is not necessary to wait for 15 minutes in step 6), and then brew until no water is left
in the tank.
10.Repeat step 9 at least 3 times to make sure the piping is clean.
CLEANING MINERAL DEPOSITS (for the section on making drip coffee)
1. Fill the tank with water and descaler to the MAX level (the ratio of water to descaler is 4:1), the
detail refers to the instructions of the descaler. Please use “household descaler”, you may use
citric acid instead of the descaler (one hundred parts of water and three parts of citric acid).
2. Push carafe onto keeping warm plate, pay attention to ensure that the center line of the carafe
aligns with that of the brew basket.
3. Press down the ON/OFFbutton, and the indicator will be illuminated. After a while, water will drop
out automatically.
4. After percolating the equivalent of one cup, press the ON/OFFbutton again to stop the appliance.
5. Allow the solution to work for 15 minutes, repeat steps 3-5 again.
6. Turn the appliance on and run off the water until the water tank is completely empty.
7. Rinse by operating the appliance with water at least 3 times.

9
ENGLISH
TROUBLE SHOOTING
Symptom
Cause
Corrections
Carafe leaks water or
water leaks out from
lid of carafe
The carafe is not adjusted properly
Ensure center line of carafe aligns with leakage
opening of brew basket well.
The level of water in the tank
exceeds the scale of MAX.
The water level in the tank should be within the
scale of MIN and MAX.
The metal parts in
the tank have rust.
The descaler is not of the
recommended type. It may corrode
the metal parts in the tank.
Use the descaler recommended by
manufacturer.
Water leaks from the
bottom of coffee
maker.
There is too much water in the drip
tray.
Please clean the drip tray.
The coffee maker is
malfunctioning.
Please contact the authorized service facility for
repair.
Water leaks out of
outer side of filter.
There is some coffee powder on
filter edge.
Get rid of the coffee powder.
Acid (vinegar) taste
exists in Espresso
coffee.
Did not clean correctly after
cleaning mineral deposits.
Clean coffee maker as indicated in “before the
first use” several times.
The coffee powder is stored in a
hot, wet place for a long time. The
coffee powder turns bad.
Please use fresh coffee powder, or store
unused coffee powder in a cool, dry place. After
opening a package of coffee powder, reseal it
tightly and store it in a refrigerator to maintain
its freshness.
The coffee maker
cannot work any
more.
The power cord is not plugged in
properly.
Plug the power cord into a wall outlet correctly,
if the appliance still does not work, please
contact the authorized service facility for repair.
The steam cannot
froth.
The steam ready indicator (green
indicator) is not illuminated.
Only after the steam ready indicator (green
indicator) is illuminated, the steam can be used
to froth.
The container is too big or the
shape does not fill well.
Use tall and narrow cup.
You have used skimmed milk
Use whole milk or half-skimmed milk

10
ENGLISH
WARRANTY
PLEASE AFFIX YOUR RECEIPT/PROOF OF PURCHASE HERE.
IN THE EVENT OF A CLAIM UNDER THIS WARRANTY THE AFORESAID RECEIPT/PROOF OF
PURCHASE MUST BE PRODUCED TOGETHER WITH THIS WARRANTY.
Model number
(Lot number: )
Product name
Date of purchase
Place of purchase
1. The party selling the product (“the seller”) to the original purchaser of this product (“the
customer”) hereby warrants that this product will be of good quality and, in good working order
and, free of defects and suitable for its intended purpose under normal household use, for a
period of 1 (one) year from the date of purchase (“warranty period”) of this product.
2. In the event that the warranty period has not lapsed and the product is not of a good quality, or in
good working order or, is defective or is not suitable for its intended purpose under normal
household use, the customer may, subject to paragraph 3 below, return the product to the seller
and have the following options available:
2.1 Within the first 6 (six) months of the warranty: to receive a refund of the actual price paid
or to exchange the product for the same or similar product of the same purchased value;
2.2 Within the second 6 (six) months of the warranty: to have the product exchanged for the
same or similar product of the same purchased value.
3. The seller will not replace the product or refund the customer in terms of this warranty if the
product:
3.1 has been altered contrary to the instructions provided in the product manual;
3.2 has been misused, abused or tampered with;
3.3 is defective or not in working order due to ordinary wear and tear;
3.4 is damaged resulting from the customer’s gross negligence, recklessness, malicious
behavior or criminal conduct;
3.5 has been utilised for commercial use.
4. This warranty applies only to the product that has been purchased from the seller and not to any
expendables attached to or installed on the product by the customer.
5. Any claim in terms of this warranty must be supported by the original proof of purchase.

11
PORTUGUÊS
INTRUÇÃO
Obrigado pela sua compra da nossa “Platinum” Máquina de café. Cada unidade foi manufaturada
para assegurar a segurança, a confiabilidade, e a facilidade de utilização. Antes de usar, por favor
leia estas instruções com cuidado e conserve-as para a referência futura.
PROTEÇÕES IMPORTANTES
Quando usar a sua “Platinum” Máquina de café, as precauções básicas devem sempre ser seguidas,
incluindo o seguinte:
!Este dispositivo não destina-se a ser utilizada por pessoas (incluindo crianças) com
potencialidades físicas, sensórias ou mentais reduzidas, ou falta da experiência e do
conhecimento, a menos que forem supervisionados ou forem dados a instrução a respeito do uso
do dispositivo por uma pessoa responsável para sua segurança.
!As crianças devem ser supervisionadas para assegurar-se de que não joguem com o apparatus.
!Certifique-se de que a voltagem usada na casa corresponde à voltagem indicada na etiqueta.
!Verifique regularmente o cabo de força e o plugue para ver se há todos os danos Se o cabo de
alimentação ou o plugue estiver danificado, deve ser substituído pelo fabricante, ou por pessoa
qualificado a fim de evitar um perigo elétrico.
!Este produto destina-se ao uso doméstico somente. O uso industrial ou comercial anulará a
garantia, e o fornecedor não é responsável para ferimento ou danos causados ao usar o
dispositivo para nenhuma outra finalidade.
!Operação e uso incorretos podem danificar o aparelho e causar danos ao usuário.
!Não use o aparelho se ele caiu ou foi danificado de alguma maneira. Em caso de dano, examine o
aparelho e / ou repare por um agente autorizado.
!Para reduzir o risco de choque elétrico, não submergir ou exponha o motor, o plugue ou o cabo de
alimentação à água ou qualquer outro líquido.
!Nunca submergir o aparelho na água ou outro líquido para limpeza.
!Retire o plugue da tomada segurando o plugue. Não puxe o cabo para desconectar o aparelho.
Sempre desligue o aparelho quando não estiver em uso, antes de limpar ou quando adicionar ou
remover peças.
!O uso dos acessórios não recomendado pelo fabricante do dispositivo pode causar os ferimentos,,
incêndio ou choque elétrico.
!Não deixe o cabo pendurar sobre a borda da mesa ou do balcão. Garantir que o cabo não está
em uma posição onde ele pode ser puxado descuidadosamente.
!Não deixe o cabo tocar em superfícies quentes e não coloque sobre ou perto de um gás quente
ou queimador elétrico ou em forno aquecido.
!O uso de um cabo de extensão com este aparelho não é recomendado. No entanto, se for
necessário usar um cabo de extensão , certifique-se que o cabo é apropriado para o consumo. de
energia do aparelho para evitar o sobreaquecimento do cabo de extensão, equipamento ou ponto.
Não coloque o cabo de extensão em uma posição onde ele pode ser puxado por crianças ou
animais.
!Este produto destina-se ao uso doméstico somente. Não use este aparelho para outra
finalidade.
!Não transporte o aparelho pelo cabo de alimentação.
!Não toque as superfícies quentes diretamente. Use os punhos ou os botões.

12
PORTUGUÊS
!Não deixe este aparelho sem supervisão durante o uso. Sempre desligue o aparelho quando não
estiver em uso. Deixe esfriar antes de colocar ou retirar peças e antes de limpar o aparelho.
!Sempre opere o aparelho sobre uma superfície lisa, plana e estável. Não coloque o aparelho
sobre uma superfície quente.
!O fabricante não se responsabiliza por qualquer dano ou prejuízo causado pelo uso indevido ou
incorreto do aparelho, ou reparações efectuadas por pessoal não autorizado.
!Em caso de problemas técnicos, desligar o aparelho e não tente repará-lo para si mesmo.
Retorno o aparelho a uma assistência técnica autorizada para exame , ajuste ou reparo. Sempre
use as peças sobresselentes originais..A falha de operar de acordo com as precauções e as
instruções mencionadas acima, podia afetar a operação segura desta máquina.
!Este dispositivo destina-se a ser usado na casa e em aplicações similares como.
- Áreas da cozinha nas lojas, nos escritórios e nos outros endereços trabalho.
- Casas de habitação em herdade
- Por clientes nos hotéis, nos motéis e nos outros ambientes de tipo residential
- Ambientes de tipo de cama e de pequeno almoço.
!Nunca use a máquina de caféno ambiente de alta temperatura, campo magnético de alta e
umidade,não coloque a máquina de caféna superfície quente ou ao lado de incêndio ou outro
aparelho elétrico,como em cima da geladeira, evite ser danificado.E também nunca coloque os
outros objetos em cima da máquina de café.
!Tem cuidado para não se queimar com o vapor.
!Algumas partes do aparelho estão quentes quando operado(como prato decorado inoxidável,
prateleira bandeja de gotejamento, tampa superior, tubo de vapor e bico espuma e etc.),por isso,
não toque com a mão diretamente. Apenas use a alavanca ou botão.
!Limpar e manter a máquina de café regularmente de acordo com a seção de "Limpeza e
manutenção" para garantir a qualidade do café e da vida usando do aparelho.E adicionar óleo
lubrificante nas peças em execução regularmente.
!Se você não quiser usar o aparelho por um longo tempo, primeiro, limpar todos os componentes
destacáveis, e secá-los para o armazenamento.
!Durante a máquina de caféeatá nos estados de fazer café, tornando a água quente e vapor
fazendo, nunca abra a porta lateral para remover o componente e desligar a energia. A operação
detalhe refere-se detalhadamente o manual de operação.
!Quando o aparelho há problema, nunca opere o aparelho, não coloque o objeto estranho dentro o
fermentador.
!Nunca use o detergente ou água quente para a limpeza do componente da cerveja, para evitar o
componente em execução éa falta de óleo lubrificante e o componente seráa distorção como a
temperatura alta.
!O recipiente éprojetado para uso com este aparelho, ele nunca deve ser usado no topo de uma
gama .
!Não defina um recipiente quente numa superfície molhada ou frio.
!Não use um recipiente rachado ou um recipiente tendo uma alça solta ou enfraquecido.
!Não limpe o recipiente com produtos de limpeza, esponja de aço ou outros materiais abrasivos.
!Não deixe que a máquina de caféfunciona sem água.

13
PORTUGUÊS
CONHECER A SUA MÁQUINA DE CAFÉ
[A] Tampa superior
[B] Funil (para o café por gotejamento)
[C] Filtro de nylon ( para o café por
gotejamento)
[D] Funil de apoio
[E] Mantendo placa quente
[F] Tampa
[G] Garrafa grande
[H] Alça
[I ] Gotejamento bandeja
[J] Funil de metal lidar
[K] Imprensa bar (imprensa malha de aço
com ele quando derramar resíduos de café
para evitar a sua escorregar para fora)
[L] Funil de metal (por espresso)
[M]1- xícara& 2-xícara malhas de aço
[N] Prateleira removível
[O] Espuma do dispositivo
[P] Tubo de vapor
[Q] Controlador de vapor
[R] Tanque de água
[S] Tampa do reservatório
[T] Garrafa pequeno
[U] Botão de controle de bomba
[V] Botão de seleção de café espresso /
espuma
[W] Botão on / off
[X] Painel de controle
ESPECIFICAÇÕES
Capacidade
:
1.5L
Tensão
:
AC 220-240V / 50Hz
Potência
:
1850W
Cabo
:
3 pinos aterrada plug. (para reduzir o risco de choque elétrico)
USAR A SUA MÁQUINA DE CAFÉ
Você deve ler todas as instruções antes de usar.
!Remova todo o material de embalagem e verifique cuidadosamente, certificando-se que a sua
máquina de caféestáem boas condições.Ele não deve ter fissuras na unidade e nenhum dano
ao cabo / ficha. Não descarte das embalagens atéque todos os acessórios foram encontrados.
!Vocêdeve confirmar que a tensão indicada na máquina de cafécorresponde com a voltagem
em sua casa.
!Para garantir a primeira xícara de caféprova excelente, vocêdeve lavar a máquina de café
com água quente como segue:
1. Despeje a água 1500ml no tanque de água, e depois substitui sua tampa.
2. Definir funil de nylon no apoio funil (não acrescentam moído). Coloque um filtro de papel no funil.
3. Coloque a malha de aço dentro funil de metal (sem caféna malha de aço).Puxe a barra de
imprensa para trás, certifique-se o tubo no funil se alinha com sulco no aparelho,depois, insira o
funil para dentro do aparelho da posição "Insert" e solte a barra de imprensa,e vocêpode
corrigi-los na máquina de cafécom firmeza por meio de transformá-lo anti-horário atéque esteja

14
na posição "LOCK".
PORTUGUÊS
4. Ponha garrafa no prato térmico e coloque jarro (sua xícara) na prateleira amovível.
5. Conecte o cabo de alimentação na tomada, aperte o botão ON / OFF Ⅰ,o indicador será
iluminado.O aparelho começaráa trabalhar.Vocêpode parar a fermentação por apertar o botão à
posição 0 no qualquer momento, o indicador serádesligado.O aparelho continuaráfermentar
logo que aperte o botão ON / OFF Ⅰnovamente.
6. Aperte ON / OFF Ⅱpara caféexpresso, o indicador amarelo estáaceso,vocêdeve apertar o
botão de controle de bomba , quando a água flui para fora e feche o botão da bomba , o elemento
de calor interno começa a trabalhar , a máquina de cafécomeça a ser pré-aquecido. Quando a
luz verde estáacesa, o pré-aquecimento éterminado. Aperte o botão de controle da bomba de
novo e a água fluirá.
7. Quando a água não estápingando mais, vocêpode derramar a água para fora em cada
recipiente, e limpe-os bem, agora vocêpode começar a fermentar .
Nota: Talvez haja ruído quando bombeado da água pela primeira vez, o que énormal, porque o
aparelho estáliberando o ar no aparelho. Após cerca de 20 s, o barulho desaparecerá.
PARA USAR A SUA MÁQUINA DE CAFÉ
Fazer Café de Gotejamento
1. Abra a tampa do reservatório, despeje quantidade adequada de água potável dentro do tanque de
água de acordo com o calibre. Depois feche a tampa do reservatório.
2. Abra a tampa superior e coloque o funil no suporte de funil. Verifique se ele está montado
corretamente. Coloque o filtro correctamente.
3. Adicione o pó de café no filtro com uma colher de medição. Uma colher de pó de café pode fazer
uma xícara de café de primeira qualidade, mas você pode ajustar de acordo com seu gosto.
Feche a tampa superior.
4. Insira a garrafa no prato térmico horizontalmente.
5. Conecte o cabo de alimentação na tomada, aperte o botão ON / OFF , o indicador será
iluminado. O aparelho começará a trabalhar. Você pode parar a fermentação por apertar o botão
ON / OFF novamente no qualquer momento.
Nota: No qualquer momento, vocêpode tirar garrafa para servir, mas o tempo não pode
exceder 30 segundos.
6. Quando o processo estiver terminado, se vocênão quer servir imediatamente, manter a ligar, o
cafépode ser mantido quente no prato térmico atéque a energia écortada manualmente. Para
um sabor de cafémelhor, servi-lo apenas após fermentação .
PRÉ-AQUECIMENTO
Para fazer uma boa xícara de café espresso quente, recomendamos que você pré-aquecer o
aparelho antes de fazer café, incluindo o funil, filtro e xícara, para que o sabor do café não pode ser
influenciado pelas partes frias.
1. Abra a tampa do reservatório e encha o tanque com água de
acordo com o calibre. Recoloque a tampa do reservatório.
2. Olhe para a escala na malha de aço, selecione a um-xícara ou
dois-xícara de malha, malha de aço colocado em funil de metal,
puxe a barra de apertar para trás, certifique-se o tubo no funil fique
alinhada com a ranhura da máquina, depois, insira o funil para
dentro do aparelho da posição "Insert" e solte a barra de imprensa,
e vocêpode corrigi-los na máquina de cafécom firmeza por meio

15
de transformá-lo anti-horário atéque esteja na posição "LOCK". (Veja a Figura 1.).
PORTUGUÊS
3. Coloque uma chávena de caféexpresso (sua xícara) na prateleira amovível.
4. Depois conecte o aparelho àfonte de alimentação. Certifique-se o botão de controle de vapor
estiver na posição desligado.
5. Aperte botão ON / OFF Ⅱpara caféexpresso, o indicador amarelo seráiluminado, gire o
botão/ para a posição . Segure o botão de controle da bomba na posição "P", quando a água flui
para fora, feche a bomba imediatamente. O objetivo da etapa épara bombear a água do tanque
dentro a cobertura.
6. Quando a luz verde estáacesa, vocêdeve apertar o interruptor de controle da bomba para a
posição "P" novamente, a água quente vai fluir para fora.Quando a luz verde se apaga, feche a
bomba. O pré-aquecimento do aparelho estáterminado.
FAZER CAFÉ EXPRESSO
1. Retire o funil de metal girando em sentido horário.Coloque a malha de aço dentro funil de metal.
Adicione o póde cafépara a malha de aço com uma colher de medição, uma colher de póde
cafépode fazer sobre uma xícara de caféde primeira qualidade, depois aperte o póde café
levemente com a adulteração e remova o póde caféna borda .
2. Puxe a barra de imprensa para trás, certifique-se o tubo no funil fique alinhada com a ranhura da
máquina, depois insira o funil para dentro do aparelho da posição "Insert" e solte a barra de
imprensa, e vocêpode corrigi-los na máquina de caféfirmemente girando sentido anti-horário até
que esteja na posição "LOCK". (Veja a Figura 1.).
3. Despeje a água quente na xícara. depois, coloque a xícara quente (sua xícara) na prateleira
amovível.
4. No momento, a luz verde estáacesa, se a luz verde se apaga, aguarde um momento, uma vez
que a luz verde esteja acesa, vocêdeve apertar o interruptor de controle da bomba para a
posição "P", aguarde um momento, o cafévai fluir para fora.
Nota 1: Enquanto fermentar café ou fazer vapor, é normal que a luz verde para ser desligado,
isso só significa que o aquecedor está se aquecendo para manter a temperatura na faixa padrão.
Nota 2: No caso de nenhum caféflui para fora após um período considerável, vocêpode
transformar o controlador de botão de vapor para a posição ON, quando a água flui para fora do
tubo de vapor, desligue imediatamente o controlador de botão de vapor para a posição OFF,
depois de um tempo , o caféfluiráa partir da saída do café.
5. Vocêdeve apertar o botão ON / OFF Ⅱmanualmente uma vez que o cafédesejado seja obtido
ou a cor de cafése torna visivelmente mais leve, os indicadores verdes e amarelos apagam e a
máquina de caféacaba funcionar, o seu caféestápronto agora.
ATENÇÃO: Não deixe a máquina de cafédesacompanhado quando fazer o café, e você
precisa operá-lo manualmente às vezes!
6. Uma vez que termine de fazer o café, vocêpode levar o funil de metal para fora por girar no
sentido horário, depois, despeje o resíduo de cafécom a malha de aço apertado pela imprensa
bar.
7. Deixe-os arrefecer completamente, depois lave com água corrente.
FAZER CAPPUCCINO
Você obte uma xícara de cappuccino quando você enche uma xícara de café expresso com espuma
de leite.
Nota: Ao fazer a vapor, o aço de metal deve ser montado na posição.
Método:
1. Prepare espresso primeiro com um recipiente que seja grande o suficiente, conforme indicado
em "MAKE ESPRESSO COFFEE", certifique-se que o controlador de vapor estiver na posição

16
desligado.
PORTUGUÊS
2. Aperte e segure o botão / na posição , esperando atéque o indicador verde está
aceso.
3. Encha uma jarra com cerca de 100 gramas de leite para cada cappuccino que estar preparado,
vocêérecomendado o uso de leite integral em temperatura de geladeira (não quente!).
Nota: Ao escolher o tamanho do jarro, é recomendável que o diâmetro não seja inferior a 70 ± 5
mm.E ter em mente que o leite duplica em volume, por isso certifique o jarro é alto o suficiente.
4. Insira o dispositivo de formação de espuma 2mm de profundidade dentro o leite.
5. Ligue o controlador de vapor lentamente no sentido anti-horário lentamente, vapor sairáda
tomada de vapor ajustável. Para obter um melhor efeito, mova a xícara constantemente para
cima e para baixo.
Nota: Nunca ligue o controlador de vapor rapidamente, porque o vapor iráacumular
rapidamente e pode aumentar o risco de explosão.
6. Uma vez que o volume necessário seja atingido, você pode transformar o controlador de vapor
para a posição desligado e apertar o botão / para parar de gerar o vapor.
Nota: Limpe o dispositivo de formação de espuma com uma esponja molhada
imediatamente após o vapor acaba de geração, mas tem cuidado para não se queimar!
7. Despeje a espuma de leite dentro caféexpresso preparado, agora o cappuccino estápronto.
Adoçar o paladar como desejado, polvilhe a espuma com um pouco de cacau em pó.
Nota 1: depois de fazer espuma de leite, lembre-se de limpar o tubo de vapor para evitar que
seja preso na próxima utilização. O método de limpeza écomo segue: Primeiro, aperte o café
espresso / espuma para selecionar o botão para a posição e mergulhe o tubo de vapor
dentro a xícara; Segundo, ligue o controlador de vapor e aperte o botão de controle de bomba
para a posição P, e a água vai fluir para fora do tubo de vapor e do funil.
Nota 2: depois de fazer vapor cada vez, recomendamos que você permitir que a máquina para
esfriar, pelo menos, por 5 min antes de fazer café novamente. Caso contrário, seu café espresso
pode adquirir um odor queimado, mas se você quiser fazer o café imediatamente, siga os passos
seguintes :Primeiro,aperte o café espresso / espuma para selecionar o botão para a posição
e mergulhe o tubo de vapor dentro a xícara; segundo, ligue o controlador de vapor e aperte o
botão de controle de bomba para a posição P, e a água vai fluir para fora do tubo de vapor e do
funil;após a luz verde é desligado, feche a bomba, depois, ligue o controlador de vapor para a
posição desligado.Quando a luz verde estáacesa, vocêpode começar a fermentar o café
novamente.
8. Aperte o botão ON / OFF Ⅱlogo que corte a fonte de alimentação.
Produção de Vapor para Aquecer Líquidos ou Espuma de Leite Separatamente
O tubo de vapor pode ser usado para fazer espuma de leite separadamente e fazer bebidas quentes,
como chocolate para beber, água ou chá.
Método:
1. Abra a tampa do reservatório, adicione água potável para o tanque de água de acordo com o
calibre.
2. Feche a tampa do reservatório de água, em seguida, conecte o aparelho àtomada.

17
PORTUGUÊS
3. Certifique-se que o botão de controle de vapor estiver na posição desligado.
4. Aperte o botão ON / OFF Ⅱ, e o indicador amarelo seráiluminado, vocêdeve apertar o
controlador da bomba, quando a água flui para fora e feche a bomba, o elemento de calor
interno começa a funcionar, a máquina de cafécomeça a ser pré-aquecido.
5. Apertar o botão / , esperando atéque o indicador verde éiluminado, ele mostra que o pré
-aquecimento éterminado.
6. Mergulhe o tubo de vapor para o líquido a ser aquecido ou o leite de espuma destina.Ligue o
controlador de vapor sentido anti-horário lentamente para começar a fazer vapor.
7. Quando a temperatura desejada é atingida (o ideal éde 60 ºC) ou o leite de espuma éobtida,
vocêpode transformar o controlador de vapor para a posição desligado.
8. Aperte o botão ON / OFF Ⅱlogo que corte o fornecimento de energia .
CUIDADOS E LIMPEZA
1. Corte o fornecimento de energia e deixe a máquina de caféesfriar completamente antes de
limpar.
2. Limpe a cobertura da máquina de cafécom uma esponja àprova de umidade frequentemente .
3. Nota: Não limpe com álcool ou com um limpador de solvente. Nunca mergulhe a cobertura em
água para limpeza.
4. Retire o funil de metal por girar no sentido horário, livre-se de qualquer resíduo do caféno
interior, depois vocêpode limpá-lo com um limpador, mas no final vocêdeve enxaguar com á
gua limpa.
5. Limpe todos os acessórios removíveis com água e seque-as completamente.
LIMPEZA DE DEPÓSITOS MINERAIS (para a seção de fazer café espresso)
1. Para se certificar da sua máquina de caféopera de forma eficiente, tubulação interna está
limpo e vocêobtenha o sabor máximo no seu café, vocêdeve limpar afastado dos depósitos
minerais a cada 2-3 meses.
2. Encha o tanque com água e descalcificante para o nível de MAX (a proporção de água e
descalcificante éde 4:1, o detalhe refere-se àinstrução de descalcificante. Por favor utilize
"casa descalcificante", vocêpode usar o ácido cítrico (para obtenção de farmácia ou farmácias)
em vez do descalcificante ( cem partes de água e três partes de ácido cítrico).
3. De acordo com o programa de pré-aquecimento, coloque o funil de metal (sem póde caféno
mesmo) e garrafa (jarro) no lugar. Fermentar água por "PRE-AQUECIMENTO"
4. Aperte ON / OFF Ⅱbotão para caféexpresso, o indicador amarelo seráiluminado, vocêdeve
apertar o interruptor de controle da bomba, aperte o botão / para a posição , quando a
água flui para fora e feche a bomba, e espere por um momento, a máquina de cafécomeça a
ser aquecido.
5. Quando a luz verde estáacesa, ela mostra que o aquecimento éterminado. Aperte o botão de
controle de bomba para a posição "P" e faz duas xícaras de café(cerca de 2 oz). Em seguida,
feche a bomba e espere por 5s.

18
PORTUGUÊS
6. Aperte o botão / para a posição , esperando atéque a luz indicadora verde acende.
Faz vapor por 2min, em seguida, ligue o controlador de vapor para a posição desligado para
parar de fazer vapor. Aperte o botão ON / OFF II àposição "0" para parar o equipamento
imediatamente, deixe o depósito destartáricos na unidade, pelo menos, 15 minutos.
7. Reinicie o aparelho e repita os passos 4-6, pelo menos, três vezes.
8. Em seguida, apertando o botão / para a posição , quando a luz verde estáacesa,
aperte o botão de controle de bomba para a posição "P" para fermentar at énenhum
descalcificante é resta.
9. Em seguida, fermente o café(sem póde café) com água da torneira, ao nível de MAX, e
repita os passos 4-6 três vezes (não énecessário esperar por 15 minutos no passo 6), e
depois fermente aténenhuma água édeixada no tanque.
10. Repita o passo 9 pelo menos 3 vezes para garantir que o encanamento estálimpo.
LIMPEZA DE DEPÓSITOS MINERAIS (para a seção sobre como fazer café do gotejamento)
1. Encha o tanque com água e descalcificante para o nível de MAX (a proporção de água para
descalcificante é de 4:1), o detalhe refere-se as instruções do descalcificante. Por favor, use
"casa descalcificante", você pode usar ácido cítrico em vez do descalcificante (cem partes de
água e três partes de ácido cítrico).
2. Empurre garrafa para cima do prato térmico, preste atenção para garantir que a linha central do
garrafa alinha com o do cesto de fermentação.
3. Aperte o botão ON / OFF , e o indicador será iluminado. Depois de um tempo, a água vai cair
automaticamente.
4. Após percolar o equivalente da uma xícara, aperte o botão ON / OFF Ⅰnovamente para parar
o aparelho.
5. Permita que a solução para trabalhar por 15 minutos, repita os passos 3-5 novamente.
6. Ligue o aparelho e execute fora da água atéo tanque de água estácompletamente vazio.
7. Enxágue por operar o aparelho com água pelo menos 3 vezes.

19
PORTUGUÊS
RESOLUÇÃO DE PROBLEMAS
Sintoma
Causa
Correções
Garrafa vaza água ou
água vaza da tampa da
garrafa
A garrafa não é ajustado
corretamente.
Garantir a linha central do carafe alinha
com a abertura de vazamento o cesto de
fermentação também.
O nível de água no tanque excede a
escala do MAX.
O nível da água no tanque deve estar
dentro da escala de MIN e MAX.
As peças de metal no
tanque tem ferrugem.
O descalcificador não é do tipo
recomendado. Ele pode corroer as
peças de metal no tanque.
Use o descalcificante recomendado pelo
fabricante.
Água vaza do fundo da
máquina de café .
Há muita água na bandeja de
gotejamento.
Por favor, limpe o tabuleiro.
A máquina de café está com defeito.
Por favor,contate com o serviço
autorizado para reparos.
Água vaza do lado
externo do filtro.
Há um pouco de pó de café na borda
do filtro.
Livrar-se do pó de café.
Gosto ácido (vinagre)
existe no café Espresso.
Não limpar corretamente após a
limpeza de depósitos minerais.
Limpar a máquina de café como indicado
em "antes do primeiro uso" várias vezes.
O pó de café é armazenado num
lugar quente e úmido por muito
tempo. O pó de café vira ruim.
Por favor, utilize pó de café fresco, ou
armazene pó de café inusitado num lugar
fresco e seco. Depois de abrir um pacote
de pó de café, feche-a com força e
armazená-lo num refrigerador para
manter a sua frescura.
A máquina de café não
pode trabalhar mais.
O cabo de alimentação não está
ligado corretamente.
Conecte o cabo de alimentação a uma
tomada corretamente, se o aparelho ainda
não funciona, por favor contacte o serviço
autorizado para reparos.
O vapor não pode
espuma.
O indicador de vapor pronto (verde
indicador) não é iluminado.
Só depois que o indicador de vapor pronto
(verde indicador) é iluminado, o vapor
pode ser usado para espuma.
O recipiente é muito grande ou a
forma não preenche bem.
Use copo alto e estreito.
Você usou o leite desnatado
Use leite integral ou semi-desnatado
This manual suits for next models
1
Table of contents
Languages:
Other Platinum Coffee Maker manuals
Popular Coffee Maker manuals by other brands

Philips
Philips Senseo HD7830 user manual

Morphy Richards
Morphy Richards MISTER CAPPUCINO EXPRESSO AND FILTER COFFEE... manual

Siemens
Siemens TE506..RW instruction manual

DeLonghi
DeLonghi Nespresso LATTISSIMA PRO EN 750.MB manual

Saeco
Saeco Via Venezia RI9366/47 Specifications

Panasonic
Panasonic NC-ZA1 operating instructions