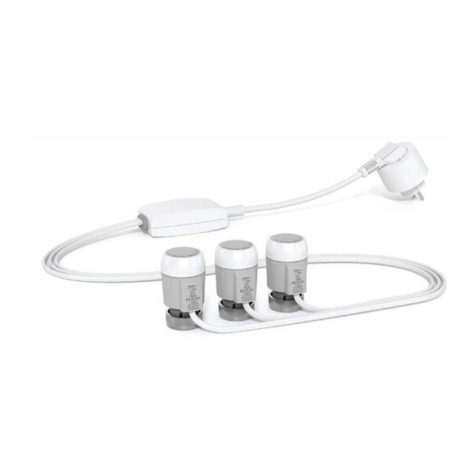
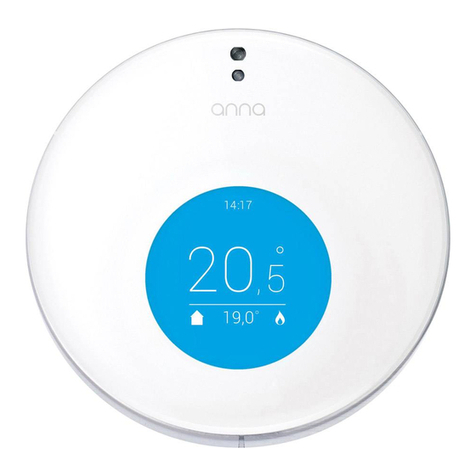
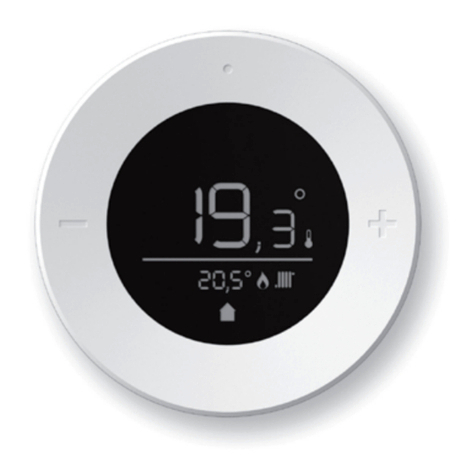
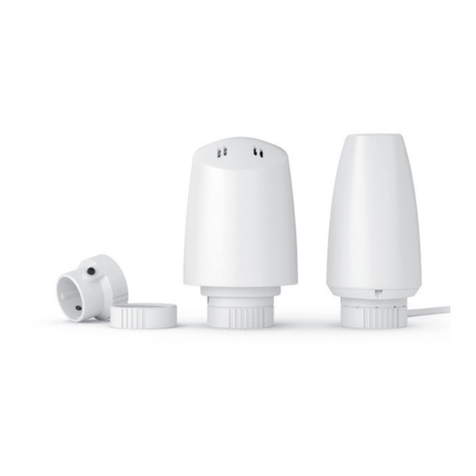
Plugwise Lisa 158-01 User manual

6000-0056-02
Installation manual
,
,
Model 158-01
Nederlands | English
Lisa

2 | Zone-thermostaat
EU-conformiteitsverklaring 3
Pakketinhoud 4
Vooraf 4
Voorzorg en veiligheid 5
Meer informatie 5
Zigbee-netwerk 5
Installatie 6
Gebruik 9
Het gedrag van de status LED 11
EU declaration of Conformity 12
In the package 13
Before you start 13
Precautions and safety 14
More information 14
Zigbee network 14
Installation 15
Controls 18
LED behavior 20
Nederlands
Inhoudsopgave
English
Table of content

Zone-thermostaat | 3
NL
Dit document bevat informatie over de
installatieprocedure en de functionaliteiten
van dit product.
Meer informatie over de Plugwise
zone-thermostaat vind je op onze website
plugwise.com.
Copyright 2018, Plugwise.
Alle rechten voorbehouden.
Plugwise B.V. verklaart hierbij dat dit
product voldoet aan de benodigde
vereisten van de desbetreffende Europese
richtlijnen, waaronder 1999/5/EC
(R&TTE). Een exemplaar van de Europese
conformiteitsverklaring is beschikbaar op:
www.plugwise.com/product-conformity.
Oude elektrische en elektronische
apparaten bevatten vaak waardevolle
materialen. Plaats een afgedankt apparaat
dan ook nooit bij het gewone afval. Lever
altijd het apparaat in bij een gemeentelijk
inzameldepot voor elektrische en
elektronische apparatuur.
Installatiehandleiding
EU-conformiteitsverklaring

4 | Zone-thermostaat
Pakketinhoud Vooraf
Lisa is een zone-thermostaat die de
temperatuur in de ruimte meet en deze
temperatuur en de gewenste temperatuur
kan doorgeven aan andere apparaten
binnen het netwerk. Je kunt Lisa installeren
binnen jouw bestaande Zigbee-netwerk
(Home Automation 1.2). In deze
handleiding wordt in het kort uitgelegd hoe
je Lisa installeert.
Daarnaast wordt kort uitgelegd hoe je Lisa
toevoegt aan het Plugwise Home
Automation (HA) systeem. Voeg je Lisa toe
aan een ander systeem? Raadpleeg
hiervoor dan de handleiding van de
gateway waar je Lisa bij wilt aanmelden.
Symbolen
Let op, waarschuwing!
Tip
• Deze stap moet je uitvoeren
Lisa
Muurplaatje
Standaard
Adapterkabel
USB-adapter 4 AAA-batterijen

Zone-thermostaat | 5
NL
Voorzorg en
veiligheid
Installeer Lisa niet met een
USB-adapter als je Lisa wilt gebruiken
met batterijen. De levensduur van de
batterijen neemt drastisch af als je Lisa
aanmeldt als geïnstalleerd met een
USB-adapter, maar in werkelijkheid
gaat gebruiken met batterijen. Wil je
later wisselen? Verwijder Lisa uit het
netwerk en installeer Lisa opnieuw in
het netwerk, voorzien van de juiste
voeding.
Installeer Lisa nooit met batterijen en
USB-adapter tegelijk!
Meer informatie
Meer informatie over Lisa vind je op onze
website plugwise.com/lisa.
Zigbee-netwerk
Lisa kan met batterijen of met een
USB-adapter gevoed worden. Afhankelijk
van deze keuze, zal Lisa tijdens de installatie
in een nieuw netwerk automatisch het
gedrag aanpassen.
Als je Lisa installeert met de USB-adapter,
dan gedraagt Lisa zich als een “Zigbee
Router” (ZR). Lisa is nu altijd bereikbaar
voor andere Zigbee-modules en vergroot
de kwaliteit van het Zigbee-netwerk.
Wil je Lisa liever met batterijen installeren?
Dat kan ook. Lisa zal dan in een
energiebesparende ‘slaapstand’ worden
ingesteld, zodat er minder stroom wordt
gebruikt. Lisa gedraagt zich als een “Sleepy
end device” (SED).
Zigbee router
Sleepy end device
Zigbee gateway
Internet

6 | Zone-thermostaat
Kies of je Lisa wilt gebruiken met een
USB-adapter of met batterijen.
Wil je later wisselen? Verwijder Lisa uit
het netwerk en installeer Lisa opnieuw
in het netwerk, voorzien van de juiste
voeding.
Batterijen
• Haal de achterkant van Lisa om de
batterijen te plaatsen: houd Lisa vast
en druk in de onderkant van de
opening zoals is aangegeven in de
afbeelding.
• Plaats de batterijen zoals is aangegeven
in de batterijhouder van Lisa.
• Plaats de achterkant terug op Lisa.
Installatie
1. Sluit de voeding aan
USB-adapter
Wil je Lisa gebruiken in combinatie
met de USB-adapter? Dit is alleen
mogelijk als je Lisa plaatst op de
standaard om Lisa in de kamer neer te
zetten.
• Plaats de adapterkabel in Lisa zoals
afgebeeld in de afbeelding. Hiervoor
hoeft de achterkant van Lisa niet
verwijderd te worden.
• Sluit de USB-adapter aan op de
adapterkabel en steek de stekker in
het stopcontact.

Zone-thermostaat | 7
NL
Drukknop
2. Voeg toe aan het Zigbee-netwerk
» De LED brandt groen als Lisa (al) is
toegevoegd aan het netwerk.
Niet gelukt Lisa toe te voegen aan het
netwerk? Verwijder dan eerst Lisa uit
het netwerk (zie pagina 10) en
probeer het opnieuw.
Voeg je Lisa toe aan een ander
systeem? Raadpleeg hiervoor de
handleiding van de gateway waar je
Lisa bij wilt aanmelden.
,
,
Zorg ervoor dat je Lisa vlakbij Adam HA
anmeldt voor een goede ontvangst.
• Log in op de lokale web-interface
(HTML-interface) van Adam HA. Zorg
ervoor dat je bent verbonden met
hetzelfde netwerk als waarmee ook
Adam is verbonden:
» open de HTML-interface in de app,
» of ga naar connect.plugwise.net en
log in met het ID van Adam.
• Ga via het menu naar Indeling om een
apparaat toe te voegen.
• Gebruik de optie om een nieuw
apparaat toe te voegen (het +icoontje
rechts onderin het scherm).
• Druk kort op één van de knoppen van
Lisa als dit wordt aangegeven in de
web-interface, zodat Lisa in
aanmeldmodus komt.
» De LED knippert langzaam groen als
Lisa naar een netwerk aan het
zoeken is.
Knop
KnopKnop

8 | Zone-thermostaat
3. Plaats Lisa
Plaats Lisa in de ruimte die overeenkomt met
de zone waar je Lisa aan hebt toegevoegd.
Controleer dat Lisa is toegevoegd aan
een zone. Alleen als Lisa is toegevoegd
aan een zone met radiatorkranen
kunnen die worden aangestuurd door
Lisa.
Plaats Lisa altijd in een ruimte die
warmte ontvangt van de centrale
warmtebron waarop je Adam HA hebt
aangesloten, zoals de cv-ketel.
Installeer Lisa voor een betrouwbare
meting:
» op ooghoogte en vrij van de grond
» vrij van warmtebronnen:
» Niet bij een raam of deuropening
» Niet in direct zonlicht
» Niet bij de radiator
» Niet in de keuken (vlakbij de oven)
» Niet naast elektrische apparaten
die opwarmen, zoals een televisie
Gebruik je Lisa in combinatie met de
USB-adapter? Dit is alleen mogelijk als
je Lisa plaatst op de standaard om Lisa
in de kamer neer te zetten.
Standaard
Met de meegeleverde standaard kun je Lisa
overal in de kamer neerzetten.
• Plaats de standaard op Lisa zoals is
aangegeven in de afbeelding.
Installeer je Lisa in combinatie met de
standaard? Zorg er dan voor dat je Lisa
op dezelfde plek in de ruimte laat
staan. Alleen dan kan de Plugwise
zoneregeling van Adam goed regelen
aan de hand van de temperatuur-
wijzigingen die worden gemeten door
Lisa.

Zone-thermostaat | 9
NL
Muurplaatje
Wil je Lisa liever aan de muur hangen?
Gebruik dan het muurplaatje.
Dit is alleen mogelijk als je Lisa hebt
geïnstalleerd in combinatie met batterijen.
• Schroef het muurplaatje aan de muur.
• Schuif Lisa van bovenaf in het
muurplaatje.
Gebruik
Lisa heeft op de voorkant drie knoppen om
de ingestelde temperatuur en presets te
wijzigen.
Met de linker- en rechterknop stel je per
0,5°C de temperatuur lager of hoger in.
Met de knop boven het scherm in het
midden wissel je van preset.
,
,
De drukknop op de achterkant kun je
gebruiken voor meerdere functionaliteiten.
De LED boven de knop geeft je
terugkoppeling. Achterin de handleiding
vind je het gedrag van de LED terug. Het
lampje knippert rood elke seconde dat je de
Presets
HogerLager

10 | Zone-thermostaat
knop ingedrukt houdt. Zo kun je eenvoudig
de seconden meetellen.
Verwijder Lisa uit het netwerk
• Druk de knop op de achterkant 3
seconden in en laat los.
• Druk binnen 1 seconde opnieuw de
knop 3 seconden in en laat los.
• Druk binnen 1 seconde de knop 10
seconden in en laat los.
Nadat je de knop hebt losgelaten, brandt de
LED 5 seconden: Lisa verlaat nu het
netwerk.
Knopcombinatie niet herkent
Als Lisa de combinatie die wordt ingedrukt
met de knop niet herkent, zal de LED
0,5 seconde kort aan gaan.
Scherm
Op het scherm zie je boven de lijn de
gemeten temperatuur (groot) samen met
een klein thermometer-icoon. Onder de
lijn zie je de ingestelde temperatuur (klein).
Als je de temperatuur wijzigt verandert het
LED
getal boven de lijn tijdelijk naar de
ingestelde temperatuur, het thermometer-
icoon verdwijnt. Afhankelijk van de situatie
worden een of meerdere icoontjes
getoond.
,
,
1
2
3
4
5
6
1. Batterij is bijna leeg
2. Geen verbinding
3. Gemeten temperatuur
4. De weergegeven waarde is de
gemeten temperatuur
5. Ingestelde temperatuur
6. Presets: thuis, nacht, weg, vakantie
en vorstbeveiliging
Drukknop

Zone thermostat | 11
EN
Het gedrag van de status LED
Kleur Patroon Beschrijving
Groen ZR: brandt 5 seconden Het is gelukt om Lisa toe te voegen aan het netwerk
of Lisa is al aan het netwerk toegevoegd.
SED: 5x snel knipperen
(aan: 1 seconde/ seconde)
Groen Knippert langzaam Lisa probeert zich aan te melden op het netwerk.
Rood Brandt 5 seconden Het is mislukt om aan te melden op het netwerk, of
de netwerkinstellingen zijn gewist.
Rood Snel knipperen (3 seconden) De batterijen zijn bijna leeg.
Rood 1 Keer knipperen (0,5 seconde) Lisa begrijpt het patroon niet dat wordt ingedrukt
op de knop.
Rood Snel knipperen
(aan: 0,1 seconde/seconde)
De knop is ingedrukt.
Aan de achterkant boven de drukknop zit
de status LED.
Batterijen vs. USB-adapter
Als Lisa is gecongureerd met batterijen
gedraagt zij zich als een “end-device” (SED).
Het LED-gedrag waarbij de LED continu
brandt zal in het geval van een end-device
elke seconde knipperen.
Kijk voor support op
plugwise.com/support

12 | Zone thermostat
Installation manual
This document contains the installation
procedure and functional description of
this product.
More information about the Plugwise zone
thermostat can be found on our website
plugwise.com.
Copyright 2018, Plugwise.
All rights reseverd.
Plugwise B.V. hereby declares that this
product is in compliance with the applicable
essential requirements of the appropriate
EC-Directives, including 1999/5/EC
(R&TTE). A copy of the EU declaration of
Conformity is available at
www.plugwise.com/product-conformity.
Old electrical and electronic appliances
very often contain valuable materials.
Therefore, never dispose discarded
appliances with normal household waste.
Always hand in your old appliances at the
municipal collection points for electrical
and electronic equipment.
EU declaration of Conformity

Zone thermostat | 13
EN
In the package Before you start
Lisa is a zone thermostat that measures the
room temperature and can communicate
this temperature and the desired
temperature to other products in the
network. Lisa can be added to your existing
Zigbee network (Home Automation 1.2). In
this manual we shortly describe how to
install Lisa.
In addition we briey explain how you can
add Lisa to the Plugwise Home Automation
(HA) system. Do you want to add Lisa to
another system? Please consult the manual
of the system you want to connect Lisa to,
in order to nd the right procedure.
Symbols:
Warning, be aware!
Advice
• You must carry out this step
Lisa
Wall mount
Desk stand
Adapter cable
USB adapter 4 AAA batteries

14 | Zone thermostat
Precautions and
safety
Do not install Lisa with the USB
adapter if you want to use Lisa together
with batteries. The battery lifetime will
reduce dramatically in case you have
installed Lisa with the USB adapter and
then change to battery power supply.
Do you want to switch the power
supply later? Remove Lisa from the
network and add Lisa again to the
network connected to the right power
supply.
Never install Lisa with batteries and
USB adapter at the same time!
More information
More information about Lisa can be found
on our website plugwise.com/lisa.
Zigbee network
Lisa can be powered with batteries or an
USB adapter. Depending on which power
supply you choose, Lisa will automatically
adapt its behaviour when joining a new
network.
If you install Lisa with an USB adapter, Lisa
will behave like a “Zigbee router” (ZR). As
such Lisa has the advantage that it is always
reachable for other Zigbee modules and
will improve the mesh quality of the Zigbee
network.
Do you want to install Lisa with batteries?
That is also possible. Lisa then operates in a
power saving “sleep” mode, allowing longer
battery life. Lisa will behave like a “Sleepy
end device” (SED).
Zigbee router
Sleepy end device
Zigbee gateway
Internet

Zone thermostat | 15
EN
Installation
1. Connect the power supply
Please decide if you want to power up
Lisa using an USB adapter or batteries.
Do you want to switch the power
supply later? Remove Lisa from the
network and add Lisa again to the
network connected to the right power
supply.
Batteries
• Remove the back cover of Lisa to place
the batteries: hold Lisa and remove the
back cover by pulling at the bottom of
the opening as shown in the image.
• Make sure the batteries are placed as
indicated in the battery compartment
of Lisa.
• Place the back cover on Lisa.
USB adapter
Do you prefer to use Lisa with the USB
adapter? This is only possible when
using the supplied desk stand to place
Lisa in the room.
• Place the adapter cable into Lisa as
shown in the image. The back cover
does not need to be removed.
• Connect the adapter cable to the USB
adapter and plug the adapter into the
wall socket.

16 | Zone thermostat
2. Add to the ZigBee network
For a good reception, make sure Lisa is
nearby Adam HA when you add Lisa to
the Zigbee network.
• Log into the local web interface
(HTML interface) of Adam HA. Make
sure that your device is connected to
the same network as to which Adam is
connected:
» open the HTML interface in the app,
» or go to connect.plugwise.net and
log in with the ID of Adam.
• Go via the menu to Setup to add an
appliance.
• Use the option to add a new appliance
(the + sign in the right bottom corner).
• Press any button briey on Lisa when
instructed in the web interface, so Lisa
becomes visible in the network.
» The LED is slowly blinking green if
the radiator valve is searching for a
new network to join.
» The LED is solid green if the radiator
valve is (already) added to the network.
Not successful in adding Lisa to the
network? First remove Lisa from the
network (see also page 19) and try
again.
Do you want to add Lisa to another
system? Please consult the manual of
the Zigbee gateway you want Lisa to
connect to.
,
,
Push
button
Button
ButtonButton

Zone thermostat | 17
EN
3. Position Lisa
Position Lisa in the room that corresponds
with the zone to which you have added Lisa.
Make sure Lisa is added to a zone. Only
if Lisa is added to a zone with radiator
valves, the radiator valves can be
controlled by Lisa.
Position Lisa in a room that receives
heat from the central heat supply to
which you have connected Adam HA
to, like the central heating boiler.
For reliable temperature
measurements position Lisa:
» at eye level and free from the ground
» free from heat sources:
» Not near a window or door
opening
» Not in direct sunlight
» Not next to a radiator
» Not in the kitchen (near the oven)
» Not near to electrical appliances
that heat up, like the television
Do you prefer to use Lisa with the USB
adapter? This is only possible when
using the supplied desk stand to place
Lisa in the room.
Desk stand
Use the supplied desk stand to place Lisa in
the room wherever you want.
• Place the desk stand in the opening on
the back cover as shown in the image.
Do you install Lisa in combination with
the desk stand? Make sure that you
keep Lisa at the same spot in the room.
Only then the Plugwise regulation of
Adam is able to regulate the room
temperature well, based on the
temperature changes in the room
measured by Lisa.

18 | Zone thermostat
Wall mount
Do you prefer to place Lisa on the wall? Use
the wall mount.
• Screw the wall mount on the wall.
• Slide Lisa from above on the wall
mount.
3. Position Lisa Controls
Lisa has three buttons on the front to
change the setpoint temperature and the
active preset.
With the left- and right button you can
decrease or increase the setpoint
temperature in steps of 0,5°C.
With the button in the middle on top of the
screen you can switch presets.
,
,
The push button on the backside can be
used for multiple actions. The LED above
the push button shows the feedback.
An overview of the different LED behaviors
is provided at the end of this manual. The
LED will ash red every second while the
Presets
HigherLower

Zone thermostat | 19
EN
button is pressed. This helps you counting
the seconds.
Remove Lisa from the network
• Press and hold the button on the
backside for 3 seconds and release.
• Within 1 second, press and hold the
button for 3 seconds again and release.
• Within 1 second, press and hold the
button for 10 seconds and release.
After you have released the button, the LED
will burn solid red for 5 seconds: Lisa has left
the network.
Button sequence not recognized
When Lisa does not understand the button
pattern, the LED will ash red for 0,5
seconds.
Display
The display shows you the measured
temperature above the line (big), together
with a small thermometer icon. The setpoint
temperature is shown below the line (small).
LED
When changing the setpoint temperature,
the set temperature will temporarily be
shown above the line, and the thermometer
icon will be hidden. Depending on the
situation one or more of the following icons
will be shown.
,
,
1
2
3
4
5
6
1. Battery is almost empty
2. No connection
3. Measured temperature
4. The shown value is the measured
temperature
5. Set point temperature
6. Presets: home, night, away, vacation
and frost protection
Push button

20 | Zone thermostat
LED behavior
The LED is located on the backside above
the pushbutton.
Batteries vs. USB adapter
If Lisa is congured with batteries it
behaves like an “end device” (SED).
The LED indications described as “solid”
will now blink shortly every second.
Colour Pattern Description
Green ZR: 5 seconds Lisa has successfully joined the network or has
already joined the network.
SED: 5x quickly blinking
(on: 1 second/second)
Green Slowly blinking Lisa is joining a network (in progress).
Red 5 seconds Joining the network has failed or the network
settings have been erased.
Red Quickly blinking (3 seconds) The batteries are almost empty.
Red 1 Blink (0,5 second) Lisa does not understand the pattern that has
been pressed.
Red Quickly blinking
(on: 0,1 second/second)
The button is pressed.
Need support
plugwise.com/support
Table of contents
Languages:
Other Plugwise Thermostat manuals
Popular Thermostat manuals by other brands

Bryant
Bryant start-up and Installation, Start-Up and Service Instructions

Homematic IP
Homematic IP HmIP-WTH-B-2 Installation and operating manual

Honeywell Home
Honeywell Home CM900 installation guide

Airzone
Airzone ACUAZONE IBPRO32 user manual

EPH Controls
EPH Controls RFRA operating instructions

Beijer Electronics
Beijer Electronics X2 base 15 v2 HP manual