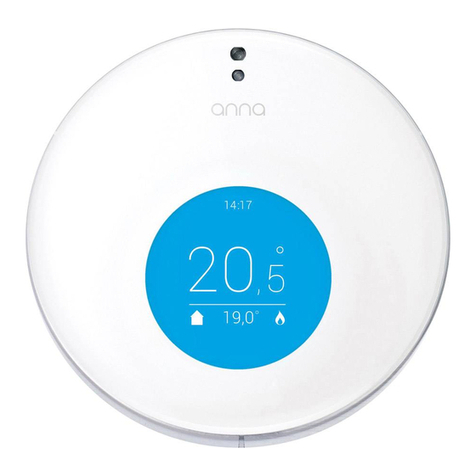
Plugwise Anna User manual

Manual
Anna HTML-interface.
Manual PW version 2.1
From rmware version 1.1.3
Engs

Hello Anna.
Before there were thermostats. Now there is Anna.
Anna works for you and does what she is supposed to do:
create a comfortable indoor environment.
This manual explains how to use the HTML-interface.
Visit www.plugwise.com/anna for additional tips and frequently
asked questions.
This manual is subject to change.
The website contains the most recent version of this manual.
2
Copyright 2015, Plugwise. All rights reserved.
This document contains a functional description of the Anna HTML
interface. Because Plugwise is the manufacturer of Anna, we include
all relevant functionalities in this manual. No rights may be derived
from this description.
It might be possible that the provided functionalities on your Anna
deviate from this manual. This depends on the software license and
the service offered on it and/or rmware version installed for Anna.

Content.
Hello Anna. 2
Content. 3
The Anna HTML-interface. 4
Anna. 5
Schedule. 6
Anna offers advice. 7
Preset. 9
Graphs. 10
System status. 12
System settings. 13
Home settings. 15
Network settings. 16
DHCP client. 17
Boiler settings. 18
Maintenance and updates. 19
Contact. 20
Glossary. 21
3

The Anna HTML-interface.
You can log in to the Anna HTML-interface via
https://anna.plugwise.net. You can operate Anna at home via the
Anna HTML interface the same way as you do with the app.
In addition, you can view the system status here and check whether
any rmware updates are available. If you wish to change Anna’s
settings, you can easily do this via the HTML-interface.
To log in to the Anna web page, it is necessary for your smartphone,
tablet or computer to be connected to the same network as to which
you have connected the Smile.
Go to https://anna.plugwise.net
Enter the Smile’s Smile ID and click on connect.
The page with the Anna-screen opens.
stuvwxyz
ssid: smile_abcdef
Plugwise Smile T
+5V
2.5A
+
Sme
trk na
4

Anna.
5
Increase the temperature.
Decrease the temperature.
The “Home” status has been
activated: the icon is blue
and is displayed on Anna’s
screen.
By clicking on the same icon,
you can switch between
the various presets. You
can deactivate a preset
by manually changing the
temperature.
The schedule is deactivated:
the icon is grey. By clicking
the icon you activate the
schedule.

Schedule.
The method used to create a schedule via the HTML-interface is
almost the same as the method used to do this in the app
Via the HTML-interface you click once on the temperature to change
the temperature setting.
When you click on an empty spot in the schedule, you create a new
temperature setting.
You can also make adjustments to the schedule by dragging a
temperature. You do this by placing the cursor on a temperature,
while holding down the left mouse button.
You can change the time by dragging the
dot left or right.
It is possible to specify a different
temperature setting for 15-minute
periods.
You can place up to a maximum of 50
temperature points in the schedule.
16.15
You can only set up a schedule in the
Anna App by entering the time when you
get up, when you go to work, when you
get home and when you go to bed.
6

w n rmre
upde 1.1.3
Anna offers advice.
Anna learns from your lifestyle and gives you advice.
She remembers when you deviate from your daily schedule and
provides you with tips on how to improve your schedule.
After 4 weeks Anna offers you advice on how to improve your
schedule.
Set a schedule.
Anna follows the schedule you set. Until you change the temperature
yourself. Anna switches back to the schedule when a new
temperature in the schedule is set. And, she remembers when you
changed the temperature via the app or via Anna itself.
Anna lters the temperature settings and combines them. The more
often you make the same modication, the better her advice.
Go to “Schedule” via the menu.
You can view the advice of Anna by
clicking on the icon.
7
Mo
Tu
Th
We
Fr
Sa
Su

w n rmre
upde 1.1.3
Anna proposes a new
temperature setting.
Anna offers advice.
20,0º
10
,
0
º
20,0º
20,0º
º
0
You are able to choose whether you want to implement the advice of
Anna on your daily temperature schedule or not. Compare her advice
with the schedule you set earlier and choose which temperature
settings you want to apply or change.
Do you disagree with
her proposal?
Uncheck the box by
click on the dot.
The proposal will not
be included into the
new temperature
schedule.
Anna includes these
temperature settings
from your set
schedule if she nds
them suitable in your
daily routine.
Anna advises to
exclude these
temperature settings
you set in the new
schedule.
Would you like to
keep the temperature
setting? Check the
box by clicking on the
dot. The temperature
setting will now be
included in the new
schedule.
10
,
0
º
Apply your new
schedule. The
temperature points
with a checkmark will
be included into your
new schedule.
Go back to the
schedule you set.
Please note this is
only possible if you
have not already
set up your new
schedule.
There is a new advice
from Anna waiting for
you.
8

Preset.
9
“Preset” makes it possible to quickly adjust a temperature setting
at the single push of a button. The preset button is located at the
bottom right of the Anna screen. By repeatedly pressing this button,
you can switch between the various presets.
A preset is automatically deactivated when a new temperature
setting is activated in the temperature schedule or when you
manually adjust the temperature setting.
The “t ec” and “ci” aumicay
stch hedu. Th y t acve
unl y change yf.
You can set the temperatures for the various presets using “Preset” in
the menu. You can set the temperature by clicking on a preset.

Measured temperature
Graphs.
Anna remembers how she has heated your house and is happy
to show you. She also remembers the reason she had to heat the
house. She provides an insight into your heating habits so that you
can optimise them.
You can switch the graphs on or off with a single click of the button.
10
w gn n
rmre upde 1.1.3
Set temperature
(higher, lower, preset)
Schedule
Add a graph
Boiler on/off
Expert
(only available if Anna reads out the
OpenTherm-protocol of the boiler)
Return water temperature
Water temperature
Intended water temperature
21 December 2015

Graphs.
11
Besides graphs Anna offers more insight with the addition of
statistics in the HTML interface. The amount of burning hours, the
highest, lowest and average temperature are now available per day.
The amount of
measured burning
hours of the
selected day.
The highest
measured
temperature of the
selected day.
The lowest
measured
temperature of the
selected day.
The average
measured
temperature of the
selected day.
w n rmre
upde 1.1.3
Click on the icon on the left to view the statistics of the selected day.
Burn hours Highest Lowest Average
18 december 2015

System status.
Via “System status” you can retrieve various types of information
about the system, the rmware, the Smile’s hardware and the
network to which the Smile is connected. This information may be
particularly important when you contact the help desk.
12
w a rmre
upde v 0.12.7
From now on it is also possible to view the strength of your WiFi signal via “System status”.
The signal strength is measured in dBm. The more negative the value, the weaker the signal
is. The closer the value will be to 0, the better the signal of the WiFi network is. You will need
a signal strength of at least -75 dBm.
Is your signal strength to weak? Try to rotate the gateway a little or place it somewhat
further from the boiler in order to strengthen your signal.

System settings.
You can view and change the system settings via “System settings”
For remote operation, Anna must establish a connection with the
Plugwise server. This is the only way in which you can adjust the
temperature remotely. You can authorise this action under “System
settings”.
13

Measurable data To be able to make use of remote operation,
Plugwise requires your approval to store your data.
You authorise Plugwise to do this by checking off a
checkbox.
Presence detection
sensor
(device settings)
If the presence detection sensor does not appear to
be working as it should, you can readjust its settings.
Press ‘Calibrate’ for this purpose. You can also
switch off the presence detection sensor. Anna will
no longer detects you. Anna’s screen will no longer
switch on automatically. Now you will only be able to
switch on the screen by touching Anna.
Restart
(device settings)
When it is difcult to reach the Smile to restart it,
you can easily do this via the Anna HTML-interface
instead.
Temperature
compensation
Does the temperature in your house not feel the
way you want it to? That could be because Anna is
located at a warmer part of the house. Anna heats
the house according to the temperature measured in
the location where she has been placed. If you want
it to be nice and warm throughout the house, you can
enter a temperature compensation value.
System settings.
14

Home settings.
Here you can adjust the home details that you previously entered
when the app was rst installed. If you have not (yet) installed the
app, you can enter/change your home details here.
Anna uses these details to heat the house as efciently as possible.
15

Network settings.
In ‘Network Settings’ you can connect the Smile to your own or to
another network.
First click on ‘Scan’ to nd your WiFi
network. If your WiFi network does
not appear on the list, re-click ‘Scan’. It
is possible that a WiFi network is not
detected right away.
The security type is the security type
which is set for the selected WiFi
network.
Enter the WiFi network’s password and
click on ‘Save’ to log the Smile in to the
new WiFi network.
When you wish to switch the Smile from a LAN connection to a WiFi
connection, make sure you rst disconnect the network cable (UTP
cable) from the Smile.
After saving the new WiFi settings, the connection between the
Smile and the internet browser will be lost. When the Smile and the
computer, tablet or smartphone are connected to the same network,
the Smile can once again be accessed via the internet browser.
It is possible that the Smile has been given a different IP address
depending on the settings used and the network router. The IP
address can be found under ‘Presets’.
ng tre?
Prs ack Sme r 5 sec unl
light “Stus” h ind 5 s and light “WLAN”
ar ink radly. (The netrk ses
d.) Wa 2 minus unl Sme h ed up, n
try again cnect Sme yr WiFi netrk.
16

Desired IP Address
255.255.255.0, unless set otherwise
Router’s IP address
Router’s IP address, unless set
otherwise
DHCP client.
The Smile is set to DHCP network mode by default. This will cause
the Smile to receive an IP address issued by the router. If you want to
give the Smile a xed IP address, you can do this by selecting DHCP
client ‘Off’ and entering the requested information.
17

Boiler settings.
Is Anna using the OpenTherm protocol?
Then you can adjust the maximum boiler
temperature.
Did you not tell Anna what the maximum
boiler temperature is? Then she’ll set it to 60
degrees.
Set the boiler temperature to 60 degrees in a
well-insulated house. The boiler will then heat
for longer, but with a lower ame. Because
your home is well insulated, very little heat is
lost. Your gas consumption will fall.
Set the boiler temperature to 80-85 degrees
in a poorly insulated house. Very little heat
will be lost because your house heats up
quickly. The heaters can be quite a bit warmer
than you are used to. This will mean it will be
warmer, even when the temperature is set
lower.
Anna is automatically set to comfortable
heating. You can create savings with Anna by
selecting a savings mode.
By entering the size of your house and the
type of boiler, you will help Anna to heat your
home more intelligently.
Do you think that Anna is switching on the
heating too early? Then let her know that you
no longer want her to preheat your home and
she will happily oblige.
The boiler protocol (On/Off or OpenTherm) is
the protocol that the Smile reads. When, for
example, you connect the Smile to another
boiler or when the protocol specied here is
not correct, click on ‘Check’ to nd the boiler’s
correct protocol.
18

Maintenance and updates.
Updates
Updates contain solutions to problems and may include new
functionalities. It is recommended that you always install updates as
quickly as possible. If this is not done automatically, you can access
and install updates via the HTML-interface of Anna.
Cleaning
You can clean Anna by wiping it with a dry soft cloth.
Power failure
Following a power failure, Anna should automatically reactivate
itself; Anna’s clock will be synchronised, provided internet access is
available.
Ventilation
Keep the ventilation openings at the back of Anna open and free from
dust.
19

Contact.
Having trouble?
Please visit our website at www.plugwise.com/anna.
Here you will nd handy tips and instructions.
You can also ll in the contact form:
www.plugwise.com/technical-contact
Still having difculties?
You can always call us on workdays
between nine (09.00h) and ve (17.00h)
+31(0) 88 24 33 033.
How do I set up the help desk connection?
To be of the best possible service to you, you can temporarily use
the Smile to set up a help desk connection so that Plugwise help
desk staff and developers can view your environment directly
together with you to determine the problem. Press six times in quick
succession the black button on the Smile. This establishes a 48-hour
connection. Contact the help desk in advance, so we know that you
are establishing the help desk connection.
20
Other manuals for Anna
4
Table of contents
Other Plugwise Thermostat manuals
Popular Thermostat manuals by other brands

Cardiff
Cardiff A3602 owner's manual

Tranberg
Tranberg TEF 1058 installation manual

Energate
Energate Pioneer Z100 Smart Thermostat OPERATING AND INSTALLATION Manual

RDZ
RDZ User Display Installation sheet

Stelpro
Stelpro Maestro ASMT402 user guide

Heatit Controls
Heatit Controls HEATIT Z-TRM3 Installer manual

Emerson
Emerson White Rodgers 1F80-0224 user manual

Theben
Theben RAMSES 366/1 top2 Installation and operating instructions

Geca
Geca Simply manual

ICM Controls
ICM Controls SC4011 Installation, operation & application guide

EWC Controls
EWC Controls EWT-855i installation manual

Honeywell
Honeywell FocusPRO 6000 Series installation instructions