PNI Prime Pro User manual

User Manual
Prime Pro
Digital Magnetic Compass

PNI Sensor DOC#TBD
Prime Pro User Manual Preliminary September 2022 Page i
Table of Contents
1 COPYRIGHT & WARRANTY INFORMATION..................................................1
2 INTRODUCTION..........................................................................................2
3 SPECIFICATIONS.........................................................................................3
3.1 Characteristics & Requirements ............................................................3
3.2 Mechanical Drawings.............................................................................7
4 SET-UP AND EVALUATION ..........................................................................8
4.1 Electrical Connections............................................................................8
4.2 Installation Location...............................................................................8
4.2.1 Operate within the Prime Pro’s dynamic range ...........................9
4.2.2 Locate away from changing magnetic fields.................................9
4.2.3 Mount in a physically stable location ...........................................9
4.2.4 Choose Non-magnetic Mounting Screws .....................................9
4.2.5 Keep Proper Distance....................................................................9
4.3 Mechanical Mounting......................................................................... 10
4.3.1 Pitch and Roll Convention.......................................................... 10
4.3.2 Coordinate System..................................................................... 11
4.3.3 Mounting Orientation................................................................ 11
5 USER CALIBRATION ..................................................................................12
5.1 Magnetic Calibration........................................................................... 12
5.1.1 Full-Range Calibration................................................................ 14
5.1.2 2D Calibration ............................................................................ 16
5.1.3 Limited-Tilt Calibration .............................................................. 17
5.1.4 Hard-Iron-Only Calibration ........................................................ 19
5.2 Accelerometer Calibration.................................................................. 19
6 OPERATION WITH PNI STUDIO .................................................................22
6.1 Installation .......................................................................................... 22
6.2 PNI Studio Header and Connecting to PNI Studio .............................. 22
6.3 PNI Studio Footer and Saving/Applying Settings................................ 24
6.4 Configuration Tab ............................................................................... 25
6.4.1 General Settings......................................................................... 25
6.4.2 Acquisition Settings.................................................................... 27
6.5 Calibration and the Calibration Tab.................................................... 27
6.5.1 Calibration Settings.................................................................... 28
6.5.2 Performing a Calibration............................................................ 30
6.5.3 Calibration Results ..................................................................... 30
6.6 Test Tab............................................................................................... 31
6.7 Log Data Tab ....................................................................................... 33
6.8 Graph Tab............................................................................................ 34

PNI Sensor DOC#TBD
Prime Pro User Manual Preliminary September 2022 Page ii
7 OPERATION WITH PNI BINARY PROTOCOL................................................35
7.1 Datagram Structure ............................................................................ 35
7.2 Parameter Formats............................................................................. 36
7.2.1 Endianness ................................................................................. 36
7.2.2 Floating Point ............................................................................. 36
7.2.3 Signed Integer............................................................................ 37
7.2.4 Unsigned Integer........................................................................ 38
7.2.5 Boolean ...................................................................................... 38
7.3 Commands Overview.......................................................................... 39
7.4 Set-Up Commands .............................................................................. 40
7.4.1 Module Information................................................................... 40
7.4.2 Module Configuration................................................................ 41
7.4.3 Saving Settings ........................................................................... 45
7.5 Measurement Commands .................................................................. 45
7.5.1 Data Acquisition Parameters ..................................................... 45
7.5.2 Data Components ...................................................................... 46
7.5.3 Making a Measurement............................................................. 48
7.5.4 Continuous Data Output After Power Cycle.............................. 49
7.6 Calibration Commands........................................................................ 50
7.6.1 User Calibration Commands ...................................................... 50
7.6.2 Performing a User calibration.................................................... 52
7.6.3 Calibration Score........................................................................ 53
7.6.4 Factory Calibration..................................................................... 54
7.7 Performance Commands .................................................................... 55
7.7.1 FIR Filters.................................................................................... 55
7.7.2 Power Down/Up ........................................................................ 57
7.8 Using Multiple Coefficient Sets........................................................... 58
7.9 Communication Protocol Example ..................................................... 61

PNI Sensor DOC#TBD
Prime Pro User Manual Preliminary September 2022 Page iii
List of Figures
Figure 2-1: Prime Pro ..............................................................................................2
Figure 3-1: Typical Current Drawing During Application of External Power ..........5
Figure 3-2: Prime Pro Mechanical Drawing ............................................................7
Figure 3-3: Molex-to-Pigtail Cable Drawing, pn 14479...........................................7
Figure 3-4: Molex-to-USB Cable Drawing, pn 14480 ..............................................7
Figure 4-1: Positive & Negative Roll and Pitch Definition................................ 10
Figure 4-2: Prime Pro Enclosed Mounting Orientations...................................... 11
Figure 5-1: 12 Point Full-Range Calibration (Realistic View)................................ 16
Figure 5-2: Accelerometer Calibration Starting Positions ................................... 20
Figure 7-1: Datagram Structure ........................................................................... 35
List of Tables
Table 3-1: Performance Specifications1..................................................................3
Table 3-2: Absolute Maximum Ratings...................................................................3
Table 3-3: Electrical Requirements .........................................................................4
Table 3-4: I/O Characteristics..................................................................................5
Table 3-5: Environmental Requirements ................................................................5
Table 3-6: Mechanical Characteristics ....................................................................5
Table 3-7: ESD Ratings.............................................................................................6
Table 4-1: Prime Pro Pin Descriptions.....................................................................8
Table 5-1: Magnetic Calibration Mode Summary................................................ 14
Table 5-2: 12 Point Full-Range Calibration Pattern (Two Circles)........................ 15
Table 5-3: 12 Point Full-Range Calibration Pattern (One Circle) ......................... 15
Table 5-4: 12 Point 2D Calibration Pattern .......................................................... 17
Table 5-5: 12 Point Limited-Tilt Calibration Pattern............................................ 18
Table 5-6: 12 Point Limited-Tilt Calibration Alternative Pattern......................... 18
Table 5-7: 6 Point Hard-Iron-Only Calibration Pattern ........................................ 19
Table 5-8: Accelerometer Calibration Pattern..................................................... 21
Table 7-1: Port Configuration............................................................................... 35
Table 7-2: Prime Pro Command Set..................................................................... 39
Table 7-3: Configuration Identifiers..................................................................... 42
Table 7-4: Sample Points...................................................................................... 43
Table 7-5: Component Identifiers........................................................................ 47
Table 7-6: Recommended FIR Filter Tap Values .................................................. 56
Table 7-7: Multiple Coefficient Command List ..................................................... 59

PNI Sensor DOC#TBD
Prime Pro User Manual Preliminary September 2022 Page 1
1 Copyright & Warranty Information
© Copyright PNI Sensor, Protonex LLC 2022. Revised December 2018.
All Rights Reserved. Reproduction, adaptation, or translation without prior written permission is prohibited, except
as allowed under copyright laws. For the most recent version of this manual, visit our website at www.pnicorp.com.
PNI Sensor
2331 Circadian Way
Santa Rosa, CA 95407, USA
Tel: (707) 566-2260
Fax: (707) 566-2261
Warranty and Limitation of Liability. PNI Sensor ("PNI") manufactures its Prime Pro products (“Products”) from
parts and components that are new or equivalent to new in performance. PNI warrants that each Product to be
delivered hereunder, if properly used, will, for one year following the date of shipment unless a different warranty
time period for such Product is specified: (i) in PNI’s Price List in effect at time of order acceptance; or (ii) on PNI’s
web site (www.pnicorp.com) at time of order acceptance, be free from defects in material and workmanship and will
operate in accordance with PNI’s published specifications and documentation for the Product in effect at time of order.
PNI will make no changes to the specifications or manufacturing processes that affect form, fit, or function of the
Product without written notice to the OEM, however, PNI mayat any time, without such notice, make minor changes
to specifications or manufacturing processes that do not affect the form, fit, or function of the Product. This warranty
will be void if the Products’ serial number, or other identification marks have been defaced, damaged, or removed.
This warranty does not cover wear and tear due to normal use, or damage to the Product as the result of improper
usage, neglect of care, alteration, accident, or unauthorized repair.
THE ABOVE WARRANTY IS IN LIEU OF ANY OTHER WARRANTY, WHETHER EXPRESS, IMPLIED,
OR STATUTORY, INCLUDING, BUT NOT LIMITED TO, ANY WARRANTY OF MERCHANTABILITY,
FITNESS FOR ANY PARTICULAR PURPOSE, OR ANY WARRANTY OTHERWISE ARISING OUT OF
ANY PROPOSAL, SPECIFICATION, OR SAMPLE. PNI NEITHER ASSUMES NOR AUTHORIZES ANY
PERSON TO ASSUME FOR IT ANY OTHER LIABILITY.
If any Product furnished hereunder fails to conform to the above warranty, OEM’s sole and exclusive remedy and
PNI’s sole and exclusive liability will be, at PNI’s option, to repair, replace, or credit OEM’s account with an amount
equal to the price paid for any such Product which fails during the applicable warranty period provided that (i) OEM
promptly notifies PNI in writing that such Product is defective and furnishes an explanation of the deficiency; (ii) such
Product is returned to PNI’s service facility at OEM’s risk and expense; and (iii) PNI is satisfied that claimed
deficiencies exist and were not caused by accident, misuse, neglect, alteration, repair, improper installation, or
improper testing. If a Product is defective, transportation charges for the return of the Product to OEM within the
United States and Canada will be paid by PNI. For all other locations, the warranty excludes all costs of shipping,
customs clearance, and otherrelated charges. PNI will have areasonable time to make repairs or to replace the Product
or to credit OEM’s account. PNI warrants any such repaired or replacement Product to be free from defects in material
and workmanship on the same terms as the Product originally purchased.
Except for the breach of warranty remedies set forth herein, or for personal injury, PNI shall have no liability for any
indirect or speculative damages (including, but not limited to, consequential, incidental, punitive and special damages)
relating to the use of or inability to use this Product, whether arising out of contract, negligence, tort, or under any
warranty theory, or for infringement of any other party’s intellectual property rights, irrespective of whether PNI had
advance notice of the possibility of any such damages, including, but not limited to, loss of use, revenue or profit. In
no event shall PNI’s total liability for allclaims regarding a Product exceed the price paid for the Product. PNI neither
assumes nor authorizes any person to assume for it any other liabilities.
Some states and provinces do not allow limitations on how longan implied warranty lasts or the exclusion or limitation
of incidental or consequential damages, so the above limitations or exclusions may not apply to you. This warranty
gives you specific legal rights and you may have other rights that vary by state or province.

PNI Sensor DOC#TBD
Prime Pro User Manual Preliminary September 2022 Page 2
2 Introduction
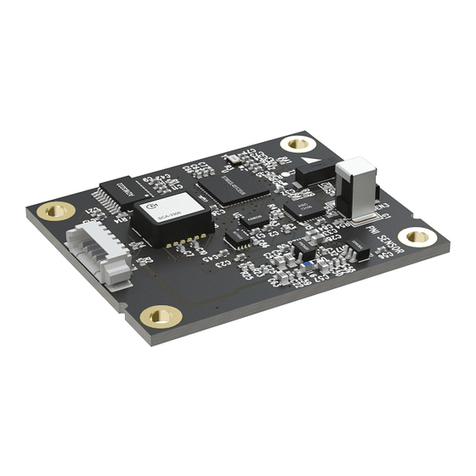
Introducing Prime Pro, a new digital magnetic compass that’s half the size and twice as robust as
our standard Prime DMC. It delivers field-accurate heading, pitch and roll data, even where GPS
is compromised or unavailable –with 1º of accuracy.
New Prime Pro is extremely robust, uses exceptionally low power, and is pinpoint accurate over
time. It’s ideal for use in devices working underwater, underground, beneath bridges, or in densely
urban situations, alone or as a supplement to GPS.
Thank you for selecting the Prime Pro.
Figure 2-1: Prime Pro

PNI Sensor DOC#TBD
Prime Pro User Manual Preliminary September 2022 Page 3
3 Specifications
3.1 Characteristics & Requirements
Table 3-1: Performance Specifications1,3
Parameter
Value
Compass Mode
Heading
Static Accuracy2
1.0° rms
Resolution
0.01°
Repeatability
0.05° rms
Tilt
Range
Pitch
± 90°
Roll
± 180°
Static Accuracy2
0.6° rms
Resolution
0.01°
Repeatability
0.05° rms
Magnetometer Range
± 150 µT
Accelerometer Range
± 1.0 g
Footnotes:
1. Specifications are typical unless otherwise noted, and subject to change.
2. Assumes that the Prime Pro is motionless; that the local magnetic field is clean
relative to user calibration; that the magnetic dip angle is <= 65° that the pitch
angle is ≤ 50°; and that a Full-Range calibration has been performed.
3. To meet performance specifications, the module must be operated over a
temperature range of –10C to 50C. A magnetometer user calibration should
be performed if the temperature changes by more than +-10C.
Table 3-2: Absolute Maximum Ratings
Parameter
Minimum
Maximum
Units
Supply Voltage
-0.3
+6
VDC
Input Voltage (Rx)
-0.5
+7
VDC
Storage Temperature
-40
+85
°C
CAUTION:
Stresses beyond those listed above may cause permanent damage to the device.
These are stress ratings only. Operation of the device at these or other conditions
beyond those indicated in the operational sections of the specifications is not implied.

PNI Sensor DOC#TBD
Prime Pro User Manual Preliminary September 2022 Page 4
Table 3-3: Electrical Requirements
Parameter
Conditions
Value
VIN
Supply Voltage
2.9 to 5.5 VDC (1)
IIN
Supply Current
Maximum Output Rate
9.5 mA typical
Typical Current Draw Profile
See Figure 3-1
Sleep Mode
0.38 mA typical
IOH
High-level output current
(Tx)
VIN = 3.3 V
-7mA max
VIN = 5 V
-8mA max
IOL
Low-level output current
(Tx)
VIN = 3.3 V
7mA max
VIN = 5 V
8mA max
VIH
High-level input voltage
(Rx)
VIN = 3 V to 3.3 V
1.39 V min
VIN = 3.6 V
1.48 V min
VIN = 4.5 V to 5 V
2.03 V min
VIN = 5.5 V
2.11 V min
VIL
Low-level input voltage
(Rx)
VIN = 3 V to 3.6 V
0.65 V Max
VIN = 4.5 V to 5.5 V
0.8 V Max
VOH
High-level output voltage
(Tx)
VIN = 2.9 V to 5.5V
IOH = -20uA
VIN - 0.1V min
VIN = 3 V
IOH = -3mA
IOH = -5.5mA
2.7 V min
2.49 V min (2)
VIN = 3.3 V, IOH = -5.5mA
2.8 V min
VIN = 4.5 V, IOH = -4mA
4.1V min
VIN = 4.5 V, IOH = -8mA
3.95V min
VIN = 5 V, IOH = -8mA
4.5 V min
VOL
Low-level output voltage
(Tx)
VIN = 2.9 V to 5.5V
IOH = 20uA
0.1V max
VIN = 3 V, IOH = 3mA
0.15 V max
VIN = 3 V, IOH = 3mA
0.252 V max
VIN = 4.5 V, IOH = 3mA
0.2 V max
VIN = 4.5 V, IOH = 3mA
0.35 V max
Footnotes:
(1) TTL-compliant logic levels guaranteed for VIN = 3.0V to 5.5V with RXload ≤3mA or VIN = 3.3V to 5.5V with
loads ≤8mA. CMOS-compliance is guaranteed the entire VIN voltage range.
(2) High load currents at low VIN voltages may prevent device from producing TTL-compliant voltages.

PNI Sensor DOC#TBD
Prime Pro User Manual Preliminary September 2022 Page 5
Figure 3-1: Typical Current Drawing During Application of External Power
Table 3-4: I/O Characteristics
Parameter
Value
Communication Interface
TTL/CMOS serial UART
Communication Protocol
PNI Binary
Communication Rate1
2400 to 921,600 baud
Maximum Data Output Rate
50 samples/sec
Footnote:
1. The Prime Pro can operate up to 921,600 baud, but native TTL is limited
to 115,200 baud.
Table 3-5: Environmental Requirements
Parameter
Value
Operating Temperature
-20C to +70C
Storage Temperature
-40C to +85C
Table 3-6: Mechanical Characteristics
Parameter
Value
Dimensions (l x w x h)
29.3 x 21.3 x 10.1 mm
Weight
2.4 gm
Connector
4-pin Molex, part number 0533980410
Mating Molex connector part number 051020400

PNI Sensor DOC#TBD
Prime Pro User Manual Preliminary September 2022 Page 6
Table 3-7: ESD Ratings
Value
Unit
V(ESD)
Electrostatic
Discharge
Human body model (HBM), per
ANSI/ESDA/JEDEC JS-001(1)
2000
V
Charged device model (CDM), per JEDEC
specification JESD22-C101(2)
1000
Machine Model (A115-A)
200
Footnote:
(1) JEDEC document JEP155 states that 500-V HBM allows safe manufacturing with a
standard ESD control process.
(2) JEDEC document JEP157 states that 250-V CDM allows safe manufacturing with a
standard ESD control process.

PNI Sensor DOC#TBD
Prime Pro User Manual Preliminary September 2022 Page 7
3.2 Mechanical Drawings
Figure 3-2: Prime Pro Mechanical Drawing
Figure 3-3: Molex-to-Pigtail Cable Drawing, pn 14479
Note: Alternatively, an unjacketed cable is available from Molex Part Numbers 218112040X,
where X = 0 thorugh 3
Figure 3-4: Molex-to-USB Cable Drawing, pn 14480
CABLE USB TO RS232 (FTDI TTL-232R-3V3-WE)

PNI Sensor DOC#TBD
Prime Pro User Manual Preliminary September 2022 Page 8
4 Set-Up and Evaluation
This section describes how to configure the Prime Pro in your host system. To install the Prime
Pro into your system, follow these steps:
•Make electrical connections to the Prime Pro.
•Evaluate the Prime Pro using the PNI Studio program, or a binary terminal emulation
program, such as RealTerm or Tera Term, to ensure the Prime Pro is working properly.
•Choose a mounting location.
•Mechanically mount the Prime Pro in the host system.
•Perform a user calibration.
4.1 Electrical Connections
The Prime Pro incorporates a 4 pin Molex connector, part number 53047-0410, which mates
with Molex part 51021-0410 or equivalent. The pin-out for both is given below in Table 4-1.
Table 4-1: Prime Pro Pin Descriptions
Pin #1
Prime Pro
4 Pin Molex
Connector
USB Demo
Cable Wire
Color
Pigtailed Cable
1
Ground
Black
Black
2
+2.9-5.5V Power
Red
Red
3
TTL UART Tx
Green
Green
4
TTL UART Rx
White
White
Footnote:
1. Pin #1 is the left most position of the connector as indicated on Figure
3-2
After making the electrical connections, it is a good idea to perform some simple tests to ensure
the Prime Pro is working as expected. See Section 6 for how to operate the Prime Pro with
PNI Studio or Section 7 for how to operate the Prime Pro using PNI’s binary protocol.
4.2 Installation Location
The Prime Pro’s wide dynamic range and sophisticated algorithms allow it to operate in many
environments. For optimal performance however, you should mount the Prime Pro with the
following considerations in mind:

PNI Sensor DOC#TBD
Prime Pro User Manual Preliminary September 2022 Page 9
4.2.1 Operate within the Prime Pro’s dynamic range
The Prime Pro can be user calibrated to correct for static magnetic fields created by the
host system. However, each axis of the Prime Pro has a calibrated dynamic range of ±150
µT. If the total field exceeds this value for any axis, the Prime Pro may not perform to
specification. When mounting the Prime Pro, consider the effect of any sources of
magnetic fields in the host environment that, when added to Earth’s field, may take the
Prime Pro out of its dynamic range. For example, large masses of ferrous metals such as
transformers and vehicle chassis, large electric currents, permanent magnets, and electric
motors.
4.2.2 Locate away from changing magnetic fields
Keep the Prime Pro away from sources of local magnetic distortion that will knowingly
change with time, such as electrical equipment that will be turned on and off, or ferrous
bodies that will move.
4.2.3 Mount in a physically stable location
Choose a location that is isolated from persistent vibration or other dynamic motion.
Accurate measurement of gravity vector is required for accurate heading, but vibration and
acceleration will induce errors in the gravity measurement by the accelerometer sensor on
the Prime Pro. Mounting should minimize mechanical stress on the device.
4.2.4 Choose Non-magnetic Mounting Screws
Use non-magnetic mounting screws. There are 3 mounting holes in Prime Pro. Brass,
copper or aluminum screws should be used to secure it in place to eliminate close proximity
magnetic distortion from the fasteners.
4.2.5 Keep Proper Distance
Keeping good distance from known magnetic interference, such as batteries, magnets and
ferrous objects, can reduce magnetic distortion significantly. Magnetic fields diminish
mathematically as 1/(distance3).

PNI Sensor DOC#TBD
Prime Pro User Manual Preliminary September 2022 Page 10
4.3 Mechanical Mounting
The Prime Pro must be aligned within the host system with respect to these mounting holes.
Ensure any stand-offs or screws used to mount the Prime Pro are non-magnetic. Refer to
Section 0 for dimensions, hole locations, and the reference frame orientation.
4.3.1 Pitch and Roll Convention
The Prime Pro utilizes 3-2-1 Euler angles as the primary method for providing orientation
data, although quaternions outputs also are available. The Euler angles are the common
method used for aircraft orientation, where the outputs are heading, pitch and roll. When
using Euler angles in aviation, roll is defined as the angle rotated around an axis through
the center of the fuselage, while pitch is rotation around an axis through the center of the
wings. These rotations are dependent on each other since the axes of rotation move with
the plane.
As shown in Figure 4-1, for the Prime Pro a positive pitch is when the front edge of the
board is rotated upward, and a positive roll is when the right edge of the board is rotated
downward. The order of rotation is given as heading, pitch, and then roll.
Figure 4-1: Positive & Negative Roll and Pitch Definition

PNI Sensor DOC#TBD
Prime Pro User Manual Preliminary September 2022 Page 11
4.3.2 Coordinate System
The Prime Pro utilizes North East Down (NED) coordinate system (frame) to define X, Y
and Z axes as shown in Figure 4-1.
4.3.3 Mounting Orientation
The Prime Pro can be mounted in 16 different orientations, as shown in Figure 4-2. All
reference points are based on the default orientation shown in Figure 4-1. The orientation
should be programmed in the Prime Pro using theConfiguration Tab in PNI Studio or using
the kSetConfig command and the kMountingRef setting in the PNI Protocol, as described
in Section 7.4.2. The default orientation is “STD 0°”.
Figure 4-2: Prime Pro Enclosed Mounting Orientations

PNI Sensor DOC#TBD
Prime Pro User Manual Preliminary September 2022 Page 12
5 User Calibration
The magnetic sensor in the Prime Pro is calibrated at PNI’s factory in a magnetically controlled
environment. However, sources of magnetic distortion positioned near the Prime Pro in the user’s
system will distort Earth’s magnetic field and must be compensated for in the host system with a
user calibration. Examples of such sources include ferrous metals and alloys (e.g., iron, nickel,
steel, etc.), batteries, audio speakers, current-carrying wires, and electric motors. Compensation
is accomplished by mounting the Prime Pro in the host system and performing a user calibration.
It is expected that the magnetic distortion sources will remain fixed, relative to the Prime Pro‘s
position within the host system. By performing a calibration, the Prime Pro identifies the local
sources of magnetic distortion and negates their effects from the overall reading to provide an
accurate heading.
Key Points:
•Magnetic calibration:
oRequires incorporating the Prime Pro into the user’s host system such that the
magnetic components of the user’s system can be compensated for.
oAllows for 4 different methods of calibration. Full-Range Calibration provides
the highest heading accuracy but requires ≥30°of pitch. 2D and Limited-Tilt
Calibration allow for good calibration when the range of allowable motion is
limited. Hard-Iron-Only Calibration updates the hard-iron compensation
coefficients with a relatively easy procedure.
•If the Prime Pro will experience different states during operation, such as operating with
a nearby shutter sometimes closed and sometimes open, or operating over a broad
temperature range, then different sets of calibration coefficients can be saved for the
various states. Up to 8 magnetic calibration coefficient sets can be saved.
As with the magnetic sensor, the accelerometer in the Prime Pro is calibrated at PNI’s factory.
If for any reason the accelerometer needs to be checked or calibrated, please refer to the
accelerometer calibration section below.
5.1 Magnetic Calibration
Two fundamental types of magnetic distortion exist: hard-iron and soft-iron. These are
discussed in the following paragraphs, plus a discussion on how temperature also affects
magnetic fields and other considerations. For more information on magnetic distortion and
calibration, see PNI’s white paper “Local Magnetic Distortion Effects on 3-Axis Compassing”
at PNI’s website (http://www.pnicorp.com/technology/papers).

PNI Sensor DOC#TBD
Prime Pro User Manual Preliminary September 2022 Page 13
Hard-Iron Effects
Hard-iron distortions are caused by permanent magnets and magnetized objects in close
proximity to the sensors. These distortions add or subtract a fixed component to each
axis of the magnetic field reading. Hard-iron distortions usually are unchanging and in
a constant location relative to the sensors, for all heading orientations.
Soft-Iron Effects
Magnetically “soft” materials effectively bend the magnetic field near them. These
materials have a high magnetic permeability, meaning they easily serve as a path for
magnetic field lines. Unlike hard-iron effects, soft-iron effects do not increase or
decrease the total field in the area. However, the effect of the soft-iron distortion
changes as the host system’s orientation changes. Because of this, it is more difficult
to compensate for soft-iron materials.
Temperature Effects
While the hard-iron and soft-iron distortion of a system may remain quite stable over
time, normally the distortion signature will change over temperature. As a general rule,
the hard-iron component will change 1% per 10°C temperature change. Exactly how
this affects heading depends on several factors, most notably the hard-iron component
of the system and the inclination, or dip angle.
Consider the example of a host system with a 100 µT hard-iron component. This is a
fairly large hard-iron component, but not completely uncommon. A 10°C temperature
change will alter the magnetic field by ~1 µT in the direction of the hard-iron
component. Around San Francisco, with an inclination of ~60°, this results in up to a
couple of degrees of heading change over 10°C.
Consequently, no matter how stable a compass is over temperature, it is wise to
recalibrate after significant temperature change since the magnetic signature of the host
system will change with temperature. The Prime Pro helps accommodate this issue by
allowing the user to save up to 8 sets of magnetic calibration coefficient sets, so
different calibration coefficients can be generated and loaded at different temperatures.
Other Considerations
Prime Pro can store up to 8 different sets of magnetic calibration coefficients, hence if
the system magnetic signature will change in different known unique states, perform a
user calibration in these unique states and save each of the calibration coefficients. The
unique calibration coefficients can be recalled when the system is operated in that
specific state again.

PNI Sensor DOC#TBD
Prime Pro User Manual Preliminary September 2022 Page 14
The main objective of a magnetic user calibration is to compensate for hard-iron and soft-iron
distortions to the magnetic field caused by components within the user’s host system. To that
end, the Prime Pro needs to be mounted within the host system and the entire host system needs
tobe moved as a singleunit during auser calibration. ThePrime Pro allows theuser to perform
a calibration only in a 2D plane or with limited tilt but provides the greatest accuracy if the
user can rotate through 360° of heading and at least ±30°of tilt.
The following subsections provide instructions for performing a magnetic calibration of a
Prime Pro system. Several calibration mode options exist, as summarized in Table 5-1. To
meet the accuracy specification, the number of samples should be the “Minimum
Recommended” value, or greater. Calibration may be performed using PNI Studio or using
the PNI binary protocol, and up to 8 sets of magnetic calibration coefficients may be saved.
The recommended calibration patterns described in the following sub-sections provide a good
distribution of sample points.
Table 5-1: Magnetic Calibration Mode Summary
Calibration
Mode
Static Accuracy in
Compass Mode
Pitch
Range
during Cal
Minimum
Recommended
# of Samples 1
Full-Range
0.25° rms
>±30°
12
2D Calibration
<2°
<±5°
12
Limited-Tilt
<2° over 2x tilt range
±5° to ±30°
12
Hard-Iron-Only
Restores prior
accuracy
>±30°
4
Footnote:
1. Maximum number of sample points is 32 in Prime Pro.
Before proceeding with a calibration, ensure the Prime Pro is properly installed in the host
system. The device should be installed as discussed in Section 4, and the software should be
properly configured with respect to the mounting orientation, Endianness, north reference, etc.
Section 6.5 outlines how to perform a calibration using Prime Pro Studio, while Section 7.6.2
provides a step-by-step example of how to perform a calibration using the PNI protocol.
5.1.1 Full-Range Calibration
A Full-Range Calibration is appropriate when the system with the Prime Pro installed can
be tilted ±30° or more. This method compensates for hard and soft-iron effects in three
dimensions and allows for the highest accuracy readings. The recommended 12-point
calibration pattern is a series of 2 circles of evenly spaced points, as illustrated Figure 5-1

PNI Sensor DOC#TBD
Prime Pro User Manual Preliminary September 2022 Page 15
as the realistic view and listed in Table 5-2 and Table 5-3. The pitch used in the two circles
of the calibration should at least match the maximum and minimum pitch the device is
expected to encounter in use.
Table 5-2: 12 Point Full-Range Calibration Pattern (Two Circles)
Sample #4
Heading1
Pitch2
Roll3
First Circle
1
0°
≥+30°
Any
2
60°
≥+30°
Any
3
120°
≥+30°
Any
4
180°
≥+30°
Any
5
240°
≥+30°
Any
6
300°
≥+30°
Any
Second Circle
7
0°
≤ -30°
Any
8
60°
≤ -30°
Any
9
120°
≤ -30°
Any
10
180°
≤ -30°
Any
11
240°
≤ -30°
Any
12
300°
≤ -30°
Any
Table 5-3: 12 Point Full-Range Calibration Pattern (One Circle)
Sample #4
Heading1
Pitch2
Roll3
1
0°
≥ +30°
Any
2
0°
≤ -30°
Any
3
60°
≥ +30°
Any
4
60°
≤ -30°
Any
5
120°
≥ +30°
Any
6
120°
≤ -30°
Any
7
180°
≥ +30°
Any
8
180°
≤ -30°
Any
9
240°
≥ +30°
Any
10
240°
≤ -30°
Any
11
300°
≥ +30°
Any
12
300°
≤ -30°
Any
Footnote:
1. Heading and Tilt listings are not absolute heading directions, but rather relative
heading referenced to the first sample.

PNI Sensor DOC#TBD
Prime Pro User Manual Preliminary September 2022 Page 16
2. Pitch 30° or more is recommended; acceptable range is between ±10° to ±60°.
3. Roll is not required.
4. Both the One Circle and Two Circle patterns are the same since the sequence order
of sample points is not required. The 12 points can be sampled in any order.
Figure 5-1: 12 Point Full-Range Calibration (Realistic View)
Notes
•The location of the device changing in realist view is for illustration purpose. If
possible, it is best to rotate around the center of the device as a pivot point.
5.1.2 2D Calibration
A 2D Calibration is intended for applications with very low tilt operation, (<5°) and where
calibrating the Prime Pro with greater tilt is not practical.
Table of contents
Other PNI Control Unit manuals
Popular Control Unit manuals by other brands

GEM
GEM 651 operating instructions

ARI
ARI Eliptix R-31 Q 2W Installation, Operating, Maintenance

Balluff
Balluff BNI PNT-508-005-E002 user guide

Continental Refrigerator
Continental Refrigerator FE5RW0D31 Manual and user guide

resideo
resideo Braukmann AM-1 Series installation instructions

Grandstream Networks
Grandstream Networks HA100 Deployment guide

RJG
RJG Lynx IA1-M-V product manual

Emerson
Emerson KGA Installation and maintenance instructions

Elettronica Progetti
Elettronica Progetti Multi-Pull EP095Mini Instructions for installation and use

Honeywell
Honeywell S8600A manual

Kilowatt Labs
Kilowatt Labs SIRIUS CAPACITOR MODULE user manual

Velbus
Velbus VMB8PBU extended manual