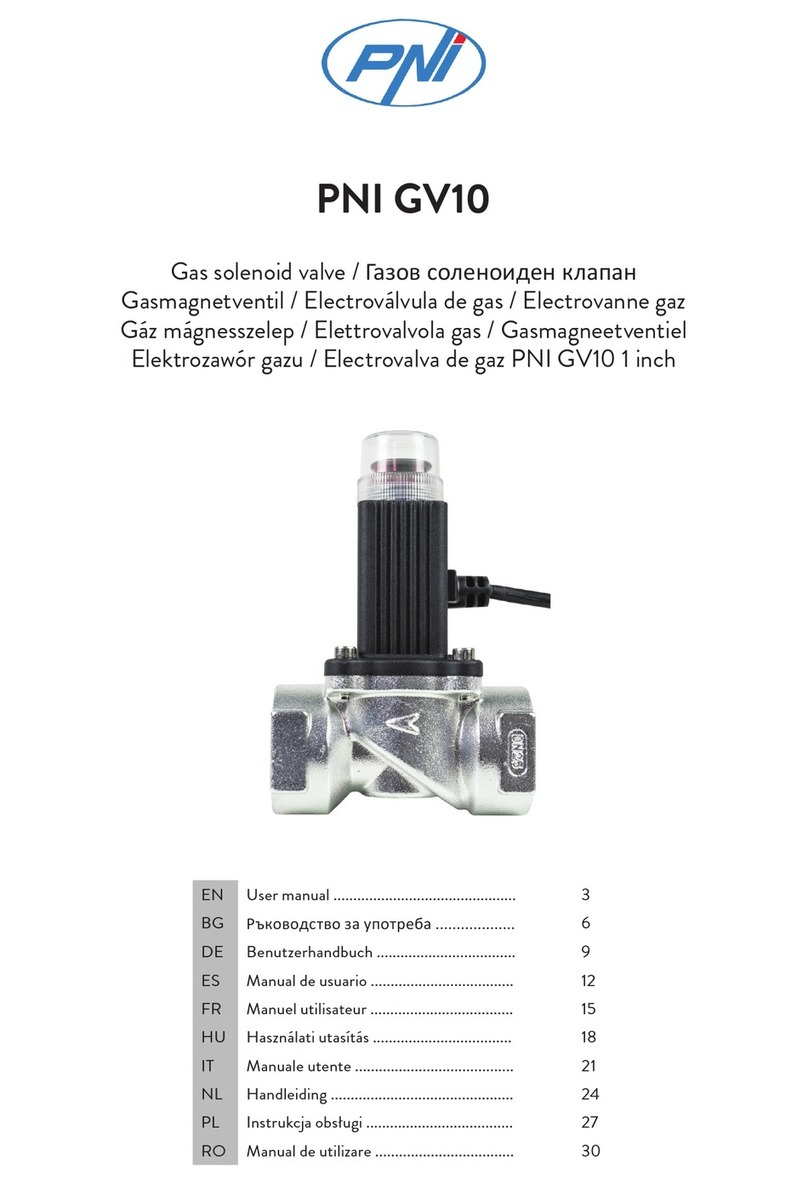
PNI V-02 User manual

PNI V-02
Gas emergency cut-o solenoid valve
Gázkioldó mágnesszelep
Awaryjny gazowy zawór elektromagnetyczny
Electrovalva de gaz
EN User manual 2
HU Használati utasítás 4
PL Instrukcja obsługi 6
RO Manual de utilizare 8

EN
2
GAS VALVE DESCRIPTION
The gas valve provides a safety solution, stopping the gas in case of emergency. The valve can be connected
to a gas sensor or to a re alarm circuit.
The valve has an automatic closing system when 9-12 V input voltage is detected. Lift the red button to allow
the gas ow.
TECHNICAL SPECIFICATIONS OF GAS VALVE
Locking mode Current impulse or manually
Activation mode Manual by lifting the red button
Material Brass alloy
P max 100 kPa
Conection: ø3/4”
Power voltage DC 9 ~ 12 V (Impulse)
Closing time (in alarm) < 1 sec.
Temperatura de utilizare -10°C ~ +50°C
INSTRUCTIONS FOR USE
1. The valve can be operated in two ways:
a) Electric impulse of about 1 sec. (9 - 12V c.c.)
b) By pressing the red button (rst remove the plastic protective cap).
After this operation, the gas valve stays closed.
NOTE: The protective cap must remain in place when using the valve.
2. When the valve is closed, pull the red button vertically upwards to unlock the valve. The valve will remain
open.
3. The electrovalve will close automatically when it receives an input signal from the sensor. If this does not
happen, contact the supplier or manufacturer.
4. After the valve closes, an inspection of the gas installation will be carried out. Act with caution when the gas
valve has to be restarted.
RECOMMENDATIONS FOR INSTALLATION
1. The valve will only be installed by qualied personnel.
2. The valve must be installed after the main gas valve.
3. The valve must be installed in the direction of the gas ow marked on the valve. The coil should not be
mounted face down. The valve can be installed horizontally or vertically.
4. The valve control wires must be connected correctly. The white wire is positive and the black one is negative.
Making an incorrect connection can result in shortcircuit risk.
5. During maintenance work on the gas pipe, such as cleaning the pressure pipe, the gas valve must be
dismantled to avoid malfunctions.

EN
3
6. During pressure tests, the valve must be opened.
7. The valve opening button can be pulled up vertically when pressures are equal (inlet and outlet).
8. Reverse polarity and wrong voltage can damage the electromagnetic coil of the gas valve.
9. The valve is recommended to be used with a gas sensor. The connection is plug & play type (plug in the
socket) without any changes.
PRECAUTIONS
1. If bolts and screws come into contact with water or chemicals, it is necessary to remove them to prevent
corrosion;
2. If the product is installed wholly or partly outside, it is recommended to protect it against water;
3. The transparent cover acts as a protection against the accidental action of the red button.
CONNECTIONG THE GAS VALVE AND THE GAS SENSOR
Connecting the gas sensor with the gas valve can be done using the plug & play connector. Both products can
be adapted for other valves / sensors if changing the connections system.
Cable recommendations:
1. Cable type: two-wire, 2 x 0.3 mm² or higher
2. Cable length < 20 meters

HU
4
GÁZSZELEP LEÍRÁS
A gázszelep biztonságos megoldást nyújt azáltal, hogy megállítja a gázt szükség esetén. A szelep
csaltakoztatható a gázérzékelő készülékhez vagy tűzriasztó áramkörhöz annak érdekében.
A szelep egy automatikus zárórendszerrel rendelkezik 9-12 V bemeneti feszültség érzékelése esetén. Engedje
fel a vörös gombot a gáz szabad áramlásának engedélyezéséhez.
GÁZSZELEPPEL KAPCSOLATOS INFORMÁCIÓK
Zárt mód Áramerősség által vagy manuálisan
Bekapcsolási mód Kézileg a vörös gomb felengedésével
Anyag Bronz ötvözet
P max 100 kPa
Kapcsolat ø3/4”
Feszültség DC 9 ~ 12 V (Impulzív)
Zárási idő (Riasztás esetén) < 1 sec.
Működési hőmérséklet -10°C ~ +50°C
HASZNÁLATI INSTRUKCIÓK
1. A szelep két módon használható:
a) Elektromos impulzus 1 másodperc alatt (9 - 12V c.c.)
b)A vörös gomb megnyomása által (elsőként távolítsa el a műanyag védőburkolatot).
A működés után a gázszelep zárt állapotban marad.
MEGJEGYZÉS: A védőburkolatnak a helyén kell maradjon a szelep használata közben.
2. Zár szelepállás esetén húzza fel a vörös gombot függőlegesen felfelé a szelep kinyitásához. A szelep nyitva
marad.
3. Az elektromos szelep automatikusan zárul bemeneti jelzés esetén. Ha ez nem történik meg, lépjen
kapcsolatba a gyártóval vagy a forgalmazóval.
4. Miután a szelep zárt állásban van, gáz telepítési vizsgálat kerül kivitelezésre. Figyelmesen bánjon a
szeleppel az újraindítás során.
AJÁNLOTT TELEPÍTÉSI ELŐÍRÁSOK
1. A szelep csak szakképzettséggel rendelkező személy által telepíthető.
2. A szelepet a fő gázcsőre kell telepíteni.
3. A szelepet a gázáramlással megfelelő irányban, a jelöltek szerint kell telepíteni. A tekercsnek nem szabad
arccal lefelé telepítve lenni. A szelepet vízszintesen és függőlegesen is lehet telepíteni.
4. A szelep irányító vezetéteket megfelelően kell csatlakoztatni. A fehér vezeték a pozitív és a Fekete pedig

HU
5
negatív. Nem megfelelő csatlakoztatás esetén rövidzárlat kockázata állhat fent.
5. A gázszelep karbantartási munkálatai során- mint például takarítás- a gáz szelepet le kell bontani a hibák
elkerülése érdekében.
6. Nyomáspróba során a szelepet nyitott helyzetben kell tartani.
7. A szelepnyílás gomb egyenlő nyomás esetén függőlegesen felhúzható. (kimenet és bemenet).
8. Ellentétes polaritás és a nem megfelelő feszültség sértheti a szelep mágneses tekercsét.
9. A szelepet ajánlott gázérzékelővel együtt használni. A kapcsolat plug & play típusú (csatlakoztassa az
aljzatot), változtatás nélkül.
ÓVINTÉZKEDÉSEK
1. A rozsdásodás megelőzése érdekében távolítsa el a csavarokat, ha azok vízzel vagy bármilyen kémiai
anyaggal kapcsolatba léphetnének;
2. Külső telepítés esetén ajánlott az eszközt a külső környezeti hatásoktól -mint például víztől- védeni.
3. Az átlátszó burkolat védelemként szolgál a vörös gomb véletlenszerű megnyomása ellen.
A GÁZSZELEP ÉS GÁZÉRZÉKELŐ CSATLAKOZTATÁSA
A gázérzékelő csatlakoztatása végrehajtható a csatlakoztatás és indítás (plug & play) kapcsoló segítségével.
Both products can
be adapted for other valves / sensors if changing the connections system. Mindkét termék alkalmazható
szelepekhez/ érzékelőkhöz a kapcsolati rendszer megváltoztatásának esetében.
Cable recommendations:
1. Cable type: two-wire, 2 x 0.3 mm² or higher
2. Cable length < 20 meters

PL
6
OPIS ELEKTROZAWORU
Elektrozawór zapewnia rozwiązanie dla bezpieczeństwa, zatrzymując gaz w przypadku awarii poprzez
zamknięcie zaworu. Elektrozawór można podłączyć do czujnika gazu.
Elektrozawór ma automatyczny system zamykania przy wykryciu napięcia wejściowego 9-12 V. Po zamknięciu
zawór otwiera się ręcznie, podnosząc czerwony przycisk.
SPECYFIKACJE TECHNICZNE ELEKTROZAWORU
Tryb zamknięcia Impuls prądu lub ręczny
Tryb uruchamiania Ręcznie, podnosząc czerwony przycisk
Materiał Stop mosiądzu
Obsługiwane maksymalne ciśnienie 100 kPa
Conexiune ø3/4”
Tensiune de alimentare DC 9 ~ 12 V (impuls)
Timp inchidere ventil in caz de alarma < 1 secunda
Temperatura de utilizare -10°C ~ +50°C
INSTRUKCJA UŻYTKOWANIA
1. Elektrozawór można obsługiwać w celu zamknięcia na dwa sposoby:
a) Elektryczny impuls 1 sekundowy (9 - 12V c.c.)
b) Naciskając czerwony przycisk (najpierw należy zdjąć plastikową osłonę ochronną). Po tej operacji
elektrozawór pozostaje zamknięty.
UWAGA: Podczas korzystania z elektrozaworu pokrywa ochronna musi pozostać na miejscu.
2. Gdy elektrozawór jest zamknięty, pociągnij czerwony przycisk pionowo w górę, aby odblokować go.
Elektrozawór pozostanie otwarty.
3. Elektrozawór zamknie się automatycznie, gdy odbierze sygnał wejściowy z czujnika. Jeśli tak się nie stanie,
skontaktuj się z dostawcą lub producentem w celu naprawy.
4. Po zamknięciu zaworu elektromagnetycznego powinna zostać przeprowadzona kontrola instalacji gazowej.
Zachowaj ostrożność, gdy trzeba ponownie uruchomić zawór elektromagnetyczny.
ZALECENIA DOTYCZĄCE INSTALACJI
Elektrozawór instaluje się wyłącznie przez wykwalikowany personel.
2. Elektrozawór musi być zainstalowany za głównym zaworem gazu.
3. Elektrozawór musi być zainstalowany w kierunku przepływu gazu oznaczonego na elektrozaworze. Cewka
nie powinna być montowana do dołu. Elektrozawór można zainstalować poziomo lub pionowo.
4. Przewodu elektrozaworu muszą być prawidłowo podłączone. Biały przewód jest dodatni, a czarny jest

PL
7
ujemny.
Nieprawidłowe podłączenie może spowodować ryzyko zwarcia.
5. Podczas prac konserwacyjnych na rurze gazowej, takich jak czyszczenie przewodu ciśnieniowego, zawór
elektromagnetyczny musi zostać zdemontowany, aby uniknąć wadliwego działania.
6. Podczas prób ciśnieniowych zawór elektromagnetyczny musi pozostać otwarty.
7. Przycisk otwierania elektrozaworu można pociągnąć pionowo, gdy ciśnienia są równe (wlot i wylot).
8. Odwrócona polaryzacja i nieprawidłowe napięcie mogą uszkodzić cewkę elektromagnetyczną elektrozaworu.
9. Zawór zaleca się stosować z czujnikiem gazu. Połączenie jest typu plug & play (wtyczka w gnieździe) bez
żadnych zmian.
UWAGI
1. Jeśli śruby i podkładki zetkną się z wodą lub chemikaliami, należy je usunąć, aby zapobiec korozji;
2. Jeśli produkt jest zainstalowany całkowicie lub częściowo na zewnątrz, zaleca się ochronę przed wodą;
3. Przezroczysta pokrywa działa jako ochrona przed przypadkowym naciśnięciem czerwonego przycisku.
POŁĄCZENIE CZUJNIKA Z ELEKTROZAWOREM
Podłączenie czujnika gazu z zaworem elektromagnetycznym sprawia, że wtyczka w plug & play nie wymaga
żadnych regulacji, produkty można dostosować do innych zaworów elektrozaworu lub czujnika.
Recomandari pentru cablu:
1. Kabel: biolar, 2 x 0.3 mm² większy
2. Długość kabla < 20 metrów

RO
8
DESCRIERE ELECTROVALVA
Electrovalva ofera o solutie de siguranta, oprind gazul in caz de urgenta prin inchiderea ventilului. Electrovalva
poate conectata la un senzor de gaz sau la un circuit de alarma anti incendiu.
Electrovalva are un sistem de inchidere automat, atunci cand sunt detectate tensiuni de intrare de 9-12 V.
Dupa inchidere, deschiderea acesteia se face manual prin ridicarea butonului rosu.
SPECIFICATII TEHNICE ELECTROVALVA
Mod de inchidere Impuls de curent sau manual
Mod de pornire Manual, prin ridicarea butonului rosu
Material Aliaj de alama
Presiunea maxima suportata 100 kPa
Conexiune ø3/4”
Tensiune de alimentare DC 9 ~ 12 V (impuls)
Timp inchidere ventil in caz de alarma < 1 secunda
Temperatura de utilizare -10°C ~ +50°C
INSTRUCTIUNI DE UTILIZARE
1. Electrovalva poate actionata pentru inchidere in doua moduri:
a) Un impuls electric de 1 secunda (9 - 12V c.c.)
b) Prin apasarea butonului rosu (mai intai trebuie sa indepartati capacul protector din plastic).
Dupa aceasta operatiune, electrovalva ramane inchisa.
NOTA: Capacul protector trebuie sa ramana pus pe tot timpul folosirii electrovalvei.
2. Atunci cand electrovalva este inchisa, trageti de butonul rosu vertical in sus pentru a debloca electrovalva.
Electrovalva va ramane deschisa.
3. Electrovalva se va inchide automat atunci cand primeste semnal de intrare de la senzor. Daca acest lucru
nu se intampla, contactati furnizorul sau producatorul.
4. Dupa inchiderea electrovalvei, se va realiza o inspectie a instalatiei de gaz. Actionati cu prudenta atunci
cand electrovalva trebuie repornita.
RECOMANDARI PENTRU INSTALARE
1. Electrovalva se va instala numai de catre personal calicat.
2. Electrovalva trebuie instalata dupa robinetul principal de gaz interior.
3. Electrovalva trebuie instalata in directia uxului de gaz marcata pe supapa electrovalvei. Bobina nu trebuie
montata cu fata in jos. Electrovalva poate instalata pe orizontala sau verticala.
4. Firele de control ale electrovalvei trebuie conectate corect. Firul alb este pozitiv, iar negru este negativ.

RO
9
Realizarea unei conexiuni incorecte poate duce la risc de scurtcuit.
5. In timpul lucrarilor de mentenanta la teava de gaz, cum ar curatarea tevii cu presiune, electrovalva trebuie
demontata pentru a evita defectarea acesteia.
6. In timpul testelor de presiune, electrovalva trebuie deschisa.
7. Butonul de deschidere al electrovalvei poate tras vertical in sus atunci cand presiunile sunt egale (admisie
si evacuare).
8. Polaritatea inversata si tensiunea gresita pot deteriora bobina electromagnetica a electrovalvei.
9. Se recomanda instalarea impreuna cu un senzor de gaz. Conectarea se face plug & play (mufa in mufa),
fara alte modicari.
PRECAUTII
1. In cazul in care suruburile si saibele intra in contact cu apa sau substante chimice, este necesara curatarea
acestora pentru prevenirea coroziunii;
2. In cazul in care produsul este instalat total sau partial in afara, este recomandata protectia impotriva apei;
3. Capacul transparent are rolul de protectie impotriva actionarii accidentale a butonului rosu.
CONECTAREA SENZORULUI CU ELECTROVALVA
Conectarea senzorul de gaz cu electrovalva se face mufa in mufa (plug & play), insa ambele produse se pot
adapta si pentru alte dispozitive de tip electrovalva, respectiv senzor daca se schimba sistemul de mufare.
Recomandari pentru cablu:
1. Cablu: bilar, 2 x 0.3 mm² sau mai mare
2. Lungimea cablului < 20 metri

EN:
EU Simplied Declaration of Conformity
SC ONLINESHOP SRL declares that Solenoid valve PNI V-02 complies with the Directive EMC 2014/30/EU. The full
text of the EU declaration of conformity is available at the following Internet address:
https://www.mypni.eu/products/1040/download/certications
BG:
Опростена декларация за съответствие на ЕС
SC ONLINESHOP SRL декларира, Соленоиден клапан PNI V-02 спазва директивата EMC 2014/30/EU.
Пълният текст на ЕС декларацията за съответствие е достъпен на следния интернет адрес:
https://www.mypni.eu/products/1040/download/certications
DE:
Vereinfachte EU- Konformitätserklärung
SC ONLINESHOP SRL erklärt, dass das Magnetventil PNI V-02 der Richtlinie EMC 2014/30/EU entspricht. Sie
nden den ganzen Text der EU-Konformitätserklärung an der folgenden Internetadresse:
https://www.mypni.eu/products/1040/download/certications
ES:
Declaración UE de conformidad simplicada
SC ONLINESHOP SRL declara que el Válvula de solenoide PNI V-02 cumple con la Directiva EMC 2014/30/EU.
El texto completo de la declaración de conformidad de la UE está disponible en la siguiente dirección de Internet:
https://www.mypni.eu/products/1040/download/certications
FR
Déclaration de conformité simpliée de l’UE
SC ONLINESHOP SRL déclare que Électrovanne PNI V-02 est conforme à la directive EMC 2014/30/EU. Le texte
complet de la déclaration de conformité UE est disponible à l’adresse Internet suivante:
https://www.mypni.eu/products/1040/download/certications
HU:
Egyszerűsített EU Megfelelési Közlemény
SC ONLINESHOP SRL kijelenti azt, hogy a Szolenoid szelep PNI V-02 megfelel az EMC 2014/30/EU irányelvnek.
Az EU-megfelelőségi nyilatkozat teljes szövege a következő internetes címen érhető el:
https://www.mypni.eu/products/1040/download/certications
IT:
Dichiarazione UE di conformità semplicata
SC ONLINESHOP SRL dichiara che il Valvola solenoide PNI V-02 è conforme alla direttiva EMC 2014/30/UE. Il testo
completo della dichiarazione di conformità europea è disponibile al seguente indirizzo Internet:
https://www.mypni.eu/products/1040/download/certications
PL:
Uproszczona deklaracja zgodności UE
SC ONLINESHOP SRL oświadcza, że Elektrozawór PNI V-02 jest zgodny z dyrektywą EMC 2014/30/EU. Pełny tekst
deklaracji zgodności UE dostępny jest pod następującym adresem internetowym:
https://www.mypni.eu/products/1040/download/certications
RO:
Declaratie UE de conformitate simplicata
SC ONLINESHOP SRL declara ca Electrovalva de gaz PNI V-02 este in conformitate cu Directiva EMC 2014/30/EU.
Textul integral al declarației UE de conformitate este disponibil la urmatoarea adresa de internet:
https://www.mypni.eu/products/1040/download/certications


Table of contents
Languages:
Other PNI Control Unit manuals
Popular Control Unit manuals by other brands

Harvia
Harvia XAFIR CS170 Instructions for installation and use

Cumberland
Cumberland Flex-Flo FLX-5350 Operation manual

Emerson
Emerson KTM RICHARDS FIGURE R382 Installation and operating instructions

ECM Manufacture
ECM Manufacture P1061 Assembly instructions

Kessel
Kessel Aqualift F Comfort 400V Series Installation and operating instructions

Huawei
Huawei MU509 Series Hardware Migration Guide