PODOBLOCK Stat-X 2023 Operator's manual


Stat-X
Mobile X-ray stand
Overseas customers
Contact your local distributor. In case of doubt contact Podoblock BV.
For further information visit www.podoblock.com
Trade marks
Podoblock™ is a trading name of Podoblock B.V.
The CE marking affixed to the products certifies that it
complies with the European Medical Devices Directive
93/42/EEC and related legislation
After sales correspondence
All correspondence relating to the after sales service of Podoblock B.V.
to be addressed to:
NL Customers
Podoblock B.V.
Verlengde Nijverheidsweg 10
9482 WT Tynaarlo
The Netherlands
Tel: +31 50 8200 257
Fax: +31 50 8200 212
The CE marking affixed to the products certifies that it
complies with the European Medical Devices Directive
93/42/EEC and related legislation
version 2021-03
3/24

Stat-X
Mobile X-ray stand
4/24 version 2021-03

Type indication Min. weight Max. weight
Stat-X
Mobile X-ray stand
5/24
1.0 Preliminary information
Warning
Read this preliminary information carefully and note ALL of the warnings,
cautions and safety notes contained within this manual before using the
Stat-X. Keep this manual close at hand at all times for reference.The Stat-X
must only be used as detailed within this manual. Failure to do so could
result in injury to patients or users, or damage to the equipment.
1.1 This manual should be readily accessible for reference at all times and
be referred to for details of the following products: Stat-X Bucky, Vaquero,
Infinity and Espléndido.
1.2 Sections marked with this symbol give guidance on possible actions
that could lead to injury of the patient or user or damage to the Stat-X.
Ensure all warnings in the manual are strictly complied with.
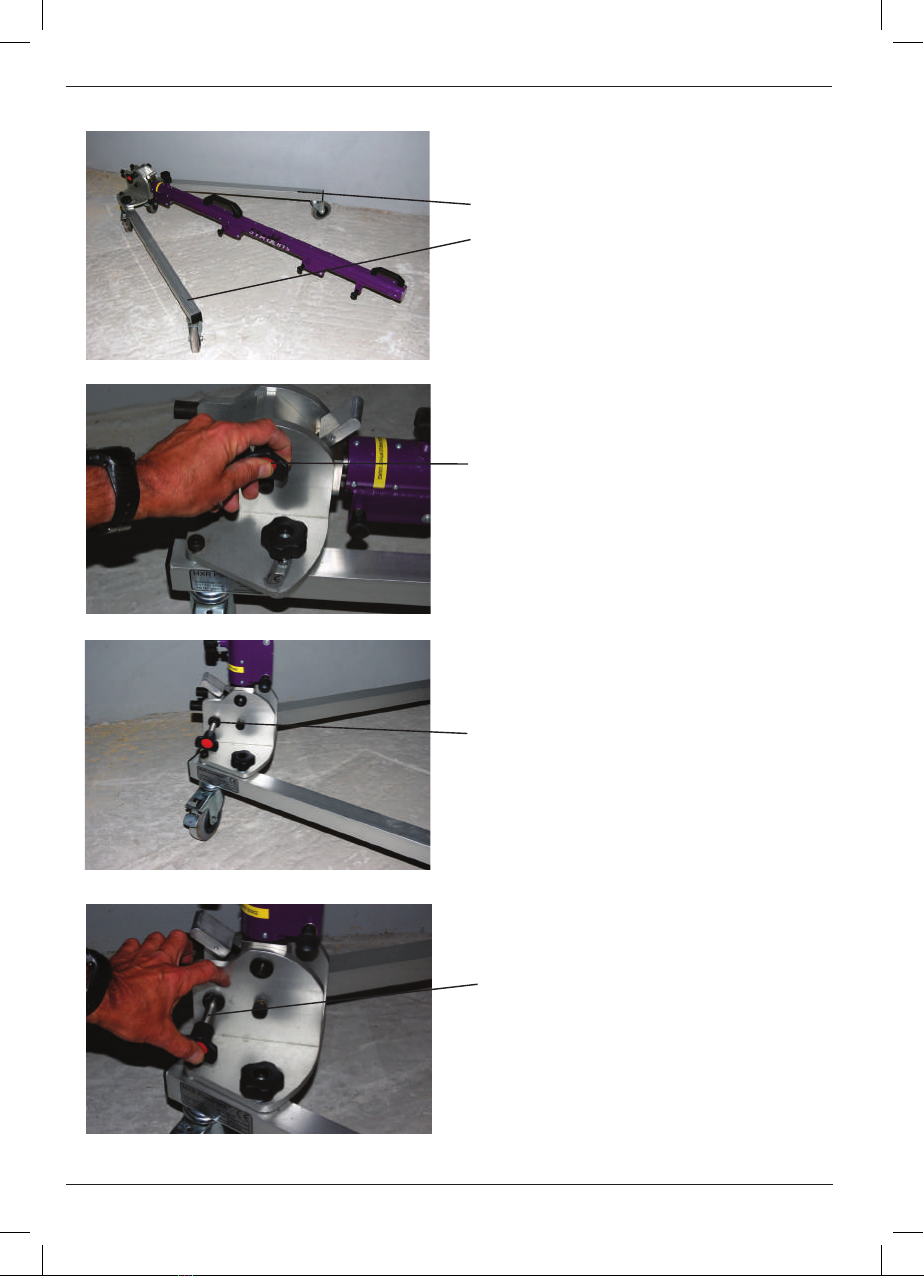
1.3 Section 3 (Operation) provides information detailing how to use the different
types of Stat-X. It is strongly recommended that the user has read - and is
familiar with - section 3 before using the Stat-X products. For those customers
who bought a Stat-X Espléndido, an additional chapter is added - starting in
section 5 - to reference the use of the special 3D-head that comes with this
type only. In this section you will also find extra information on the Stat-X Bucky.
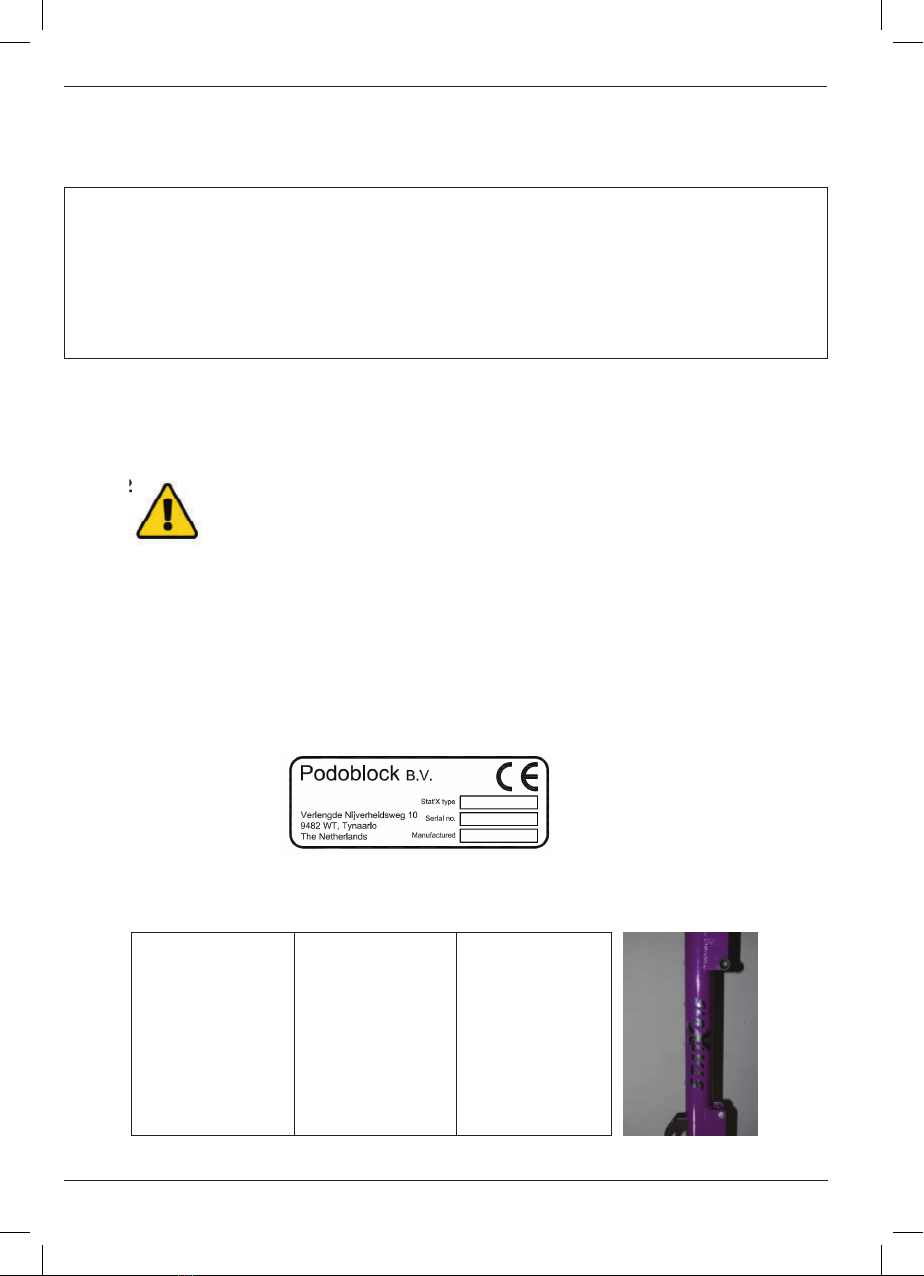
1.4 The following information is used on the Stat-X label:
1.5 Stat-X type: this indicates which weight variations the Stat-X is designed for.
The minimum and maximum load are indicated as follows:
Stat-X 2023
Stat-X 1017
Stat-X 815
Stal-X 609
Stat-X 407
Stat-X 305
20 kg
10 kg
8 kg
6 kg
4 kg
3 kg
25 kg
17 kg
15 kg
10 kg
7 kg
5 kg fig 1
1.2
that could lead to injury of the patient or user or damage to the Stat-X.
Ensure all warnings in the manual are strictly complied with.
Stat-X
Mobile X-ray stand
4/24 version 2018-04
version 2021-03

Stat-X
Mobile X-ray stand
6/24
1.6 Serial no: this is a unique number of your Stat-X and contains all detailed
information about this specific product. Always mention this serial number when
communicating with your supplier.
1.7 ‘Manufactured’: this indicates the date on which your Stat-X was produced
1.8 The Stat-X should only be used in the following environment:
Temperature: +10 °C to +40 °C
Pressure: 69 - 106 KPa
Humidity range: 30% to 75% RH non-condensing
Never use a source or Bucky holder which has more weight than
the Stat-X type indicates. This weight variation is also mentioned
on the Stat-X label on page 5.
version 2021-03

Stat-X
Mobile X-ray stand
6/24 version 2018-04
1.6 Serial no: this is a unique number of your Stat-X and contains all detailed
information about this specific product. Always mention this serial number when
communicating with your supplier.
1.7 ‘Manufactured’: this indicates the date on which your Stat-X was produced
1.8 The Stat-X should only be used in the following environment:
Temperature: +10 °C to +40 °C
Pressure: 69 - 106 KPa
Humidity range: 30% to 75% RH non-condensing
Never use a source or Bucky holder which has more weight than
the Stat-X type indicates. This weight variation is also mentioned
on the Stat-X label on page 5.
Stat-X
Mobile X-ray stand
7/24
2 Description
The Stat-X is available in 4 different types, which are designed with the
following functions:
Stat-X Bucky:
foldable X-ray stand for back, neck, head
and hip X-rays. The Stat-X Bucky is furnished with a
3D-connection for the accessory cassette holder.
Stat-X Vaquero and
Stat-X Espléndido:
foldable X-ray stand to carry
your X-ray source.
Stat-X Infinity:
foldable X-ray stand to do all examinations.
Furnished with a 3D-connection for the cassette holder
as well as a bracket for your X-ray source.
version 2021-03

Stat-X
Mobile X-ray stand
8/24
The Stat-X is delivered without any X-ray source or cassette. This equipment
you need to add yourself.
The Stat-X consists of 3 main parts:
• 1 Mobile base with 4 swivel castors
• 1 Vertical lifting device
• 1 or 2 horizontal swivel arms, depending on the type of stand
This handbook describes the operation of all 4 types of Stat-X.
3 Operation
Check for any wear, tear or damage that could compromise
your safety before using your Stat-X.
3.1 Unfolding the stand:
The Stat-X is delivered in folded position. This is also the position for both
storing the device and for transportation.
fig 2
fig 3
Set the feet of the base:
Release both knobs by turning them
leftward so they can move freely.
Apply brakes:
Block the rear castor wheels with
the foot pedal.
version 2021-03

Stat-X
Mobile X-ray stand
8/24 version 2018-04
The Stat-X is delivered without any X-ray source or cassette. This equipment
you need to add yourself.
The Stat-X consists of 3 main parts:
• 1 Mobile base with 4 swivel castors
• 1 Vertical lifting device
• 1 or 2 horizontal swivel arms, depending on the type of stand
This handbook describes the operation of all 4 types of Stat-X.
3 Operation
Check for any wear, tear or damage that could compromise
your safety before using your Stat-X.
3.1 Unfolding the stand:
The Stat-X is delivered in folded position. This is also the position for both
storing the device and for transportation.
fig 2
fig 3
Set the feet of the base:
Release both knobs by turning them
leftward so they can move freely.
Apply brakes:
Block the rear castor wheels with
the foot pedal.
Stat-X
Mobile X-ray stand
9/24
fig 4
fig 7
Make sure the locking pin is pushed in
completely.
fig 5
fig 6
Move both feet outwards until they are
blocked at the end of the slotted holes.
Tighten both knobs from fig 3again
by turning them to the right.
Push in the red button on the locking pin
and pull out the complete pin, while
holding the red button. The vertical lifting
device will stay in the position as it was
before removing the pin.
Set the vertical lifting device:
Manually lift up the vertical arm 90°,
then re-insert in the locking pin into the
second locking hole.
version 2021-03

Stat-X
Mobile X-ray stand
10/24
fig 8
fig 11
fig 9
fig 10
The Stat-X is delivered with the horizontal
swivel arm in its central position (lower
position for the Espléndido).
During transportation the arm should
always be in this position, otherwise it is
not possible to clamp the arm to the
vertical tube. It is not possible to fix both
arms during transport in case you have a
Stat-X Infinity. To set the swivel arm in
horizontal position, just release the
locking bolt.
Release the top locking pin by pulling it
towards you and turn it 90°.
Keep the swivel arm in position with your
other free hand.
The swivel arm will fall down
if you do not hold it in position
Make sure the middle locking pin is
in the ‘out’-position. Then lower the
swivel arm until it is in horizontal position.
Lock the middle locking pin by
turning it 90°.
version 2021-03

Stat-X
Mobile X-ray stand
10/24 version 2018-04
fig 8
fig 11
fig 9
fig 10
The Stat-X is delivered with the horizontal
swivel arm in its central position (lower
position for the Espléndido).
During transportation the arm should
always be in this position, otherwise it is
not possible to clamp the arm to the
vertical tube. It is not possible to fix both
arms during transport in case you have a
Stat-X Infinity. To set the swivel arm in
horizontal position, just release the
locking bolt.
Release the top locking pin by pulling it
towards you and turn it 90°.
Keep the swivel arm in position with your
other free hand.
The swivel arm will fall down
if you do not hold it in position
Make sure the middle locking pin is
in the ‘out’-position. Then lower the
swivel arm until it is in horizontal position.
Lock the middle locking pin by
turning it 90°.
Stat-X
Mobile X-ray stand
11/24
fig 12
fig 14
fig 13
The Stat-X is now ready for use.
3.2 Mounting the X-ray source
Note: In case you have a Stat-X Espléndido, please turn to page 19
for further instructions about mounting your source. For instructions
regarding mounting your cassette holder, please turn to page 12.
Release the hand knob by turning it
to the left.
• Take off the complete hand knob and
you will see a treaded rod.
• Attach your X-ray source over the
treaded rod.
• By fastening the hand knob again,
the X-ray source will be secured.
version 2021-03

Stat-X
Mobile X-ray stand
fig 16
fig 17
3.3 Mounting the cassette holder
In case you purchased our Stat-X Bucky or Infinity, we
advise you to carefully observe the extra instructions
laid out for you in the following chapter.
The Bucky 3D-head turns and swivels in all three axes and
allows you to put your cassettes in any angle or position
you want them to be.
Attaching the included cassette holder
Sliding the cassette holder or box onto the Bucky 3D-head is made very easy,
but before use of the Stat-X Bucky the user needs to ascertain that the cassette
holder has been fastened properly in
order to avoid accidents or damage to
your equipment.
To attach your cassette holder, pull the
black knob and slide the cassette holder
onto the head into its final position and
make sure the pin clicks into the holder.
12/24
The Stat-X 3D-head
fig 15
When taking the X-ray source off the bracket, the swivel arm
may move up very fast. Only take out the source when the swivel
arm is in upper position. If necessary, lift the X-ray source by
hand in order to put the swivel arm in upper position.
It is possible to rotate the X-ray source while
hanging in the bracket. Release the hand knob
by turning it to the left, so the bracket can be
rotated to both the left and the right. In order
to fix the source in desired position, tighten the
hand knob again by turning it to the right.
version 2021-03

Stat-X
Mobile X-ray stand
fig 16
fig 17
3.3 Mounting the cassette holder
In case you purchased our Stat-X Bucky or Infinity, we
advise you to carefully observe the extra instructions
laid out for you in the following chapter.
The Bucky 3D-head turns and swivels in all three axes and
allows you to put your cassettes in any angle or position
you want them to be.
Attaching the included cassette holder
Sliding the cassette holder or box onto the Bucky 3D-head is made very easy,
but before use of the Stat-X Bucky the user needs to ascertain that the cassette
holder has been fastened properly in
order to avoid accidents or damage to
your equipment.
To attach your cassette holder, pull the
black knob and slide the cassette holder
onto the head into its final position and
make sure the pin clicks into the holder.
12/24 version 2018-04
The Stat-X 3D-head
fig 15
When taking the X-ray source off the bracket, the swivel arm
may move up very fast. Only take out the source when the swivel
arm is in upper position. If necessary, lift the X-ray source by
hand in order to put the swivel arm in upper position.
It is possible to rotate the X-ray source while
hanging in the bracket. Release the hand knob
by turning it to the left, so the bracket can be
rotated to both the left and the right. In order
to fix the source in desired position, tighten the
hand knob again by turning it to the right.
Stat-X
Mobile X-ray stand
fig 18
fig 19
The Stat-X Bucky 3D-head allows you to position your cassette holder in all 3
possible axes.
X-axis:
In order to turn the cassette holder from
left to right, just release the black lever
and manually pivot the headon the rotating
base. The Stat-X Bucky3D-head gives you
a 360° angle.
Y-axis:
In order to rotate the cassette holder in
its Y-plain, also manually bring the
cassette in its desired position. Friction
can be augmented with the wrench that
is included in your product package.
Z-axis:
In order to achieve the right angle in the
Z-plain, release the black lever forward,
swivel the cassette holder to its desired
angle, then fasten the black lever again.
fig 20
13/24
version 2021-03

Stat-X
Mobile X-ray stand
14/24
fig 21
3.4 Setting the weight properties of the swivel arm
The swivel arm is pre-set to carry the weight of your X-ray source.
Before using the Stat-X, fine-tuning of the weight setting is necessary:
• Make sure your X-ray source is mounted in the bracket correctly
(see 3.2 Mounting the X-ray source).
Only set the weight adjustment WITH mounted X-ray source.
Adjusting without source will inhibit setting of the swivel arm.
Make sure the arm is in horizontal position during adjustment.
By turning the key clockwise, the arm can carry
less weight, by turning the key counter-clockwise,
the arm can carry more weight.
The adjustment setting is correct when the
swivel arm stays in place in every vertical position.
Together with this manual comes an Allen key, with which you can adjust the
weight properties at the intersection of the swivel arm and the central core:
version 2021-03

Stat-X
Mobile X-ray stand
14/24 version 2018-04
fig 21
3.4 Setting the weight properties of the swivel arm
The swivel arm is pre-set to carry the weight of your X-ray source.
Before using the Stat-X, fine-tuning of the weight setting is necessary:
• Make sure your X-ray source is mounted in the bracket correctly
(see 3.2 Mounting the X-ray source).
Only set the weight adjustment WITH mounted X-ray source.
Adjusting without source will inhibit setting of the swivel arm.
Make sure the arm is in horizontal position during adjustment.
By turning the key clockwise, the arm can carry
less weight, by turning the key counter-clockwise,
the arm can carry more weight.
The adjustment setting is correct when the
swivel arm stays in place in every vertical position.
Together with this manual comes an Allen key, with which you can adjust the
weight properties at the intersection of the swivel arm and the central core:
Stat-X
Mobile X-ray stand
15/24
fig 24
fig 22
fig 23
3.5 Moving the swivel arm
Rotating the arm in horizontal plane by 5°
to either the left or the right is possible by
releasing the hand knob.
Vertical lifting of the swivel arm:
Release the hand knob according fig 22, push the
release pedal slowly by pressing down your foot.
During this process hold your hand to the black
bow grip. This will prevent sudden movements of
the tube, swivel arm and X-ray source.
Do not release the foot handle without
an X-ray tube hanging in the swivel arm.
The lifting device may go up very fast
and may cause injuries to the user!
In order to bring the arm in a lower position,
just push on top of the vertical tube.
Always do this when the X-ray source is attached.
This makes it much easier to push in the tube.
version 2021-03

Stat-X
Mobile X-ray stand
16/24
fig 25
fig 27
fig 26
With each type of Stat-X it is possible to set
the swivel arm in 3 different positions in order
to achieve a wider imaging field.
In case you have an Infinity version, it is also
possible to fix a second arm to the Stat-X.
Release the top locking pin by pulling it
towards you and turning it 90° to the left.
Place the swivel arm in the required position.
To fixate the arm, turn the locking knob 90°
to the right.
3.6 Changing positions of the swivel arm
version 2021-03

Stat-X
Mobile X-ray stand
16/24 version 2018-04
fig 25
fig 27
fig 26
With each type of Stat-X it is possible to set
the swivel arm in 3 different positions in order
to achieve a wider imaging field.
In case you have an Infinity version, it is also
possible to fix a second arm to the Stat-X.
Release the top locking pin by pulling it
towards you and turning it 90° to the left.
Place the swivel arm in the required position.
To fixate the arm, turn the locking knob 90°
to the right.
3.6 Changing positions of the swivel arm
Stat-X
Mobile X-ray stand
17/24
Horizontal position: the Stat-X is resting on
the wheels. Lift the Stat-X by the middle bow
grip.
fig 30
fig 28a
fig 29
When you move the Stat-X, always hold
the device by one of the black bow grips.
Vertical position: the Stat-X is resting on the feet
of the base frame and on 2 buffers.
In case the Stat-X is transported in a car in its
vertical position, it is essential the device be tied
to a fixed point in the car.
If you pull the Stat-X other
than by the black bow grips,
you risk the Stat-X falling
and injuring the user or
damaging the equipment.
If you have 2 arms fixed in the Stat-X (in case of an Infinity-
version), or when the swivel arm with X-ray source is fixed in the
upper position, be extra careful for instability. Extra attention
of the user is necessary to prevent the Stat-X from falling over.
fig 28b
3.7 Transport positions
The Stat-X can be transported in 3 different ways:
version 2021-03

Stat-X
Mobile X-ray stand
18/24
fig 31
fig 32
4 Service
The Stat-X does not require servicing, however a regular 4-monthly check for any
wear or physical damage that could impair function is recommended. This check
should include the following:
• Check if the 4 wheels are running free
• Check if the brake of either wheel is
functioning well
• Check if the locking pins are clean and
the red button is functioning well
• Check if the sliding tube is clean and free of dirt
• Check if the locking knobs are functioning well
by turning them 90° both ways. The inner pin
has to go in and come out of the housing
(also see fig 9 and 11)
• Check on damages on the entire device
Pushing: the Stat-X is resting on 2 wheels.
The Stat-X can be moved by pushing it forward.
Pulling the Stat-X is possible, but not convenient.
version 2021-03

Stat-X
Mobile X-ray stand
18/24 version 2018-04
fig 31
fig 32
4 Service
The Stat-X does not require servicing, however a regular 4-monthly check for any
wear or physical damage that could impair function is recommended. This check
should include the following:
• Check if the 4 wheels are running free
• Check if the brake of either wheel is
functioning well
• Check if the locking pins are clean and
the red button is functioning well
• Check if the sliding tube is clean and free of dirt
• Check if the locking knobs are functioning well
by turning them 90° both ways. The inner pin
has to go in and come out of the housing
(also see fig 9 and 11)
• Check on damages on the entire device
Pushing: the Stat-X is resting on 2 wheels.
The Stat-X can be moved by pushing it forward.
Pulling the Stat-X is possible, but not convenient.
Stat-X
Mobile X-ray stand
19/24
fig 33
fig 34
5 Use of the Stat-X Espléndido 3D-head
The Stat-X Espléndido comes with a revolutionary addition, a 3D-head that will
give you extra opportunities for both improving and facilitating your work. This
cunning device needs tender loving care, however, which is not much of an effort
on your part. When following the steps below, the Stat-X Espléndido will be a
great asset to your practice.
The Stat-X Espléndido will be delivered to you
as seen in fig 33, that is to say, with the V-shape
of the 3D-head pointing downwards. In rest
- or during transportation - this should always
be the case to prevent damage to the head.
The new 3D-head now allows you to rotate
your source 360° in all directions and secure
its position with a multi-stage locking system.
fig 35
fig 36
On the previous pages you were shown how
to set up the Stat-X Espléndido. Unfolded it
will look like this. Pins in? Knobs tightened?
Castor wheels locked? Good!
In order to be able to hang in your source,
press the handle at the back of the head
and turn the coupling downwards.
version 2021-03

Stat-X
Mobile X-ray stand
20/24
fig 37
fig 38
fig 39
fig 40
While holding the handle turn the coupling
down to a ‘hanging’ position.
The Espléndido package includes a set of
4 metal pieces, 2 screws and a small
Allen key.
One of the pieces will fit the width of your
source-handle precisely and clench it tightly.
You will only need to screw it on once,
unless you use multiple sources.
Hang in your source and choose the piece
that fits your source-handle best and screw
it onto the head with the included screws.
version 2021-03
This manual suits for next models
5
Table of contents
Popular Medical Equipment manuals by other brands

Vyaire
Vyaire Avea user guide

YIMI Life
YIMI Life YM201 user manual

MHC Medical Products
MHC Medical Products SureLife Clearwave user manual

ulrich medical
ulrich medical Obelisc CS 2931 Series Assembly and disassembly instructions with special cleaning instructions

ivWatch
ivWatch 400 user manual

Globus
Globus Magnum XL operating manual

ResMed
ResMed Astral 100 Series user guide

Shenzhen Roundwhale Technology Co., LTD.
Shenzhen Roundwhale Technology Co., LTD. R-C4D instruction manual

Bistos
Bistos BT-250 Operation manual

Kontak
Kontak PROPOLAIR SMART quick guide

Dräger Medical
Dräger Medical CF 800 Technical documentation

Livassured
Livassured NightWatch Livanova Technical description