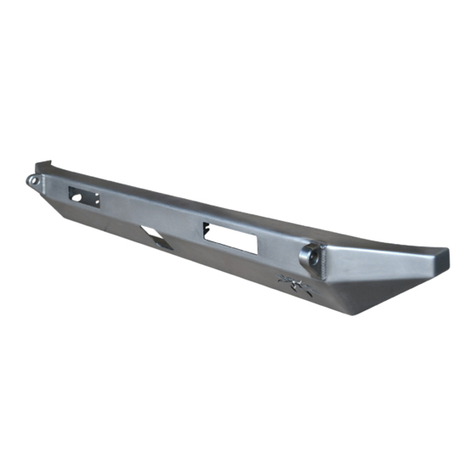
Poison Spyder Rear Stinger Tire Carrier User manual

©2015 POISON SPYDER CUSTOMS • 951-849-5911 • WWW.POISONSPYDER.COM
INSTALLATION INSTRUCTIONS
Thank you for purchasing a Poison Spyder Rear
Stinger Tire Carrier for your Jeep. Installation
is fairly simple with the right tools. If you are
not condent in your mechanical skills, please
seek the help of a professional to perform the
installation. Please read through these entire
instructions before proceeding with installation.
PARTS LIST
Please check your packages immediately upon
arrival to ensure that everything listed is included,
and to check for damage during shipping. If
anything is missing or damaged, call Poison
Spyder at (951) 849-5911 as soon as possible.
(1) Rear Stinger Tire Carrier Main Assembly
(1) Lower Mount Plate
(1) Right Upper Corner Mount
(1) Left Upper Corner Mount
(1) 3-Way Spare Tire Strap
(2) 1/2” Hitch Pin
(2) Hairpin Cotter Pin
(8) Urethane bushing
(2) Thick wall bushing insert
(2) Thin wall bushing insert
(2) 5/8-11 X 4-1/2 Gr8 hex head cap screw
(2) 5/8-11 nylon insert lock nut
(4) 5/8”atwasher
(2) 7/16-14 X 1 Gr8 Hex Head Cap Screw
(2) 7/16-14 Gr8 Nylon Insert Lock Nut
(4) 7/16 Gr8 Flat Washer
(8) 3/8-16X3/4SSatheadcapscrew
(4) 3/8-16 X 1 SS button head cap screw
(12) 3/8-16 nylon insert lock nut
(12) 3/8atwasher
TOOLS NEEDED
• Drill motor with 3/8” drill bit
• 7/32 hex key
• 9/16 wrench
• 13/16 wrench
REAR STINGER TIRE CARRIER INSTALL

INSTALLATION INSTRUCTIONS
Poison Spyder Customs •
REAR STINGER TIRE CARRIER INSTALL
Page 2
©2015 POISON SPYDER CUSTOMS • 951-849-5911 • WWW.POISONSPYDER.COM
• 7/8 wrench
BEFORE YOU BEGIN
The bare steel components of the Rear Stinger
Tire Carrier kit should be powder coated or
painted prior to installation. If powder coating,
be sure to not install the urethane bushings until
AFTER the parts have been powder coated, but
make sure the coater masks the inside of the
bushing cavities as the thickness of the powder
coat may make installation of the bushings
difcult.
If painting the components, thoroughly wash and
prep the bare metal components, then apply
a quality metal-etching primer, followed by the
paint color of your choice.
Remove the existing tire carrier and rear bumper
prior to beginning this install. The removal
procedure of any existing rear bumper is not
included in these instructions. Retain the OE
bolts that thread into the bottom of the Jeep’s
frame to hold the OE bumper on. They will be
re-used.
These instructions assume that Poison Spyder
Crusher Corners™ have already been installed.
INSTALL PROCEDURE
1. Park vehicle on a level surface and set the
emergency brake. You will want to wear eye
protection beyond this point.
2. Install the Lower Mount Plate to the Jeep’s
rear frame/cross member using the supplied
stainless steel at head cap screws, at
washers and lock nuts. Use the hole
locations that correspond to existing holes in
the Jeep’s frame. Use the OE hardware in
the two bolt locations along the bottom of the
LowermountPlate,attheundersideofeach
frame rail.
3. Note that several of the hole locations do
not have a corresponding hole through the
Jeep’s frame. Use the drill motor and 3/8”
drill bit to drill through the frame at these
locations, using the Lower Mount Plate as
your drill guide. Before you begin to drill,
check behind the frame cross member at
each hole location to make sure it is clear
of any wires or other components. The fuel
tankislocatedinthisarea,becarefulwhen
drilling not to punch through to the fuel tank.
4. Apply some paint to the bare metal around
the edges of the new holes just drilled, to
discourage rust.
5. Install the remaining stainless steel at
headcapscrews,washersandlocknutsinto
the new hole locations.
6. Install the Upper Corner Mounts to the
upper rear corners of the Jeep. Note that
the countersunk hole locations in the Upper
Corner Mounts correspond with existing
mounting hardware for your Crusher
Corners. Remove the existing hardware
fromtheseholes,andusethesupplied3/8-
16 X 1 stainless steel button head cap screws
withatwashersandlocknutstosecurethe
Upper Corner Mounts. Leave this hardware
loose until after installing the Rear Stinger.
7. Install the urethane bushings into each
of the four bushing sleeves on the Rear
Stinger assembly. Push the narrow end of
the bushing into the sleeve until the wider
ange is seated against the edge of the
sleeve tube. Put two bushing halves into
eachsleevetube,onefromeachside.You
may need to carefully use a rubber mallet to
tap the bushings into the sleeves.
8. Note that there are two THIN wall inner
bushing sleeves and two THICK wall inner
bushing sleeves. Insert the thin wall inner
bushing sleeves into the lower bushings in
the Rear Stinger. Insert the thick wall inner
bushing sleeves into the upper bushings.
You may need to carefully use a rubber
mallet to tap the inner bushing sleeves into
the bushings.
9. Insert the lower bushings of the Rear
Stinger into the bushing tabs on the Lower
Mount Plate. Do this with the upper end of
theRearStingerrestingontheoor.Usethe
1/2-13 Grade 8 hex head cap screws, 1/2”
at washers and 1/2-13 lock nuts to attach
theRearStingertotheLowerMountPlate,
through the tabs and bushings. Tighten the
1/2” hardware enough to secure the Rear
Stinger but leave it slightly loose enough to
allow the Stinger to swing up and down.

INSTALLATION INSTRUCTIONS
Poison Spyder Customs •
REAR STINGER TIRE CARRIER INSTALL
Page 3
©2015 POISON SPYDER CUSTOMS • 951-849-5911 • WWW.POISONSPYDER.COM
10. Fold the Rear Stinger upward, until the
upper bushings meet the mounting tabs in
the Upper Corner Mounts. You may need to
slightly adjust the Upper Corner Mounts to
allow the bushings to swing easily into the
tabs.Testforpropertmentwiththesupplied
hitch pins and cotter pins. Once everything
issatisfactorilyaligned,tightenthehardware
for the Upper Corner Mounts. Remove the
hitch pins and fold the Rear Stinger back
down.
11. Roll your spare tire onto the Rear Stinger
and lay it down with the outside of the wheel
facing down. Push the tire against the tire
stop on the Rear Stinger.
12. Place the 3-way Spare Tire Strap over the
spare tire, with the two lower ends (with
metal mounting tabs) draped over each side
ofthetire,andtheupperend(withtheratchet
mechanism) draped over the end of the tire
that is farthest from the Jeep.
13. Use the supplied 7/16-14 X 1 Gr8 Hex
Head Cap Screws, at washers and lock
nuts to secure each of the metal mounting
tabs of the 3-Way Spare Tire Strap to the
corresponding tabs on each side of the Rear
Stinger. Do not fully tighten this hardware
yet.
14. Pass the upper strap of the 3-Way Spare
Tire Strap through the small loop at the upper
endofthe Rear Stinger,thenback through
the buckle.
15. Adjust the three straps until,whentight,the
center ring is located near the center of the
tire.Oncethestrapisadjustedcorrectly,and
tightened,nishby tightening thehardware
that attaches the two lower straps to the tabs
on the Rear Stinger.
16. Test operation by folding theRearStinger,
withtiremounted,upwardandinstallingthe
hitch pins into each Upper Corner Mount.
Insert the hairpin cotter pins into the holes in
each hitch pin to keep them in place while in
use.
Congratulations, you have completed the
installation of your Poison Spyder Rear Stinger
Tire Carrier!

INSTALLATION INSTRUCTIONS
Poison Spyder Customs •
REAR STINGER TIRE CARRIER INSTALL
Page 4
©2015 POISON SPYDER CUSTOMS • 951-849-5911 • WWW.POISONSPYDER.COM
WARRANTY
Poison Spyder Customs™ warranties all of
the products we sell and distribute for one (1)
year from the date of sale. These products will be
free from defects in material and workmanship
under normal installation, and use. Due to the
intended use the powder coat nish is warranted
for ninety (90) days. The nish warranty will not
cover a product if it has been damaged in any
way. Warranty is limited to repair or replacement.
Poison Spyder Customs™ does not offer any
type of labor or shipping allowance and all
warranty claims are subject to inspection by
Poison Spyder Customs™.
At the discretion of Poison Spyder Customs™,
the products in question can be repaired or
replaced when found defective. Prior to any
replacement or repair, written authorization must
be obtained from Poison Spyder Customs™.
Failure to contact us prior to having warranty work
preformed will immediately void all applicable
warranties; and it is then the sole responsibility
of the customer to remit any payment incurred.
The warranty expressed above is the sole
warranty of Poison Spyder Customs™, and
any other expressed or implied warranties are
hereby specically excluded and disclaimed.
HOLD HARMLESS AGREEMENT
1. In purchasing a Poison Spyder Customs
Product™ I release, waive, discharge and
covenant not to sue Poison Spyder Customs
ofcers, servants, agents, or employees
(hereinafter referred to as Releasees) from
anyandallliability,claims,demands,actions
and causes of action whatsoever arising out
oforrelatedtoanyloss,damage,orinjury,
including death, that may be sustained by
me(oranyoneelse),anypropertybelonging
tome(oranyoneelse),whethercausedby
thenegligenceofthereleaseesorotherwise,
whileworkingon,usingoranyactivityrelated
to this product.
2. Iamfullyawareofrisksandhazardsconnected
with the use of a this product and I elect to
voluntarily engage in such use of this product
knowing that the use may be hazardous to
me and my property. I voluntarily assume full
responsibility for any risks of loss, property
damage or personal injury, including death,
that may be sustained by me (or anyone
else), or any loss or damage to property
owned by me (or anyone else), as a result
ofusingthisproduct,whethercausedbythe
negligence of releasees or otherwise.
3. I further agree to indemnify and hold harmless
thereleaseesfromanyloss,liability,damage
or costs, including court cost and attorney
fees,thattheymayincurduetomyuseofa
thisproduct,whethercausedbynegligence
of releasees or otherwise.
4. It is my express intent that this Release and
Hold Harmless Agreement shall bind the
members of my family and spouse, if I am
alive, and my heirs assigns and personal
representative, if I am deceased, and shall
bedeemedasarelease,waiver,discharge,
and covenant not to sue the above named
releasees. I further agree that this Waiver of
Liability and Hold Harmless Agreement shall
be construed in accordance with the laws of
the State of California.
By accepting this product, I acknowledge and
represent that I have read the above Waiver
and Liability and Hold Harmless Agreement,
understand it and accept it voluntarily as my
own free act and deed; no oral presentations,
statements, or inducements, apart from the
foregoing written agreement, have been made;
I am at least eighteen (18) years of age and
fully competent; and I execute this Release for
full, adequate and complete consideration fully
intending to be bound by same.
If you do not agree with the preceding Hold
Harmless Agreement, you may return the product
and receive a full refund. Please, contact a
Poison Spyder Customs™ sales representative
and they will issue a call tag for the product in
question. Once the product has been received
by Poison Spyder Customs™ a full refund will
be issued.
Other Poison Spyder Automobile Accessories manuals
Popular Automobile Accessories manuals by other brands

Whispbar
Whispbar K867W manual

Whispbar
Whispbar K623W Fitting instructions

banks
banks PowerPDA 61100 Owner's manual with installation instructions

Steeda
Steeda 50-1015-100 installation manual

AA Products
AA Products RB0013 instruction manual

Curt Manufacturing
Curt Manufacturing 13454 installation instructions