Polar Electro Polar Heat C1 User manual

C1 Heater Control Panel User Manual
1. Introduction
Please read these operating instructions carefully before starting to set up and operate. This
operating manual contains all the important information you need during setup and operation.
Please keep this operation manual for future reference.
1.1 Safety instructions
When entering the gas station, be sure to turn off the heater. Pay attention to all information
and tips, especially the safety instructions in this document and heater instructions!
1.2 Scope of use
The timer is used to start and switch off the heater equipment installed in the vehicle, as well
as for selecting the operating mode, setting the operating time and pre-selecting the start time.
1.3 General tips
The timer has a simple operating structure. All functions must be set and changed when
required by means of 4 buttons.
If the car has been disconnected (the battery has been disconnected) and then the power is
restored, the time and day of the week have to be set again.

2. Overview
2.1 Technical Parameters
Rated Voltage
12V
Operating Voltage Range
9V - 18V
Operating Temperature
-40℃- +65℃/-40℉- +149℉
Installation Location
Vehicle Interior
Timing Start
3start times can be preset within 7 days
2.2 Key Description
Time
Ambient Temperature
Operation Hours
Ambient Temperature
Time
On/Off/Confirm Key
键
Right/Up Key
Return Key
Left /Down Key
Off State
ON State
Boot Instructions

3. Operation & Setting
3.1 ON/OFF
Power on: Press any key to wake up the screen, short press the power on key to enter the
running time adjustment interface. Adjust the running time according to different needs,
press the left key to reduce the running time, press the right key to increase the running
time.
The running time can be set in the range of 10-120min. When adjusting to 120min, press
the right key again, it can be set to run for unlimited time. (Please use this function
carefully, it will consume a lot of battery power and the vehicle will be difficult to start.)
Turn on the machine, after 60 seconds, the screen enters hibernation mode. There is a
breathing light flashing in the middle of the screen, indicating that the heater is on.
Long press the on button for 5 seconds, the heater will follow the last running time and go
directly to the already on interface.
Shutdown: Press any key to wake up the screen. Long press the off button for 3 seconds,
the heater will turn off and the screen will return to the main menu interface. 60 seconds
later, the screen will enter hibernation mode.
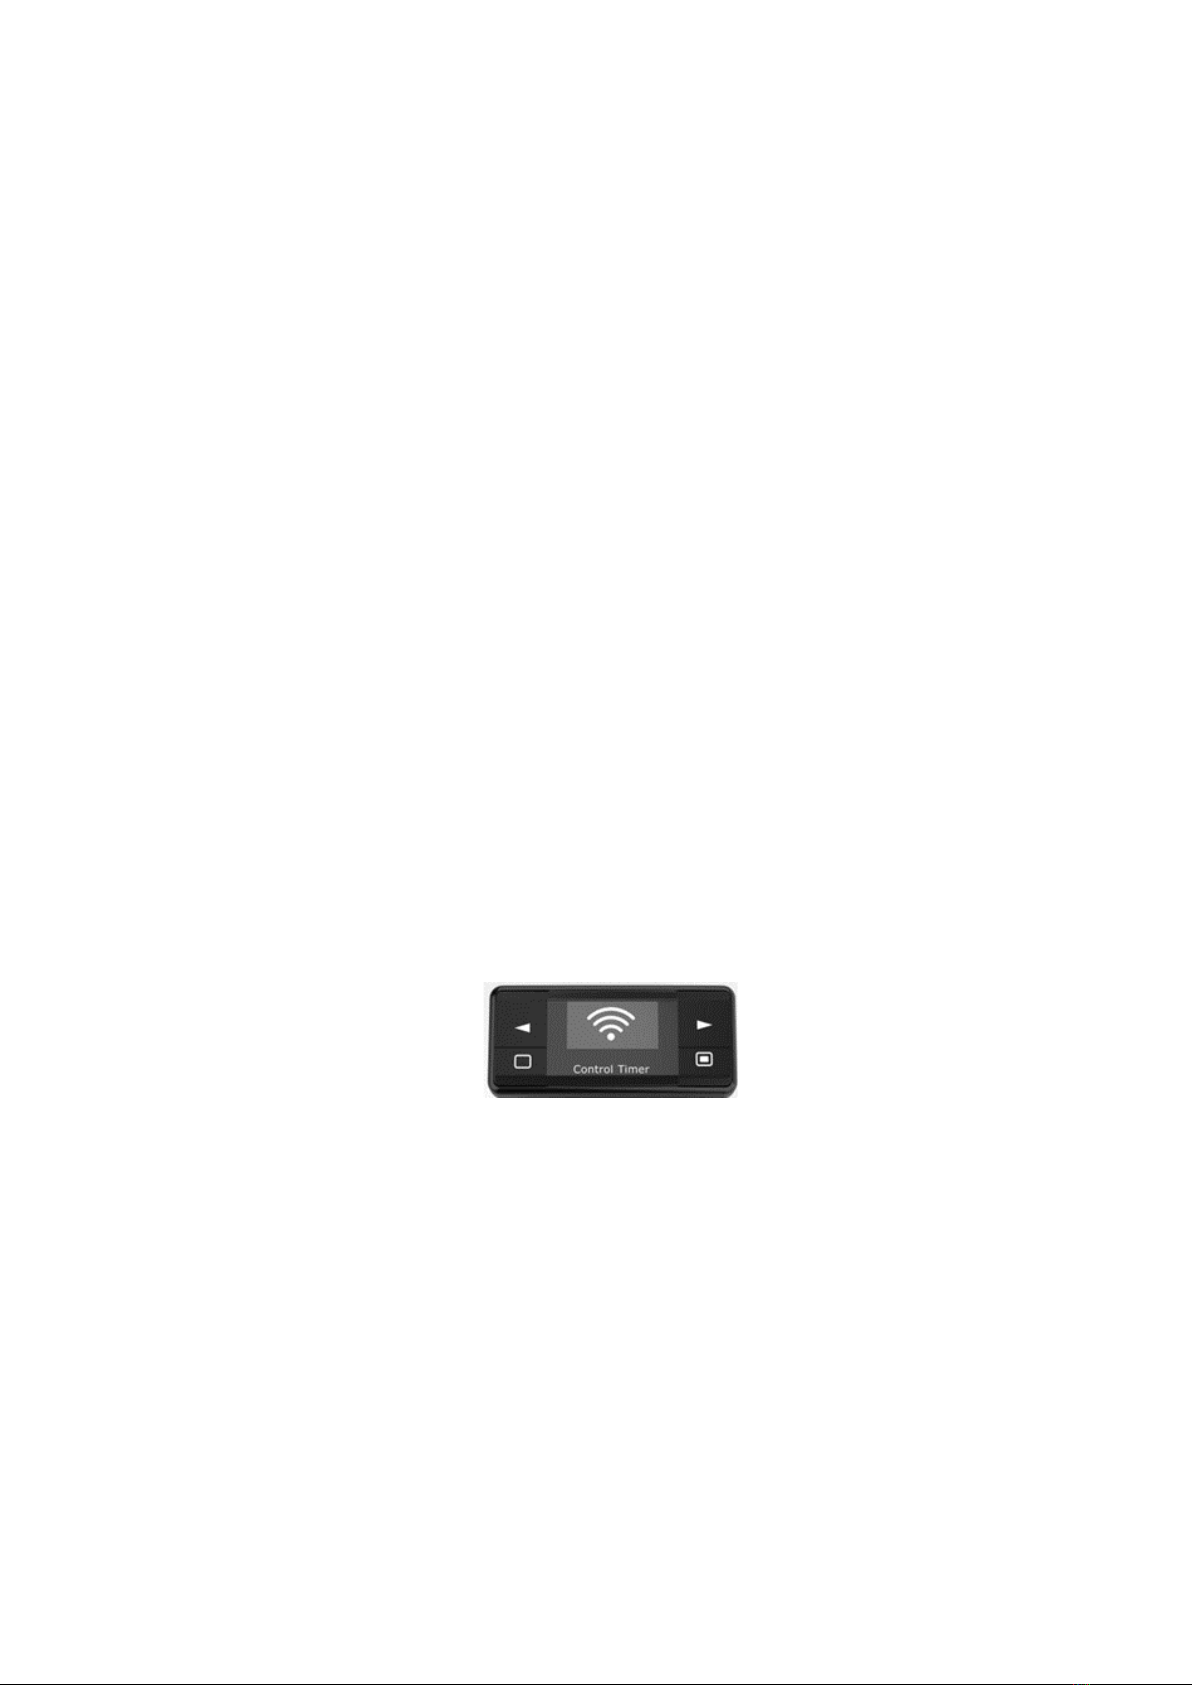
3.2 Remote Control Pairing
In the off state, press and hold the left button and return button at the same time for 3 seconds
to enter the remote-control matching interface. Press the ON or OFF key of the remote control
once at this time, and the interface will show the word OK when the match is successful. If the
match is unsuccessful, the word NOK will be displayed. You need to match the remote control
again; one timer can match two remote controls at the same time.
3.3 Remote Control Power ON/OFF
The remote control is one-way remote control, without back transmission function, the
remote-control distance is about 30 meters (open area).
Remote control power on: short press the remote control ON key, the timer screen will wake up,
the screen will show the power on interface, after 60 seconds, it will enter the hibernation state,
and the breathing light will flash in the middle of the screen.
Remote control shutdown: short press the remote control OFF key, the timer screen wakes up,
at this time the screen returns to the main menu interface, and will enter the hibernation state
after 60 seconds.
3.4 Time Setting
Press any key to wake up the screen, left and right key to select setting, press confirm key to
Remote Control Pairing

enter the time setting (24 hours). After pressing confirm key the clock flashes, press left and
right key to adjust the clock. After pressing confirm key, the minute flashes, press left and right
key to adjust the minute. Press confirm button again to return to clock screen. Press left and
right button to select week setting, press confirm button to enter week setting screen, press left
and right button to select week (MON.TUE.WEN.THR.FRI.SAT.SUN.).
3.5 Timer setting
Press any key to wake up the screen, left and right keys to select P timer function. Press
confirm key to enter the timer interface, 3 pre-selected times can be in the same day of the
week or divided in different days.
Press the confirmation key to enter P1 timing selection, then press the confirmation key, select
the week, press the confirmation key, the clock flashes, adjust the clock, then press the
confirmation key, set the running time, then press the confirmation key again, select ON or
OFF by the left and right keys, and finally press the confirmation key, the screen returns to the
main menu interface. At this time, a dot will appear in the upper left corner of the screen to
indicate that the timing function has been turned on. If you set P2 and P3, please press the
above operation.
When the pre-selected time is finished running, the tick behind P1 will be cancelled, indicating
that P1 is finished running. If P2 and P3 do not turn on the timing function, the dot prompt in
the upper left corner of the screen turns off at this time.
3.6 Function Inquiry
In the power on state, press any key to wake up the screen, press and hold the left key and
right key at the same time for 3 seconds to enter the function query interface, arrange the data
from top to bottom: fan speed, voltage, oil pump frequency, water temperature, press the
return key to return to the main menu interface.
Timing Setting Interface
Time Setting
Week Setting

4Faults & Solutions
4.1 Error Code
Error
Code
Error of Issue
Troubleshooting
E-01
The heater failed to
ignite
Two ignition failures, check the oil circuit and intake and
exhaust.
E-02
Flame goes out
The flame goes out during operation, check the oil
circuit.
E-03
The voltage is too high
The voltage is continuously higher than 16V for 5
seconds
E-04
The voltage is too low
The voltage is continuously lower than 10V for 20
seconds
E-05
Water temperature
sensor
Open circuit or short circuit
E-06
Overheating sensor
Open circuit or short circuit
E-07
The fuel pump is
malfunctioning
Fuel pump open
E-08
Fan failure
Open circuit or short circuit
E-09
The glow plug is
malfunctioning
Open circuit or short circuit
E-10
The glow plug power is
too small
The glow plug heat does not reach the set value
E-11
The heater is
overheated
The water circuit is blocked or the antifreeze is lacking
E-12
Overheating lock
machine
Three consecutive overheating failures
E-13
Ignition fails and locks
the machine
The heater fails E-01 twice in a row, and the machine
locks
E-14
Water pump failure
Short circuit of water pump
E-15
Lin communication
failure
Lin communication line failure
4.2 Fault solution
If the heater fails in the power-on state, the screen will show E-XX. Press and hold the
power-off button for 3 seconds to turn off the heater. 3 seconds later, turn on the heater again
and the fault code will be cleared. If the fault is not removed, the fault code will still appear until
the fault is removed. See the fault code table for details.
If the fault E-12 and E-13 appear, the heater is already in a locked state at this time. Shutdown
state, you need to pull off the heater fuse (20A) for 3 seconds, and then reinstall the fuse, the
machine lock-up fault is removed.
Table of contents
Popular Heater manuals by other brands

Pineware
Pineware PHH03 Instructions and warranty

Klarstein
Klarstein Bornholm Smart manual

Dancover
Dancover PALMA TWIN manual

Runtal
Runtal EWP series Owner's manual & operating instructions

Sonnenkonig
Sonnenkonig MAXIMO 1000 instructions

Comfort Glow
Comfort Glow CGR18P OWNER'S OPERATION AND INSTALLATION MANUAL

Lasco
Lasco 5775 Important instructions & operating manual

STIEBEL ELTRON
STIEBEL ELTRON CK 15 E Operation and installation

Frico
Frico IRCF3000 Mounting and operating instructions

Greentouch
Greentouch MrHeater 1046HI-09-107 Assembly / care & use instructions

Wilfa
Wilfa RAY CTG-1500W operating instructions

Nibe
Nibe ELK 15 Installation and maintenance instructions