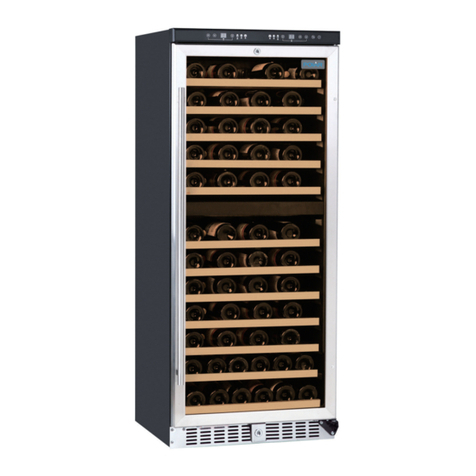
Polar Electro W518 User manual

Wijnklimaatkast
W518 -42 flessen /W519 - 66 flessen
Handleiding
Armoire à vin
W518 - bouteilles/W519 - 66 bouteilles
Mode d'emploi
Weinkühlvitrine
W518 - 42 flaschen/W519 - 66 flaschen
Bedienungsanleitung
Refrigeratore per vini
W518 - 42 bottiglie/W519 - 66 bottiglie
Manuale di istruzioni
Refrigerador para vinos
W518 - 42 botellas/ W519 - 66 botellas
Manual de instrucciones
Expositor de vinhos refrigerado
W518 42 garrafas/W519 66 garrafas
Manual de instruções
Vinkyl
W518 - 42 flaska/W519 - 66 flaska
Bruksanvisning
Vinkøler
W518 - 42 flaska/W519 - 66 flaska
Instruktionsvejledning
Vinkjøle
W518 - 42 flasker/W519 - 66 flasker
Brukerhåndbok
Viinikaappi
W518 - 42 pulloa/W519 - 66 pulloa
Ohjekirja
NL
FR
DE
IT
ES
PT
S
DK
N
FIN
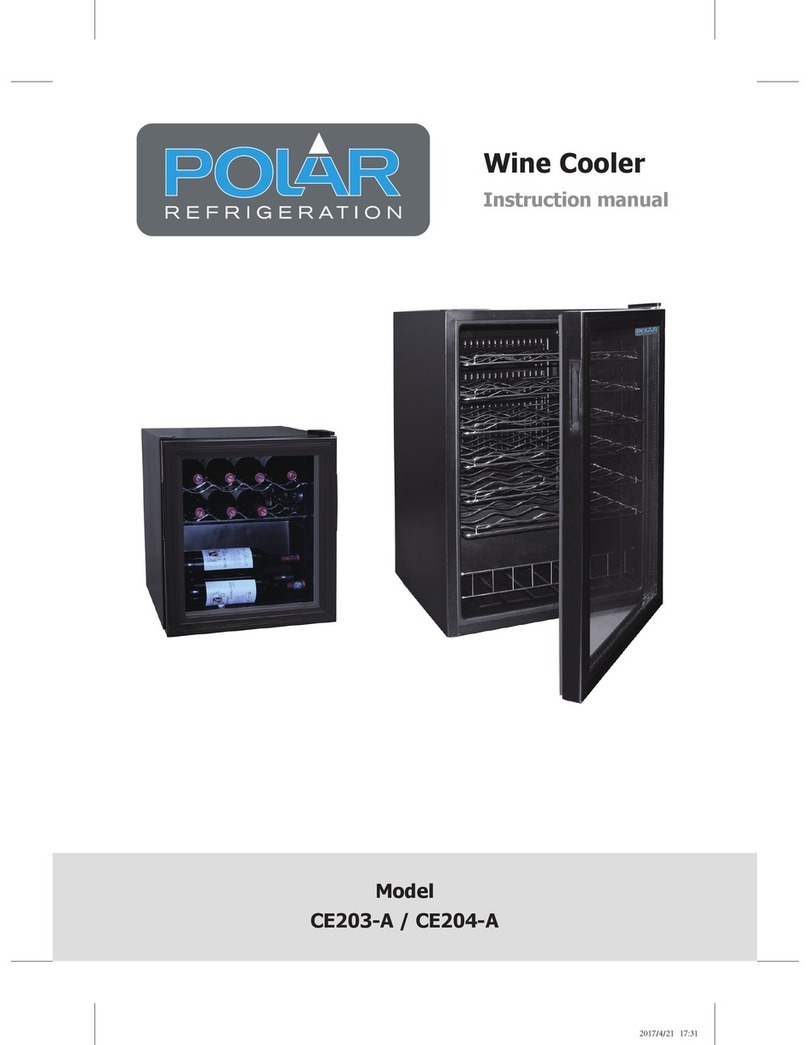
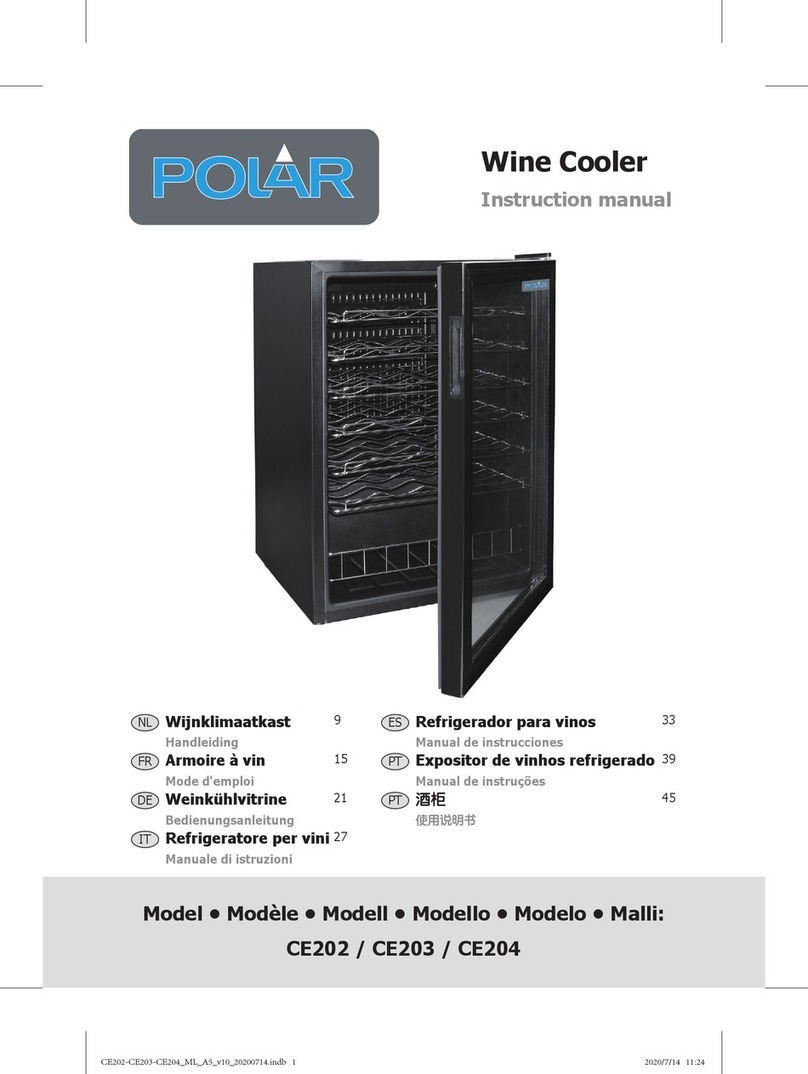
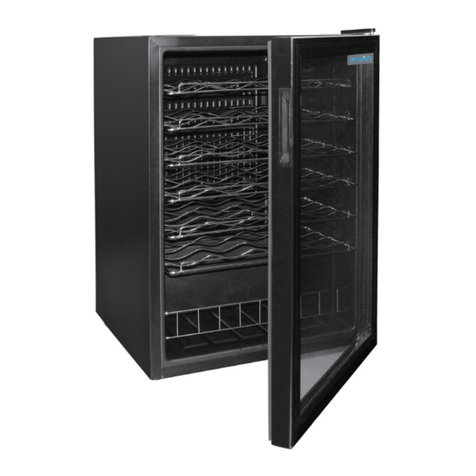
Wine Cooler
W518 - 42 Bottle
W519 - 66 Bottle
Instruction manual
Model •Modèle •Modell •Modello •Modelo •Malli:
W518/W519

Table of Contents
Safety Tips . . . . . . . . . . . . . . . . . . . . . . . . . . . . . . . . . . . . . . . . . . . . . . . . . . . . . . . . . . 1
Introduction . . . . . . . . . . . . . . . . . . . . . . . . . . . . . . . . . . . . . . . . . . . . . . . . . . . . . . . . 1
Pack Contents . . . . . . . . . . . . . . . . . . . . . . . . . . . . . . . . . . . . . . . . . . . . . . . . . . . . . . 1
Installation . . . . . . . . . . . . . . . . . . . . . . . . . . . . . . . . . . . . . . . . . . . . . . . . . . . . . . . . . . 2
Reversing the Door . . . . . . . . . . . . . . . . . . . . . . . . . . . . . . . . . . . . . . . . . . . . 2
Attach the Door Handle . . . . . . . . . . . . . . . . . . . . . . . . . . . . . . . . . . . . . . . . . 3
Operation . . . . . . . . . . . . . . . . . . . . . . . . . . . . . . . . . . . . . . . . . . . . . . . . . . . . . . . . . . 3
Control panel . . . . . . . . . . . . . . . . . . . . . . . . . . . . . . . . . . . . . . . . . . . . . . . . . 3
Setting the Temperature . . . . . . . . . . . . . . . . . . . . . . . . . . . . . . . . . . . . . . . . . 4
Storing Mixed Bottles . . . . . . . . . . . . . . . . . . . . . . . . . . . . . . . . . . . . . . . . . . . 4
Turn the Light On/Off . . . . . . . . . . . . . . . . . . . . . . . . . . . . . . . . . . . . . . . . . . 4
Cleaning, Care & Maintenance . . . . . . . . . . . . . . . . . . . . . . . . . . . . . . . . . . . . . . . . . . 4
Replacing the Bulb . . . . . . . . . . . . . . . . . . . . . . . . . . . . . . . . . . . . . . . . . . . . . . 4
Troubleshooting . . . . . . . . . . . . . . . . . . . . . . . . . . . . . . . . . . . . . . . . . . . . . . . . . . . . . 5
Alarm Codes . . . . . . . . . . . . . . . . . . . . . . . . . . . . . . . . . . . . . . . . . . . . . . . . . . 5
Technical Specifications . . . . . . . . . . . . . . . . . . . . . . . . . . . . . . . . . . . . . . . . . . . . . . . 6
Electrical Wiring . . . . . . . . . . . . . . . . . . . . . . . . . . . . . . . . . . . . . . . . . . . . . . . . . . . . . 6
Disposal . . . . . . . . . . . . . . . . . . . . . . . . . . . . . . . . . . . . . . . . . . . . . . . . . . . . . . . . . . . 6
Compliance . . . . . . . . . . . . . . . . . . . . . . . . . . . . . . . . . . . . . . . . . . . . . . . . . . . . . . . . . 6
Inhoudsopgave
Veiligheidstips . . . . . . . . . . . . . . . . . . . . . . . . . . . . . . . . . . . . . . . . . . . . . . . . . . . . . . . 7
Inleiding . . . . . . . . . . . . . . . . . . . . . . . . . . . . . . . . . . . . . . . . . . . . . . . . . . . . . . . . . . . . 7
Verpakkingsinhoud . . . . . . . . . . . . . . . . . . . . . . . . . . . . . . . . . . . . . . . . . . . . . . . . . . . 7
Installatie . . . . . . . . . . . . . . . . . . . . . . . . . . . . . . . . . . . . . . . . . . . . . . . . . . . . . . . . . . . 8
Richting deuropening veranderen . . . . . . . . . . . . . . . . . . . . . . . . . . . . . . . . . . 8
Deurhendel bevestigen . . . . . . . . . . . . . . . . . . . . . . . . . . . . . . . . . . . . . . . . . . 9
Bediening . . . . . . . . . . . . . . . . . . . . . . . . . . . . . . . . . . . . . . . . . . . . . . . . . . . . . . . . . . . 9
Bedieningspaneel . . . . . . . . . . . . . . . . . . . . . . . . . . . . . . . . . . . . . . . . . . . . . . . 9
Temperatuur instellen . . . . . . . . . . . . . . . . . . . . . . . . . . . . . . . . . . . . . . . . . . . 9
Gemengd bewaren van wijnflessen . . . . . . . . . . . . . . . . . . . . . . . . . . . . . . . . . 10
Verlichting in-/uitschakelen . . . . . . . . . . . . . . . . . . . . . . . . . . . . . . . . . . . . . . . 10
Reiniging, zorg & onderhoud . . . . . . . . . . . . . . . . . . . . . . . . . . . . . . . . . . . . . . . . . . . 10
Lamp vervangen . . . . . . . . . . . . . . . . . . . . . . . . . . . . . . . . . . . . . . . . . . . . . . . 10
Oplossen van problemen . . . . . . . . . . . . . . . . . . . . . . . . . . . . . . . . . . . . . . . . . . . . . . 11
Alarmcodes . . . . . . . . . . . . . . . . . . . . . . . . . . . . . . . . . . . . . . . . . . . . . . . . . . . 11
Technische specificaties . . . . . . . . . . . . . . . . . . . . . . . . . . . . . . . . . . . . . . . . . . . . . . . 12
Elektrische bedrading . . . . . . . . . . . . . . . . . . . . . . . . . . . . . . . . . . . . . . . . . . . . . . . . . 12
Afvalverwerking . . . . . . . . . . . . . . . . . . . . . . . . . . . . . . . . . . . . . . . . . . . . . . . . . . . . . 12
Productconformiteit . . . . . . . . . . . . . . . . . . . . . . . . . . . . . . . . . . . . . . . . . . . . . . . . . . 12
UK
NL

Sommaire
Conseils de sécurité . . . . . . . . . . . . . . . . . . . . . . . . . . . . . . . . . . . . . . . . . . . . . . . . . . 13
Introduction . . . . . . . . . . . . . . . . . . . . . . . . . . . . . . . . . . . . . . . . . . . . . . . . . . . . . . . . 13
Contenu de l'emballage . . . . . . . . . . . . . . . . . . . . . . . . . . . . . . . . . . . . . . . . . . . . . . . 13
Installation . . . . . . . . . . . . . . . . . . . . . . . . . . . . . . . . . . . . . . . . . . . . . . . . . . . . . . . . . . 13
Inversion du sens d'ouverture de la porte . . . . . . . . . . . . . . . . . . . . . . . . . . . 14
Pose de la poignée de porte . . . . . . . . . . . . . . . . . . . . . . . . . . . . . . . . . . . . . . 15
Fonctionnement . . . . . . . . . . . . . . . . . . . . . . . . . . . . . . . . . . . . . . . . . . . . . . . . . . . . . 15
Panneau de configuration . . . . . . . . . . . . . . . . . . . . . . . . . . . . . . . . . . . . . . . . 15
Réglage de la température . . . . . . . . . . . . . . . . . . . . . . . . . . . . . . . . . . . . . . . 15
Ranger des bouteilles mixtes . . . . . . . . . . . . . . . . . . . . . . . . . . . . . . . . . . . . . 16
Pour allumer / éteindre la lumière . . . . . . . . . . . . . . . . . . . . . . . . . . . . . . . . . 16
Nettoyage, entretien et maintenance . . . . . . . . . . . . . . . . . . . . . . . . . . . . . . . . . . . . 16
Pour changer l'ampoule . . . . . . . . . . . . . . . . . . . . . . . . . . . . . . . . . . . . . . . . . 16
Dépannage . . . . . . . . . . . . . . . . . . . . . . . . . . . . . . . . . . . . . . . . . . . . . . . . . . . . . . . . . 17
Codes d'alarme . . . . . . . . . . . . . . . . . . . . . . . . . . . . . . . . . . . . . . . . . . . . . . . . 17
Spécifications techniques . . . . . . . . . . . . . . . . . . . . . . . . . . . . . . . . . . . . . . . . . . . . . . 18
Raccordement électrique . . . . . . . . . . . . . . . . . . . . . . . . . . . . . . . . . . . . . . . . . . . . . . 18
Mise au rebut . . . . . . . . . . . . . . . . . . . . . . . . . . . . . . . . . . . . . . . . . . . . . . . . . . . . . . . 18
Conformité . . . . . . . . . . . . . . . . . . . . . . . . . . . . . . . . . . . . . . . . . . . . . . . . . . . . . . . . . 18
Inhalt
Sicherheitshinweise . . . . . . . . . . . . . . . . . . . . . . . . . . . . . . . . . . . . . . . . . . . . . . . . . . 19
Einführung . . . . . . . . . . . . . . . . . . . . . . . . . . . . . . . . . . . . . . . . . . . . . . . . . . . . . . . . . . 19
Lieferumfang . . . . . . . . . . . . . . . . . . . . . . . . . . . . . . . . . . . . . . . . . . . . . . . . . . . . . . . . 19
Montage . . . . . . . . . . . . . . . . . . . . . . . . . . . . . . . . . . . . . . . . . . . . . . . . . . . . . . . . . . . 20
Montage der Tür zur anderen Seite . . . . . . . . . . . . . . . . . . . . . . . . . . . . . . . . 20
Anbringen des Türgriffs . . . . . . . . . . . . . . . . . . . . . . . . . . . . . . . . . . . . . . . . . 21
Betrieb . . . . . . . . . . . . . . . . . . . . . . . . . . . . . . . . . . . . . . . . . . . . . . . . . . . . . . . . . . . . 21
Bedienfeld . . . . . . . . . . . . . . . . . . . . . . . . . . . . . . . . . . . . . . . . . . . . . . . . . . . . 21
Einstellen der Temperatur . . . . . . . . . . . . . . . . . . . . . . . . . . . . . . . . . . . . . . . 21
Lagern gemischter Flaschen . . . . . . . . . . . . . . . . . . . . . . . . . . . . . . . . . . . . . . 22
Ein- und Ausschalten der Beleuchtung . . . . . . . . . . . . . . . . . . . . . . . . . . . . . . 22
Reinigung, Pflege und Wartung . . . . . . . . . . . . . . . . . . . . . . . . . . . . . . . . . . . . . . . . . 22
Auswechseln der Glühbirne . . . . . . . . . . . . . . . . . . . . . . . . . . . . . . . . . . . . . . 22
Störungssuche . . . . . . . . . . . . . . . . . . . . . . . . . . . . . . . . . . . . . . . . . . . . . . . . . . . . . . . 23
Warncodes . . . . . . . . . . . . . . . . . . . . . . . . . . . . . . . . . . . . . . . . . . . . . . . . . . . 23
Technische Spezifikationen . . . . . . . . . . . . . . . . . . . . . . . . . . . . . . . . . . . . . . . . . . . . . 24
Elektroanschlüsse . . . . . . . . . . . . . . . . . . . . . . . . . . . . . . . . . . . . . . . . . . . . . . . . . . . . 24
Entsorgung . . . . . . . . . . . . . . . . . . . . . . . . . . . . . . . . . . . . . . . . . . . . . . . . . . . . . . . . . 24
Konformität . . . . . . . . . . . . . . . . . . . . . . . . . . . . . . . . . . . . . . . . . . . . . . . . . . . . . . . . 24
FR
DE

Indice
Suggerimenti per la sicurezza . . . . . . . . . . . . . . . . . . . . . . . . . . . . . . . . . . . . . . . . . . . 25
Introduzione . . . . . . . . . . . . . . . . . . . . . . . . . . . . . . . . . . . . . . . . . . . . . . . . . . . . . . . . 25
Contenuto dell'imballaggio . . . . . . . . . . . . . . . . . . . . . . . . . . . . . . . . . . . . . . . . . . . . . 25
Installazione . . . . . . . . . . . . . . . . . . . . . . . . . . . . . . . . . . . . . . . . . . . . . . . . . . . . . . . . 26
Inversione del portello . . . . . . . . . . . . . . . . . . . . . . . . . . . . . . . . . . . . . . . . . . 26
Montaggio della maniglia del portello . . . . . . . . . . . . . . . . . . . . . . . . . . . . . . . 27
Funzionamento . . . . . . . . . . . . . . . . . . . . . . . . . . . . . . . . . . . . . . . . . . . . . . . . . . . . . . 27
Pannello di controllo . . . . . . . . . . . . . . . . . . . . . . . . . . . . . . . . . . . . . . . . . . . . 27
Impostazione della temperatura . . . . . . . . . . . . . . . . . . . . . . . . . . . . . . . . . . . 27
Conservazione di bottiglie di diverso tipo . . . . . . . . . . . . . . . . . . . . . . . . . . . 28
Accensione/spegnimento della luce . . . . . . . . . . . . . . . . . . . . . . . . . . . . . . . . 28
Pulizia e manutenzione . . . . . . . . . . . . . . . . . . . . . . . . . . . . . . . . . . . . . . . . . . . . . . . . 28
Sostituzione della lampadina . . . . . . . . . . . . . . . . . . . . . . . . . . . . . . . . . . . . . . 28
Risoluzione dei problemi . . . . . . . . . . . . . . . . . . . . . . . . . . . . . . . . . . . . . . . . . . . . . . 29
Codici di allarme . . . . . . . . . . . . . . . . . . . . . . . . . . . . . . . . . . . . . . . . . . . . . . . 29
Specifiche tecniche . . . . . . . . . . . . . . . . . . . . . . . . . . . . . . . . . . . . . . . . . . . . . . . . . . . 30
Cablaggi elettrici . . . . . . . . . . . . . . . . . . . . . . . . . . . . . . . . . . . . . . . . . . . . . . . . . . . . . 30
Smaltimento . . . . . . . . . . . . . . . . . . . . . . . . . . . . . . . . . . . . . . . . . . . . . . . . . . . . . . . . 30
Conformità . . . . . . . . . . . . . . . . . . . . . . . . . . . . . . . . . . . . . . . . . . . . . . . . . . . . . . . . . 30
Índice
Consejos de Seguridad . . . . . . . . . . . . . . . . . . . . . . . . . . . . . . . . . . . . . . . . . . . . . . . . 31
Introducción . . . . . . . . . . . . . . . . . . . . . . . . . . . . . . . . . . . . . . . . . . . . . . . . . . . . . . . . 31
Contenido del Conjunto . . . . . . . . . . . . . . . . . . . . . . . . . . . . . . . . . . . . . . . . . . . . . . 31
Instalación . . . . . . . . . . . . . . . . . . . . . . . . . . . . . . . . . . . . . . . . . . . . . . . . . . . . . . . . . . 32
Cambio de dirección de apertura de la puerta . . . . . . . . . . . . . . . . . . . . . . . 32
Acoplamiento del pomo de la puerta . . . . . . . . . . . . . . . . . . . . . . . . . . . . . . . 33
Funcionamiento . . . . . . . . . . . . . . . . . . . . . . . . . . . . . . . . . . . . . . . . . . . . . . . . . . . . . 33
Panel de Control . . . . . . . . . . . . . . . . . . . . . . . . . . . . . . . . . . . . . . . . . . . . . . . 33
Ajuste de la temperatura . . . . . . . . . . . . . . . . . . . . . . . . . . . . . . . . . . . . . . . . 33
Almacenamiento de botellas mezcladas . . . . . . . . . . . . . . . . . . . . . . . . . . . . . 34
Activación / desactivación de la luz . . . . . . . . . . . . . . . . . . . . . . . . . . . . . . . . 34
Limpieza, Cuidado y Mantenimiento . . . . . . . . . . . . . . . . . . . . . . . . . . . . . . . . . . . . . 34
Cambio de la bombilla . . . . . . . . . . . . . . . . . . . . . . . . . . . . . . . . . . . . . . . . . . 34
Resolución de problemas . . . . . . . . . . . . . . . . . . . . . . . . . . . . . . . . . . . . . . . . . . . . . . 35
Códigos de Alarma . . . . . . . . . . . . . . . . . . . . . . . . . . . . . . . . . . . . . . . . . . . . . 35
Especificaciones Técnicas . . . . . . . . . . . . . . . . . . . . . . . . . . . . . . . . . . . . . . . . . . . . . . 36
Cableado Eléctrico . . . . . . . . . . . . . . . . . . . . . . . . . . . . . . . . . . . . . . . . . . . . . . . . . . . 36
Desecho . . . . . . . . . . . . . . . . . . . . . . . . . . . . . . . . . . . . . . . . . . . . . . . . . . . . . . . . . . . 36
Cumplimiento . . . . . . . . . . . . . . . . . . . . . . . . . . . . . . . . . . . . . . . . . . . . . . . . . . . . . . . 36
IT
ES

Índice
Conselhos de segurança . . . . . . . . . . . . . . . . . . . . . . . . . . . . . . . . . . . . . . . . . . . . . . . 37
Introdução . . . . . . . . . . . . . . . . . . . . . . . . . . . . . . . . . . . . . . . . . . . . . . . . . . . . . . . . . 37
Conteúdo da embalagem . . . . . . . . . . . . . . . . . . . . . . . . . . . . . . . . . . . . . . . . . . . . . . 37
Instalação . . . . . . . . . . . . . . . . . . . . . . . . . . . . . . . . . . . . . . . . . . . . . . . . . . . . . . . . . . 38
Mudar a direcção de abertura da porta . . . . . . . . . . . . . . . . . . . . . . . . . . . . . 38
Colocar o manípulo na porta . . . . . . . . . . . . . . . . . . . . . . . . . . . . . . . . . . . . . 39
Funcionamento . . . . . . . . . . . . . . . . . . . . . . . . . . . . . . . . . . . . . . . . . . . . . . . . . . . . . . 39
Painel de controlo . . . . . . . . . . . . . . . . . . . . . . . . . . . . . . . . . . . . . . . . . . . . . . 39
Configurar a temperatura . . . . . . . . . . . . . . . . . . . . . . . . . . . . . . . . . . . . . . . . 39
Guardar vinhos misturados . . . . . . . . . . . . . . . . . . . . . . . . . . . . . . . . . . . . . . 40
Ligar/desligar a iluminação . . . . . . . . . . . . . . . . . . . . . . . . . . . . . . . . . . . . . . . 40
Limpeza, cuidados & manutenção . . . . . . . . . . . . . . . . . . . . . . . . . . . . . . . . . . . . . . . 40
Substituir a lâmpada . . . . . . . . . . . . . . . . . . . . . . . . . . . . . . . . . . . . . . . . . . . . 40
Resolução de problemas . . . . . . . . . . . . . . . . . . . . . . . . . . . . . . . . . . . . . . . . . . . . . . . 41
Códigos de alarme . . . . . . . . . . . . . . . . . . . . . . . . . . . . . . . . . . . . . . . . . . . . . 41
Especificações técnicas . . . . . . . . . . . . . . . . . . . . . . . . . . . . . . . . . . . . . . . . . . . . . . . . 42
Cablagem eléctrica . . . . . . . . . . . . . . . . . . . . . . . . . . . . . . . . . . . . . . . . . . . . . . . . . . . 42
Tratamento de lixo e resíduos . . . . . . . . . . . . . . . . . . . . . . . . . . . . . . . . . . . . . . . . . . 42
Conformidade . . . . . . . . . . . . . . . . . . . . . . . . . . . . . . . . . . . . . . . . . . . . . . . . . . . . . . . 42
Innehållsförteckning
Säkerhetsråd . . . . . . . . . . . . . . . . . . . . . . . . . . . . . . . . . . . . . . . . . . . . . . . . . . . . . . . . 43
Inledning . . . . . . . . . . . . . . . . . . . . . . . . . . . . . . . . . . . . . . . . . . . . . . . . . . . . . . . . . . . 43
Förpackningsinnehåll . . . . . . . . . . . . . . . . . . . . . . . . . . . . . . . . . . . . . . . . . . . . . . . . . . 43
IInstallation . . . . . . . . . . . . . . . . . . . . . . . . . . . . . . . . . . . . . . . . . . . . . . . . . . . . . . . . . 44
Byta sida på dörren . . . . . . . . . . . . . . . . . . . . . . . . . . . . . . . . . . . . . . . . . . . . . 44
Fästa dörrhandtaget . . . . . . . . . . . . . . . . . . . . . . . . . . . . . . . . . . . . . . . . . . . . 45
Drift . . . . . . . . . . . . . . . . . . . . . . . . . . . . . . . . . . . . . . . . . . . . . . . . . . . . . . . . . . . . . . 45
Kontrollpanel . . . . . . . . . . . . . . . . . . . . . . . . . . . . . . . . . . . . . . . . . . . . . . . . . 45
Ställa in temperatur . . . . . . . . . . . . . . . . . . . . . . . . . . . . . . . . . . . . . . . . . . . . . 45
Förvara blandade flaskor . . . . . . . . . . . . . . . . . . . . . . . . . . . . . . . . . . . . . . . . . 46
Sätta på/stänga av ljuset . . . . . . . . . . . . . . . . . . . . . . . . . . . . . . . . . . . . . . . . . . 46
Rengöring, omvårdnad och underhåll . . . . . . . . . . . . . . . . . . . . . . . . . . . . . . . . . . . . 46
Byta ut glödlampan . . . . . . . . . . . . . . . . . . . . . . . . . . . . . . . . . . . . . . . . . . . . . 46
Felsökning . . . . . . . . . . . . . . . . . . . . . . . . . . . . . . . . . . . . . . . . . . . . . . . . . . . . . . . . . . 47
Larmkoder . . . . . . . . . . . . . . . . . . . . . . . . . . . . . . . . . . . . . . . . . . . . . . . . . . . . 47
Tekniska specifikationer . . . . . . . . . . . . . . . . . . . . . . . . . . . . . . . . . . . . . . . . . . . . . . . 48
Elektriska kablar . . . . . . . . . . . . . . . . . . . . . . . . . . . . . . . . . . . . . . . . . . . . . . . . . . . . . 48
Avfallshantering . . . . . . . . . . . . . . . . . . . . . . . . . . . . . . . . . . . . . . . . . . . . . . . . . . . . . . 48
Tillmötesgående . . . . . . . . . . . . . . . . . . . . . . . . . . . . . . . . . . . . . . . . . . . . . . . . . . . . . 48
PT
S

Indholdsfortegnelse
Sikkerhedstips . . . . . . . . . . . . . . . . . . . . . . . . . . . . . . . . . . . . . . . . . . . . . . . . . . . . . . . 49
Introduktion . . . . . . . . . . . . . . . . . . . . . . . . . . . . . . . . . . . . . . . . . . . . . . . . . . . . . . . . 49
Emballagens indhold . . . . . . . . . . . . . . . . . . . . . . . . . . . . . . . . . . . . . . . . . . . . . . . . . . 49
Installation . . . . . . . . . . . . . . . . . . . . . . . . . . . . . . . . . . . . . . . . . . . . . . . . . . . . . . . . . . 50
Skift af lågens åbneretning . . . . . . . . . . . . . . . . . . . . . . . . . . . . . . . . . . . . . . . . 50
Monter håndtaget . . . . . . . . . . . . . . . . . . . . . . . . . . . . . . . . . . . . . . . . . . . . . . 51
Drift . . . . . . . . . . . . . . . . . . . . . . . . . . . . . . . . . . . . . . . . . . . . . . . . . . . . . . . . . . . . . . 51
Kontrolpanel . . . . . . . . . . . . . . . . . . . . . . . . . . . . . . . . . . . . . . . . . . . . . . . . . . 51
Indstilling temperatur . . . . . . . . . . . . . . . . . . . . . . . . . . . . . . . . . . . . . . . . . . . 51
Opbevaring af blandede flasker . . . . . . . . . . . . . . . . . . . . . . . . . . . . . . . . . . . . 52
Tænd/sluk lys . . . . . . . . . . . . . . . . . . . . . . . . . . . . . . . . . . . . . . . . . . . . . . . . . . 52
Rengøring, pleje og vedligeholdelse . . . . . . . . . . . . . . . . . . . . . . . . . . . . . . . . . . . . . . 52
Udskiftning af pære . . . . . . . . . . . . . . . . . . . . . . . . . . . . . . . . . . . . . . . . . . . . . 52
Fejlfinding . . . . . . . . . . . . . . . . . . . . . . . . . . . . . . . . . . . . . . . . . . . . . . . . . . . . . . . . . . 53
Alarmkoder . . . . . . . . . . . . . . . . . . . . . . . . . . . . . . . . . . . . . . . . . . . . . . . . . . . 53
Tekniske specifikationer . . . . . . . . . . . . . . . . . . . . . . . . . . . . . . . . . . . . . . . . . . . . . . . 54
El-kabler . . . . . . . . . . . . . . . . . . . . . . . . . . . . . . . . . . . . . . . . . . . . . . . . . . . . . . . . . . . 54
Bortskaffelse . . . . . . . . . . . . . . . . . . . . . . . . . . . . . . . . . . . . . . . . . . . . . . . . . . . . . . . . 54
Overensstemmelse . . . . . . . . . . . . . . . . . . . . . . . . . . . . . . . . . . . . . . . . . . . . . . . . . . . 54
Innhold
Sikkerhetstips . . . . . . . . . . . . . . . . . . . . . . . . . . . . . . . . . . . . . . . . . . . . . . . . . . . . . . . 55
Innledning . . . . . . . . . . . . . . . . . . . . . . . . . . . . . . . . . . . . . . . . . . . . . . . . . . . . . . . . . . 55
Pakkeinnhold . . . . . . . . . . . . . . . . . . . . . . . . . . . . . . . . . . . . . . . . . . . . . . . . . . . . . . . . 55
Installasjon . . . . . . . . . . . . . . . . . . . . . . . . . . . . . . . . . . . . . . . . . . . . . . . . . . . . . . . . . 55
Montere døra andre veien . . . . . . . . . . . . . . . . . . . . . . . . . . . . . . . . . . . . . . . 56
Feste dørhåndtaket . . . . . . . . . . . . . . . . . . . . . . . . . . . . . . . . . . . . . . . . . . . . . 57
Bruk . . . . . . . . . . . . . . . . . . . . . . . . . . . . . . . . . . . . . . . . . . . . . . . . . . . . . . . . . . . . . . 57
Kontrollpanel . . . . . . . . . . . . . . . . . . . . . . . . . . . . . . . . . . . . . . . . . . . . . . . . . 57
Innstille temperaturen . . . . . . . . . . . . . . . . . . . . . . . . . . . . . . . . . . . . . . . . . . . 57
Lagring av blandede flasker . . . . . . . . . . . . . . . . . . . . . . . . . . . . . . . . . . . . . . . 58
Slå lyset Av/På . . . . . . . . . . . . . . . . . . . . . . . . . . . . . . . . . . . . . . . . . . . . . . . . . 58
Rengjøring, ettersyn og vedlikehold . . . . . . . . . . . . . . . . . . . . . . . . . . . . . . . . . . . . . . 58
Skifte lyspære . . . . . . . . . . . . . . . . . . . . . . . . . . . . . . . . . . . . . . . . . . . . . . . . . 58
Feilsøking . . . . . . . . . . . . . . . . . . . . . . . . . . . . . . . . . . . . . . . . . . . . . . . . . . . . . . . . . . 59
Alarmkoder . . . . . . . . . . . . . . . . . . . . . . . . . . . . . . . . . . . . . . . . . . . . . . . . . . . 59
Tekniske spesifikasjoner . . . . . . . . . . . . . . . . . . . . . . . . . . . . . . . . . . . . . . . . . . . . . . . 60
Elektrisk tilkopling . . . . . . . . . . . . . . . . . . . . . . . . . . . . . . . . . . . . . . . . . . . . . . . . . . . 60
Deponering . . . . . . . . . . . . . . . . . . . . . . . . . . . . . . . . . . . . . . . . . . . . . . . . . . . . . . . . . 60
Samsvar . . . . . . . . . . . . . . . . . . . . . . . . . . . . . . . . . . . . . . . . . . . . . . . . . . . . . . . . . . . . 60
DK
N

Sisällysluettelo
Turvallisuusvihjeitä . . . . . . . . . . . . . . . . . . . . . . . . . . . . . . . . . . . . . . . . . . . . . . . . . . . 61
Johdanto . . . . . . . . . . . . . . . . . . . . . . . . . . . . . . . . . . . . . . . . . . . . . . . . . . . . . . . . . . . 61
Pakkauksen sisältö . . . . . . . . . . . . . . . . . . . . . . . . . . . . . . . . . . . . . . . . . . . . . . . . . . . 61
Asennus . . . . . . . . . . . . . . . . . . . . . . . . . . . . . . . . . . . . . . . . . . . . . . . . . . . . . . . . . . . . 62
Oven kääntäminen . . . . . . . . . . . . . . . . . . . . . . . . . . . . . . . . . . . . . . . . . . . . . 62
Ovenkahvan kiinnittäminen . . . . . . . . . . . . . . . . . . . . . . . . . . . . . . . . . . . . . . . 63
Käyttö . . . . . . . . . . . . . . . . . . . . . . . . . . . . . . . . . . . . . . . . . . . . . . . . . . . . . . . . . . . . . 63
Ohjauspaneeli . . . . . . . . . . . . . . . . . . . . . . . . . . . . . . . . . . . . . . . . . . . . . . . . . 63
Setting the Temperature . . . . . . . . . . . . . . . . . . . . . . . . . . . . . . . . . . . . . . . . . 63
Eri viiniä sisältävien pullojen säilytys . . . . . . . . . . . . . . . . . . . . . . . . . . . . . . . . 64
Valon kytkeminen päälle/pois päältä . . . . . . . . . . . . . . . . . . . . . . . . . . . . . . . . 64
Puhdistus, hoito & huolto . . . . . . . . . . . . . . . . . . . . . . . . . . . . . . . . . . . . . . . . . . . . . . 64
Lampun vaihtaminen . . . . . . . . . . . . . . . . . . . . . . . . . . . . . . . . . . . . . . . . . . . . 64
Vianetsintä . . . . . . . . . . . . . . . . . . . . . . . . . . . . . . . . . . . . . . . . . . . . . . . . . . . . . . . . . 65
Hälytyskoodit . . . . . . . . . . . . . . . . . . . . . . . . . . . . . . . . . . . . . . . . . . . . . . . . . 65
Tekniset tiedot . . . . . . . . . . . . . . . . . . . . . . . . . . . . . . . . . . . . . . . . . . . . . . . . . . . . . . 66
Sähköjohdot . . . . . . . . . . . . . . . . . . . . . . . . . . . . . . . . . . . . . . . . . . . . . . . . . . . . . . . . 66
Hävitys . . . . . . . . . . . . . . . . . . . . . . . . . . . . . . . . . . . . . . . . . . . . . . . . . . . . . . . . . . . . 66
Vaatimustenmukaisuus . . . . . . . . . . . . . . . . . . . . . . . . . . . . . . . . . . . . . . . . . . . . . . . . 66
FIN

1
UK
Safety Tips
• Position on a flat, stable surface.
• A service agent/qualified technician should carry out installation and any repairs if required. Do not
remove any components or service panels on this product.
• Consult Local and National Standards to comply with the following:
• Health and Safety at Work Legislation
• BS EN Codes of Practice
• Fire Precautions
• IEE Wiring Regulations
• Building Regulations
• DO NOT immerse in water, or use steam/jet washers to clean the unit.
• DO NOT cover the appliance when it is operating.
• DO NOT store food in the wine cooler.
• Always carry, store and handle the appliance in a vertical position.
• Never tilt the appliance more than 45° from the vertical.
• Not suitable for outdoor use.
• Keep all packaging away from children. Dispose of packaging in accordance to the regulations of local
authorities.
• If the power cord is damaged, it must be replaced by an POLAR agent or a recommended qualified
technician in order to avoid a hazard.
Introduction
Please take a few moments to carefully read through this manual. Correct maintenance and operation of
this machine will provide the best possible performance from your POLAR product.
Pack Contents
The following is included:
POLAR prides itself on quality and service, ensuring that at the time of packaging the contents are supplied
fully functional and free of damage.
Should you find any damage as a result of transit, please contact your POLAR dealer immediately.
• Wine Chiller
•Keysx2
• Door handle mounts x 2
• Door handle
•Screwsx2
• Screw caps x 2
• Instruction manual
• Slide out shelves x 6 (W518)
• Slide out shelves x 10 (W519)

2
UK
Telephone Helpline: 0845 146 2887 (United Kingdom)
Installation
1. Remove the appliance from the packaging and the protective film from all surfaces.
2. Avoid positioning the wine cooler in direct sunlight or damp areas.
3. When positioning the wine cooler, maintain a distance of 20cm (7 inches) between the appliance and
walls or other objects for ventilation. Increase this distance if the obstacle is a heat source.
4. If necessary, adjust the screw legs of the wine cooler to make it level.
Reversing the Door
Depending on the location of the appliance, it may be necessary to change the direction the door of the
wine cooler opens by changing the side of the door handle.
To reverse the door handle:
1. Remove the screw covers from the top of the
wine cooler with a small screwdriver.
Undo the two screws.
2. Lift off the back of the wine cooler lid.
3. Pull the lid forward to remove it.
4. Unscrew the three securing bolts and the upper
hinge pin.
5. Remove the upper door plate from the right
side position and place it on the left side of the
wine cooler. Attach the three securing bolts. Do
not insert the door securing pin at this stage.
6. If necessary, carefully tip the wine cooler back slightly to
gain access to the lower door bolt.
7. Unscrew the lower hinge pin and transfer the lower door
plate and pin assembly to the left side of the wine cooler.
8. Lift the door from the lower hinge pin and put to one
side.
9. Secure the lower door plate to the left side of the wine
cooler, attaching the securing bolts and the hinge pin.
10. Remove the upper and lower screw covers from the
left- hand side of the door, and reinsert them in the right-
hand side of the wine cooler.
11. Place the door on to the lower pin.
12. Insert the upper hinge pin and tighten, ensuring the seals around the door are not squashed.
13. Reattach the lid to the wine cooler. Ensure the front lip below the control panel is in place before
lowering the lid into position.
14. Replace the two screws and the two screw covers at the back of the lid.
Note: If the appliance has been moved or stored in a non-vertical position, stand it in an
upright position for approximately 12 hours before operation. If in doubt allow to stand.
Securing bolts
Upper
door pin
Plate
Door

3
UK
Attach the Door Handle
Once the positioning of the door has been decided, attach the
door handle.
1. Remove the two screw covers from the outer edge of the
door.
2. Remove the screw cap from the handle support and screw
into place.
3. Slot the handle bar onto the lower handle support.
4. Slot the upper handle support onto the handle bar and
screw into place.
5. Place the screw caps over the screws.
Operation
Control panel
Recommended Set Temperatures
Wine Temperature Lit LED
Red 16-18°C (60-65°F) Red
White 10-15°C (50-59°F) Green
Sparkling White 7-9°C (45-49°F) Amber
Rose 9-10°C (49-51°F) -
Note: These temperatures are an estimate and may need to be higher/lower depending
on the operational environment of the wine cooler.
Up/Down buttons
Temperature LED’s
Fahrenheit/Centigrade
LED’s
Fahrenheit/Centigrade
button
Light button

4
UK
Telephone Helpline: 0845 146 2887 (United Kingdom)
Setting the Temperature
1. When turned On, the appliance will display the current temperature within the cabinet.
2. Press the UP or DOWN buttons to display the set operating temperature.
3. Use the UP and DOWN buttons to reach the desired operating temperature.
4. To change the format the temperature is displayed in press the Fahrenheit/Centigrade button. The
Fahrenheit or Centigrade LED illuminates showing which format is selected.
Storing Mixed Bottles
Due to a slight temperature variance between the top and the bottom of the wine cooler, POLAR
recommend that bottles of white wine are stored in the bottom of the wine cooler and bottles of red wine
at the top.
Turn the Light On/Off
Press the Light button on the control panel to turn the light On/Off.
Cleaning, Care & Maintenance
• Always switch off and disconnect the power supply before cleaning.
• Remove all bottles from the appliance.
• Warm, soapy water is recommended for cleaning. Cleaning agents may leave harmful residues.
• A POLAR agent or qualified technician should carry out repairs if required.
• Periodically clean the bottom of the wine cooler compartment to remove any build-up of condensation.
Replacing the Bulb
1. Switch off the wine cooler and disconnect from the power supply.
2. Unscrew and remove the bulb cover from the roof of the wine cooler compartment.
3. Unscrew the bulb and replace with a new one.
4. Screw the bulb cover back on to the roof of the compartment.
Note: The factory default setting is 10°C (50°F).
Note: Before using the appliance for the first time, clean with warm soapy water.
Note: The bulb should be replaced with a SES 240V 10W bulb (Spare Code: AA391).

5
UK
Troubleshootin g
Alarm Codes
Fault Probable Cause Action
The appliance is
not working The appliance is not
switched on Check the appliance is plugged in correctly and switched on
Plug and lead are
damaged Call POLAR agent or qualified technician
Fuse in the plug has
blown Replace the plug fuse
Power supply Check power supply
Internal wiring fault Call POLAR agent or qualified technician
Appliance is noisy
or works
intermittently
Power fluctuations Turn off the wine cooler and restart after 3 minutes
Appliance is not level Adjust the feet to level the appliance
Winecoolercabinet
is not cold enough
Temperature set
incorrectly Check temperature and reset if necessary
External environment
may require colder
temperature
Check temperature and reset if necessary
The door is opened
too often Only open when necessary
Door seal is worn Call POLAR agent or qualified technician
The light does not
work Bulb has blown Replace bulb (see “Replacing the Bulb” on page 4)
Light switch set to Off Set light switch to On
Doors will not close
properly
Wine cooler is not
level Adjust the feet
Door has been
reversed and not
properly fitted
See “Reversing the Door” on page 2
Shelves are out of
position Check all shelves are properly inserted
Door seal is dirty Wipe clean with a damp cloth
Alarm Code Probable Cause Action
E1 Cooling sensor fault Call POLAR agent or qualified technician
E2 Defrost sensor fault Call POLAR agent or qualified technician
LL Cabinet temperature lower
than -1°C
Raise operating temperature
If alarm persists then call POLAR agent or qualified
technician

6
UK
Telephone Helpline: 0845 146 2887 (United Kingdom)
Technical Specifications
Electrical Wiring
This appliance is supplied with a 3 pin, moulded, BS1363 plug and lead, with a 13 amp fuse as standard.
The plug is to be connected to a suitable mains socket.
This appliance is wired as follows:
• Live wire (coloured brown) to terminal marked L
• Neutral wire (coloured blue) to terminal marked N
• Earth wire (coloured green/yellow) to terminal marked E
This appliance must be earthed, using a dedicated earthing circuit.
If in doubt consult a qualified electrician.
Electrical isolation points must be kept clear of any obstructions. In the event of any emergency
disconnection being required they must be readily accessible.
Disposal
EU regulations require refrigeration products to be disposed of by specialist companies who remove or
recycle all gasses, metal and plastic components.
Consult your local waste collection authority regarding disposal of your appliance. Local authorities are not
obliged to dispose of commercial refrigeration equipment but may be able to offer advice on how to dispose
of the equipment locally.
Alternatively call the POLAR helpline for details of national disposal companies within the EU
Compliance
POLAR parts have undergone strict product testing in order to comply with regulatory standards and
specifications set by international, independent, and federal authorities.
POLAR products have been approved to carry the following symbol:
All rights reserved. No part of these instructions may be produced or transmitted in any form or by any means,
electronic, mechanical, photocopying, recording or otherwise, without the prior written permission of POLAR.
Every effort is made to ensure all details are correct at the time of going to press, however, POLAR reserve the right
to change specifications without notice.
Model Voltage Power Current Bottle
Capacity Refrigerant Temp.
Range Dimensions
h x w x d mm Weight
W518 230V
50Hz 110W 0.5A 42 R600a
24g 3-18°C 850 x 544 x 600 43kg
W519 230V
50Hz 125W 0.6A 66 R600a
36g 3-18°C 1250 x 544 x 600 64.5kg

7
NL Klantenondersteuning: 050 – 609999 (België)
Veiligheidstips
• Plaatsen op een vlakke en stabiele ondergrond.
• De installatie en eventuele reparaties zijn door een servicetechnicus/vaktechnicus uit te voeren.
Verwijder geen componenten of servicepanelen van dit product.
• Raadpleeg en volg de plaatselijke en nationale regelgeving op m.b.t. tot het volgende:
• Wetgeving van gezondheid en veiligheid op de werkplaats
• Werkregels
• Brandpreventie
• IEE bekabelingsnormen
• Bouwverordeningen
• Apparaat NIET bedekken wanneer in gebruik.
• GÉÉN voedsel in de Wijnklimaatkast bewaren.
• Apparaat altijd in verticale positie vervoeren, opbergen en gebruiken.
• Kantel het apparaat nooit meer dan 45° uit de verticale positie.
• Niet geschikt voor gebruik buitenshuis.
• Laat verpakkingsmateriaal niet binnen handbereik van kinderen. Verpakkingsmateriaal in
overeenstemming met de regelgeving van de plaatselijke overheden als afval laten verwerken.
• Indien de stroomkabel beschadigd raakt, dient men deze door een POLAR technicus of aanbevolen
vaktechnicus te laten vervangen om gevaarlijke situaties te verhinderen.
Inleiding
Neem de tijd en lees deze handleiding aandachtig door. Een correct gebruik en onderhoud van deze
machine waarborgt de beste prestatie van uw POLAR product.
Verpakkingsinhoud
De verpakking bevat een
POLAR is trots op de haar productkwaliteit en dienstverlening en controleer de inhoud van de verpakkingen,
tijdens de verpakkingsfase, op functionaliteit en schade.
Mocht u product door transport zijn beschadigd, neem dan onmiddellijk contact op met uw POLAR dealer.
• Wijnklimaatkast
•Sleutelsx2
• Bevestigingen deurhendel x2
• Deurhendel
• Schroeven x 2
• Schroefdoppen x 2
• Handleiding
• Uitschuiflades x 6 (W518)
• Uitschuiflades x 10 (W519)

8
NL
Klantenondersteuning: 040 – 2628080 (Nederland)
Installatie
1. Haal het apparaat uit de verpakking en verwijder de beschermingsfolie van alle oppervlakken.
2. Men dient het plaatsen van de Wijnklimaatkast in het directe zonlicht of op vochtige plekken te
verwijderen.
3. Voor een adequate ventilatie dient men bij het plaatsen van de Wijnklimaatkast een afstand, tussen
het apparaat en de muren of andere objecten, van 20 cm aan te houden. Vergroot deze afstand indien
het object en warmtebron is.
4. Indien nodig, verstel de stelvoetjes om de Wijnklimaatkast volledig gelijk in te stellen.
Richting deuropening veranderen
Afhankelijk van de bestemde locatie van het apparaat kan het noodzakelijk zijn om de richting van de
deuropening te veranderen door de hendel van de ene zijde naar de andere zijde te verplaatsen.
Om de deurhendel te verplaatsen:
1. Met een kleine schroevendraaier verwijder de
schroefplaten van de bovenzijde van de
Wijnklimaatkast. Maak de twee schroeven los.
2.
Til de dekselachterzijde van de Wijnklimaatkast op.
3. Trek de deksel naar voren om deze te
verwijderen.
4. Schroef de drie bevestigingsbouten en de
bovenste scharnierpin los.
5. Verwijder de bovenste deurplaat van de
rechterzijde en plaats deze aan de linkerzijde van
de Wijnklimaatkast. Bevestig de drie
bevestigingsbouten. Tijdens deze fase dient men nog niet de bevestigingspin van de deur te plaatsen.
6. Indien nodig, kantelt u de Wijnklimaatkast een beetje
naar achter om toegang te krijgen tot de onderste
deurbout.
7. Schroef de onderste scharnierpin los en verplaats de
onderste deurplaat en pinunit naar de linkerzijde van de
Wijnklimaatkast.
8. Til de deur van de onderste scharnierpin en plaats deze
terzijde.
9. Bevestig de onderste deurplaat, met behulp van de
bevestigingsbouten en de scharnierpin, aan de linkerzijde
van de Wijnklimaatkast.
10. Verwijder de bovenste en onderste schroefdoppen van
de linkerzijde van de deur en plaats deze aan de rechterzijde van de Wijnklimaatkast.
11. Plaats de deur op de onderste pin.
12. Plaats en draai de bovenste scharnierpin vast, en zorg hierbij dat de afdichtingen van de deur niet
worden fijngeknepen.
13. Bevestig opnieuw de deksel aan de Wijnklimaatkast. Zorg dat de voorlip onder het bedieningspaneel
op zijn plaats is alvorens de deksel op zijn plaats te laten zakken.
14. Bevestig opnieuw de twee schroeven en de twee schroefdoppen aan de achterzijde van de deksel.
Opmerking: indien het apparaat niet in een rechtopstaande positie is opgeslagen of
vervoerd, dient men het product 12 uur vóór gebruik in de rechtopstaande positie te
plaatsen. Bij twijfel dient men het product in een rechtopstaande positie te plaatsen.
Bevestigingsbouten
Bovenste
deurpin
Plaat
Deur

9
NL Klantenondersteuning: 050 – 609999 (België)
Deurhendel bevestigen
Na het besluit van de richting van de deuropening, bevestigt
men de deurhendel.
1. Verwijder de twee schroefdoppen uit de buitenrand van de
deur.
2. Haal de schroefdoppen van de hendelsteun en schroef de
steun op zijn plaats.
3. Vergrendel de hendelstang op de onderste hendelsteun.
4. Vergrendel de bovenste hendelsteun op de hendelstand en
schroef deze op zijn plaats.
5. Plaats de schroefkappen op de schroeven.
Bediening
Bedieningspaneel
Temperatuur instellen
1. Wanneer de Wijnklimaatkast ingeschakeld is, wordt de actuele interne temperatuur op het display
weergegeven.
Wijn Temperatuur Verlichte LED
Rode 16-18°C (60-65°F) Rood
Witte 10-15°C (50-59°F) Groen
Mousserende witte 7-9°C (45-49°F) Amber
Rosé 9-10°C (49-51°F) -
Opmerking: deze temperaturen zijn een schatting en het kan zijn dat deze, afhankelijk
van de werkomgeving van de Wijnklimaatkast, hoger/lager moeten zijn.
Up/Down (Omhoog/Omlaag) knoppen Fahrenheit/Celsius LED's Verlichtingsknop
Temperatuur LED's Fahrenheit/Celsius knop

10
NL
Klantenondersteuning: 040 – 2628080 (Nederland)
2. Druk op de UP of DOWN knop op de ingestelde werktemperatuur weer te geven.
3. Gebruik de UP en DOWN knoppen om de gewenste werktemperatuur te selecteren.
4. Om het weergegeven temperatuurformaat te veranderen drukt u op de Fahrenheit/Celsius knop. De
Fahrenheit of Celsius LED licht op en toont het geselecteerde formaat.
Gemengd bewaren van wijnflessen
Door een licht temperatuurverschil tussen de bovenzijde en de onderzijde van de Wijnklimaatkast, is het
de aanbeveling van POLAR om flessen witte wijn onder en flessen rode wijn boven te bewaren.
Verlichting in-/uitschakelen
Druk op de verlichtingsknop op het bedieningspaneel om de verlichting in of uit te schakelen.
Reiniging, zorg & onderhoud
• Alvorens het apparaat te reinigen dient men altijd de stroomvoorziening uit te schakelen.
• Haal alle flessen uit de Wijnklimaatkast.
• Voor het reinigen van het apparaat wordt warm zeepwater aanbevolen. Reinigingsmiddelen kunnen
schadelijke resten achter laten.
• Eventuele reparaties moeten door een POLAR technicus of een vaktechnicus worden uitgevoerd.
• Reinig regelmatig het onderste deel van het koelcompartiment om eventuele opbouw van condensatie
te verwijderen.
Lamp vervangen
1. Schakel de Wijnklimaatkast uit en haal de steker uit het stopcontact.
2. Schroef het lampkapje aan het bovendeel van het compartiment los en verwijder deze.
3. Draai de lamp los en plaats een nieuwe lamp.
4. Schroef het lampkapje opnieuw vast aan het bovendeel van het compartiment.
Opmerking: de fabrieksinstelling is 10°C (50°F).
Opmerking: alvorens het eerste gebruik, reinig het apparaat met warm zeepwater.
Opmerking: de bestaande lamp vervangen met een SES 240V 10W lamp
(onderdeelcode: AA391).

11
NL Klantenondersteuning: 050 – 609999 (België)
Oplossen van problemen
Alarmcodes
Probleem Mogelijke oorzaak Handeling
Het apparaat
werkt niet Het apparaat staat uit Controleer of de stroomkabel van het apparaat is
aangesloten en of het apparaat is ingeschakeld
Steker en kabel zijn
beschadigd Laat een POLAR technicus of een vaktechnicus komen
De zekering in de steker is
gesprongen Vervang de zekering in de steker
Stroomvoorziening Controleer de stroomvoorziening
Storing interne bedrading Laat een POLAR technicus of een vaktechnicus komen
Het apparaat staat uit Controleer of de stroomkabel van het apparaat is
aangesloten en of het apparaat is ingeschakeld
Koelkast maakt
veel geluiden of
werkt soms wel
en dan weer niet
Stroomschommelingen Schakel de Wijnklimaatkast uit en herstart het apparaat
na 3 minuten
De Wijnklimaatkast staat
niet recht. Verstel de verstelbare poten op de Wijnklimaatkast juist
te nivelleren.
De
Wijnklimaatkast
wordt niet koud
genoeg.
Temperatuur verkeerd
afgesteld Controleer de temperatuur en indien nodig aanpassen
De werkomgeving is
waarschijnlijk te warm Controleer de temperatuur en indien nodig aanpassen
De deur staat te vaak open Verbeter de ventilatie of verplaats het product naar een
koelere locatie
De deur staat te vaak open Alleen openen wanneer nodig
Deurafdichting is versleten Laat een POLAR technicus of een vaktechnicus komen
De lamp werkt
niet Lamp is kapot Vervang de lamp (zie “Lamp vervangen”)
De afvoeropening wordt
geblokkeerd Maak de afvoeropening vrij van obstakels
Deuren sluiten
niet goed Wijnklimaatkast staat niet
recht Verstelbare poten bijstellen
De richting van de
deuropening is veranderd
maar niet juist uitgevoerd
Zie “Richting deuropening veranderen”
Lades niet juist geplaatst Controleer of alle lades juist zijn geplaatst
Alarmcode Mogelijke oorzaak Handeling
E1 Storing koelsensor Laat een POLAR technicus of een vaktechnicus
komen
E2 Storing ontdooisensor Laat een POLAR technicus of een vaktechnicus
komen
LL Koelertemperatuur lager dan -
1°C Stel een hogere werktemperatuur in Indien het
alarm blijft terugkomen, laat dan een POLAR
technicus of een vaktechnicus komen

12
NL
Klantenondersteuning: 040 – 2628080 (Nederland)
Technische specificaties
Elektrische bedrading
Men dient de steker op een geschikt stopcontact aan te sluiten.
De bedrading van dit apparaat is als volgt:
• Stroomkabel (bruin) naar de aansluitklem gemarkeerd met L
• Neutraalkabel (blauw) naar de aansluitklem gemarkeerd met N
• Aardekabel (groen/geel) naar de aansluitklem gemarkeerd met E
Dit apparaat moet worden geaard met behulp van een adequaat aardingscircuit.
Bij twijfels raadpleeg een vakkundige elektricien.
De elektrische isolatiepunten mogen niet worden geblokkeerd. In geval van een nooduitschakeling moeten
de isolatiepunten direct toegankelijk zijn.
Afvalverwerking
De EU-richtlijnen vereisen dat koelproducten door gespecialiseerde bedrijven wordt verwerkt die gassen,
metalen en plastic componenten verwijderen of recyclen.
Raadpleeg uw plaatselijke afvalverwerkingsbedrijf voor informatie over de afvalverwerking van uw
apparaat. De plaatselijke overheden zijn niet verplicht om koelingsproducten van bedrijven als afval te
verwerken maar kunnen uw informeren waar u het apparaat kunt afgeven.
U kunt ook de POLAR helplijn bellen voor informatie over landelijke afvalverwerkingsbedrijven in de EU.
Productconformiteit
De onderdelen van POLAR producten hebben strenge producttesten ondergaan om te voldoen aan
wettelijke regels en specificaties die door internationale, onafhankelijke en landelijke overheden worden
voorgeschreven.
POLAR producten zijn goedgekeurd en voorzien van het volgende symbool:
le rechten voorbehouden. Het is verboden om deze handleiding, hetzij volledig of gedeeltelijk, elektronisch of
mechanisch te reproduceren, kopiëren, op opslagmedia op te slaan of op enigerlei wijze over te dragen, zonder
voorafgaande goedkeuring van POLAR.
Wij hebben er alles aan gedaan om er zeker van te zijn dat op publicatiedatum van de handleiding alle details cor-
rect zijn, desondanks, behoudt POLAR het recht voor om specificaties zonder aankondiging te wijzigen.
Model Voltage Vermog
en Stroom Flessenc
apaciteit Refrigerant Temp.
bereik Afmetingen
h x b x d mm Gewicht
W518 230V
50Hz 110W 0,5A 42 R600a
24g 3-18°C 850 x 544 x 600 43kg
W519 230V
50Hz 125W 0,6A 66 R600a
36g 3-18°C 1250 x 544 x 600 64,5kg

13
FR Standard d'assistance téléphonique: 050 – 600006 (Belgique)
Conseils de sécurité
• Placez l'appareil sur une surface plane, stable.
• L'installation et les éventuelles réparations doivent être confiées à un dépanneur / technicien qualifié.
Ne retirez aucun composant ou cache de ce produit.
• Consultez les normes locales et nationales pour vous conformer aux :
• lois sur l'hygiène et la sécurité au travail ;
• codes de bonnes pratiques BS EN ;
• précautions contre le risque d'incendie ;
• réglementations sur les branchements électriques IEE ;
• règlements sur la construction.
• NE PAS couvrir l'appareil en service.
• NE STOCKEZ pas d'aliments dans l'armoire à vin.
• Veillez à toujours transporter, stocker et manipuler l'appareil en position verticale.
• N'inclinez jamais l'appareil à plus de 45° par rapport à la verticale.
• Cet appareil n'est pas conçu pour fonctionner à l'extérieur.
• Gardez les emballages hors de portée des enfants. Débarrassez-vous des emballages conformément
aux règlements des autorités locales.
• Un cordon d'alimentation endommagé doit être remplacé par un agent POLAR ou un technicien
qualifié recommandé, pour éviter tout danger.
Introduction
Nous vous invitons à consacrer quelques instants à la lecture attentive de ce mode d'emploi. L'entretien et
l'utilisation appropriés de cette machine vous permettront de tirer le meilleur de votre produit POLAR.
Contenu de l'emballage
Eléments fournis de série :
POLAR attache une grande importance à la qualité et au service et veille à fournir des produits en parfait
état opérationnel, parfaitement intacts au moment de l'emballage.
Nous vous prions de contacter votre revendeur POLAR immédiatement si vous constatez un dommage
quelconque survenu pendant le transport du produit.
•Armoireàvin
•2clés
• 2 supports de poignées de porte
• Poignée de porte
•2vis
• 2 cache-vis
• Mode d'emploi
• 6 étagères coulissantes (W518)
• 10 étagères coulissantes (W519)
This manual suits for next models
1
Table of contents
Languages:
Other Polar Electro Kitchen Appliance manuals