COMMUNICATION MAINTENANCE AND STORAGE
BATTERY MAINTENANCE
Precaution:
1. Communication function is only supported on
some models.Check the model no. and its spe-
cification before using communication function.
2. Do not insert the plug of communication
cable into torque wrench that does not
support communication function.
Connecting communication cable
Uploading record data
■Turn off power and then connect the accessory
cable between the COM port of PC and torque
wrench.
■Make sure the connection between PC and
wrench is normal.
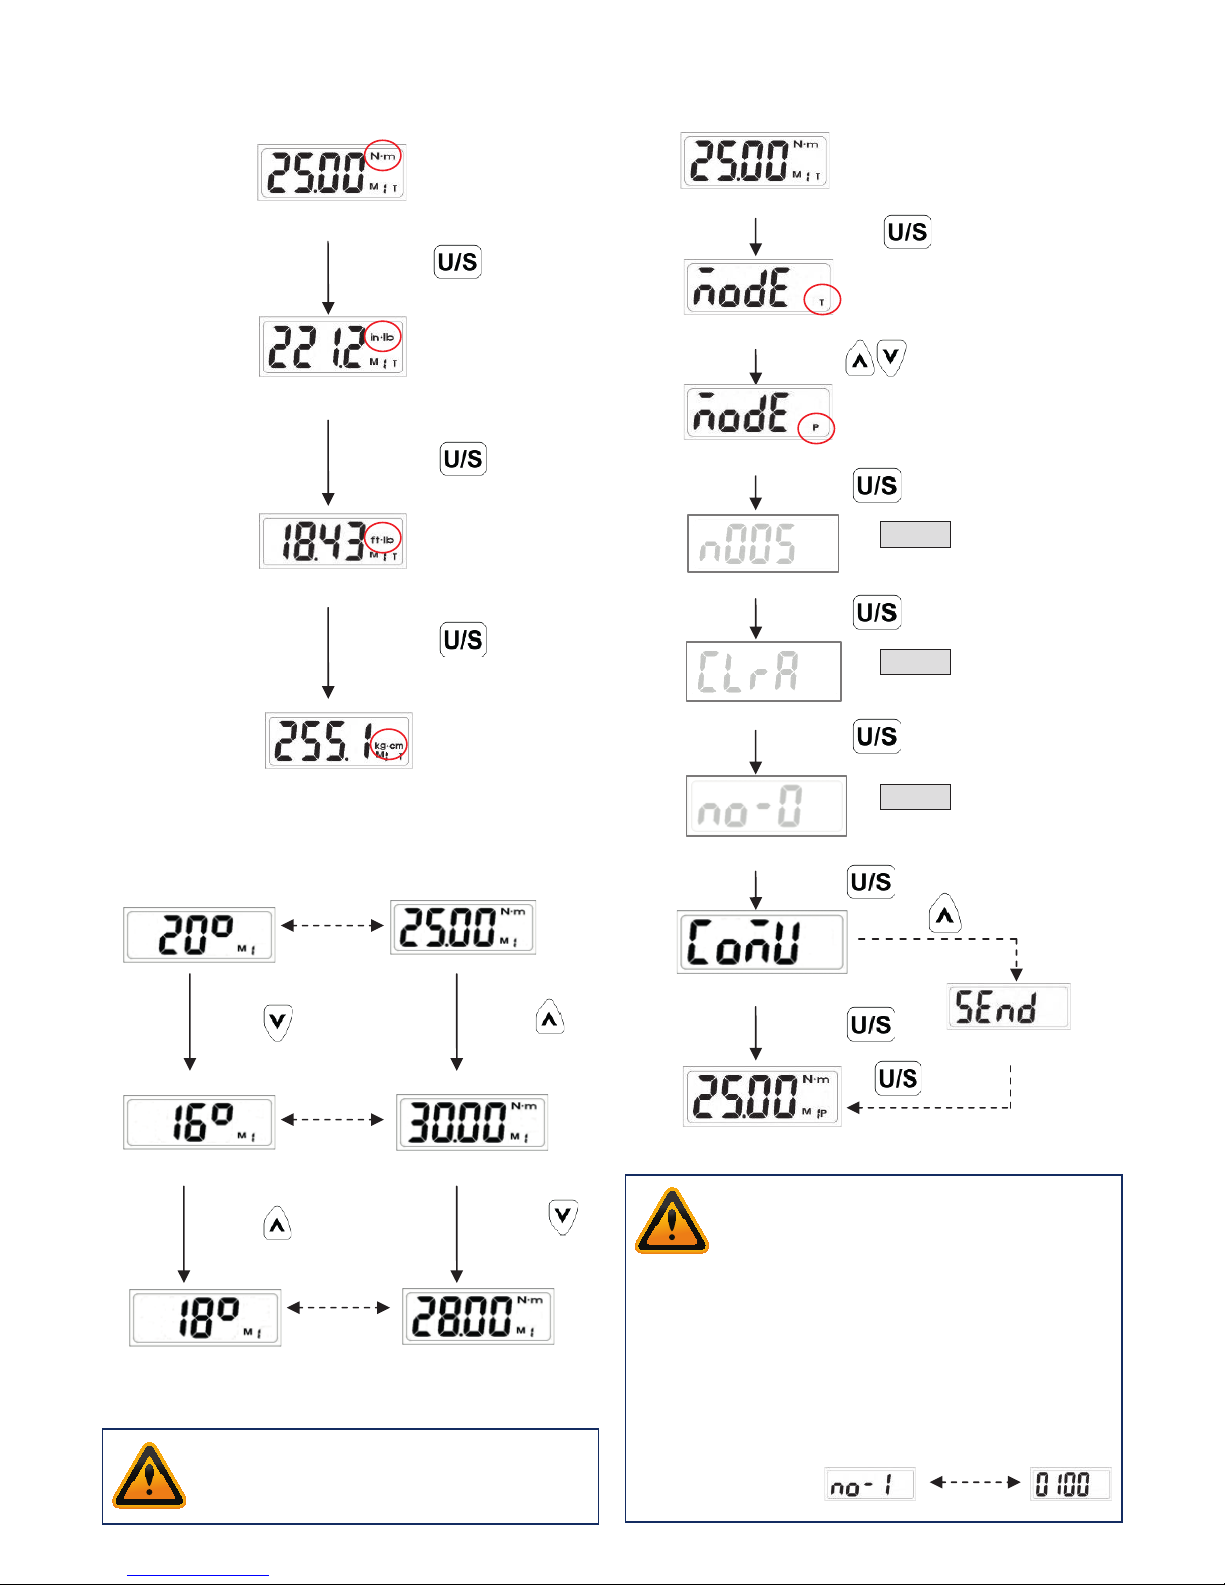
■Change the wrench operation mode to “Send”.
(Please refer to “Peak Hold Mode Recorded Value
Review” section).
■Use PC to start the uploader program.
■In uploader program, first select the correct COM
port No.
■Next, select the file path to save the uploaded data.
■Finally, press “upload” button to transmit the
torque records to PC.
■The uploaded data is then shown on the column
and saved in the *.csv file. Use Microsoft Excel to
view *.csv file.
■When the wrench is not going to be used for an
extended period of time, remove the batteries.
■Keep a spare battery on hand when going on a
long trip or to cold areas.
■Do not mix battery types or combine used
batteries with new ones.
■Sweat, oil and water can prevent a battery’s
terminal from making electrical contact. To avoid
this, wipe both terminals before loading a battery.
■Dispose of batteries in a designated disposal
area. Do not throw batteries into a fire.
Caution:
Refer to the uploader program user guide for
the detail operations.
Caution:
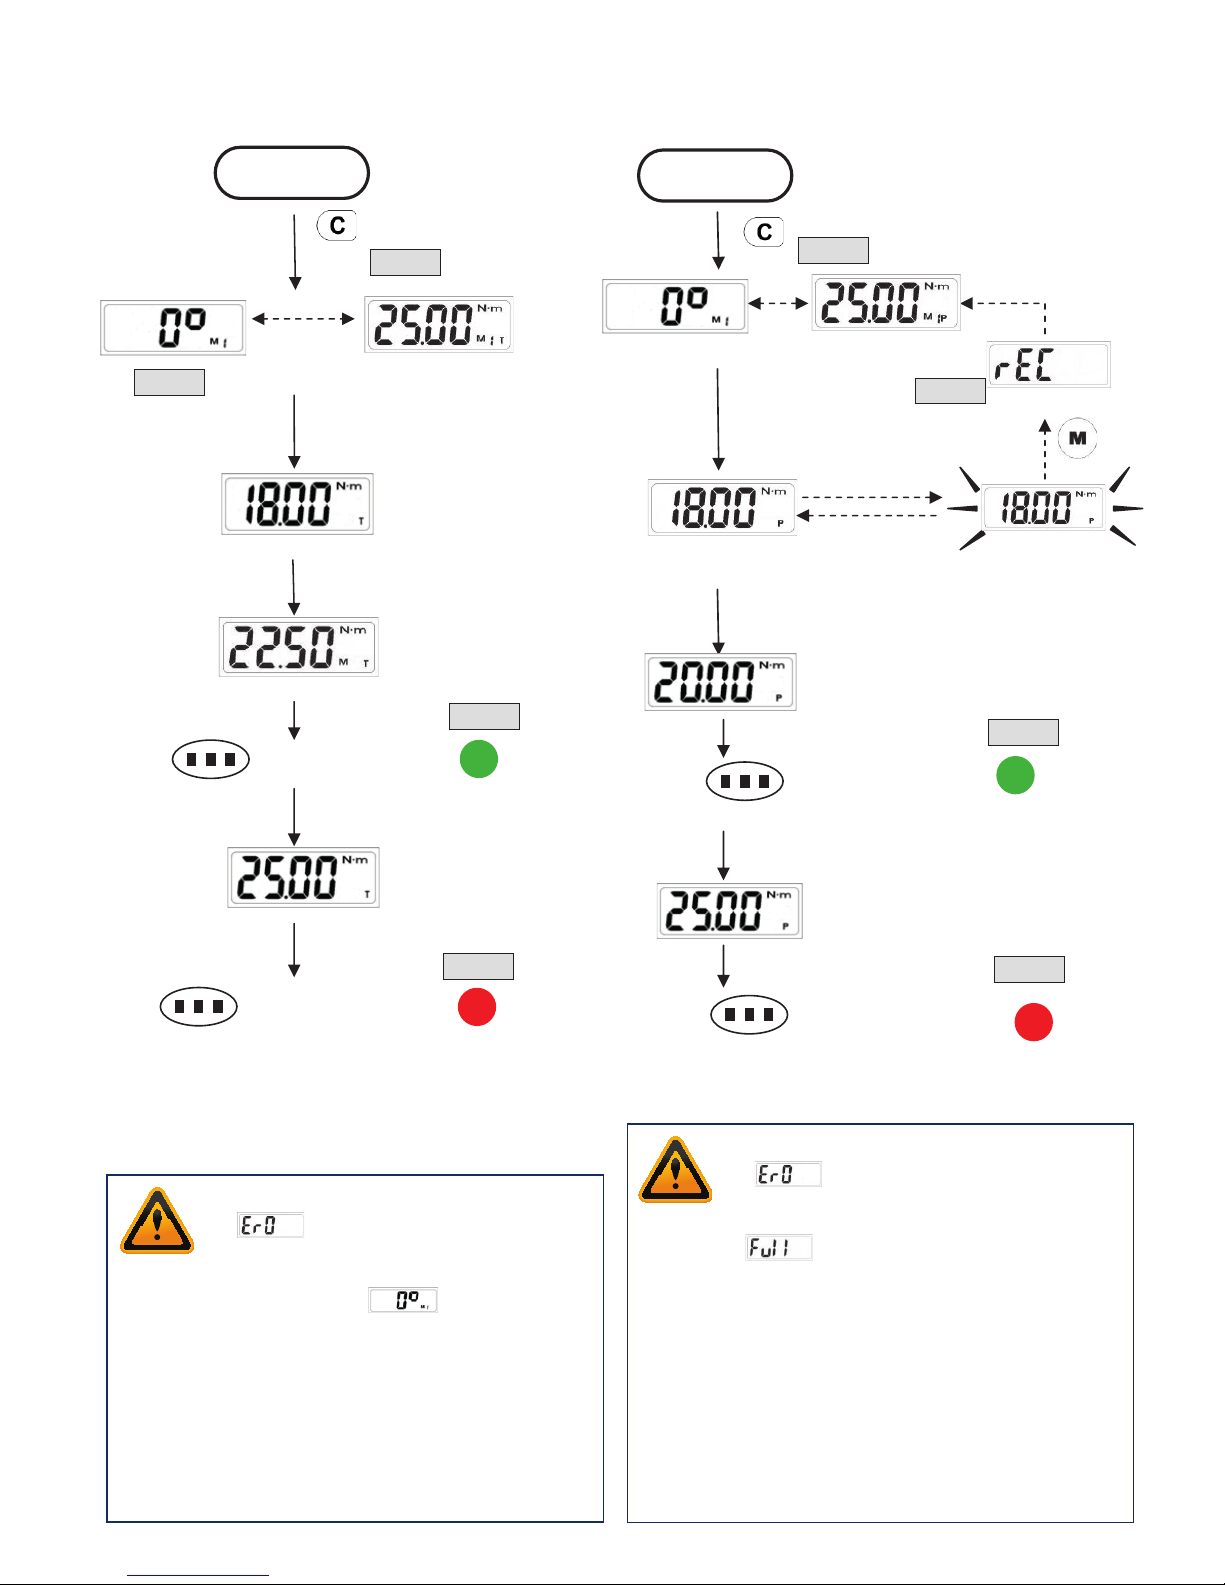
1. Over-torquing (110% of Max. torque range)
could cause breakage or lose of accuracy.
2. Do not shake violently or drop wrench.
3. Do not use this wrench as a hammer.
4. Do not leave this wrench in any place exposed
to excessive heat, humidity, or direct sunlight.
5. Do not use this apparatus in water (it is not
waterproof).
6. If the wrench gets wet, wipe it with a dry
towel as soon as possible. The salt in
seawater can be especially damaging.
7. Do not use organic solvents, such as alcohol
or paint thinner when cleaning the wrench
8. Keep this wrench away from magnets.
9. Do not expose this wrench to dust or sand
as this could cause serious damage.
10. Do not apply excessive force to the LCD panel.
11. Apply torque slowly and grasp the center
of the handle. Do not apply load to the
end of the handle.
Attention!
One-year periodic recalibration is necessary to maintain
accuracy. Please contact your local dealer for calibrations.
POLAR TOOLS A/S
SOLDALEN 9 . 7100 VEJLE . DENMARK . INFO@POLARTOOLS.COM . WWW.POLARTOOLS.COM