5
AU
Telephone Helpline: 1300225960
Operation
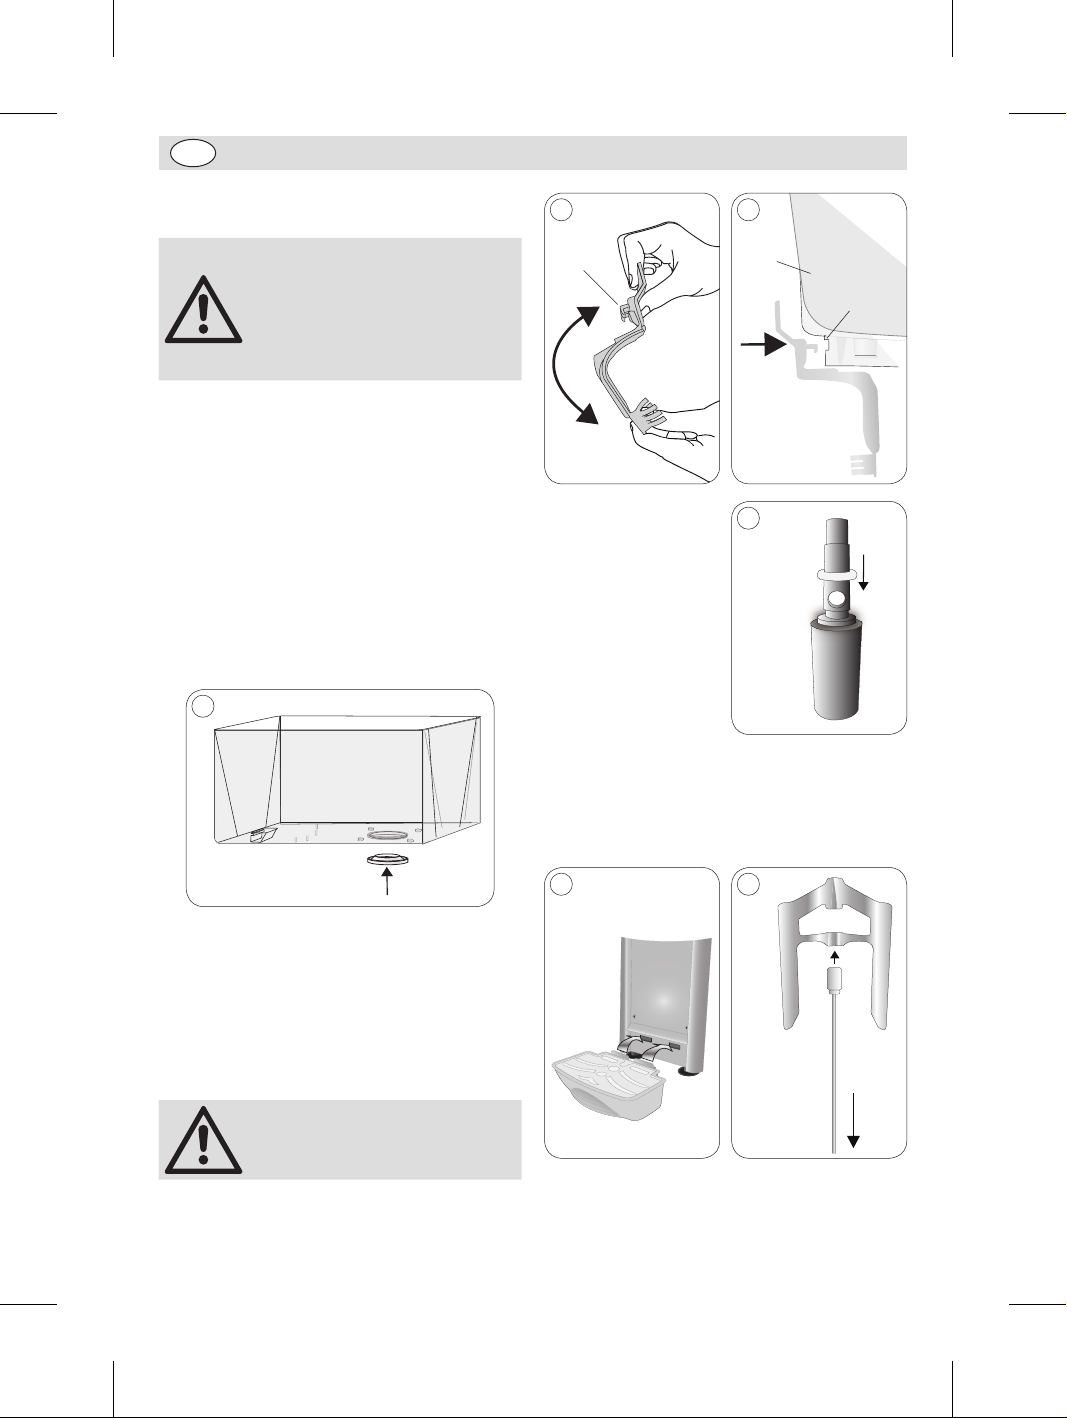
Filling
1. Switch Off the dispenser.
2. Remove the lid and pour the liquid into the
tank.
3. Replace the lid.
WARNING: Do not fill the tank
with hot liquid.
Do not let the level exceed the
‘MAX’ level line displayed on the
front of the tank.
Note: CF761-A Only - If only
one tank is to be filled, it must
be the left tank. To use left tank
only, you just need to switch left
stirring switch ON (I position).
Meanwhile, the right tank does
not chill and the paddle does
not run.
Using the Dispenser
1. Turn On the
Power switch
on the side of
the dispenser.
2. Switch the
stirring switch
to the ‘On’
position [I].
7
Model: CF761-A
3. Once the liquid is sufficiently cooled, push the
receptacle against the tap lever to dispense the
liquid.
Note: Should the paddle
encounter any resistance in the
liquid, it will reverse direction.
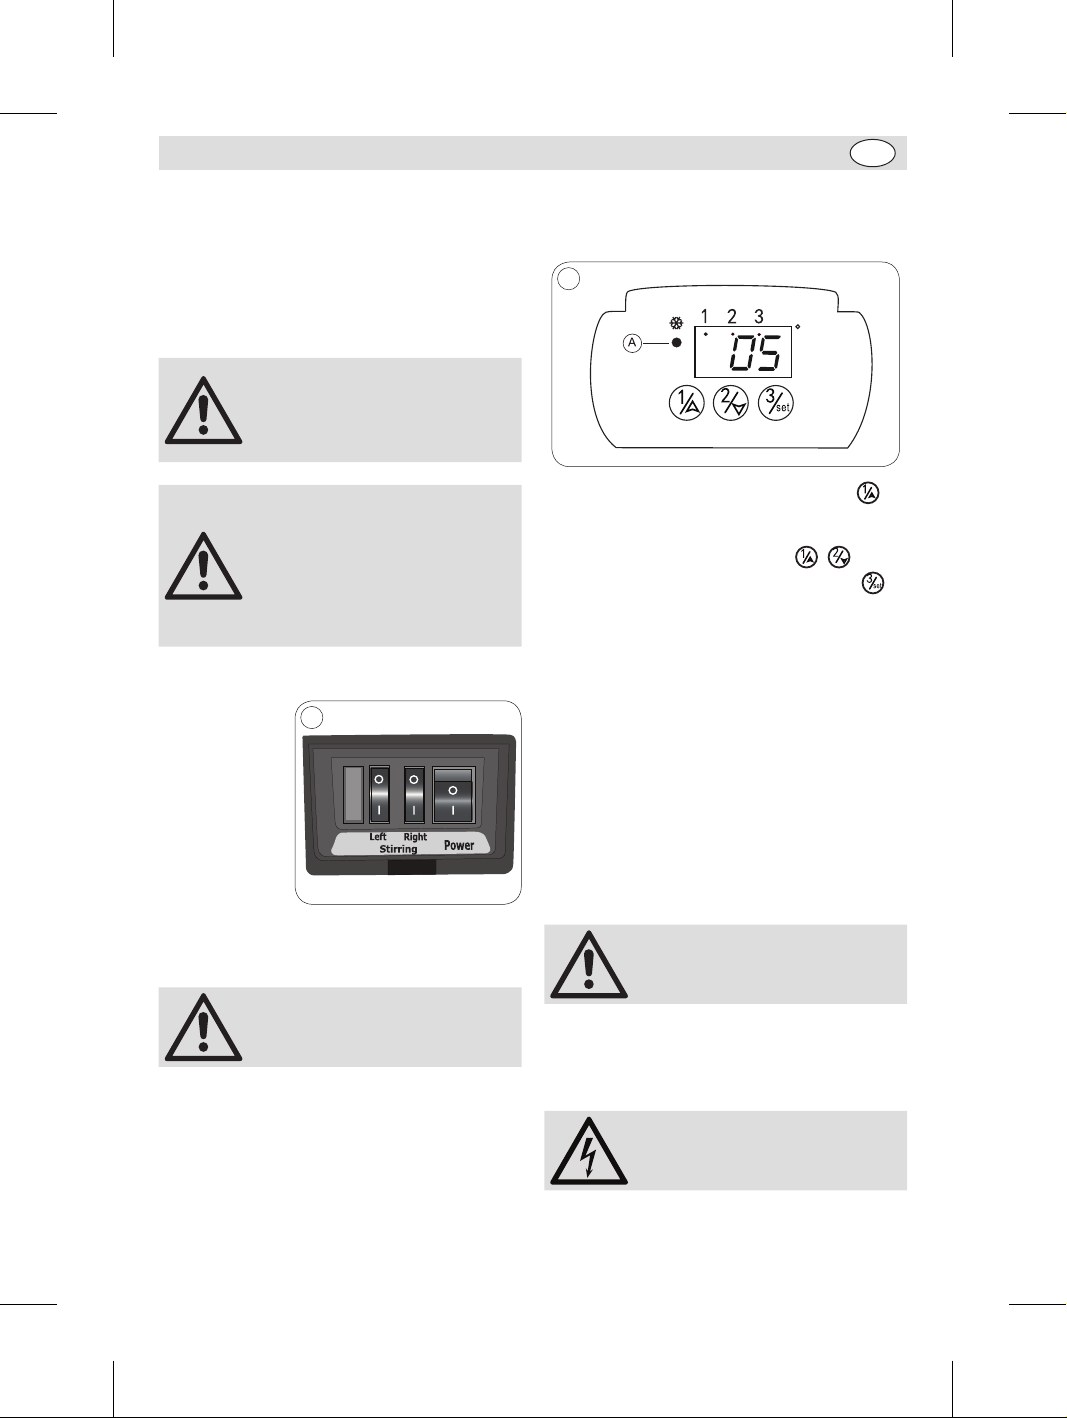
Adjusting the Beverage tank
temperature
To adjust the temperature of beverage tank(s), lift
up the plastic cover(s).
As CF761-A has 2 tanks, Tank 1 is the one on the
left hand side of the unit when looking from the
front.
1. Turn on the main switch on the right hand
of the unit. The power indicator light (A)
illuminates on the controller.
C
8
2. To set the temperature of Tank 1, press
button twice. The indicator light (1) on the top
will illuminate and the current temperature will
flash. Press the arrow buttons ( , ) to
set the desired temperature. Then press
button to confirm. (Temp range: 2°C -8°C)
3. Repeat above operations to set the
temperature of tank 2, if desired (for CF761-A).
4. During use, the unit will automatically display
the actual temperature of the tank for 2
seconds, with the corresponding tank indicator
light illuminating.
5. To switch off the cooling of a certain tank,
press the corresponding tank button for 3
seconds. “OFF” will be displayed. To switch on
cooling, press and hold the tank button again.
Emptying the Dispenser
Drain the dispenser by using the tap lever(s) to
empty the tank(s).
Note: Do not drain the dispenser
by tipping the appliance.
Cleaning, Care &
Maintenance
Switch off and disconnect
from the power supply before
cleaning
CF760-A_CF761-A_A5_v3_20190822.indb 5 2019/8/22 09:59