Impriméen Chine / Printed in China
7515212
A-7515212
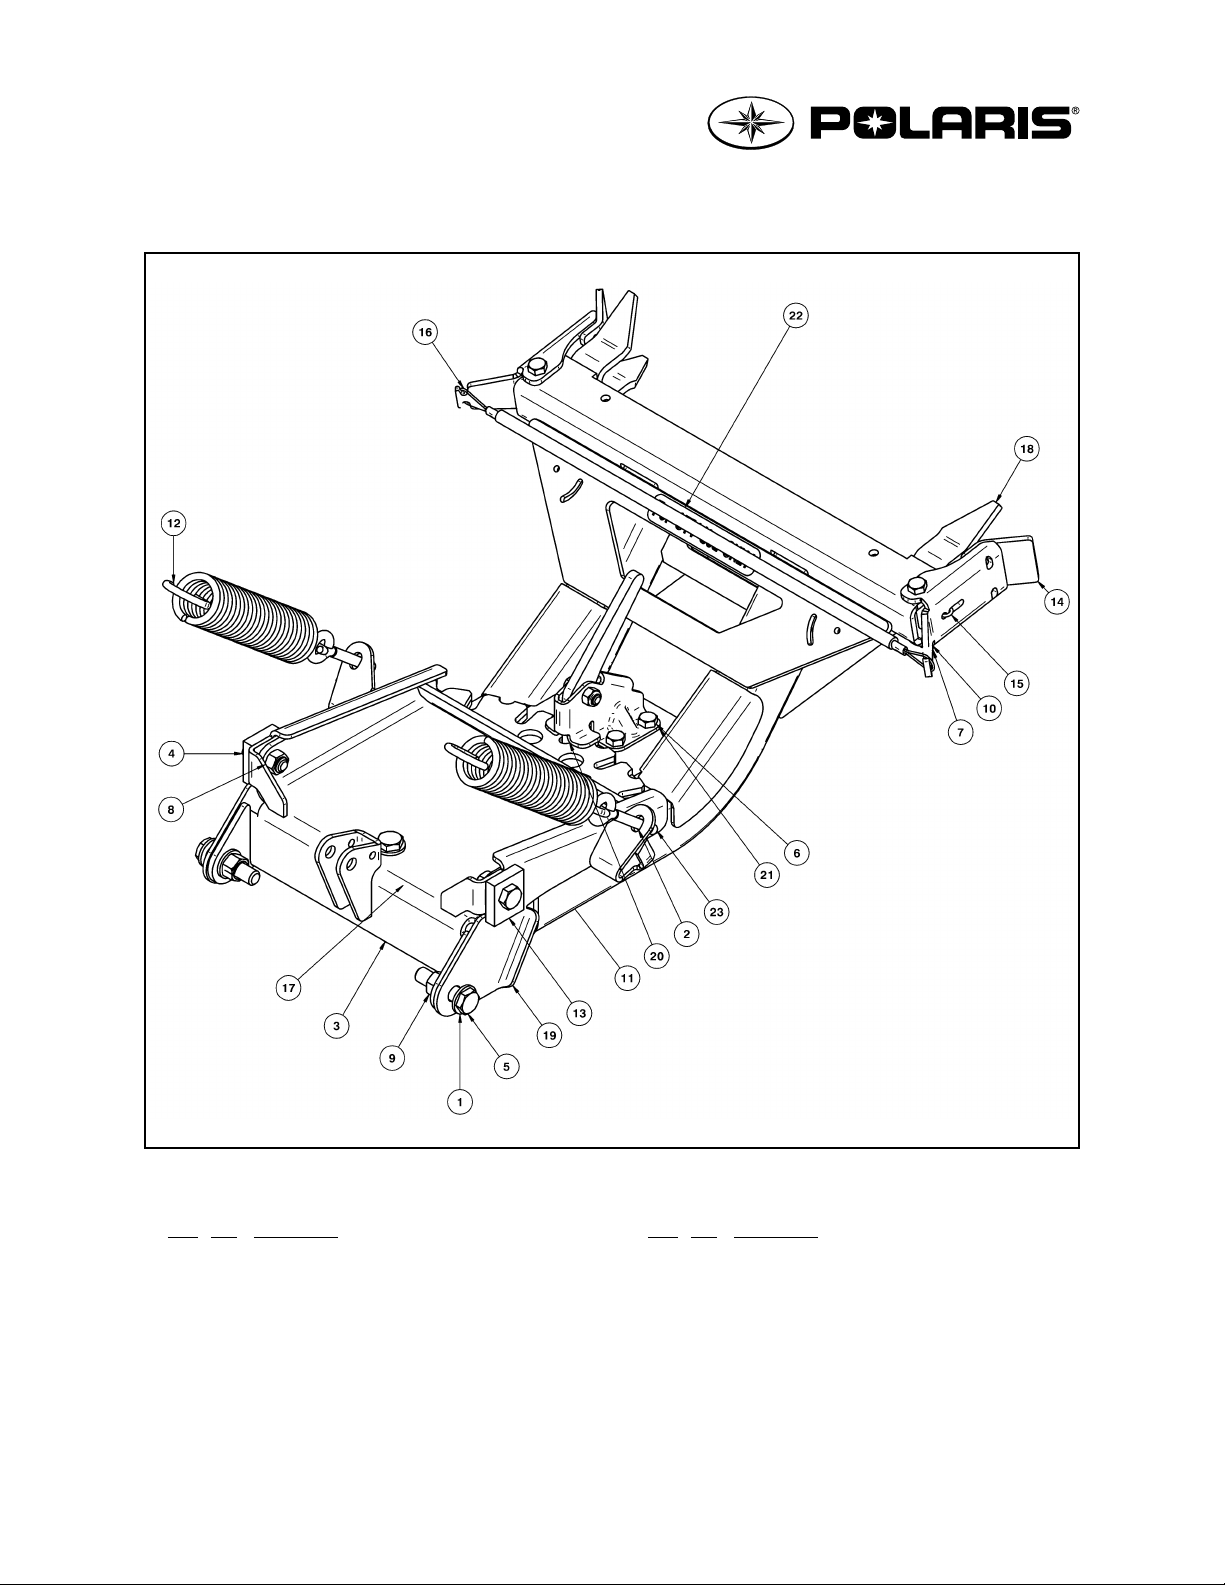
CHÂSSIS POUR PELLE «GLACIER-II»
ACCESSOIRE N°2878822
- 3 -
LIRE AVEC ATTENTION LES INSTRUCTIONS SUIVANTES AFIN D’ÉVITER BLES-
SURES OU FATALITÉ.
SI VOUS SUIVEZ LES CONSEILS SUIVANTS, VOTRE NOUVELLE PELLE ÀNEIGE
VOUS DURERA PLUSIEURS ANNÉES.
RESSERRER TOUS LES BOULONS ET LES ÉCROUS APRÈS LA PREMIÈRE 1/2
HEURE D’UTILISATION.
•NE PAS EXCÉDER 5 MPH (8 KM/H) LORSQUE VOTRE PELLE EST INSTALLÉE SUR VOTRE VÉHICULE.
•UTILISER AVEC EXTRÊME PRUDENCE DANS LES CÔTES ET TERRAINS HASARDEUX.
•RESTER ÉLOIGNÉDE LA PELLE DURANT SON UTILISATION.
•LORSQUE VOUS ENTASSEZ DE LA NEIGE, COMMENCEZ ÀRECULER AVANT DE RELEVER LA
PELLE.
•RALENTISSEZ TOUJOURS AVANT DE POUSSER LA PELLE DANS UN BANC DE NEIGE.
•PORTER ATTENTION ÀDES OBJETS QUI POURRAIENT ÊTRE DISSIMULÉS SOUS LA NEIGE.
•AVANT D’UTILISER LA PELLE, LIRE CE FEUILLET EN ENTIER AINSI QUE LE MANUEL DE VOTRE
VÉHICULE.
•PORTER TOUJOURS LES PROTECTIONS APPROPRIÉES LORS DE L’UTILISATION DE VOTRE
VÉHICULE.
•NE LAISSEZ PERSONNE S’ASSEOIR OU SE TENIR SUR LA PELLE OU SUR LE VÉHICULE.
•GARDER ÀDISTANCE TOUTE PERSONNE OU VÉHICULE LORSQUE VOUS ÊTES EN MOUVEMENT.
•TOUJOURS ARRÊTER LE MOTEUR DU VÉHICULE POUR TOUTES MANUTENTIONS DE LA PELLE. NE
JAMAIS LEVER LA PELLE AVEC VOS MAINS. UTILISER LE TREUIL.
•TOUJOURS BAISSER LA PELLE AVANT D’EN AJUSTER LA HAUTEUR.
•LORSQUE LA PELLE N’EST PAS EN UTILISATION, ARRÊTER LE MOTEUR DU VÉHICULE, METTRE LE
FREIN DE SÛRETÉET BAISSER LA PELLE.
•VU QUE LE CADRE DE LA PELLE RÉDUIT LA HAUTEUR DE GARDE AU SOL DE VOTRE VÉHICULE,
DÉTACHEZ LE CADRE ET LA PELLE DE CELUI-CI POUR TOUTE AUTRE UTILISATION.