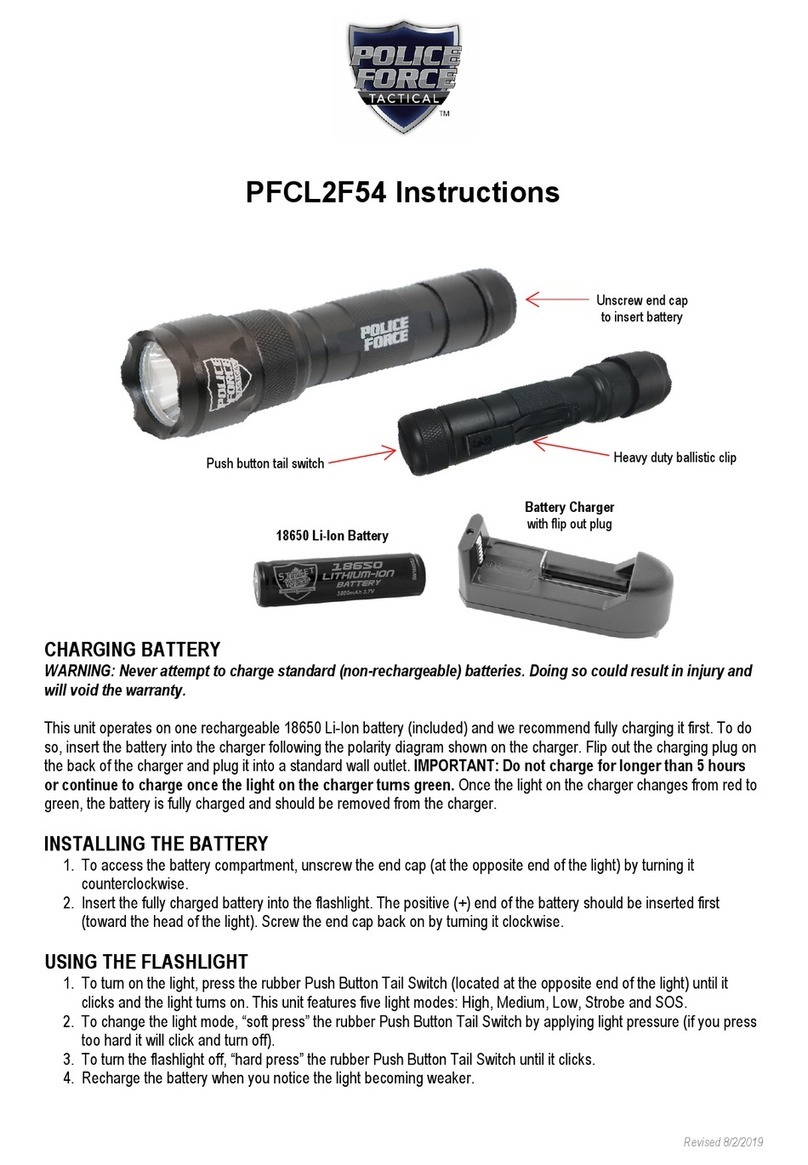
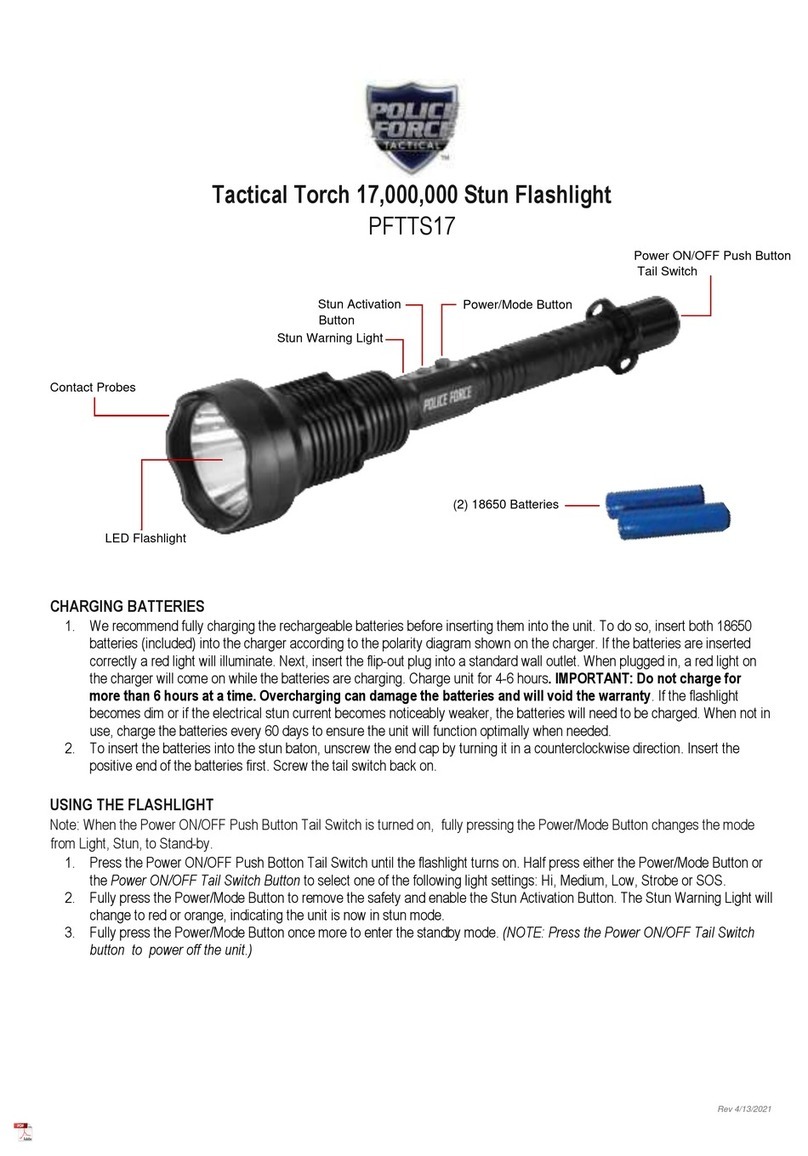
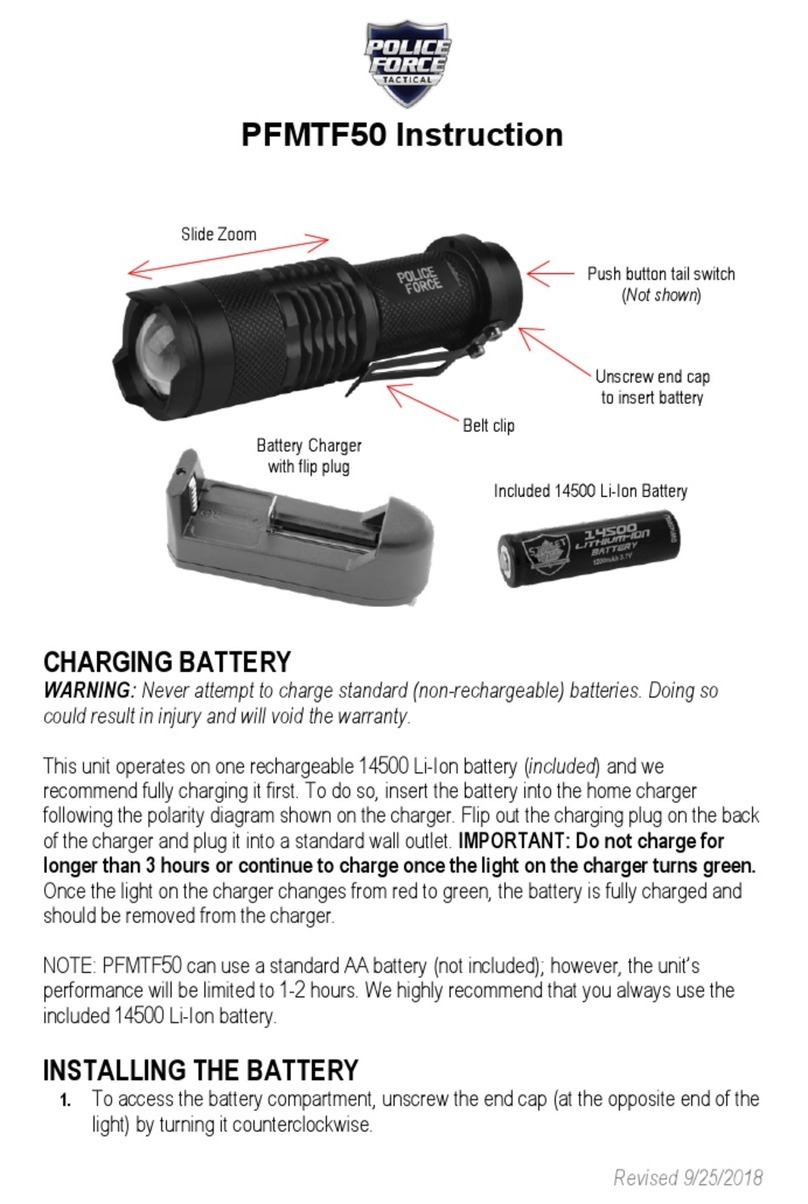
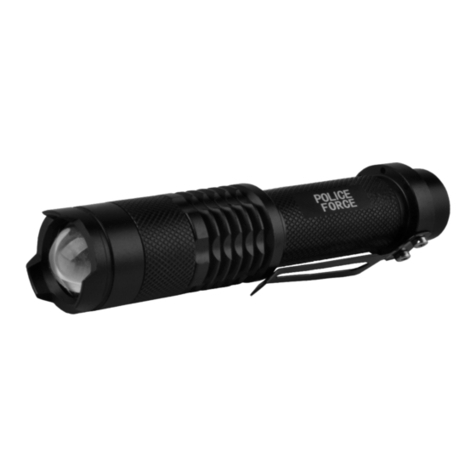
Police Force PFTB12R User manual

1FullPress: Whenfully pressed,youwillhearaclickingsound. Revised:08-03-2016
PFTB12R
Instruction Manual
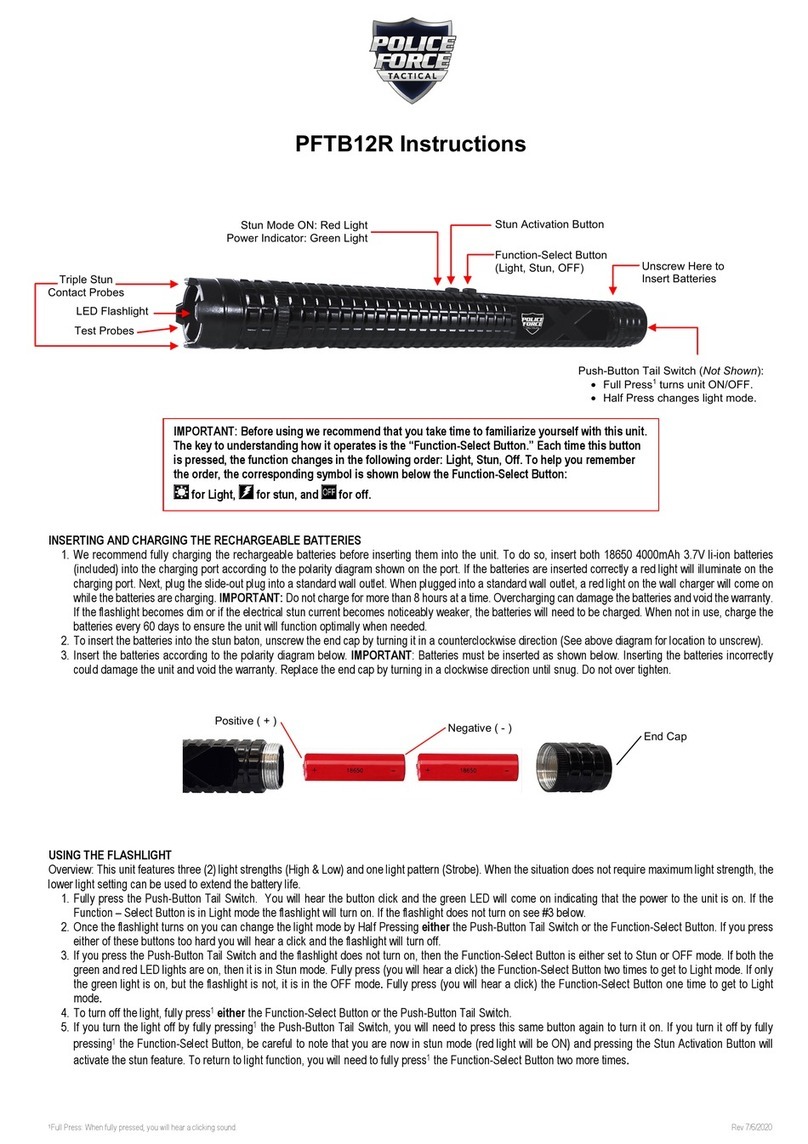
Important: Before using we recommend that you take time to familiarize yourself with this unit. The key to understanding how it operates is the
“Function-Select Button.” Each time this button is pressed, the function changes in the following order: Light, Stun, Off. To help you remember the
order, the corresponding symbol is shown below the Function-Select Button: for Light, forstun, and for off.
Inserting and Chargingthe Rechargeable Batteries
1. We recommend fully charging the rechargeable batteries before inserting them into the unit. To do so, insert both 18650 4000mAh 3.7V li-ion batteries
(included) into the charging port according to the polarity diagram shown on the port. If the batteries are inserted correctly a red light will illuminate on the
charging port. Next, plug the slide-out plug into a standard wall outlet. When plugged into a standard wall outlet, a red light on the wall charger will come
on while the batteries are charging and change to green when completely charged. IMPORTANT: Do not charge for more than 8 hours at a time.
Overcharging can damage the batteries and void the warranty. If the flashlight becomes dim or if the electrical stun current becomes noticeably weaker,
the batteries willneed to be charged. When not in use, charge the batteries every 60 daysto ensure the unit willfunction optimally when needed.
2. To insert the batteries into the stun baton, unscrew the end cap by turning it in a counterclockwise direction (See above diagram for location to unscrew).
3. Insert the batteries according to the polarity diagram below. IMPORTANT: Batteries must be inserted as shown below. Inserting the batteries incorrectly
could damage the unit and void the warranty. Replace the end cap by turning in a clockwise direction until snug. Do not over tighten.
Using the Flashlight
Overview: This unit features three (3) light strengths (Maximum, Medium, & Low) and two light patterns (SOS & Strobe). When the situation does not require
maximum light strength, the lower light settings can be used to extend the battery life.
1. Fully press the Push-Button Tail Switch. You will hear the button click and the green LED will come on indicating that the power to the unit is on. If the
Function – Select Button is in Light mode the flashlight willturn on. If the flashlight does not turn on see #3 below.
2. Once the flashlight turns on you can change the light mode by Half Pressing either the Push-Button Tail Switch or the Function-Select Button. If you press
either of these buttons too hard you willhear a click and the flashlight willturn off.
3. If you press the Push-Button Tail Switch and the flashlight does not turn on, then the Function-Select Button is either set to Stun or OFF mode. If both the
green and red LED lights are on, then it is in Stun mode. Fully press (you will hear a click) the Function-Select Button two times to get to Light mode. If
only the green light is on, but the flashlight is not, it is in the OFF mode. Fully press (you will hear a click) the Function-Select Button one time to get to
Light mode.
4. To turn off the light, fully press1either the Function-Select Button or the Push-Button Tail Switch.
5. If you turn the light off by fully pressing1the Push-Button Tail Switch, you will need to press this same button again to turn it on. If you turn it off by fully
pressing1the Function-Select Button, be careful to note that you are now in stun mode (red light will be ON) and pressing the Stun Activation Button will
activate the stun feature. To return to light function, you willneed to fully press1the Function-Select Button two more times.
Testing the Stun Baton (WARNING: Do not test fire the stun baton for more than 1 second as this will damage the unit and void the warranty.)
1. Fully press1the Push-Button Tail Switch to turn on the unit. If both the red and green LED lights turn on it is in stun mode and ready to test the stun baton.
Go to #3 below. If only the green LED is on and the flashlight is on it is in the Light mode. Fully press1the Function-Select Button one time to move to the
STUN mode. If only the green LED is on and the flashlight is off it is in the OFF mode. Fully press1the Function-Select Button two times to move to the
STUN mode.
2. Be sure both the red and green LED lights are on to confirm it is in the STUN Mode.
CREE LED
Flashlight
Triple Stun
Contact Probes
Stun Activation Button
Function-Select Button
(Light, Stun, Off)
Push-Button Tail Sw itch (Not Show n):
o Full Press 1 turns unit On/Of f.
o Half Press changes light mode.
Unscrew Here to
Insert Batteries
Negative ( - )
Positive ( + )
End Ca p
Stun Mode ON: Red Light
Pow er Indicator: Green Light

1FullPress: Whenfully pressed,youwillhearaclickingsound. Revised:08-03-2016
3. Press the STUN Activation Button to test fire the unit. Do not hold the button down for more than 1 second. You will see and hear the electrical current fire
across the top of the unit between the contact probes.
4. Once your test is complete, fully press1either the Push-Button Tail Switch or the Function-Select Button to turn the unit off.
Using the StunBaton inSelf Defense
1. Before using the stun baton in self-defense, we recommend you become familiar with how this unit operates so you can quickly
protect yourself with the Stun Function. See How to Quickly Access the StunFunction below.
2. Using the directions above, movethe unit into the Stun Mode.
3. Touch your assailant’s body with the contact probes and press the Stun Activation Button.
4. Touching anywhere on the assailant’s body will have an effect. However, the maximum effect is achieved in the areas shown to
the right:
5. When touching the assailant’s body, you will not see or hear the electrical current as you do when the unit is test fired. You can
hold the Stun Activation Button down for more than 1 second, as this willnot damage the unit, as it will when being test fired.
6. You do not have to be concerned about the effects of the charge being transferred to you. Even if the assailant touches you while
being stunned, you willnot feel the effects of the charge.
How to Quickly Access the Stun Function
1. When the Flashlight is on, fully press1the Function-Select Button then press the Stun Activation Button.
2. When the flashlight is not in use, we recommend leaving the Function-Select Button in the Stun position (with both the red and green LED lights on) and
fully pressing1the Push Button Tail Switch to turn the unit off. When you want to quickly use the Stun Function, fully press1the Push-Button Tail Switch
then the Stun Activation Button.
Effects of the Unit on an Assailant
1. Touching an assailant for less than 1 second willcause minor muscle contractions and have a repelling effect.
2. Touching an assailant for 1 to 2 seconds willcause muscle spasms and a dazed mental state.
3. Touching an assailant for 3 to 5 seconds will cause loss of balance and muscle control, total mental confusion, and disorientation. All effects to the
assailant are temporary; the stun baton can cause no permanent harm. (NOTE: The device should not be used for longer than 5 seconds.)
WARRANTY: Streetwise Security Products extends a lifetime warranty to the PFTB12R for the product against defects in materials or workmanship, with the
following exceptions:
1. The warranty does not cover damage resulting from accident, misuse or abuse, lack of reasonable care, moisture, the affixing of any attachment not
provided with the product, loss of parts, or recharging the unit in any manner not in accordance with the included instructions.
2. The warranty will be voided if the unit has been opened or tampered with in any way (unless by an authorized dealer) or if any unauthorized replacement
parts have been used.
3. The lifetime warranty extends to the stun gun and flashlight only. The batteries and the battery charger have a one-year warranty.
NOTICE: Purchaser must check and abide by all local laws governing the possession and use of stun batons. In addition, the stun batons must only be used in
a lawful manner for self-defense. NOTE: Not to be used on children, persons with heart disease, or any vital part of the human body. Not to be stored or used
in environments where it is damp or humid or where there are extreme hot or cold temperatures. Do not use on metal objects.
Conditions of Sale: Purchase of this product is an agreement by the purchaser/user to hold all sellers and manufacturers harmless of all liabilities and
damages.
To Obtain Service: Contact the Authorized Dealer from whom you purchased this unit for a Return Merchandise Authorization. The return unit must be sent
postage prepaid and proof of purchase is required. Damage or loss occurring during shipment is not covered by this warranty.
Table of contents
Other Police Force Flashlight manuals

Police Force
Police Force PFTTS17 User manual

Police Force
Police Force PFTB12R User manual

Police Force
Police Force PF1500B User manual

Police Force
Police Force PFMTF50 User manual

Police Force
Police Force PFT6F52 User manual

Police Force
Police Force PFCL2F54 User manual

Police Force
Police Force TACTICAL PFL2F53 User manual
Popular Flashlight manuals by other brands

Larson Electronics
Larson Electronics ATX-20-S quick start guide

brennenstuhl
brennenstuhl HL SA 23 MH operating instructions

Makita
Makita DML186 instruction manual

Outland Living
Outland Living Tonga Torch owner's manual

NORDRIDE
NORDRIDE 2091 operating instructions

Carson
Carson PAGEGLOW PG-10 Instructions for use