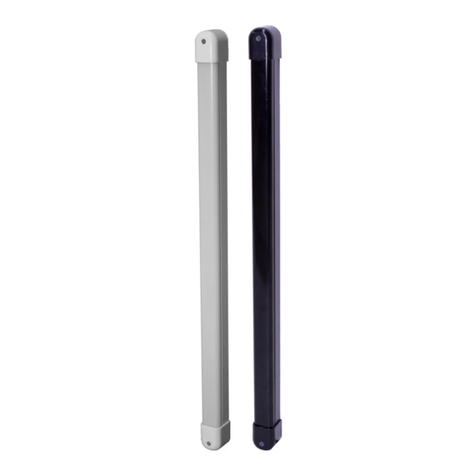
Politec MANA DT SMA Manual

PRODUCT
MANA
MANA DT SMA
Product code MANA DT SMA
DOUBLE TECHNOLOGY AND RS485 OUTPUT
PERIMETER BARRIER
INSTALLATION AND MOUNTING MANUAL VERSION 3.1

Table of contents
MANA DT SMA POLITEC | INSTALLATION MANUAL - VER.3.1
1.Introduction……………………………………………………………………………………………………………………………………...4
2.Product description…………………………...…………………………………………………………………….……….………..4
3.General warnings……………………….…………………………………………………………………………………..……………..….5
3.1 Additional warnings for devices powered by mains voltage
3.2 Installation warnings
4.List of main components…………………...……………………………………………………………………………………………..6
5.Preparation for installation…………………………………………………………………….…………………………………………7
5.1 Preparation of the barrier parts before installation
5.2 It is advisable to carry out
6.Assembly and positioning of the cable pit………………………………………………………………………………….……..8
6.1 Assembly and installation
6.2 Positioning of the cable pit
7.Column transformer assembly…………………………………………………………………..… .. ………………………… 10
8.Assembly on the base of the cable pit……………………………………………..…………… .. ………………………… 11
9.Column power supply connection …………………………….. ……………………………….. ………………………… .12
10.Evaluations before installation…………….…………………………………………………………….……………… ..… .12
9.1 Introduction to barriers - MW section
9.2 Introduction to barriers - IR section
11.Barrier positioning…………………………..………………………………………………….……………………………….… 15
11.1 Precautions before installation - MW section
11.2 Precautions before installation - IR section
11.3 Precautions before installation - double Technology
12.Wiring…………………………………….……..………………………………………..…………………….……………….… ... 18
12.1 Type of cable
13.Connections to the MANA AL214 power supply board. ………………………….……………………………...… ..19
14.Connections to the MES9C terminal board……………………………………………………….……….………………...21
14.1 Wired synchronism
15.Barrier alignment - MW section ………………………………………………………………..……………………………… ..23
16.Barrier alignment - IR section….…………………………………………………………………………………………….……..25
16.1 Calibration using SMA system
16.2 Alignment
16.3 Parallel beam calibration
16.4 Calibration with active crossing function
17.Optical synchronism ……… .. …………………………………………………………………………………………….… ... ... .29
18.Basic functions –MW section .. …………………………………………………………………………….……..……. ……… 30
18.1 Settings and basic programming - MANA RX board
19.Basic functions –IR section… ... …………………………………………………………………………………………. ……… 31
19.1 Basic settings and programming - MES9012 board
20.Intervention time adjustment…………………………………………………………..………………………………….….....32

Table of contents
MANA DT SMA POLITEC | INSTALLATION MANUAL - VER.3.1
21.Appendix A:DT3 sensor ………………………………………………………………………………………….…………………… ..33
21.1 Commissioning and adjustment
22.Appendix B:MW details ……………………………………………………………… .. ……………………………. ………… .... 34
22.1 Walk Test function
22.2 Function DIP
23. Appendix C: motherboard setting and programming (MES9012) ………………………………..…………….… 35
23.1 Motherboard components
23.2 LED signal operation
23.3 Features and settings
24.Appendix D: configuration of optical boards ……………………………. ………………………………………………… 39
24.1 Transmitter optic
24.2 Receiver optic
25.Appendix E: configuration with 3/2 receivers …………………………………………………………………….……… ..41
25.1 Setting 3 RX models
25.2 Setting 2 RX models
26.Appendix F: serial connection to the Adebus concentrator ……………………. …………………………...…… ..42
26.1 Serial port connection for each barrier
27.Appendix G: single barrier with optical synchronism …………………………………………………………… …… ..43
28.Technical specifications …………………..……………………………………………. …………………………………….…… ..44
29.FAQ ................................................................................................................ . ........................ ......... 45
30.Product disposal ………………………………………………………………………………………………. ……………….…….… .47

1.Introduction
4
MANA DT SMA POLITEC | INSTALLATION MANUAL - VER.3.1
Congratulations on having purchased the Politec perimeter barrier.This appliance guarantees
long-lasting and reliable operation if installed correctly.For correct and effective use, it is
necessary to read this instruction manual carefully.
The system has been designed to detect intrusions and activate the alarm; it is not a
device that prevents intrusion.Politec is not responsible for damage, injury or loss
caused by accidents, theft, force majeure (including momentary lightning-induced
overcurrent), abuse, improper or incorrect use, faulty installation or inadequate
maintenance.
2. Product description
The dual technology perimeter barrier has two components, one with double optic infrared and
one with 24GHz microwave.
The operation of the two technologies is INDEPENDENT, therefore if you want to use the two
barriers in AND logic, you must make the connection wired or in barrier or in the control unit.
WARNING:In the case of operation in AND, do not activate the fog disqualification function in
the IR section
This barrier is ideal for perimeter protection of internal and external areas.
It is equipped with a system for selecting the operating frequency that allows you to install
multiple barriers on the same site without them interfering with each other.The main features of
this barrier are:
•Adjustable intervention time which allows you to adapt to the characteristics of the site to be
protected;
•Protection beam angle adjustment both vertically and horizontally;
•Set up for mounting on a wall, on a pole and on aluminium columns;
•Optical alignment with viewfinder and signal measurement points;
•Selection of the operating frequency on 4 channels to avoid interference with other barriers;
•Contact signalling barrier opening.
Warnings
Mounting, installation of the barrier and connection to the mains must be carried out
by expert and qualified personnel, in compliance with rules and regulations applicable
to electrical systems.

3.General warnings
5
MANA DT SMA POLITEC | INSTALLATION MANUAL - VER.3.1
This installation manual contains important information regarding safety for installation: it is
necessary to read all the instructions before proceeding with the installation.
Keep this manual for future use.
•If you have any questions or doubts during installation, do not carry out any operations and contact
the support service.
•Use of these products for purposes other than those specified in these instructions is prohibited.
•You must not make any change to the components of the product unless stated in the manual in
order not to void the warranty; such operations can only lead to malfunctions; Politec assumes no
liability for malfunctions or damage due to modified products.
•Depending on the specific situation of use, check for the need for additional devices: detectors or
signalling devices.
•During installation, mounting and use of the product, make sure no foreign objects (solids, metals
or liquids) are able to penetrate inside the open devices.
•Manufacturer's liability:Politec assumes no liability for failures resulting from incorrect installation;
lack of maintenance, incorrect assembly or use.
•Politec is also not liable for incorrect or incomplete operation of the product or failure to detect
intrusion.
•Warranty (summary of conditions):Politec guarantees its products for a period of 2 years from the
production date.The warranty is applied to those purchasing directly from Politec; there is no
warranty for the end user who, in the event of breakdowns or faults, must contact the installer or
dealer.
•The warranty excludes aesthetic parts as well as parts subject to normal wear and parts subject to
normal consumption such as batteries and accumulators.
3.1 Additional warnings for devices powered by mains voltage
This manual is intended only for technical personnel qualified to install such devices.
•Assessing the hazards that may occur during installation and use of the system, in order to achieve
complete safety, it is necessary that installation takes place in full compliance with applicable laws,
methods, rules and regulations.
•Before accessing the internal terminals of the product, it is necessary to disconnect all the power
circuits.
•If automatic circuit breakers or fuses trip, before resetting them it is necessary to identify the fault
and repair it.
3.2 Installation warnings
•Check that all the material to be used is in excellent condition and suitable for use.
•Before proceeding with the installation, check the environmental class of the products in the
"technical specifications" chapter.
•Check, by comparing with the values shown in the paragraph "technical specifications", that the
range of the devices is equal to or greater than the physical distance between the barriers.
•Check that the barrier is positioned in areas protected against potential impact, in flat areas and on
fixed supports to avoid oscillations.
•Do not place the system components close to heat sources as they could be damaged.
•Each barrier has its own operating principle: check the instructions for choosing the right position
in the respective instruction manual.
4.List of main components
6
MANA DT SMA POLITEC | INSTALLATION MANUAL - VER.3.1
The package contains the following components and accessories.
When opening the package, check that everything has been included.
No
.
COMPONENT
1
Top closure cap
2
Cap pressure anti
-climb system (On
request)
3
Double tamper
4
Motherboard with SMA alignment
system
5
Transmitter/receiver optic
6
Flat cable
7
MW TX / RX board
8
Dish antenna and cavity at 24GHz
9
Aluminium profile
10
Heaters
11
12Vdc / 24Va power supply boardc
12
Mana 160VA transformer
13
Polycarbonate black screen
14
Anodised anticorodal aluminium
disk
3
2
5
4
1
7
9
6
12
14
13
11
10
8
Upon request, the column can be supplied for
pole or wall fixing, in which case there is no
disk at the base for fixing on the cable pit or
on the floor but a different lower closure, as
well as a pair of sliding brackets placed in the
rear aluminium profile that must be blocked
at the desired heights and which are useful for
assembling additional brackets built according
to site needs.

5.Preparation for installation
7
MANA DT SMA POLITEC | INSTALLATION MANUAL - VER.3.1
5.1 Preparation of the barrier parts before installation
Since the communication between the barriers can take place wired, via wireless and their alignment
can be done optically, it is advisable to firstly check all the component parts of the barriers and any
accessories before beginning the installation.
5.2 It is advisable to carry out:
•A test of the configuration of the devices in a sheltered or closed environment;
•a check on the operation of the optical and acoustic alignment
•the permanent fixing of each device;
•the preparation and carrying out of electrical connections.
In order to avoid errors, operating and installation problems, it is advisable to proceed as follows:
a) Place all the products with the package open on a table;
b) For the low consumption barrier version for wireless models with universal electronic board
housing, insert and connect the radio transmitter, and connect it to the barrier receiver board
cc) Power up the barriers and program them
d) Test barrier operation;
e) Place (without fixing) the barriers at the planned points;
f) Place (without fixing) all the other devices at the planned points;
g) Check for each barrier that there is sufficient field for radio communication (for wireless versions);
h) Permanently fix the barriers.
Before proceeding with the installation, it is necessary to check the integrity of the product, the
adequacy of the model chosen and the suitability of the environment intended for installation:
• Check that all conditions of use fall within the "limits of use" and in the "Technical specifications of
the product".
• Check that the environment chosen for the installation is compatible with the total footprint of the
product.
• Check that the surface chosen for the installation of the product is solid so as to ensure stable fixing
and that it is adequately protected from possible impacts or atmospheric agents.

6.Assembly and positioning of the cable pit
8
MANA DT SMA POLITEC | INSTALLATION MANUAL - VER.3.1
6.1 Assembly and installation
Insert the edge shown in the figure into the slot on the other wall and fix everything with the screws
Insert the third side in the same way and
tighten the screws
Widen the two opposite walls of the cable pit so you
can insert the last side
Insert and fully tighten the
missing screws of the two sides

9
MANA DT SMA POLITEC | INSTALLATION MANUAL - VER.3.1
The positioning of the cable pit for the MANA
column, once assembled, takes place through
the masonry keeping the upper edge flush with
the ground.
6.2 Positioning of the cable pit
Positioning must take place perpendicular to
the ground.If the base is not perfectly level,
minor adjustments can be made by adjusting
the inserts on the cable pit.By loosening the
insert on the appropriate side to be corrected,
the Mana base is raised to achieve the
appropriate vertical alignment.
Incorrect positioning Vertical level correction by insert
adjustment.
POSSIBLE CORRECTION OF INCORRECT CABLE PIT POSITIONING

10
MANA DT SMA POLITEC | INSTALLATION MANUAL - VER.3.1
Position the interspace plate and tighten the 4 fixing screws
7.Column transformer assembly
The kit is composed of:
•1 160VA transformer with 2 outputs;
•1 8x60 screw;
•2 M8 nuts;
•1 perforated plate;
•1 plate;
•2 black insulating sheath;
•4 barrier anchor screws.
Insert the 60mm screw in the perforated plate and tighten the locking bolt
Insert a sheath, the transformer, the second sheath and the plate and block everything with the
fixing nut.
N.B. it is advisable to position
the transformer in the space
intentionally left, so as to be
able to easily screw the fixing
screws to the column and have
sufficient space for positioning
the battery.

11
MANA DT SMA POLITEC | INSTALLATION MANUAL - VER.3.1
8.Mounting the base on the cable pit
Insert all the connection cables through the cable glands mounted on the cover under the base,
leaving adequate space inside the cable pit and length in the column for making connections to the
terminal board.
Cover under the base with sealing OR, for cable entry with cable glands.
Once the necessary cables have been passed through, the bottom cover is fixed with the screws
supplied along with the corresponding gasket.
At the end of the operation, position the column on the cable pit and secure it with the bolts
provided.
If the column is set up with the kit for pole or wall fixing, use the cover under the base for the
passage of the cables, following the instructions as above and finally fix it in the same way to the
base.(see photo above)

12
MANA DT SMA POLITEC | INSTALLATION MANUAL - VER.3.1
9.Column power supply connection
FUSE A: 5A-24Vac
FUSE B: 0.8A-13.8Vac
Red - Red
Black - Black
Blue - Brown
red
red
black
black
brown
blue
Make all electrical connections as shown on the diagram.
HEATER HEATER
To IR board
MES 9012 (flat
cable)
To the TX or RX
microwave
board (flat
cable)
Battery
MANA AL214
Power supply
MANA 160Va
TRANSFORMER
Fuse (delayed)

10.Evaluations before installation
13 POLITEC | INSTALLATION MANUAL - VER.3.1
10.1 Introduction to barriers - MW microwave section
These barriers are characterised by a24GHz electromagnetic wave emitted by a transmitter that
generates a cigar-shaped zone, until it reaches its receiver, so you are always in the presence of a pair
of columns, the width of which in the centre reaches up to 4-5m.The most peripheral part is called the
SENSITIVE ZONE while the most central part is called the ALARM ZONE
View from above
Signal interruption:ALARM
When a body approaches longitudinally until it crosses the lobe, the signal received by the
receiving section is perturbed until an alarm is generated.
Attenuation can be large or small depending on the mass and type of material that crosses the
emission zone.
MANA DT SMA
TX RX
$250m
~4.5m
ALARM ZONE
SENSITIVE ZONE
TX RX

14 POLITEC | INSTALLATION MANUAL - VER.3.1
10.2 Introduction to barriers - IR section
The Active Infrared Barrier is characterised by two components, a TX transmitter that impulsively
emits an infrared signal, towards the RX receiver.This signal is constantly controlled by aCODED
SYNCHRONISM which can be WIRED or OPTICAL according to the different types of barriers.
The transmitted infrared beam takes on a conical shape: the greater the distance between TX and RX,
the greater the diameter of the cone when it arrives.
View from above
TX RX
MANA DT SMA
2°
50 m
2 m
TX
Signal interruption:ALARM
A barrier can be composed of several TX transmitters and RX receivers mounted inside specific
different columns.
The infrared barriers have multiple controls that significantly limit false alarms, as the genuine
alarm signal is given by the complete interruption of the infrared signal.
HEATERS
It is recommended to power the thermostating system as, in conditions of high humidity, the
condensation that is created on the screen can lead to a significant decrease in the IR signal up to
the alarm.For obvious reasons, for battery powered barriers, there is no thermostat control even if
set up, therefore to minimise the problem, it is necessary to reduce the working distance between
TX and RX, thus ensuring a good amount of signal constantly, even in case of particular climatic
conditions.
POWER SUPPLY
The barriers can be divided into two categories, powered at low voltage and connected by wire, or
powered by batteries for wireless systems, then combined with radio transmitters to communicate
with the alarm control unit, as required by specific sector regulations.

11.Positioning barriers
15 POLITEC | INSTALLATION MANUAL - VER.3.1
11.1 Precautions before installation - MW section
Before positioning the barriers outside, you must bear in mind that the lobe generated by the
microwave can reach a width of 4-5m depending on the length of the section.
This zone must be completely clear of objects, buildings, vehicles and fences to avoid wave
reflections that would cause abnormal operation with generation of alarms.
MANA DT SMA
It should also be considered that due to the effect of the generated lobe, there is a dead zone in the
immediate vicinity of the columns.It is therefore necessary to make intersections between the
barriers, which cancel any possibility of crossing in said area.It is recommended to always place 2 TX
or 2RX at each intersection, with different frequencies out of the 4 available.
TX RX
5m
5m
TX3
TX4
TX1
TX2
RX4
RX1
RX2
RX3
5m
5m

16 POLITEC | INSTALLATION MANUAL - VER.3.1
11.2 Precautions before installation - IR section
In order to avoid false alarms, it is advisable to place the barriers away from reflecting surfaces, away
from walls or anything that can attenuate the signal.
DO NOT place the barriers if there are plants, bushes or fixed objects in the range that
obstruct the signal and create "grey areas".Leave a corridor of 50cm for distances between
columns greater than 50m
TX RX
TX RX
DO NOT place barriers close to roads: vehicle lights directed towards the RX could create
disturbances
DO NOT place barriers near automatic gates: photocell signals can create interference
RX
DO NOT place the barriers close to walls: the signal quality may decrease
MANA DT SMA

17 POLITEC | INSTALLATION MANUAL - VER.3.1
11.3 Precautions before installation - DUAL TECHNOLOGY
In the previous pages we wanted to represent the basic concepts of IR and MW individually,
highlighting the positive qualities and limitations of the two technologies, leading to the choice of
installing a Dual Technology perimeter protection system.
N.B.The dual technology barrier is always composed of two distinct columns, one with the TX part
and the other with the RX part of each IR and MW section.
The dual technology barrier concept determines the pairing of two different technologies, typically
infrared and microwave, as in this case, which give rise to the alarm condition in AND, i.e. when both
are subjected to a stress and reach the alarm threshold.
If the conditions of correct installation concerning the individual sections are respected:Active Infrared
Beams and Microwave, maximum results are obtained in terms of system operation and reliability.
This leads to the choice of an intelligent dual technology barrier and not because, critical
environmental situations, led to this choice since the barrier basically generates an AND alarm; if the
criticality for one of the two sections actually and permanently exists, this still remains, making the
system weaker.
If, on the other hand, the criticality can prove to be accidental or random due to climatic factors, the
choice of the dual technology barrier offers a significant advantage in terms of reliability in addition to
the considerable reduction of possible false alarms.
E.g.:heavy snow, growth of grass or shrubs moved by strong wind, fog, medium or large objects as well
as vehicles, left unintentionally in the vicinity of the microwave protection lobe etc.
Ultimately:
Each of the two sections must be able to work normally, as if it were on its own.
There should be nothing on the site that could permanently disturb either section.
The combination of the two technologies creates a situation of maximum reliability and security.
It is also recommended:
To manage the AND function in the alarm control unit, having brought the alarm outputs of the
individual sections, in addition to the accessory outputs.This allows the storage of any operating
faults and being able to intervene in a targeted way to solve the problem.
NOTE:The IR section has the S.LOW function, i.e. the disqualification for fog which, if activated, blocks
the alarm relay by not opening the input on the control unit, consequently the system alarm condition
cannot occur when the Microwave section should generate an alarm.It is therefore recommended to
opt for: either not activating this function, which in case of lowering of the signal causes the alarm of
the IR section, or if you want to manage this function, as a signal, typically for the duration of the
weather condition, it is necessary to create the opening of the alarm input, of the IR section on the
alarm control panel.
MANA DT SMA

12.Wiring
18 POLITEC | INSTALLATION MANUAL - VER.3.1
12.1 Type of cable
Wiring must be done using two separate cables.
The first of the electric type (e.g. 3x1.5 mm²) supplies the transformer with 230Vac.
The second one, necessarily of the SHIELDED type (e.g. Nx0.22 mm² minimum) to transfer all the
output signals of the individual columns, to the alarm control unit, in addition to the synchronism
connection between the columns, otherwise made with dedicated cable but always shielded.
N.B.The shielding of this cable must be connected to the negative of 13.8 Vdc of all the columns.
MANA DT SMA
230Vac mains cable
(power supply) Sync cable + various signals

No. TERMINAL
DESCRIPTION
Power connectors
(terminal board of
8)
1
–2
19 Vac input
Cable coming out of the transformer
3
–4
13.8 V outputcc
Infrared section power supply
5
–6
24 Vac input
Cable coming out of the transformer
7
–8
24 Vac output
Heater power supply
13.Connections to the MANA AL 214 power supply board
19 POLITEC | INSTALLATION MANUAL - VER.3.1MANA DT SMA
1 2 3 4 5 6
2
6
5
4
3
1
7
1 2 3 4 5 6 7 8

20 POLITEC | INSTALLATION MANUAL - VER.3.1MANA DT SMA
N.B.: in case of absence of 230Vac power supply, the back-up battery inside the column is
disconnected to avoid its deterioration, when its voltage drops below 10.6V.
1
MW TX or RX circuit
power supply connector
Connection
with flat cable to the connector of the MW TX or MW
RX
electronic
board
2
Battery connector
Connect
with red black two-wire cable to the backup battery
3
V
-Test jumper
If
inserted in position 1-2 it enables the power LEDs to light up, 5V
/
9
V / 13.8V.Return to the rest position 2-3 after the test.
The
4th LED, called "Mains" is always on when the board is
powered
by
the transformer, while it is off if the battery intervenes.
4
Jumper 0.5 A battery
Insert
the jumper when using batteries of 7Ah or greater.
N
.B.Current limit for battery charging 0.5 A. Without jumper
the
current
charging limit is 0.25 A
5
Heater fuse
5
A delayed to protect the heating circuits.
6
Circuit
fuse
0
.8 A delayed to protect the MW TX or RX and IR circuits.
7
Jumper J7
If
inserted, the 24Vac output of the power supply is forced to test
the
heaters
regardless of the temperature detected in the column.
No.
ID
CODE
DESCRIPTION
Terminal
board of 6
1
GND
Power
supply negative.
2
T
Battery
test.By applying a 12V pulse it is possible to verify that
the
battery
has an output voltage > 11.4Vdc.
This
information is given on terminal "B".
3
B
High
impedance output if the voltage supplied by the battery is
<
11
.4Vdc.120Ωoutput if the battery voltage is >11.4Vdc.
This
information is valid if "T" is active.
4
15
High
impedance output if the voltage supplied by the power supply
is
<
12.4Vdc.
120
Ωoutput if the voltage supplied by the power supply is >12.4Vdc.
5
24
High
impedance output if the voltage supplied by the transformer
on
the
"24Vin" terminals is <18Vac.
120
Ωoutput if the voltage supplied by the transformer on the "24
Vin"
terminals
is >18Vac.
6
NC
Not
connected
Table of contents
Other Politec Automatic Barrier manuals
Popular Automatic Barrier manuals by other brands

AVS Electronics
AVS Electronics SILVER SBH50 instructions

RITE-HITE
RITE-HITE GUARDRITE STRAP Installation and owner's manual

Keyautomation
Keyautomation ALT6K Series Instructions and warnings for installation and use

CAME
CAME G3000 manual

BFT
BFT XPASS B 1200C installation manual

BFT
BFT GIOTTO BT A 30 U Installation and user manual