manuals.online logo
Brands
  1. Home
  2. •
  3. Brands
  4. •
  5. Polygroup
  6. •
  7. Artificial Pine Tree
  8. •
  9. Polygroup TG76M2X88L03 User manual

Polygroup TG76M2X88L03 User manual

Christmas Tree
Model: TG76M2X88L03
Sku # 1003 143 820
Pre-AssemblyPre-Assembly
Package Contents
Part Description Quantity
A Tree top 1
B Tree center, Sticker 2 1
C Tree center, Sticker 1 1
D Tree stand 1
E Remote Controller 1
Safety Information
IMPORTANT SAFETY
INSTRUCTIONS
a. READ AND FOLLOW ALL
SAFETY INSTRUCTIONS.
When using electrical products, basic precautions should
always be followed, including the following:
b. Do not use seasonal products outdoors unless marked
suitable for indoor and outdoor use. When products areused
in outdoor applications, connect the product to a Ground
Fault Circuit Interrupting (GFCI) outlet. If one is not provided,
contact a qualified electrician for properinstallation.
c. This seasonal product is not intended for permanent
installation or use.
d. Do not mount or place the product near gas or electric
heaters, fireplaces, candles, or other similar sources of heat.
e. Do not secure the wiring of the product with staples or nails,
or place on sharp hooks or nails.
f. Do not let lamps rest on the supply cord or on any wire.
g. Unplug the product when leaving the house, when retiring
for the night, or if left unattended.
h. This is an electric product and not a toy! To avoid risk of fire,
burns, personal injury and electric shock it should not be
played with or placed where small children can reach it.
i. Do not use this product for other than its intended use.
j. Do not hang ornaments or other objects from cord, wire, or
light string.
k. Do not close doors or windows on the product or extension
cords, as this may damage the wire insulation.
l. Do not cover the product with cloth, paper, or any material
that is not a part of the product when in use.
m. Read and follow all instructions that are on the product or
provided with the product.
n. Risk of fire. This product does not contain lamp shunts, which
allow the product to operate if one lamp burns out. Lamps
are non-replaceable..
o. To reduce the risk of fire or electric shock, do not attempt
to replace lamps or modify string.
p.
SAVE THESE INSTRUCTIONS.
Assembly
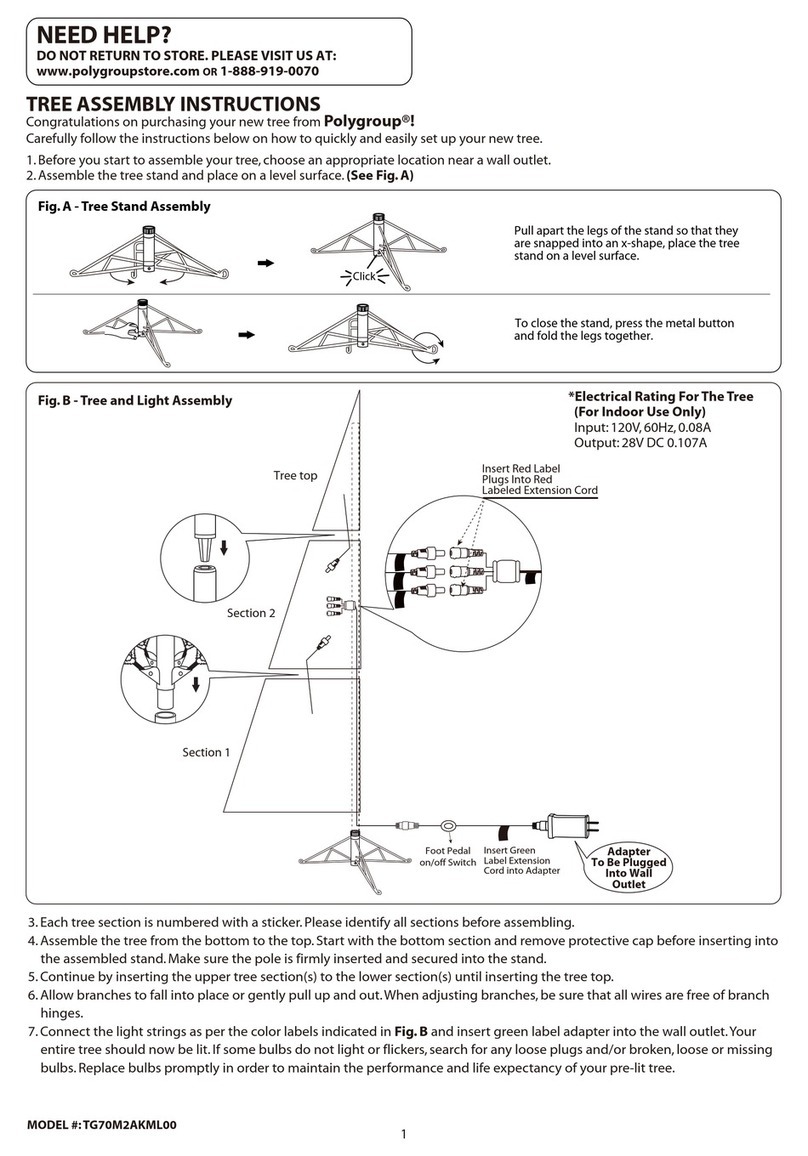
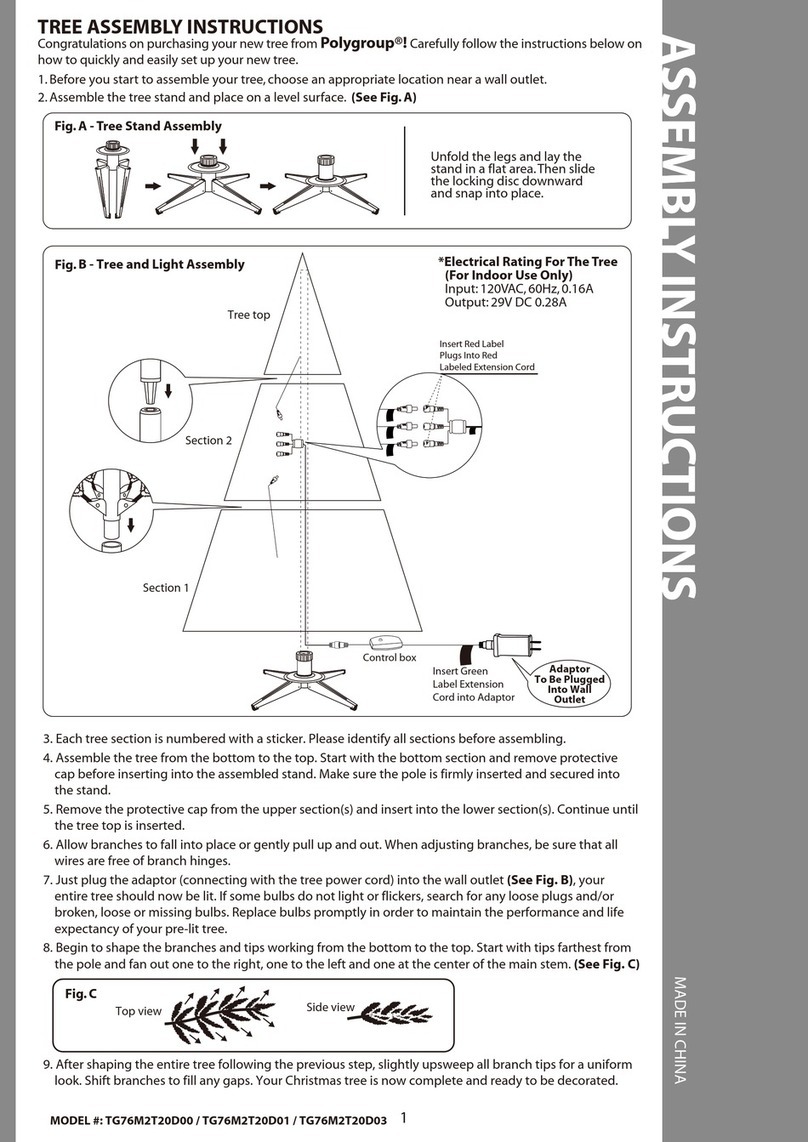
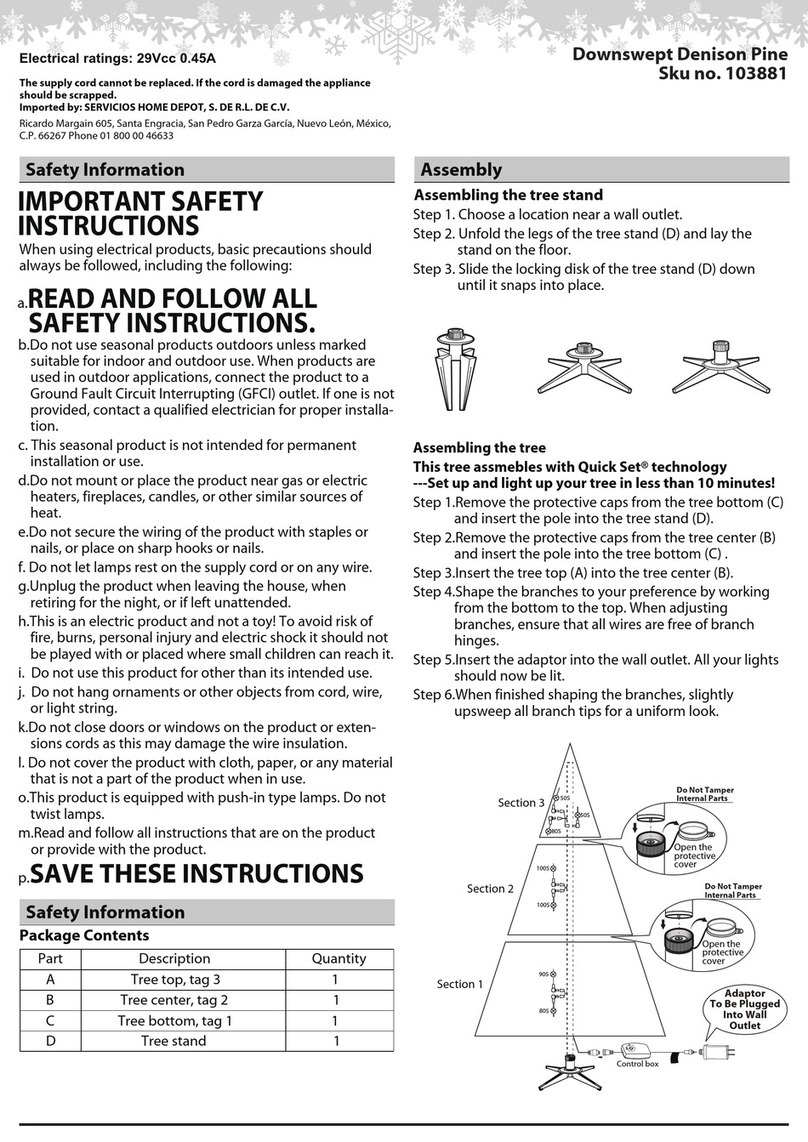
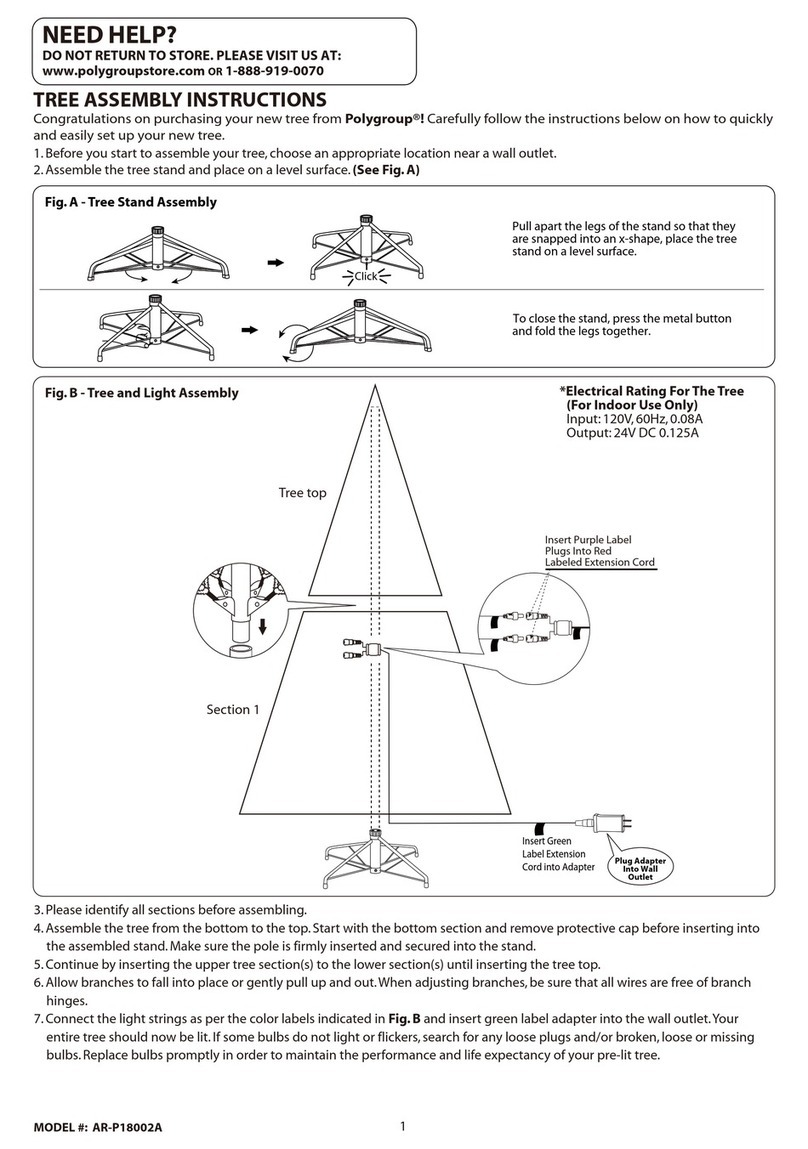
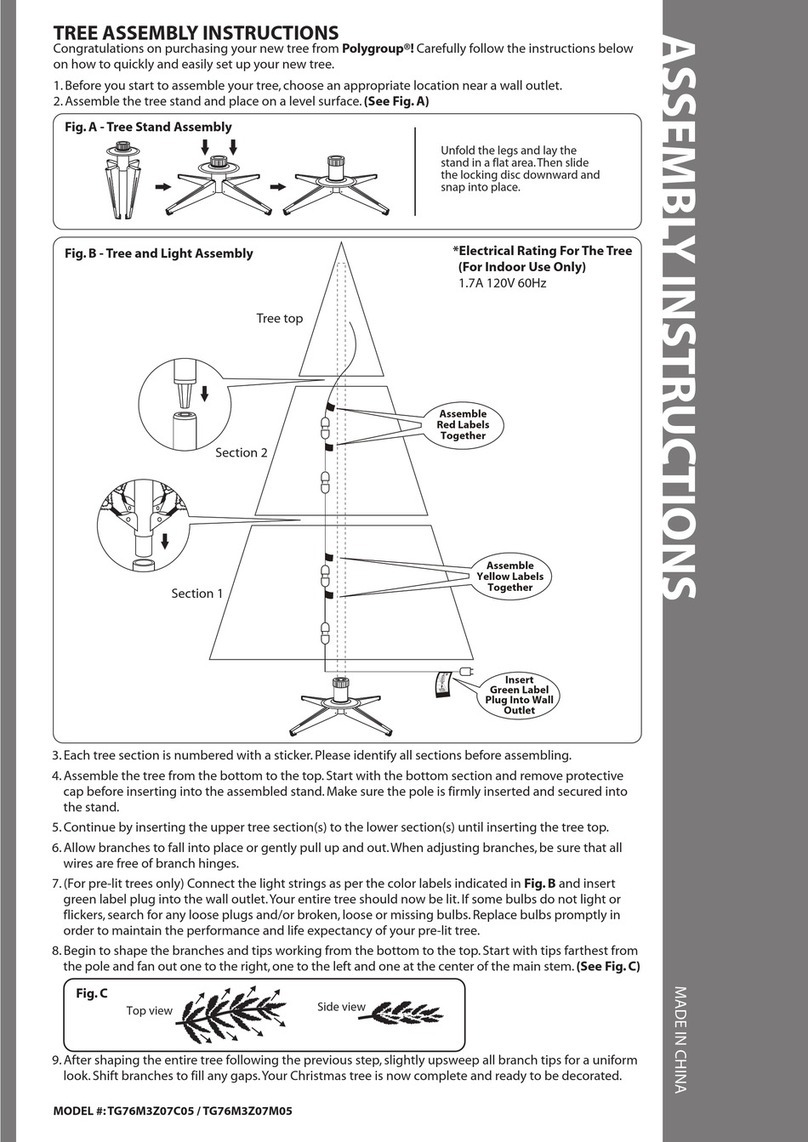
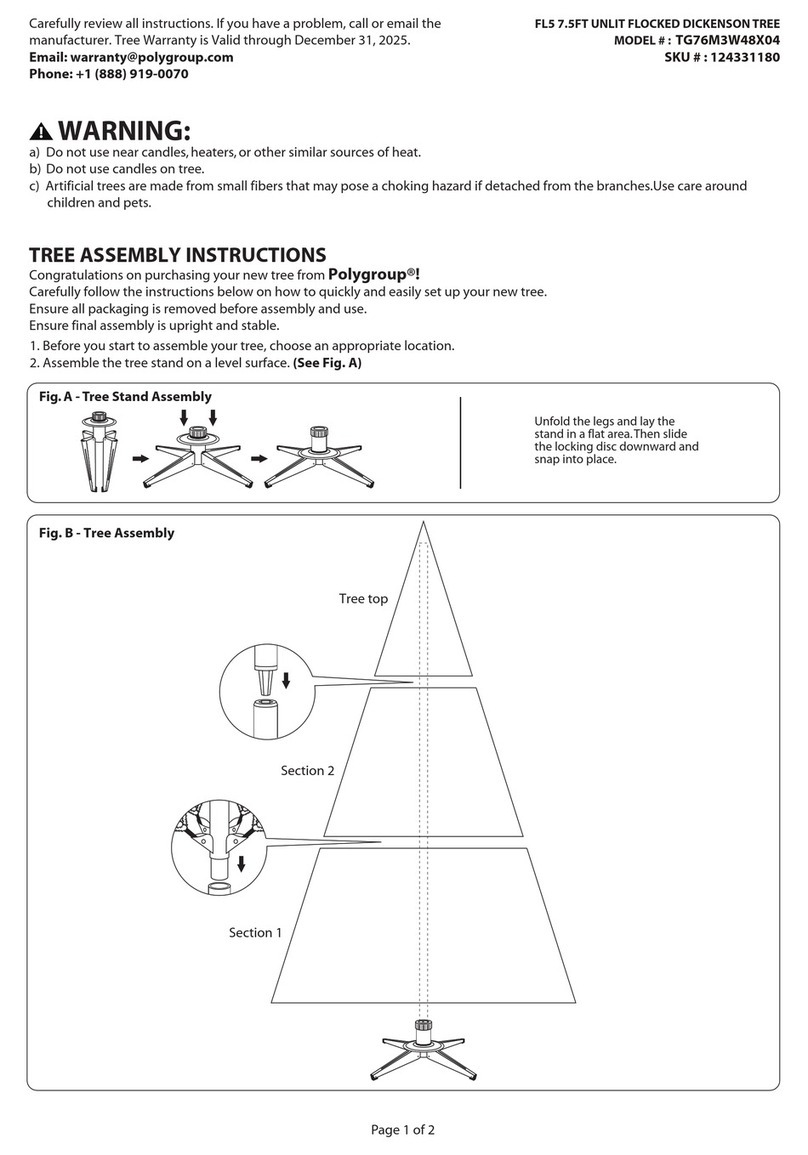
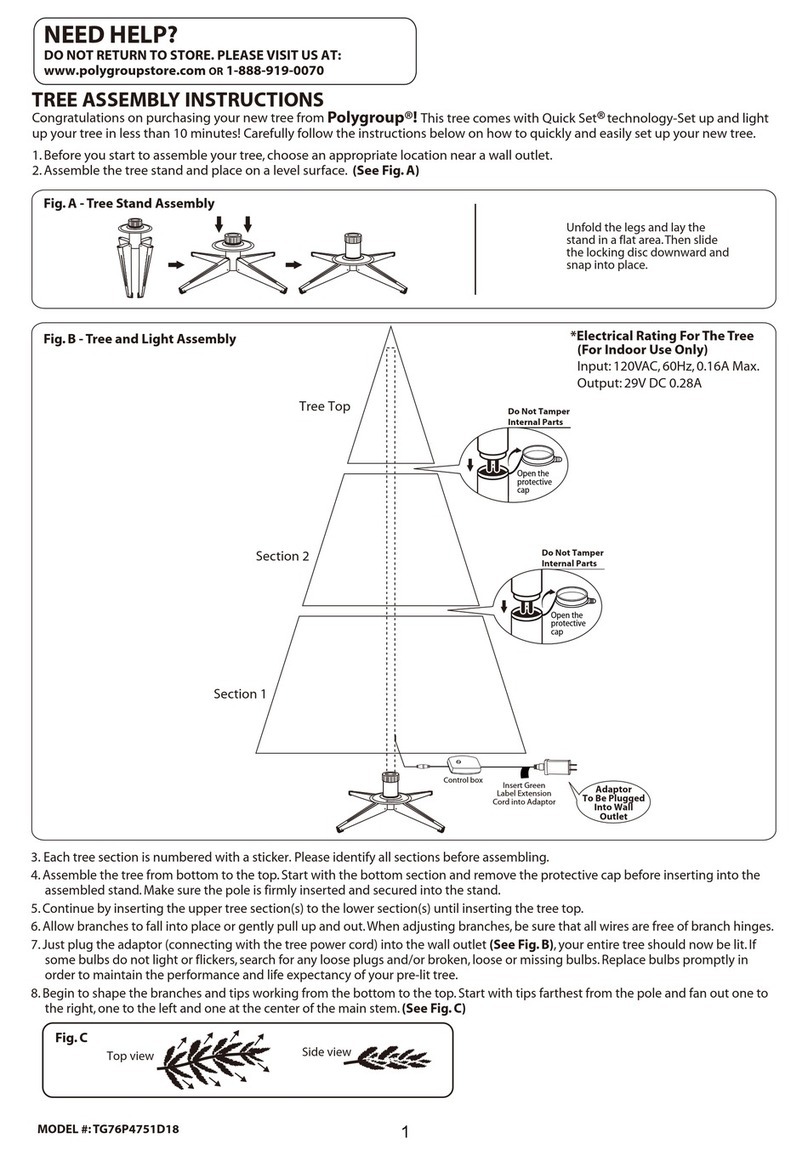
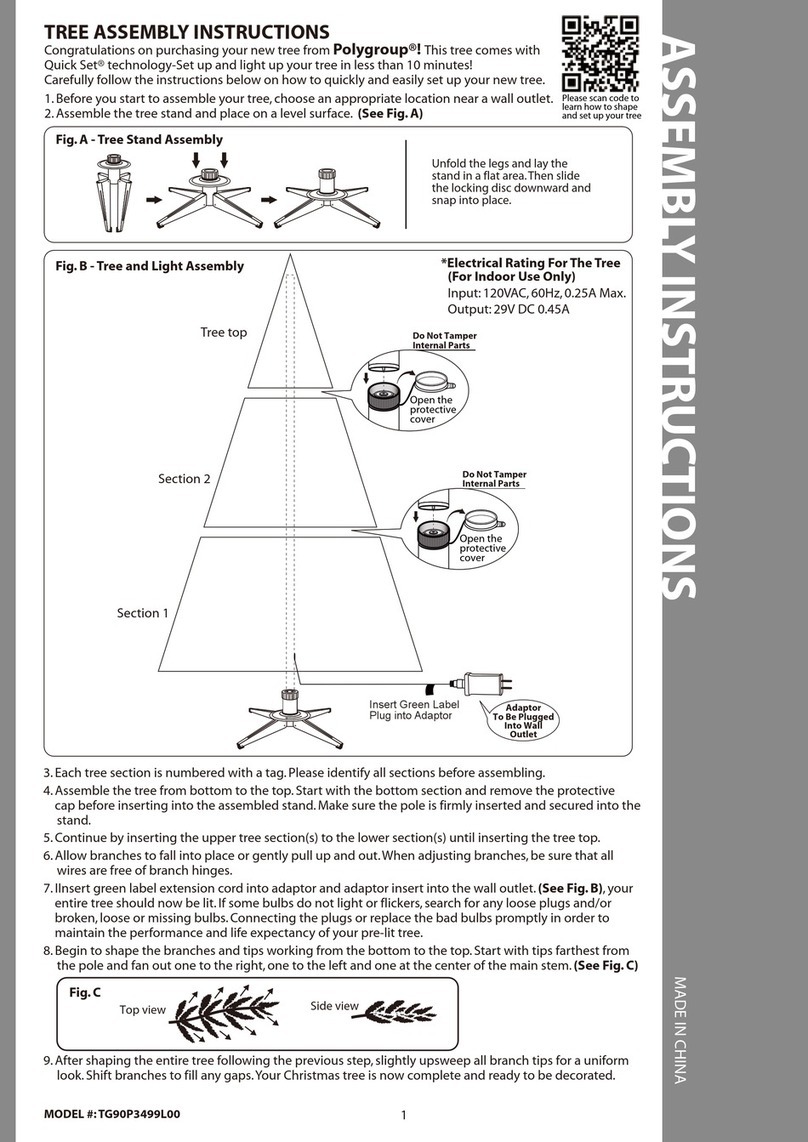
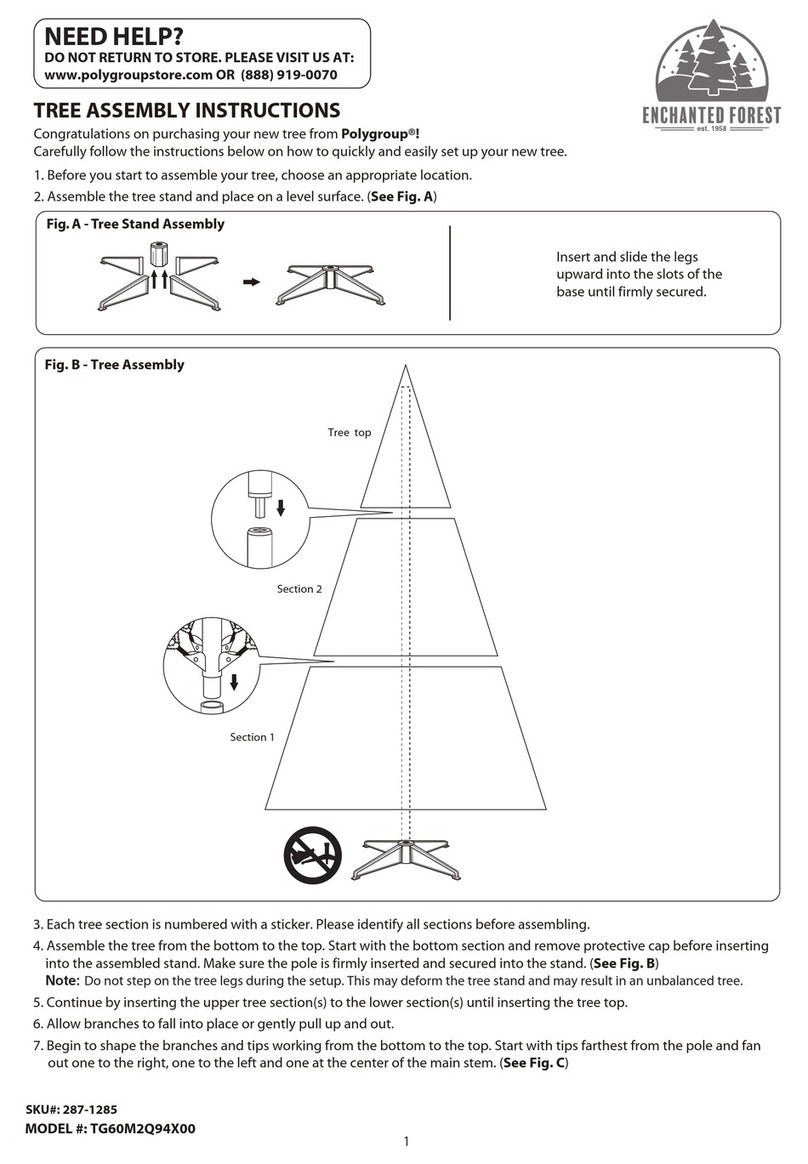
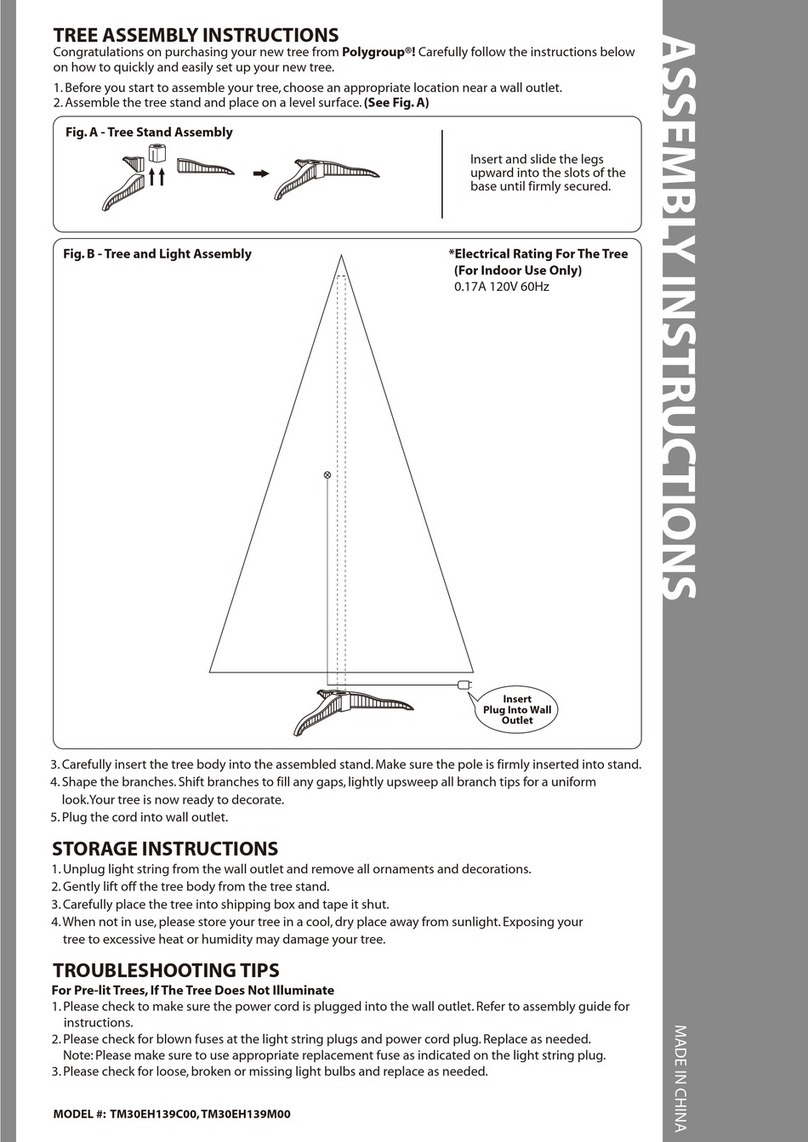
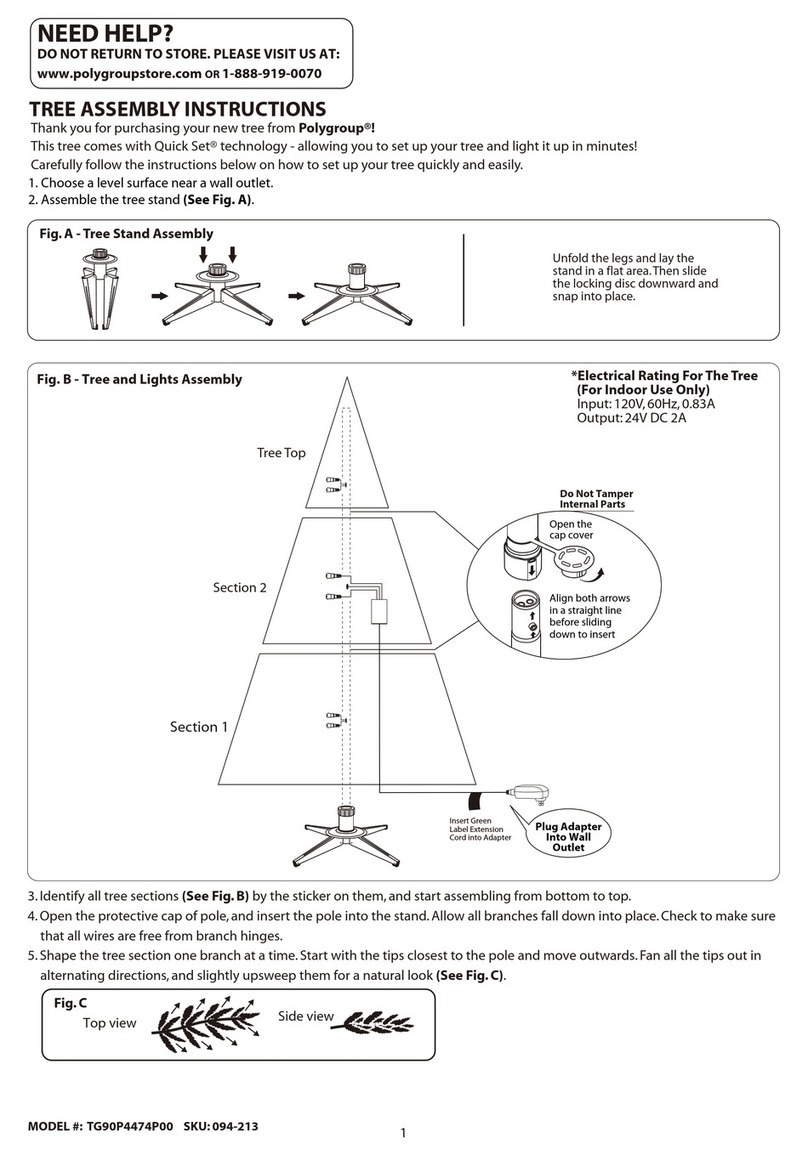
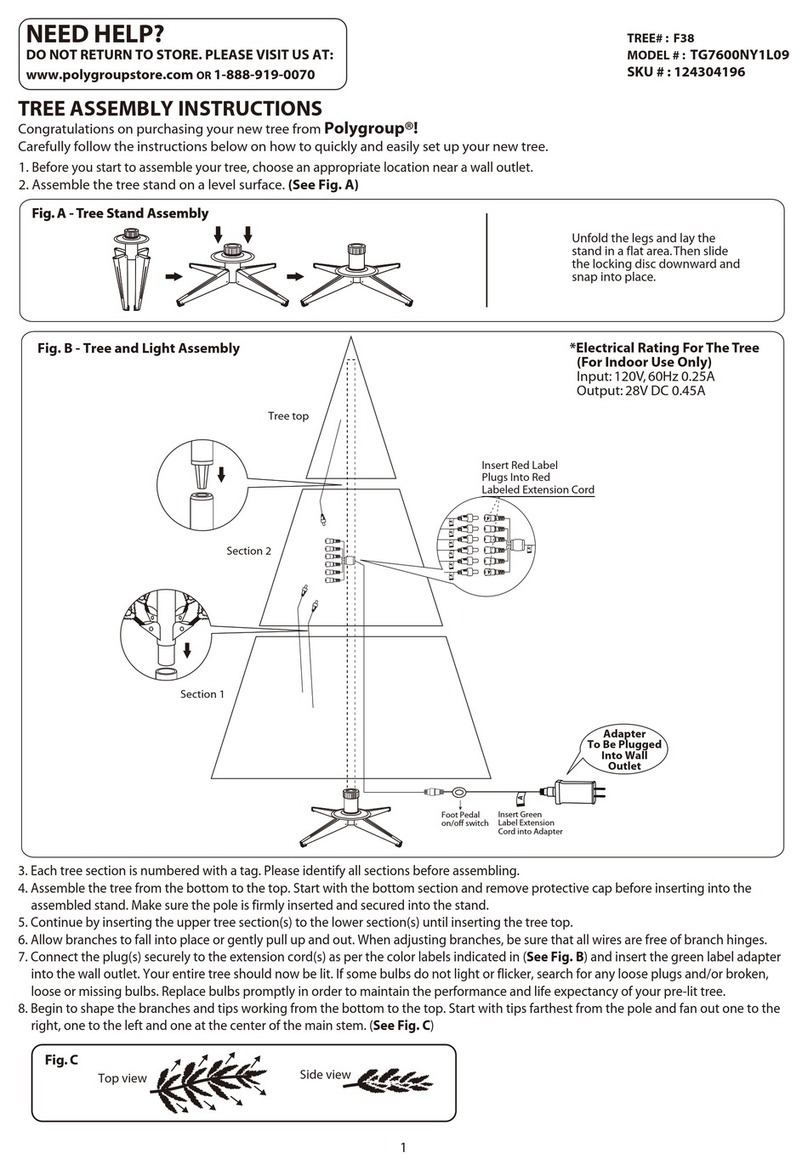
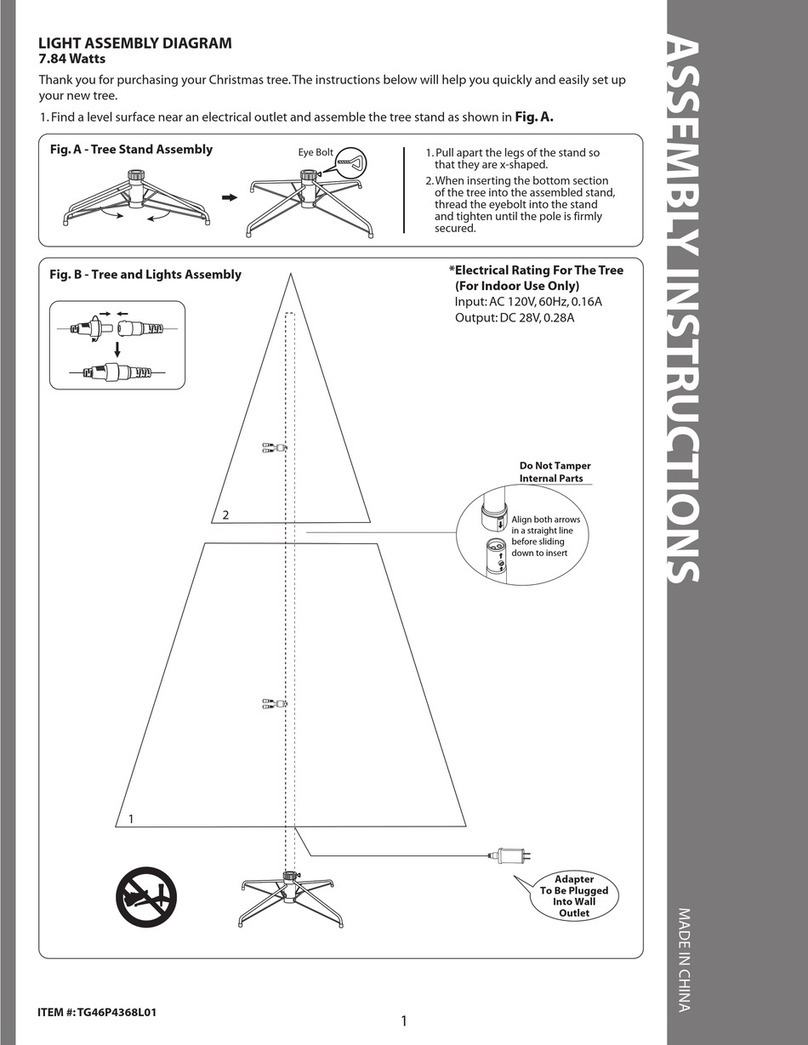
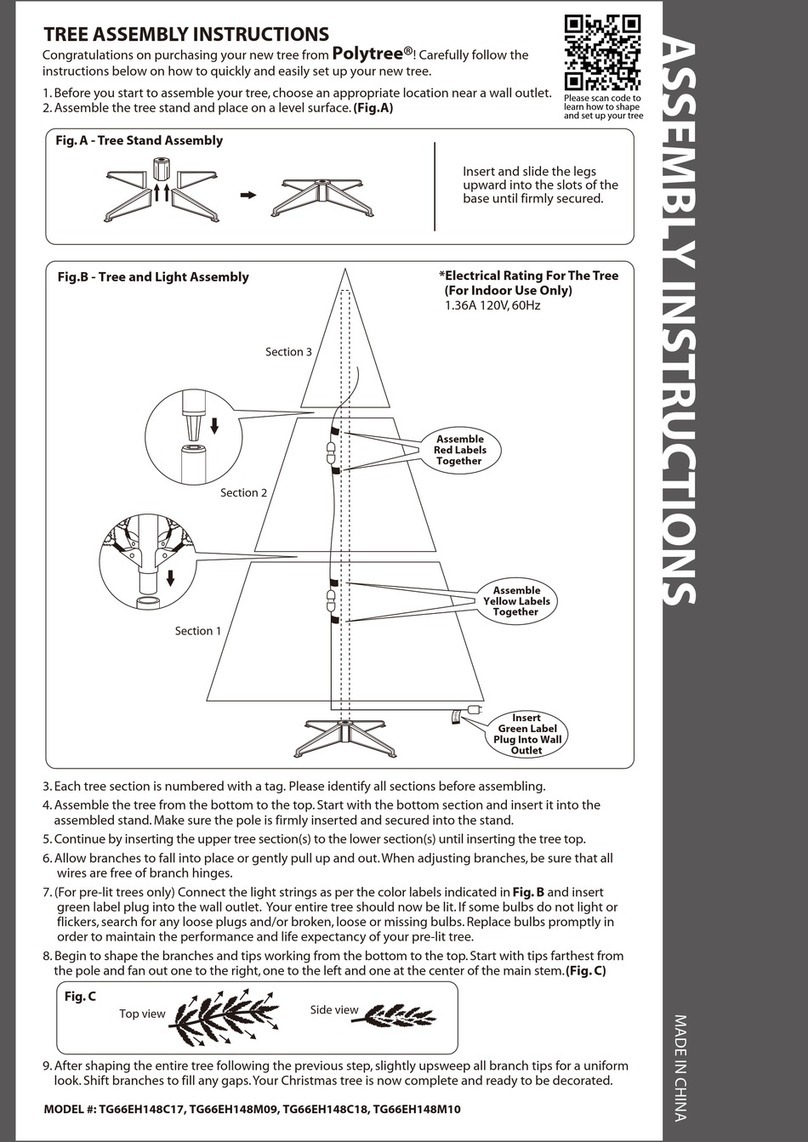
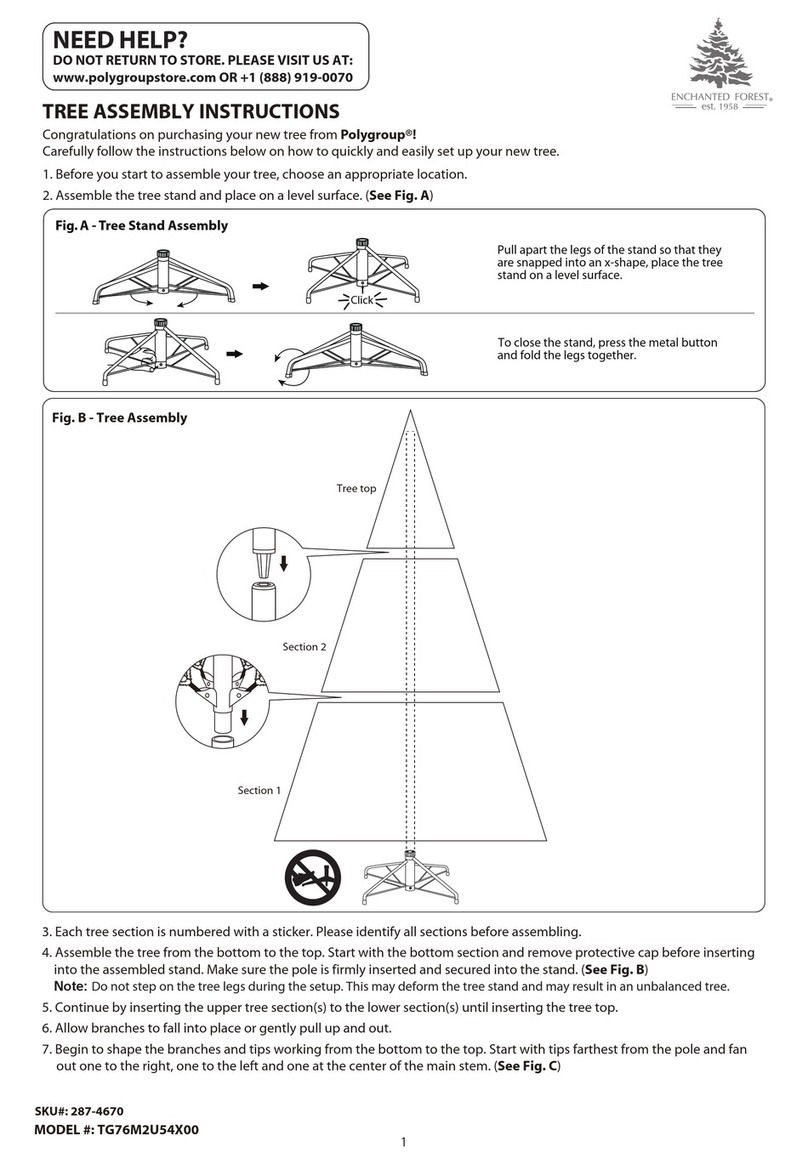
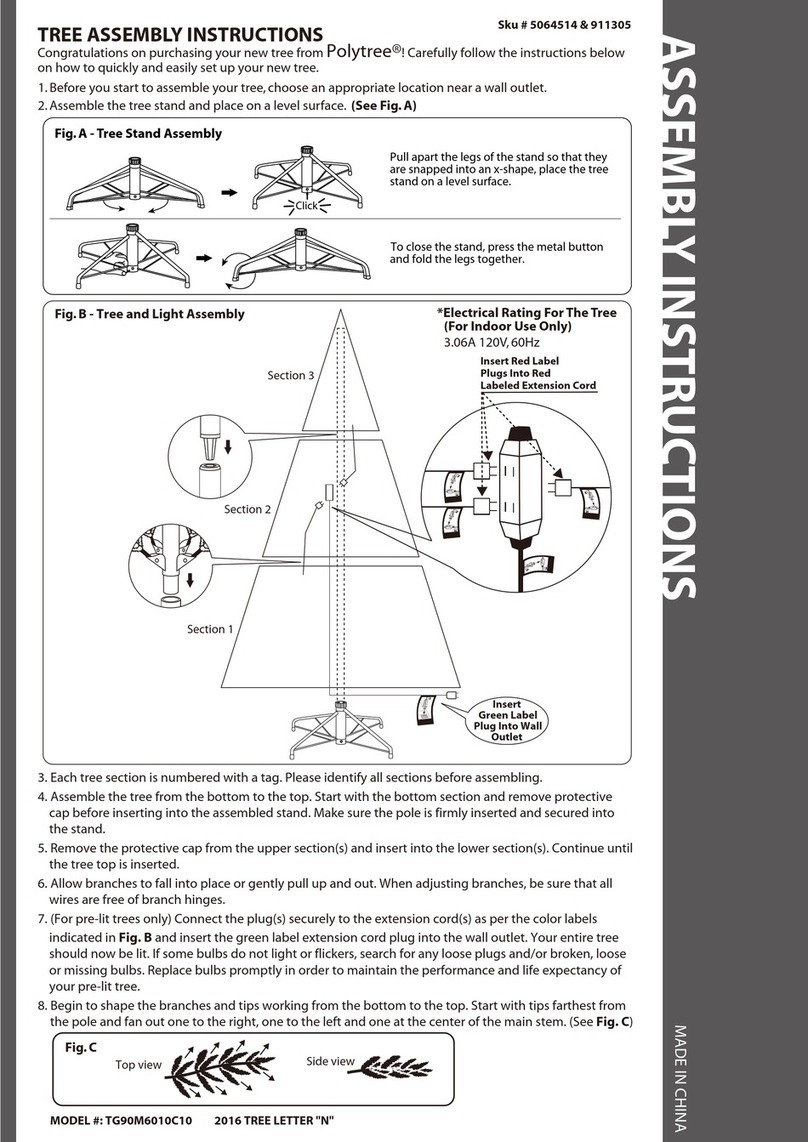
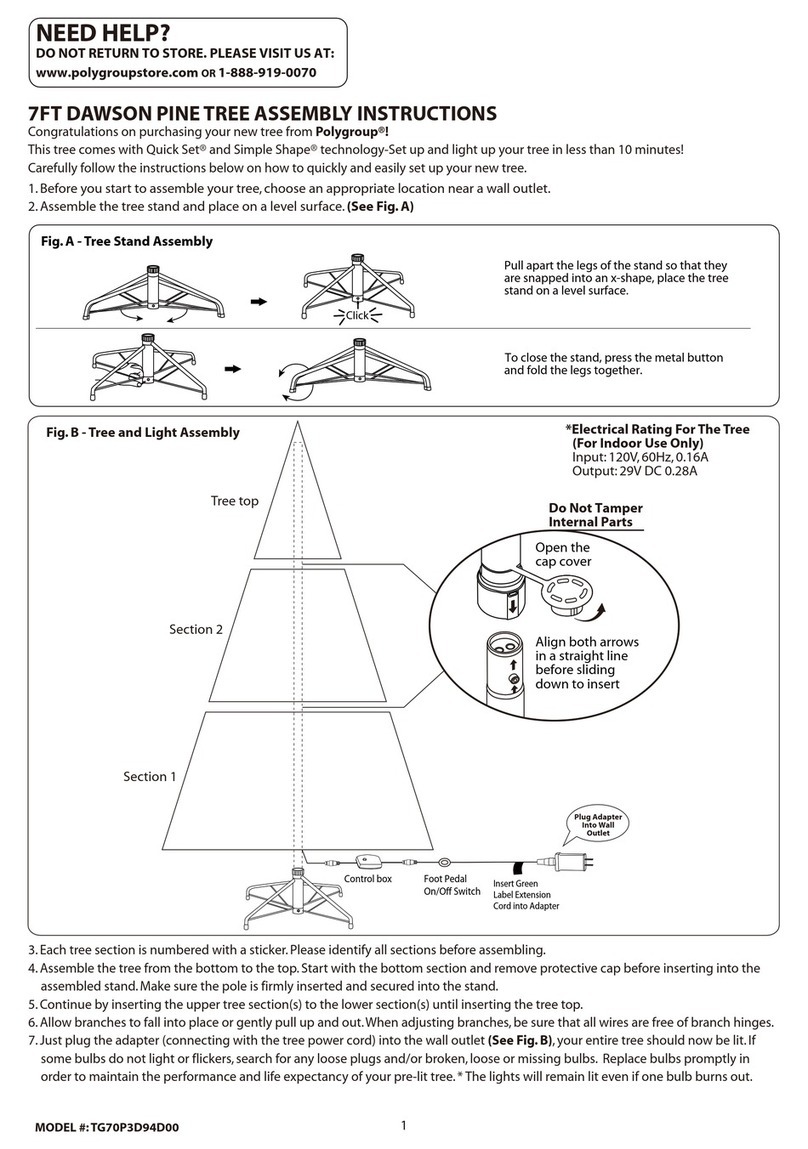
Step 1. Before you start to assemble your tree, choose an
appropriate location near a wall outlet.
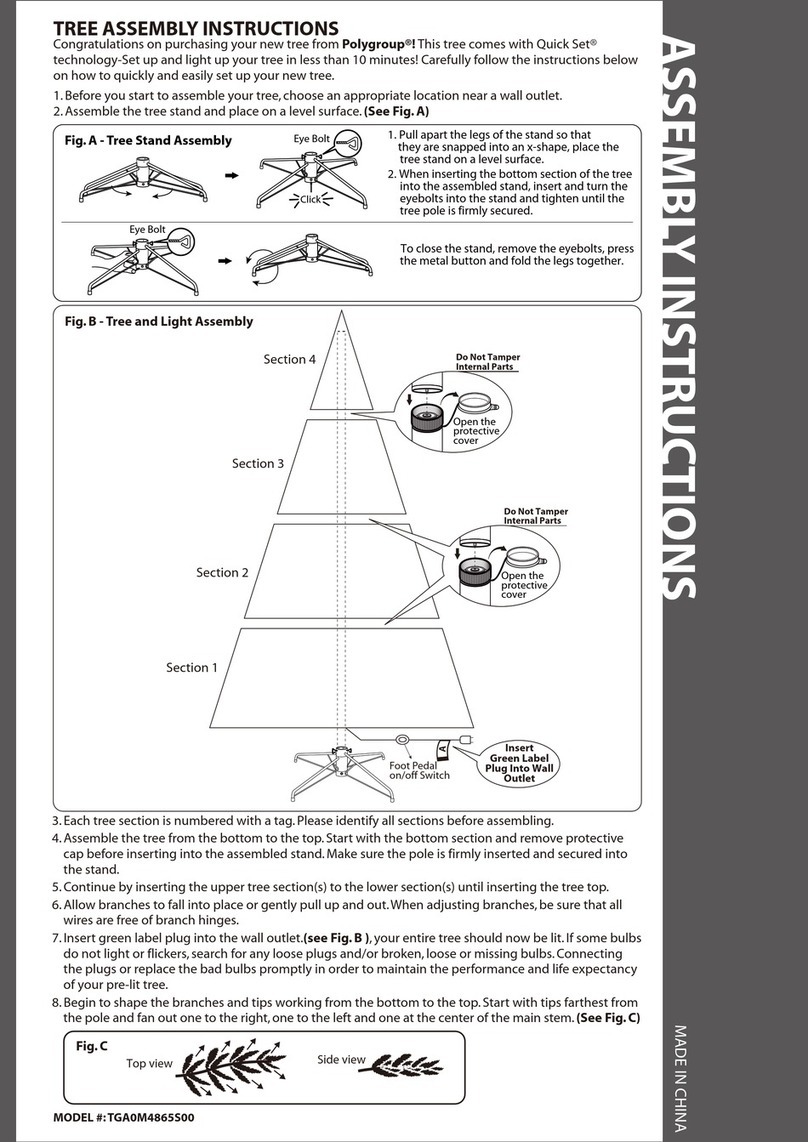
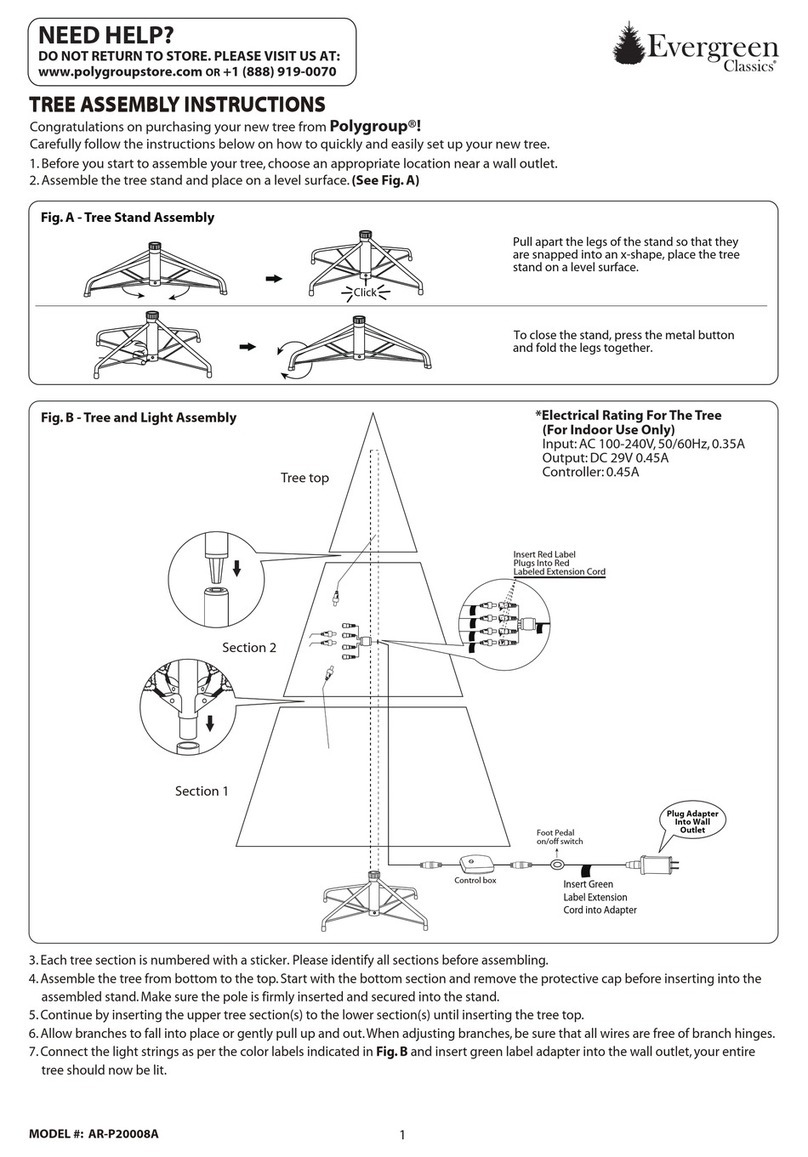
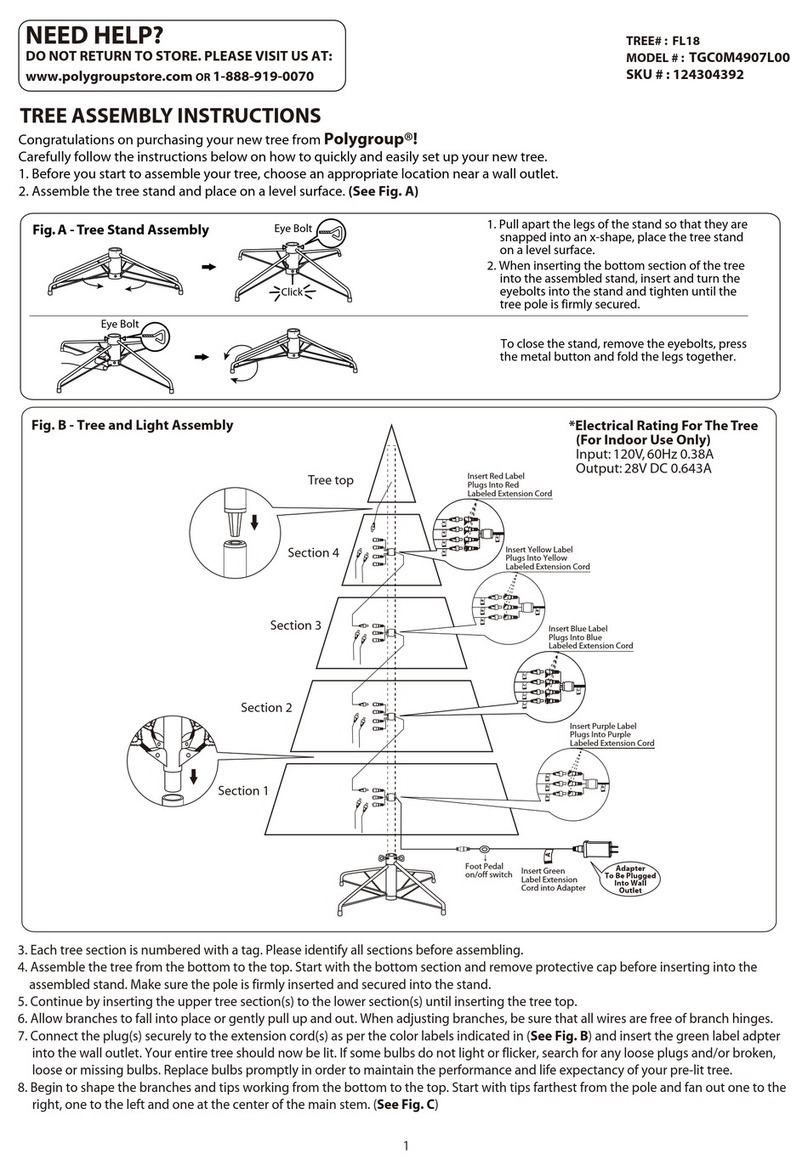
Step 2. Assemble the tree stand and place on a level surface.
(See Fig. A)
2
Insert Section 1 into the tree stand.
1
Section 1
Tree top
Section 2
Remove tree stand and tree sections
from box.
Set Up
*Electrical Rating For The Tree
(For Indoor Use Only)
Input: 120V, 60Hz, 0.35A Max.
Output: 29V 0.69A
Tree top
Section 2
Section 1
Do Not Tamper
Internal Parts
Open the
protective
cover
Do Not Tamper
Internal Parts
Open the
protective
cover
Control Box
Step 3. Each tree section is numbered with a Sticker. Please
identify all sections before assembling.
Step 4. Assemble the tree from bottom to the top. Start with the
bottom section and remove the protective cap before
inserting into the assembled stand. Make sure the pole is
firmly inserted and secured into the stand.
Fig. B - Tree and Light Assembly
Fig. A - Tree Stand Assembly
Unfold the legs and lay the stand in a flat area.Then slide the locking
disc downward and snap into place.
Insert
Adapter Into
Wall Outlet
Foot Pedal
on/off Switch
Christmas Tree
Model: TG76M2X88L03
Sku #1003 143 820
Deploy and shape the Section 1.
34
Remove the protective cap of Section
1 and add Section 2.
5
Deploy the Section 2 like Step 3.
6
Remove the protective cap of Section
2 and add Tree top.
Step 5. Allow branches to fall into place or gently pull up and out.
When adjusting branches, be sure that all wires pressing
the foot switch button are free of branch hinges.
Step 6. plug the adapter into the wall outlet. Tread the button on
Foot Pedal Switch then push power button on Remote
Controller or control box. Your entire tree should now be
lit. Select Color Selection Buttons or Modes Options on
Remote Controller to change light show effects.
Step 7. A button on the Control Box can manually operate the
light modes and color selections.
Step 8. Begin to shape the branches and tips, working from the
bottom to the top. Start with tips farthest from the pole
and fan out one to the right, one to the left, and one at
the center of the main stem. (See Fig. C)
Step 9. After shaping the entire tree following the previous step,
slightly upsweep all branch tips for a uniform look. Shift
branches to fill any gaps.Your Christmas tree is now
complete and ready to be decorated.
Top view Side view
Fig. C
Unplug extension cord from the wall outlet first and then remove
all ornaments and decorations.
1
Detach Tree top,and place in box
for storage.
4
Detach Section 2 and put it into
the box.
3
Fold the lower layer of Section 2 like
Step 2.
5
Cover the protective cap of Section 1
then fold same as Section 2.
6
Detach Section 1 from tree stand and
pack it into the box.
Fix the Remote Controller back onto
power cord.
2
Cover the protective cap of the
Section 2.
Storage Instructions
Christmas Tree
Model: TG76M2X88L03
Sku # 1002469164
Color Selection
Buttons
Power (ON/OFF)
Modes
Options
1. Press button to turn the lights ON/OFF.
2. Press color selection button for your preferred color.
3. Cycling Press button to get different light modes:
• flash
• strobe
• fade
• smooth
1. Loose the screws and detach the back cover.
2. Push the battery, and take it out alone with the arrow direction.
3. Install another new CR2025 battery.
4. Install the back cover and screws to front cover. Make sure the
screws are all tightly fastened.
5. Test the function, and see if it works.
NOTE: Air-dry Remote Controller if it gets wet.
Screw
Battery
CR2025
Front
Cover
Back
Cover
Operation Instruction Of Remote
Controller
Battery Replacement Of Remote
Controller
CAUTION:Use only power adaptor that was provided
with this product. Using a different power adaptor will damage
the lights and cause fire and electrical shock hazard.
TroubleshootingTroubleshooting
Problem Solution
The tree does
not light
Ensure that all tree sections are
plugged into each other and that the
tree is plugged into the wall. If your
tree came with a foot pedal, step on
the On/Off button.
Trouble Shooting Tips
For Pre-lit Trees, If The Tree Does Not Illuminate
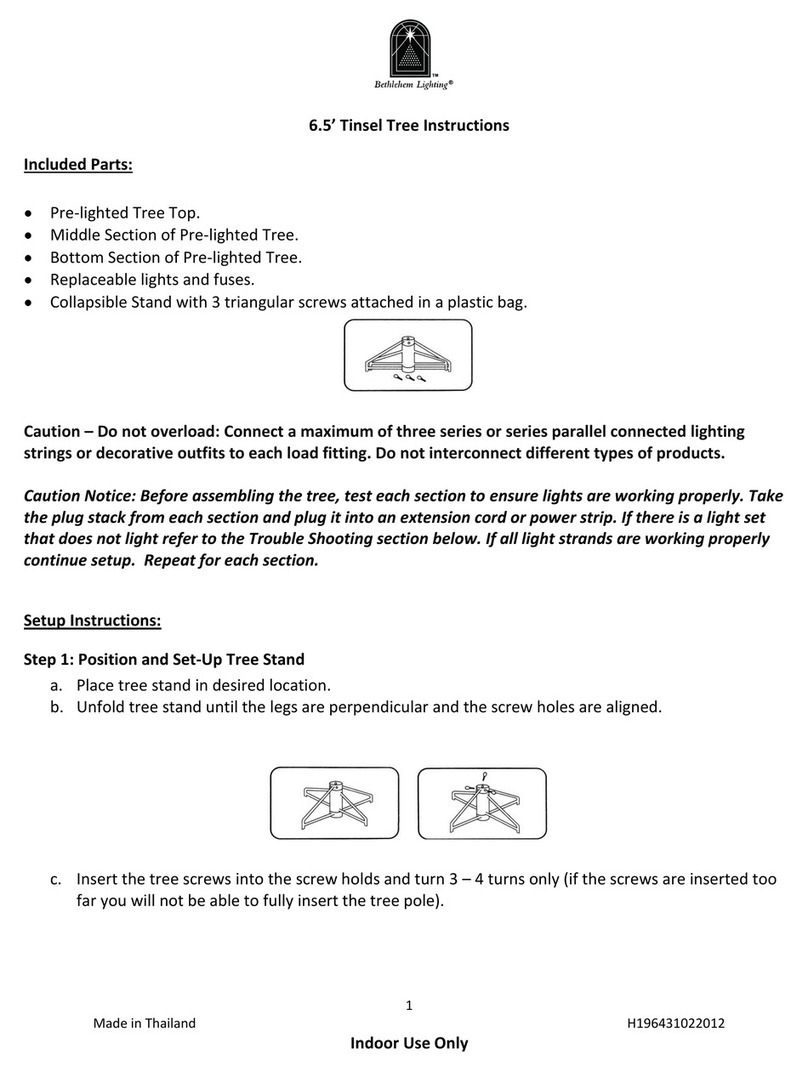
1. Please check to make sure that all plugs are properly connected
and power cord is plugged into the wall outlet. (If the tree
comes with a foot pedal, try stepping on the on/off button).
2. Turning the poles gently to make sure thepole to pole-to-pole
connection is in place.
3. Check for loose connection between light string plugs and
extension cords.
4. Manually operate the button on Control box to eliminate
Remote Controller issues.
Loose Hinge Pin
1. Extra hinge pins are included for repairing the hinges. Place
the branch into the slot of the
bracket.
2. Insert a new hinge pin through
the hole and secure using the
retainer washer. (See Fig. D) Fig.D
1.
WARNING:
SMALL PARTS, KEEP AWAY FROM CHILDREN.
2. Do not expose light set to moisture.
3. Remove batteries when not used for an extended period of
time, or when depleted.
4. Dispose of used batteries properly by following directions on
batteries.
5. Use only (CR2025) batteries for the remote controller.
6. Clean the battery contacts prior to battery installation.
7. DO NOT DISPOSE OF BATTERIES IN FIRE. BATTERIES MAY EXPLODE
OR LEAK.
Warning:

This manual suits for next models

1

Other Polygroup Artificial Pine Tree manuals
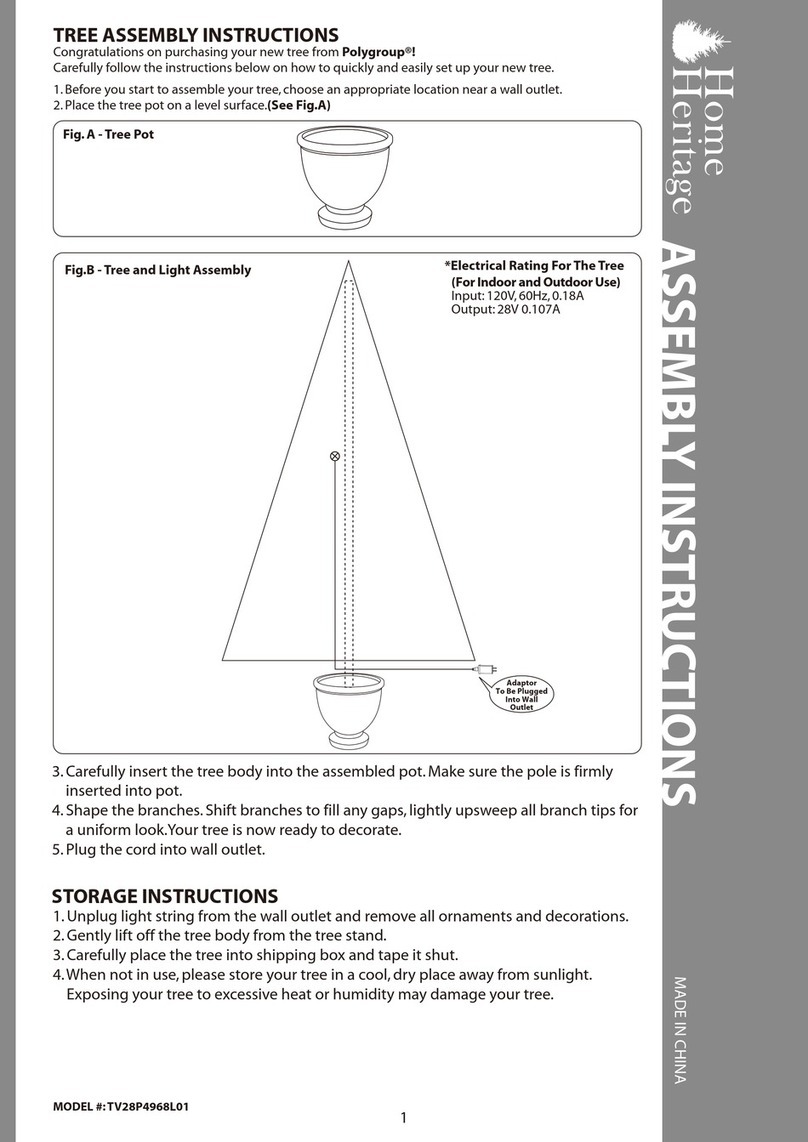
Polygroup TG7600NVQC26 User manual

Polygroup

Polygroup TG7600NVQC26 User manual

Polygroup TG70M2K04C00 User manual

Polygroup

Polygroup TG70M2K04C00 User manual

Polygroup TGC0M6010C00 User manual

Polygroup

Polygroup TGC0M6010C00 User manual

Polygroup TV70M2389C23 User manual

Polygroup

Polygroup TV70M2389C23 User manual

Polygroup TG4000FNIC12 User manual

Polygroup

Polygroup TG4000FNIC12 User manual

Polygroup TG66EH148C51 User manual

Polygroup

Polygroup TG66EH148C51 User manual

Polygroup TG76P2548C00 User manual

Polygroup

Polygroup TG76P2548C00 User manual

Polygroup TG90P4826D31 User manual

Polygroup

Polygroup TG90P4826D31 User manual

Polygroup TG76P4223L21 User manual

Polygroup

Polygroup TG76P4223L21 User manual

Polygroup Home Heritage TG70M3W92D00 User manual

Polygroup

Polygroup Home Heritage TG70M3W92D00 User manual

Polygroup TV46GH166C00 User manual

Polygroup

Polygroup TV46GH166C00 User manual

Polygroup TG76M3AE4L03 User manual

Polygroup

Polygroup TG76M3AE4L03 User manual

Polygroup TG76M4836C02 User manual

Polygroup

Polygroup TG76M4836C02 User manual

Polygroup TG76GH033X02 User manual

Polygroup

Polygroup TG76GH033X02 User manual

Polygroup TG76M3W48X00 User manual

Polygroup

Polygroup TG76M3W48X00 User manual

Polygroup TG76M3O06C00 User manual

Polygroup

Polygroup TG76M3O06C00 User manual

Polygroup TG70M2Z01C03 User manual

Polygroup

Polygroup TG70M2Z01C03 User manual

Polygroup TG76M3W85C05 User manual

Polygroup

Polygroup TG76M3W85C05 User manual

Polygroup TG90P4444D00 User manual

Polygroup

Polygroup TG90P4444D00 User manual

Polygroup TG76M3P68M00 User manual

Polygroup

Polygroup TG76M3P68M00 User manual

Polygroup TG66M3545X13 User manual

Polygroup

Polygroup TG66M3545X13 User manual

Polygroup TG76P3945P01 User manual

Polygroup

Polygroup TG76P3945P01 User manual

Polygroup AR-P17004 User manual

Polygroup

Polygroup AR-P17004 User manual

Polygroup Alexander User manual

Polygroup

Polygroup Alexander User manual

Popular Artificial Pine Tree manuals by other brands
GE Holiday Classics Flocked Laurel Pine 22003 Assembly instructions

GE

GE Holiday Classics Flocked Laurel Pine 22003 Assembly instructions

Costway CM23492 user manual

Costway

Costway CM23492 user manual

Mon Sapin Woody MSW2000 quick start guide

Mon Sapin Woody

Mon Sapin Woody MSW2000 quick start guide

Home Accents Holiday TG66M3W89D13 quick start guide

Home Accents Holiday

Home Accents Holiday TG66M3W89D13 quick start guide

EKVIP 021651 operating instructions

EKVIP

EKVIP 021651 operating instructions

Home Accents Holiday TV66M3ACDC08 quick start guide

Home Accents Holiday

Home Accents Holiday TV66M3ACDC08 quick start guide

GE Brown Winterberry 23651 Use & care guide

GE

GE Brown Winterberry 23651 Use & care guide

Home Accents Holiday TY207-1614-2 Use and care guide

Home Accents Holiday

Home Accents Holiday TY207-1614-2 Use and care guide

Polytree TG76P4371C01 Assembly instructions

Polytree

Polytree TG76P4371C01 Assembly instructions

Home Accents Holiday 1001 539 383 quick start guide

Home Accents Holiday

Home Accents Holiday 1001 539 383 quick start guide

CASARIA 104006 instructions

CASARIA

CASARIA 104006 instructions

Home Accents Holiday TG76P4969L07 manual

Home Accents Holiday

Home Accents Holiday TG76P4969L07 manual

Home Decorators Collection TG90P4B33L06 quick start guide

Home Decorators Collection

Home Decorators Collection TG90P4B33L06 quick start guide

NOMA CTI1515594 instruction manual

NOMA

NOMA CTI1515594 instruction manual

Home Accents Holiday 691824 manual

Home Accents Holiday

Home Accents Holiday 691824 manual

Home Accents Holiday 1004363934 Package Contents

Home Accents Holiday

Home Accents Holiday 1004363934 Package Contents

Mr. Christmas Alexa 68329 instruction manual

Mr. Christmas

Mr. Christmas Alexa 68329 instruction manual

Home Accents Holiday TG70M3BDSL00 quick guide

Home Accents Holiday

Home Accents Holiday TG70M3BDSL00 quick guide

manuals.online logo
manuals.online logoBrands
  • About & Mission
  • Contact us
  • Privacy Policy
  • Terms and Conditions

Copyright 2025 Manuals.Online. All Rights Reserved.