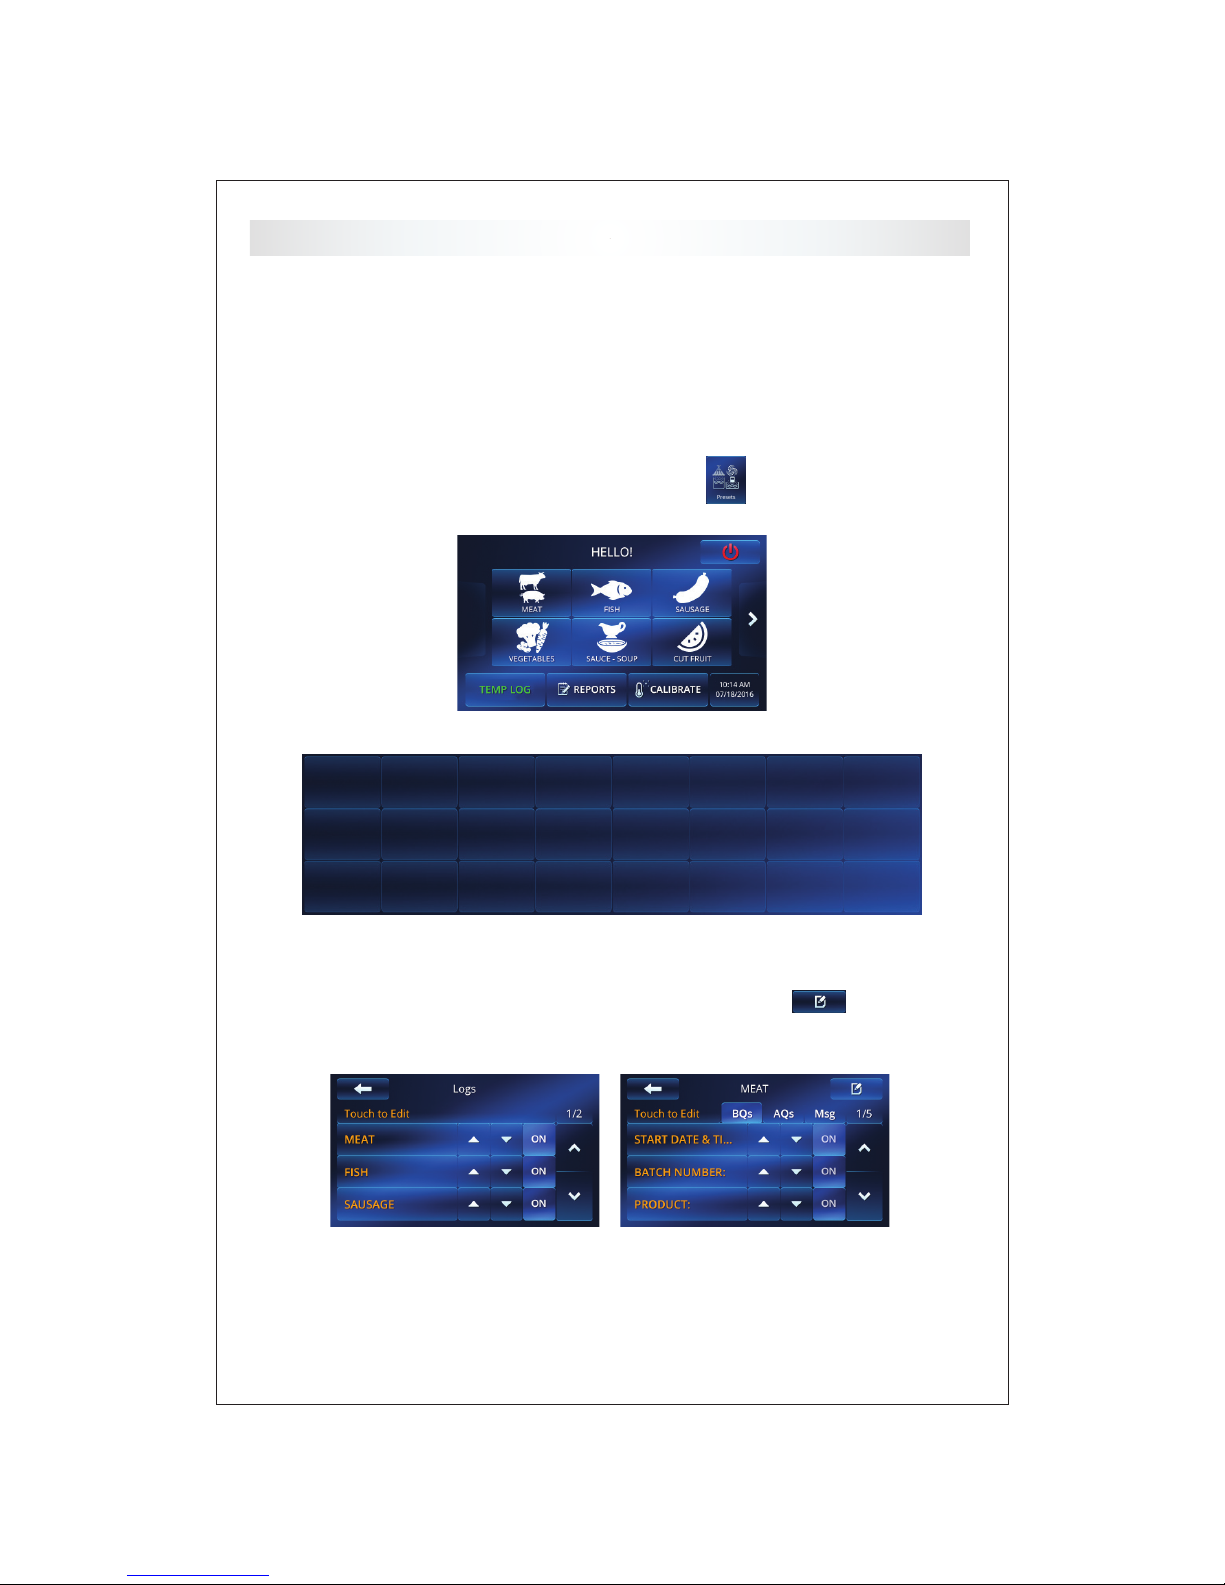
Getting Started
1Presets
Your 400 Series machine comes with 6 most commonly used Presets to get you started. The preset
buttons are listed on the Home screen. Below is a description of their vacuum settings and how they
are being used.
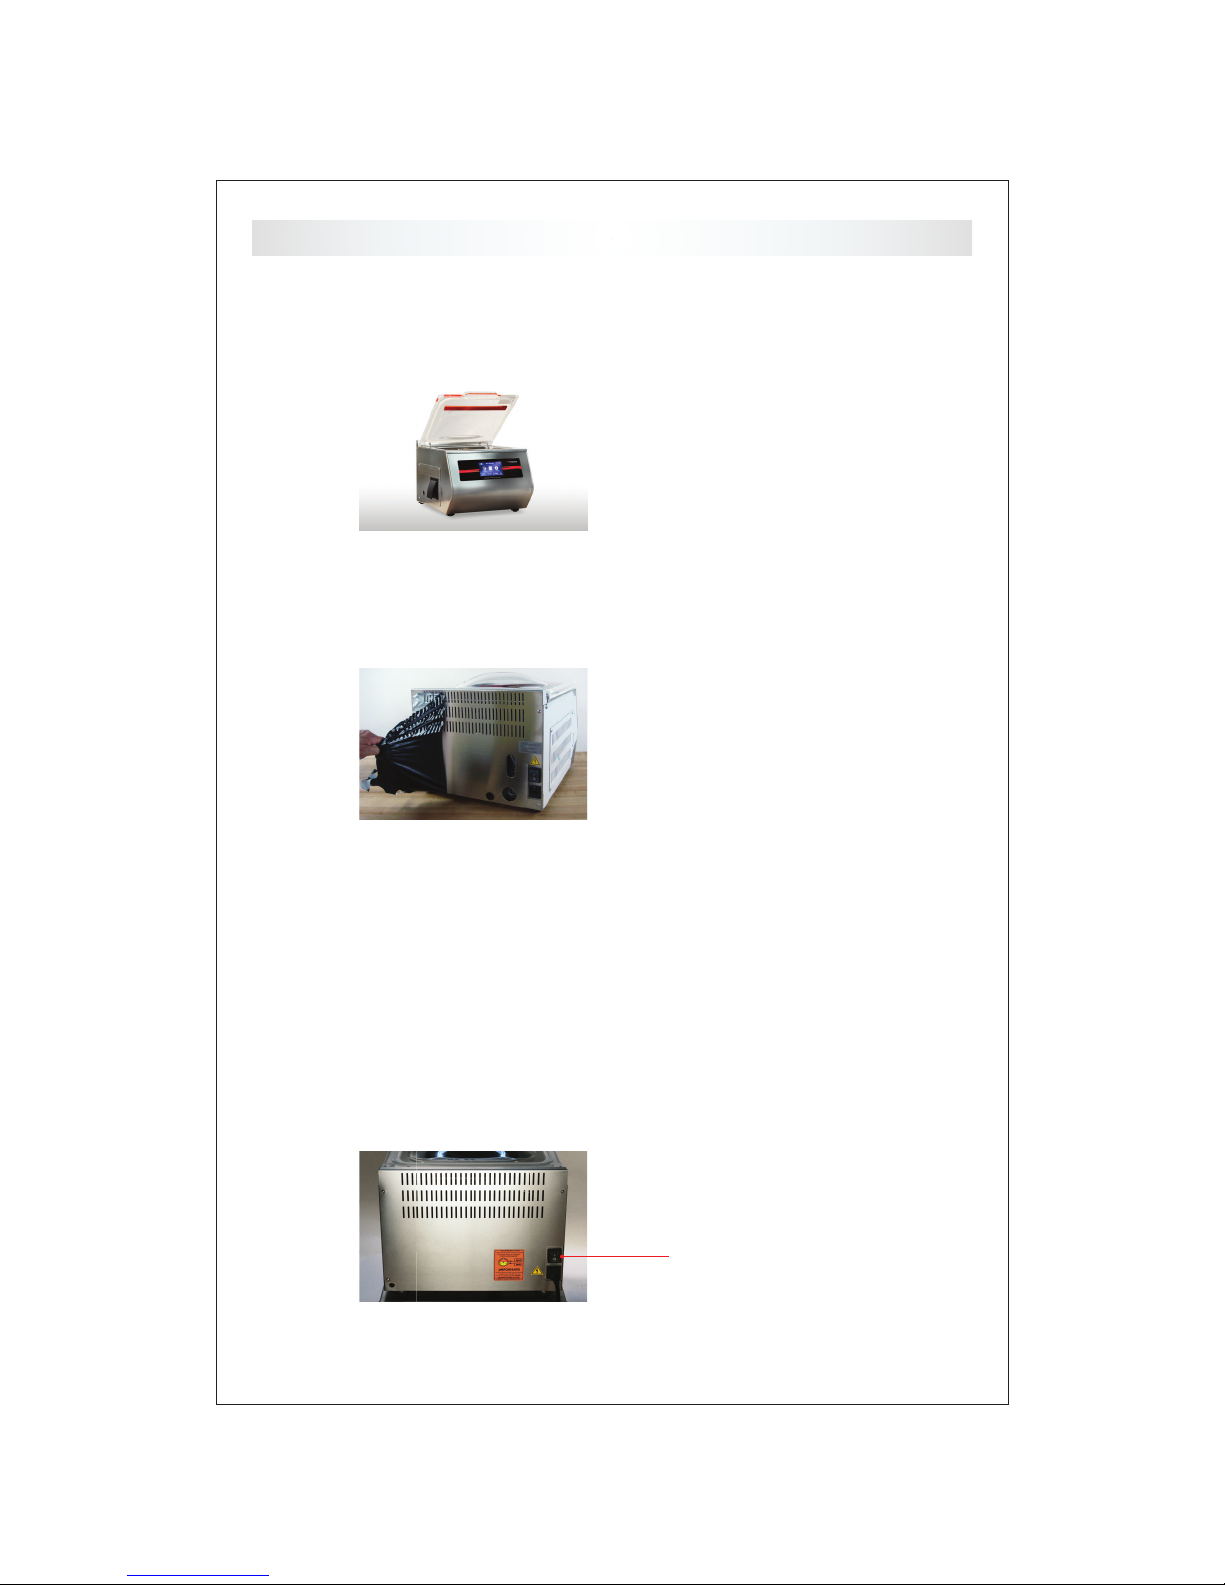
After touching the desired Preset button, place your
food product in the bag, lay the open side over the
sealing bar (see Flippin’ Tray on page 3), close the lid
and touch the green start button to start the vacuuming
process.
Repeat with all products from the same batch. When
you are done, touch the Home button to get
back to the home screen.
- 6 -
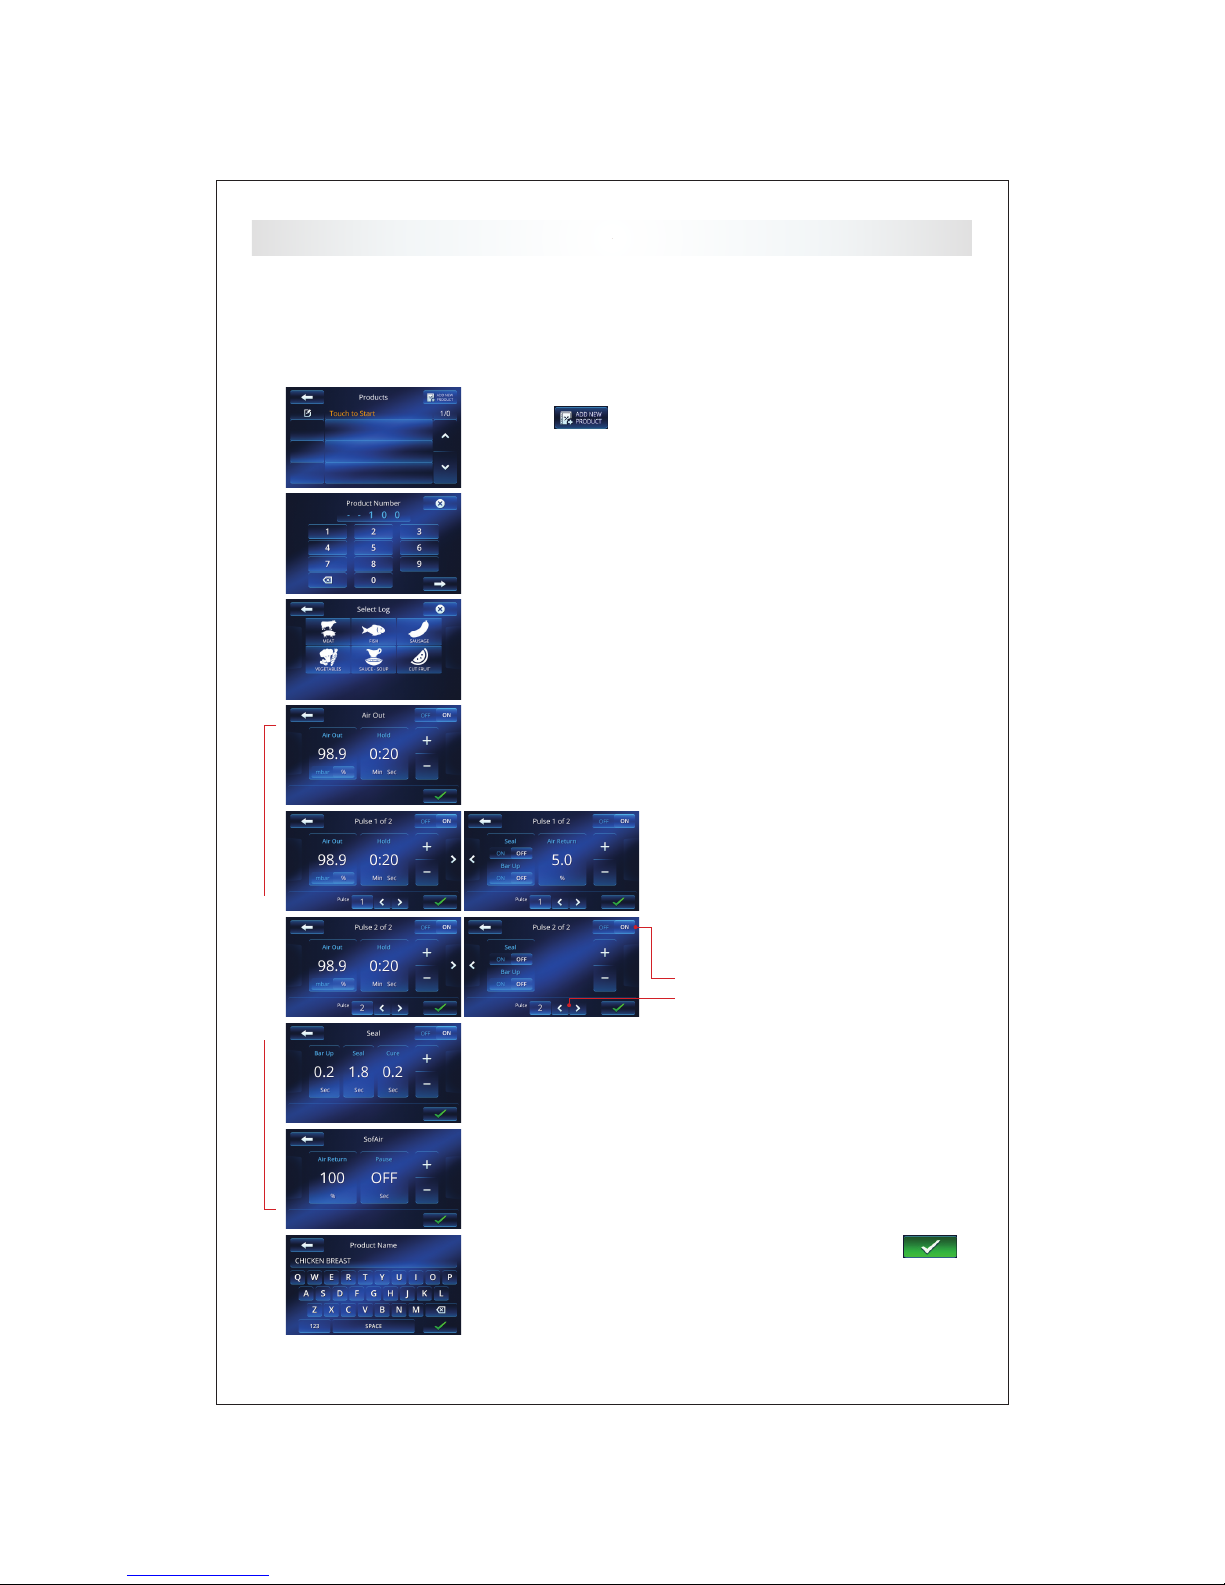
VACUUM
Vacuum seal in a bag/pouch for
chilled storage or low temperature
cooking. The preset removes
99.9% of the atmosphere from
the chamber.
SOFT VACUUM
Soft Vacuum seals sausage and
patties in a bag/pouch for chilled
storage or low temperature cook-
ing. The preset removes 97% of
the atmosphere then returning
the air slowly preventing damage.
STEP VACUUM
Step Vacuum seals sh llets, and
hams in a bag/pouch for chilled
storage or low temperature cooking.
The preset removes atmosphere in
increments, preventing boiling
which may harm the product.
INFUSE
Infuse avors in a hotel pan or
Vac-Box to create dramatic avor
& aroma to drinks. The preset
preserves avor, color & fruit
crispness. Enhance the avor
of Spa Water, create Sangria in
minutes.
LIQUID
Liquid seals in a bag/pouch for
chilled storage, retherming or
low temperature cooking. The
preset allows the user to vacuum
seal at temperatures below
150ºF (65ºC).
MARINATE
Marinate in minutes not hours
to create that special avor. The
preset opens and closes the pro-
tein bers allowing liquid marinade
to penetrate. Use a hotel pan or
Vac-Box to instantly marinate.
Note: food safety logging is being skipped for Presets