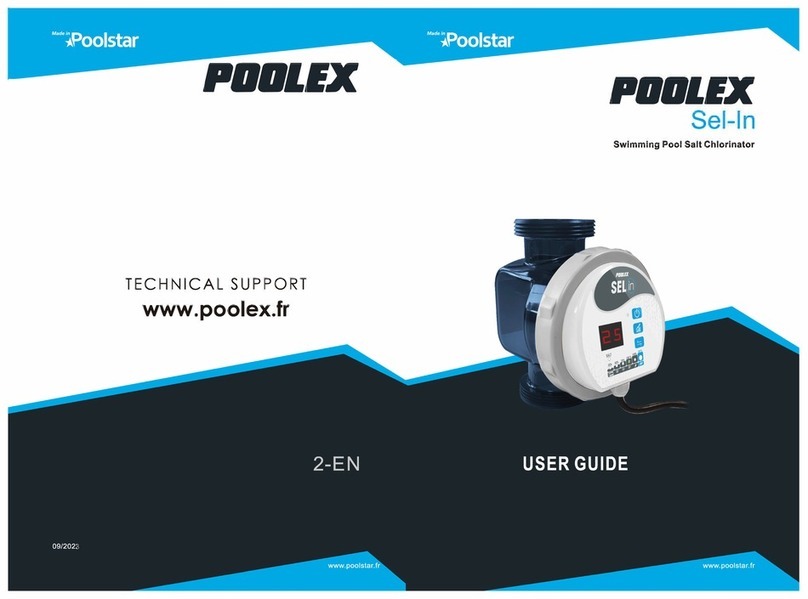
poolstar POOLEX Sel-In User manual

USER GUIDE
Swimming Pool Salt Chlorinator
Sel-In

2
ACKNOWLEDGEMENTS
Dear client,
Thank you for your purchase and your trust in our products.
Our products are the result of years of research in the design and manufacture of heat
pumps, treatment and ltration systems for pools. Our goal is to deliver high-quality
products with exceptional performance.
We took great care to put together this manual so you can get the most out of your
Poolex Salt Chlorinator.
! PLEASE READ CAREFULLY !
These installation instructions form an integral part of the product.
They must be given to the installer and kept by the user.
If you lose this manual, please visit our website:
www.poolex.fr
The warnings and guidelines contained in this manual must be carefully read and
understood as they provide important information concerning the safe handling and
operation of the chlorinator. We recommend that you keep this manual handy for future
reference.
Installation must be performed by a qualied professional in accordance with
regulations in force and the manufacturer's instructions. Errors made during installation
can cause physical injuries to people and animals as well as mechanical damage for
which the manufacturer shall not be held liable.
After unpacking the chlorinator, please check the contents for any damage.
Before plugging in the chlorinator, ensure that the instructions provided in this manual
are compatible with actual installation conditions and do no exceed the maximum
authorised limits for the product in question.
In the event of a defect and/or malfunction, electrical power must be switched o
and no attempts to repair the fault should be made. Repairs must be carried out
by an authorised technician using original spare parts. Non-compliance with the
aforementioned clauses can negatively impact the safe operation of the chlorinator.
In order to guarantee the eciency and proper functioning of the chlorinator, it must be
regularly maintained in accordance with the instructions provided.
In the event the chlorinator is sold or transferred to another party, please ensure that all
technical documentation is given to the new owner together with the equipment.
This chlorinator is designed exclusively to treat swimming pools. Any other use is
considered inappropriate, incorrect and potentially dangerous.

3
TABLE OF CONTENTS
All contractual and extra-contractual liability on the part of the manufacturer
/ distributor shall be considered null and void in the event of damage caused
by errors in the installation or operation, or due to non-compliance with the
instructions provided in this manual and standards in force for the installation of
equipment discussed in this document.
SUMMARY:
ACKNOWLEDGEMENTS...........................................................................................2
SAFETY INSTRUCTIONS ..........................................................................................4
HOW IT WORKS.........................................................................................................5
OPERATING LIMITS...................................................................................................6
FEATURES .................................................................................................................7
INSTALLATION...........................................................................................................8
BEFORE USE ...........................................................................................................10
Adding salt............................................................................................................11
Required salt levels .............................................................................................11
Quick reference table for adding salt.................................................................12
USE ...........................................................................................................................12
Overview of control panel ...................................................................................13
Selecting operating modes .................................................................................14
TROUBLESHOOTING..............................................................................................15
Error codes and xes ..........................................................................................17
Cleaning the cell...................................................................................................17
Replacing the cell.................................................................................................17
WINTERIZING...........................................................................................................17
Active winterizing.................................................................................................17
Passive winterizing..............................................................................................17
Restarting in spring .............................................................................................17
USEFUL TIPS ...........................................................................................................20
General principles................................................................................................20
List of Recommended Actions: ..........................................................................20
List of Prohibited Actions: ..................................................................................20
SUPPLEMENTARY ELECTRICAL BONDING (POOL EARTHING) ....................20
WARRANTY..............................................................................................................21

4
SAFETY INSTRUCTIONS
GENERAL TERMS AND CONDITIONS OF DELIVERY
All products and packaging, even those delivered carriage paid, travel at the risk of the
recipient.
Persons responsible for accepting delivery of the device must perform a visual
inspection to note any damage that may have occurred during transportation. Any
damage during transportation must be noted by the recipient on the delivery receipt
of the transporter and conrmed by registered post sent to the transporter within 48
hours.
SAFETY INSTRUCTIONS
Installation and maintenance of any upstream electrical components must be
performed by a qualied electrician. Failing to do so may result in electric shock,
serious injury, property damage and even death.
Prior to any maintenance or operation, ensure that the salt chlorinator and any other
devices are shut down and the main power supply is o.
The salt chlorinator’s external power adaptor must be connected to a main power
supply separate from the ltration system (no feedback control), equipped with a 30mA
residual current device and an earthing system.
The salt chlorinator must be plugged into an outlet located in a well-ventilated area to
prevent overheating. Do not plug the salt chlorinator into an outlet where it could be
damaged by humidity or rain.
The person responsible for installing the chlorinator must carefully read this manual.
In the event of a malfunction or erroneous operation, please contact the nearest
authorised reseller or technical support.
If a part is damaged, ensure a replacement is purchased from the manufacturer or an
authorised reseller.
NOT COMPLYING WITH THESE WARNINGS CAN RESULT IN PROPERTY
DAMAGE, ELECTRIC SHOCK, COMPLICATIONS OR OTHER SERIOUS INJURIES
AND EVEN DEATH.
WARNING - To avoid the risk of injury, do not allow children to operate this
device.
WARNING - Intensive use of the pool (or spa) or high temperatures may require
an increased level of chlorine production in order to maintain adequate levels of
free chlorine.

5
HOW IT WORKS
Salt chlorination of a pool works by using salt electrolysis to disinfect the water; this
electrochemical process converts the salt present in the water into a disinfectant
(hypochlorite ions).
Once this process is complete, hypochlorite turns back into salt after coming into
contact with organic material (bacteria, cells) or under the eect of UV rays or other
sources of light, starting the cycle over again.
In order to maintain a good level of disinfectant in the water, the following guidelines
must be respected:
• A proper concentration of salt in the water: 3 g/l
• Adequate ltration time (as a reminder, a good estimate is: Filtration Time = T°
water / 2)
• A good water balance with a pH between 7.0 and 7.8 (for more information
see Taylor watergram)
• Regular cleaning of your pool to remove any plant debris
• In case of frequent use, consider using the boost function.
WARNING - Salt water chlorination alone will not clear up green water by itself. In
the event of algae appearing (e.g. after a period of high temperatures or frequent
use), it may be necessary to supplement with chlorine tablets. Do not put the
chlorine tablets directly into the skimmer; use a oating dispenser.

6
OPERATING LIMITS
As with any pool, it’s important that the ltration time is long enough to maintain a good chemical
balance in the pool water, including pH, alkalinity and calcium levels.
The only special requirement to use a salt chlorinator is maintaining proper levels of salt and
stabiliser.
To get the most out of your pool, it is important to maintain these levels in order to avoid corrosion
and scale deposits. We therefore recommended that you test all of the basic parameters of the
water at least once per week.
In addition, we recommended getting your pool water tested by a professional at least twice per
season.
Your local pool store can provide you with the chemicals and steps to take to adjust the chemical
properties of the water.
Don’t forget to let the store know that you use a salt chlorinator.
Check your values and correct them at least once a week:
Parameter Target values Comments
Salinity 3 to 4 g/l Once the salt is dissolved in the water (+/- 24 to
48h), salt concentration will only vary slightly over
the course of the season.
pH level 7.2 to 7.4 Please note, a pH above 7.8 suppresses the
disinfecting properties of hypochlorite.
Free chlorine concentration From 0.5 to 3.0 ppm Measurements must be taken from around the
return inlets when the chlorinator is switched on,
preferably in the morning and out of direct sunlight.
! important !
Stabilizer rate
(Cyanuric Acid)
From 20 to 50ppm Hypochlorite is a relatively unstable disinfectant.
With too low a level of stabilizer, the hypochlorite
will turn back into salt too quickly without having
had enough time to disinfect.
Conversely, with too high a level of stabilizer, the
hypochlorite will be blocked.
Be careful, if the level of stabilizer is much too high,
the pool will have to be partially drained to add
water without stabilizer.
Additional tests
Total alkalinity (TA) From 80 to 150 ppm This level measures the concentration of mineral
salts (carbonates, bicarbonates, hydroxides) in the
water. It stabilizes / buers the water balance. High
TA levels interfere with the eects of pH regulation
and scale deposits may begin to appear.
Water hardness From 150 to 300 ppm Water hardness represents the amount of calcium
carbonate present in your water.
In addition, temperature plays a major role in the correct usage of your chlorinator:
Water temperatures lower than 10°C will render the system inoperative (E2 warning will be
displayed)
Water temperatures higher than 32°C will reduce the eectiveness of hypochlorite. The addition
of chlorine tablets is therefore recommended for consistently high temperatures; do not place
chlorine tablets directly into the skimmer, use a oating dispenser.
WARNING - the presence of iron in your water (ferruginous water) may lead to
rust deposits in your pool and require the use of a metal sequestrant - please
consult a professional.

7
FEATURES
The salt chlorinator contains the latest electronic monitoring technology for ease of use.
You can easily adjust the production of disinfectant to suit your needs, maximizing eciency while
remaining environmentally friendly. In addition to these easy-to-use settings, it also has a self-
cleaning function for the cell and a self-test mode in the event of a warning or error code.
For example, the chlorinator displays a warning when its detects low salinity levels, improper
temperatures or a lack of water ow (see section on errors codes and xes).
The compact size of the chlorinator and its integrated control panel allows for easy installation
and a smaller footprint. The water inlet and outlet are on the same axis, reducing the need to
rearrange piping.
Poolex SEL-in
Model 20 30 50 75 90
Maximum volume treated (m3) 20 30 50 75 90
Salt concentration (g/l) 3 to 4
Input voltage (VAC) 230VAC/50Hz
Output voltage (VDC) 24
Output current (A) 2 2 2 2,5 2,5
Hypochlorite production (g/h) 4 6 10 15 20
Min. ow rate in cell 2 (m3/h)
Max. ow rate in cell (m3/h) 10 (m3/h) - above this level a bypass is required
Connectors supplied (2 types) 1.5”/ D50 mm et D32/38mm
Temperature sensor YES
Flow sensor YES
Cell cleaning YES though reverse polarity
Covered mode YES (manual)
BOOST mode YES (2 BOOST levels)
Dimensions (in mm)
Sel-in 20
Sel-in 30
Sel-in 50
Sel-in 75
Sel-in 90

8
Prior to installation, please verify the following:
Ensure the electricity and water circulation system are switched o, and close the valves on the
pipes connected to the chlorinator.
Ensure any pipes used (not supplied) are compatible with the chlorinator.
Dimensions of the 2 types of connectors supplied:
- OPTION 1: 1.5” (metric: Ø50 mm) connectors to be sealed using PVC cement
- OPTION 2: D32 or 38 mm push t connectors
Remove any obstructions
Lubricate the ttings
Ensure the direction of water ow corresponds to the direction indicated on the chlorinator: ‘’
‘’.
The salt chlorinator must be installed on the return line carrying water from the pool lter back
to the return inlets, as shown in Figure 1 (horizontal assembly) and Figure 2 (vertical assembly).
If using with a water heating system, install the chlorinator downstream from the latter. The
chlorinator must be the nal element of the circuit.
Installation without a bypass is possible if your pump has a ow rate of < 10m3/h, however, using
a bypass is strongly recommended to allow the hydraulic circuit to be isolated. If the ow rate of
your pump is > 10m3, a bypass is required.
CASE 1 : Using D50mm PVC pipes:
If you need to cut existing D50mm PVC pipe, the length of the cut must be 230 mm. Make sure to
use special PVC cement for 1.5” (D50) connectors.
INSTALLATION
Swimming pool
controller with
30mA residual
current device

9
CASE 2 : Using D38mm or D32 pipe:
When using this type of pipe, another length of pipe, minimum 50cm (not supplied), equivalent to
the one in place must be added to the outlet of the lter; consider adding a valve (if not already
present) just after the chlorinator to be able to isolate this section and facilitate maintenance.
INSTALLATION
If you want to insert the chlorinator into an existing pipe (or t on
to a pipe), you must cut out a section measuring 230mm in length.
230mm
Swimming pool
controller with
30mA residual
current device

10
The power supply of the salt chlorinator must be connected to a separate power source equipped
with a 30mA residual current device, sheltered from the rain and at least 3.5 m away from the
pool. In the event of tripping the residual current device, check system integrity before resetting.
In case of doubt, contact a professional.
The salt chlorinator must be plugged into an outlet located in a well-ventilated area to prevent
overheating.
Do not install in places where water can easily ingress to prevent damage to the electrical
components caused by humidity or rain. A wall or oor mounting bracket is available as an
optional extra (ref.: CL-TSLFIX)
INSTALLATION
Mounting bracket ref. CL-TSLFIX Using the wall or oor mounting bracket
This manual suits for next models
5
Table of contents
Other poolstar Swimming Pool Filter manuals
Popular Swimming Pool Filter manuals by other brands

SACOPA
SACOPA 30889 Installation and maintenance manual

Davey
Davey PoolSweepa FloorCova operating instructions

Jandy
Jandy DEL Series Installation and operation manual

T.I.P.
T.I.P. SPF 180 operating instructions

Watermaid
Watermaid WM40 User handbook

Pentair
Pentair PLM 100 Installation and operating instructions