Portascope PVSM6150 User manual

Articulation Monitor
Type Endoscope
INSTRUCTION MANUAL
Please carefully read this manual before using

Parts Function
I
H
G
F
E
D
G
K
A
B
MENU OK
L
C
A.POWER BUTTON On/Off
B.LIGHT SWITCH
C.JOYSTICK
D.PHOTO button
E .PREW BOTTON
I . MAIN UNIT
F. MENU
G . PLAY BACK
G .NEXT BUTTON
K.REC BUTTON
H . MULTI - SELECTOR OK L. LOCK NUT .
1

Safety recommendations
DANGER
This device must not be used for medical or veterinary purposes.
Do not use this item in explosive atmospheres.
WARNING
Do not modify or disassemble the unit.
Do not subject the insertion tube or other cables to strong pulling,and do not move
the main unit around by holding the cables.Otherwise ,the insertion tube or cables
may be damaged
Do not subject the distal end to severe impact or pulling,do not expose the angulation
section to severe impact or bending.Otherwise,the precision components that make
up the distal end and the angulaion section may be damaged.
Do not allow any liquids other than water ,saltwater,machine,or diesel oil come into
contact with the insertion tube,Otherwise ,the insertion tube may be damaged.
Do not allow water come into contact with parts other then insertion tube ,water creates the
risk of electic shock ,the parts of the instument other than insertion tube are not watertight,so
the instrument should not be used or stored where it is submerged or wet.
Do not use or store the instrument at a temperature higher than 60°C or lower than -
20°C.
Store the instrument in dry and adequately ventilated environment.
2

Button Description
There are 3 basic modes for easier operations as follows:
Preview mode
Display
summarized optional
functions such as:
picture
taking,video taking
etc.
Surfing mode Survey photos and videosin the memory card ansd maintain.
Meun mode Includes file maintenance ,settings etc .
Button
Preview mode
Surfing mode
Menu mode
Zoom x4
Switch to previous/next
Select previous/next
photo or video
function or option
Image rotation360°
MENU
To return to the
To return to the
To return to the
preview mode
preview mode
preview mode
OK
To display or pause
Confirm selected
function or option
To take photo
To start /stop video
recording
To enter surfing mode
Return to preview
Choose camera or
mode
maintenance settings
Menu
Under the preview mode:Press MENU button to display options
.
as follows:
Hd
Camera HD>
Effect Nor
Date Stamp Date
OK
Enter
MENU
Back
3

Use Or
To select the item ,and enter the options display respecively as below:
VGA
HD
VGA Mode:
Image display at 3.5inch
area.
HD Mode:
Image full of screen .
OK
Enter
MENU
Back
Normal
B&W
You can choose the image with
colour or without colour.
OK
Enter
MENU
Back
Off
Date stamp can be
added to recording files
Date
or not.
Date &Time
OK
Enter
MENU
Back
4

Menu
Press Menu button return to menu mode ,and by to set more options as below:
Date &Time
Hd
Language
TV Out
Power Save
Format
Enter
Back
OK
MENU
DATE/TIME SETUP
Press to select year/month/day or hour/minute/second,and press
for
increaseing number and decreasing.
01 /01/2014 00:00
DD/MM/YYYY
OK
Enter
MENU
Back
LANGUAGE SETUP
To select language(7optional languages)
English
Hd
简体中文
Français
Español
Deutsch
OK
Enter
MENU
Back
5

TVOUT SETUP
To set up the TV output format.
NTSC
Hd
PAL
OK
Enter
MENU
Back
To set up time for auto power off.
3Min
5Min
Hd
10Min
Disable
OK
Enter
MENU
Back
FORMAT &RESET All
Choose Yes to format storage media SD card or return to original settings
No
Hd
Yes
OK Enter
MENU Back
6

Turning on checking
Press Power button for 2-3 seconds to turn on ,the displays preview mode.Adjust illumination and extend the
insertion tube straight out and operate joystick to check for smooth angulation section operation.
NOTE Increasing the insertion tube bending amount decreases the maximum the angulation
angle.Keep the insertion tube as straight as possible to get best operations.
Operation
Photo
Press
to take picture,After this operation ,automatically switch
back preview mode.
1.Press
for video recording .The icon
in the lower -left
REC
corner to indicate recording status.
2.Press
to stop recording.The icon
disappears accordingly.
Zoom
In the preview mode press
to get enlarged x1/x2/x3/x4 view of
observation object ,
In the preview mode press to get image up side down or mirror
Rotation image
Storage &Maintenance
1.Rechargeable battery
Charging time around 7 hours till the indicator light turn off ,the fully charged battery can
continuously works up to 8 hours.
2 Cleaning components
Cleaning insertion tube
Wipe thoroughly with a piece of gauze or other material moistened with neutral detergent,next
clean by gauze moistened with clear water,and then wipe the insertion tube dry off all moisture.
CAUTION Clear the insertion tube immediately after withdrawing the insertion tube.Leave the
very dirty insertion tube for long periods can cause it to be corroded.
Cleaning distal end
Grasping the rigid portion of distal end,use a clean soft piece of gauze or cotton swabs to wipe off
dirty and water.Best results may be obtained using commercially available absolute ethanol.
7

Storage &Maintenance
Cleaning unit body
Wipe with soft cloth dampened with clean water,and wipe with clear
and dry cloth.
3.Storage precautions
Store the instrument under normalroom temperature and humidity.
Unload the battery,and straighten angulation section while lay into carrying case.
Store the equipment at a clear,dry and stable place.
Q&A
Q: No image on the screen after turning the power on
A: Battery is exhausted. connect the main unit to the power adapter and recharge ,
Q: No image ,only words on the LCD monitor after turning the power on
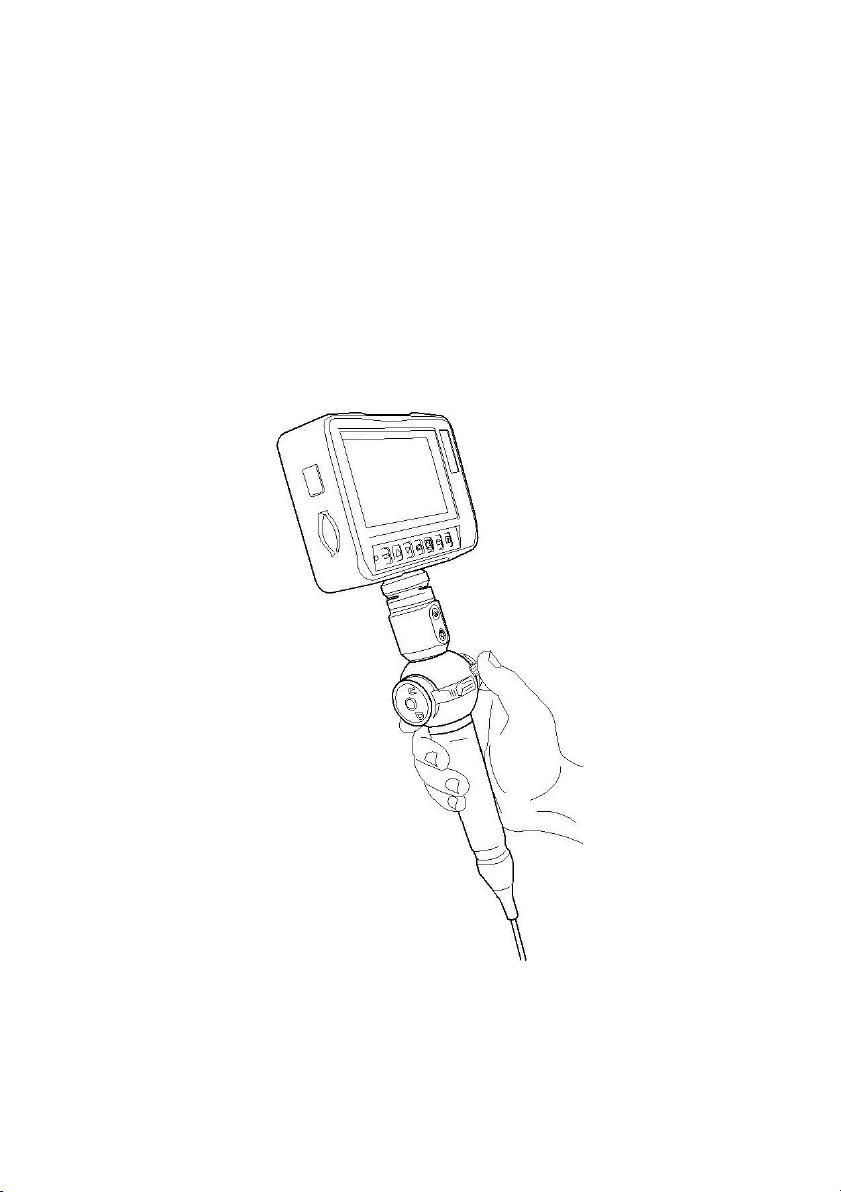
A: Check that the control unit is correctly connected to the display main unit.
Q: Unable to take photo or record video
A: SD card absent ,wrongly inserted, full or faulty.
Q: Shut down
A: When all functions freeze or fail, insert an insulated
needle into the hole on the side of the main unit ,the
system will restart automatically
8

Sepcification
LCDPanel4.3inch(Image display at 3.5inch area with W&B sensor )
Input/output connector
MicroUSB. DC in .TV out
Power supply
Lithium battery 3000mAh
AC adapter :Input 100-240VAC 50/60Hz, Out put 5VDC
Recording media
SDHC Card support 32 GB
Distal end & Camera
camera
Articulation
Sensor
Rigid portion
Remark
8.5mm
4-way
Dia8.5X28mm
Far focal
640x480
IR camera
6meters away visible
at complete darkness
8mm
4-way
640x480
Dia8.0X28mm
Far focal
8mm
4-way
1080x720
Dia8.0X28mm
Near focal
5.5mm
4-way
640x480
Dia5.5X23mm
Near focal
3.9mm
4-way
640x480
Dia3.9X14.5mm
Near focal
2.8mm
2-way
400x400
Dia2.8X10mm
Near focal
9
Table of contents