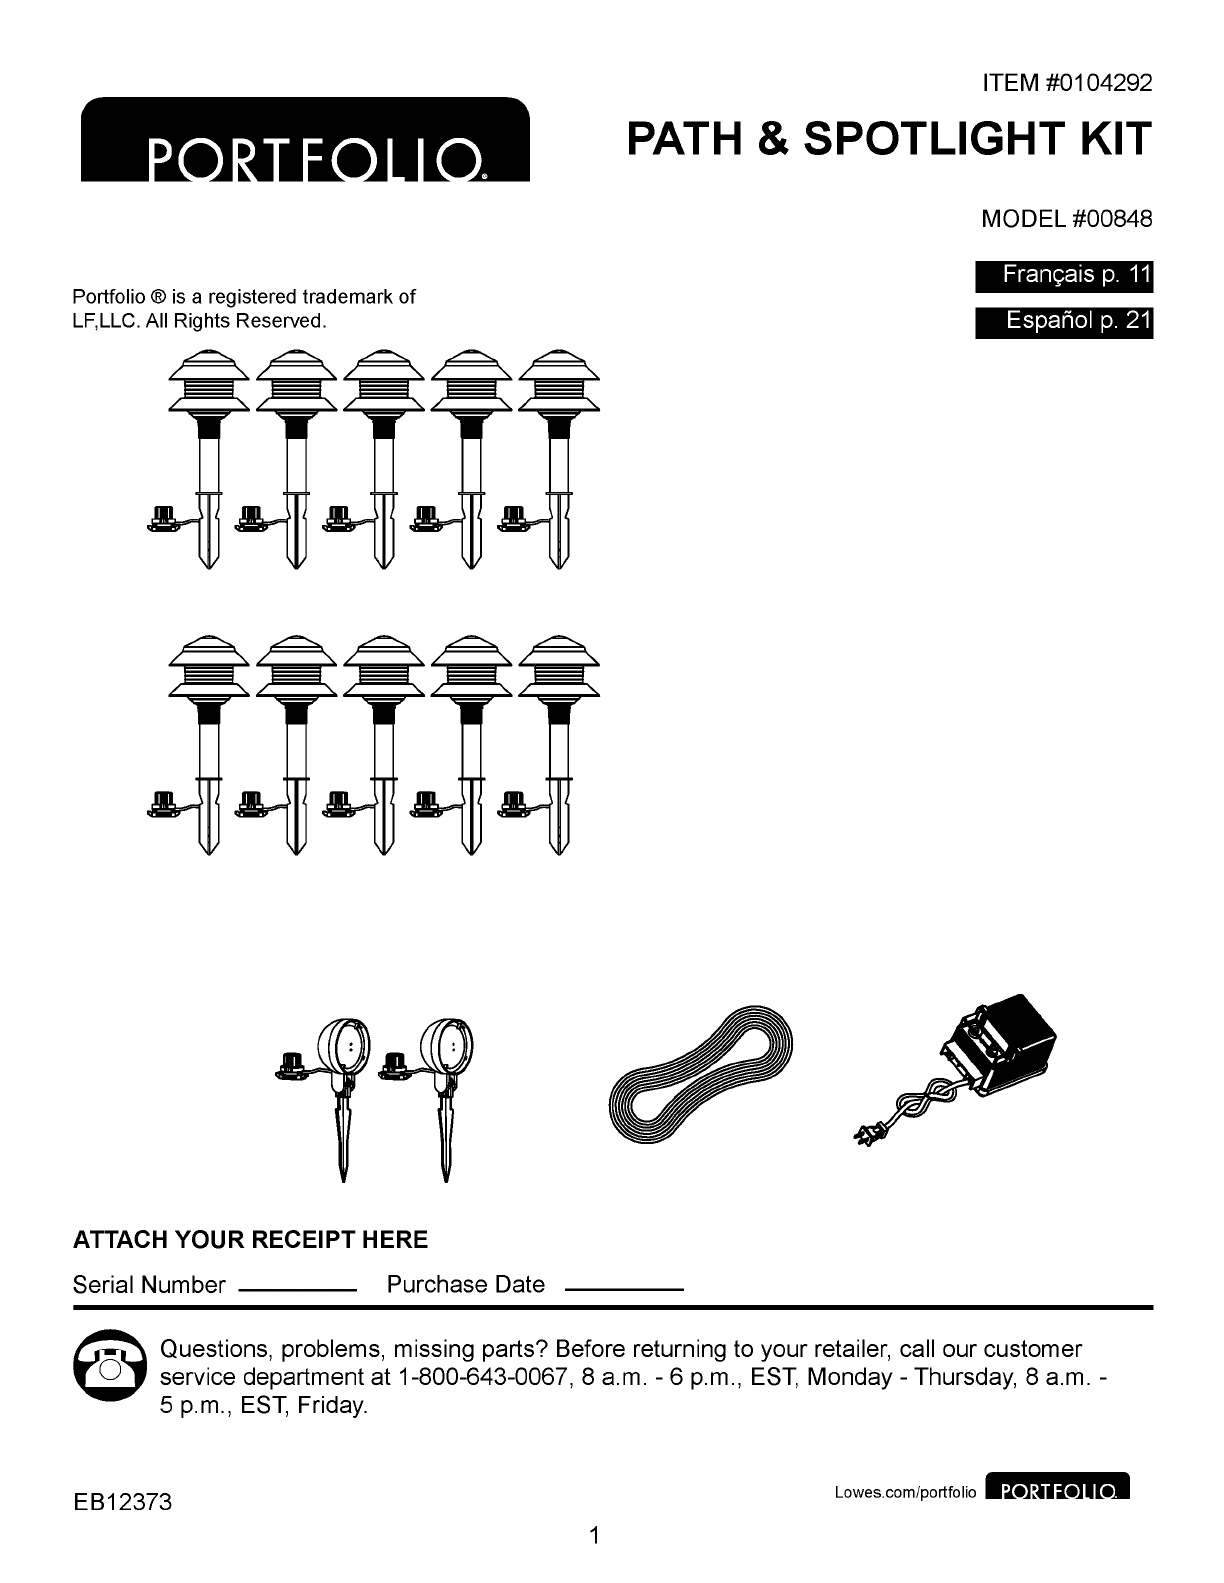
Portfolio 00848 User manual

Portfolio®
is
a registered trademark
of
LF,LLC. All Rights Reserved.
ATTACH YOUR RECEIPT HERE
Serial Number
----
Purchase Date
ITEM
#01
04292
PATH
& SPOTLIGHT KIT
MODEL #00848
Frangais
p.
11
Espanolp.21
~
Questions, problems, missing parts? Before returning to your retailer, call our customer
f..i;iJ
service department at 1-800-643-0067, 8
a.m.-
6 p.m.,
EST,
Monday-
Thursday, 8
a.m.-
5 p.m.,
EST,
Friday.
EB12373 Lowes.com/portfolio
1

PACKAGE CONTENTS
• e
PART DESCRIPTION QUANTITY
A Top tier cover 10
B Plastic lens 10
c Bottom tier 10
D Fixture body 10
E Connector 10
F Plastic tier stake 10
H Power pack 1
G #16 Low-voltage cable 1
I Lens (preassembled to fixture housing) 2
J Socket (preassembled to lens) 2
K Fixture housing 2
L Plastic pivot stake 2
Lowes.com/portfolio
2

HARDWARE CONTENTS
•
~
.
~
I~
Bulb Anchor
c'
>
Screw
Qty.
12
Qty.
1
Qty.
1
A SAFETY INFORMATION
Please read and understand this entire manual before attempting to assemble, operate or install
A the product.
..
WARNING
• For use with low-voltage landscape lighting systems
only.
• Risk of electric shock.
•
To
reduce the risk of fire or injury, turn off/unplug and allow to cool before replacing bulb.
• Install all luminaires
10ft.
or more from a pool, spa or fountain.
• Lamp gets hot quickly. Contact only switch/plug when turning
on.
• Lighted lamp
is
HOT Keep lamp away from materials that may burn.
•
DO
NOT touch hot lens, guard or enclosure.
•
DO
NOT operate the luminaire fitting with missing or damaged parts.
• This power pack
is
for use with low-volatage landscape lighting systems
ONLY.
• This power pack
is
suitable for outdoor use
ONLY.
Do not mount power pack inside
homes, garages, basements or any enclosed structures.
•
Do
not install or connect wires with wet hands.
• The branch cable
is
intended for shallow
burial-
maximum depth must not exceed 6
in.
(15.2
em
).
•
Do
not step
on
or drive over the branch cable or power cable.
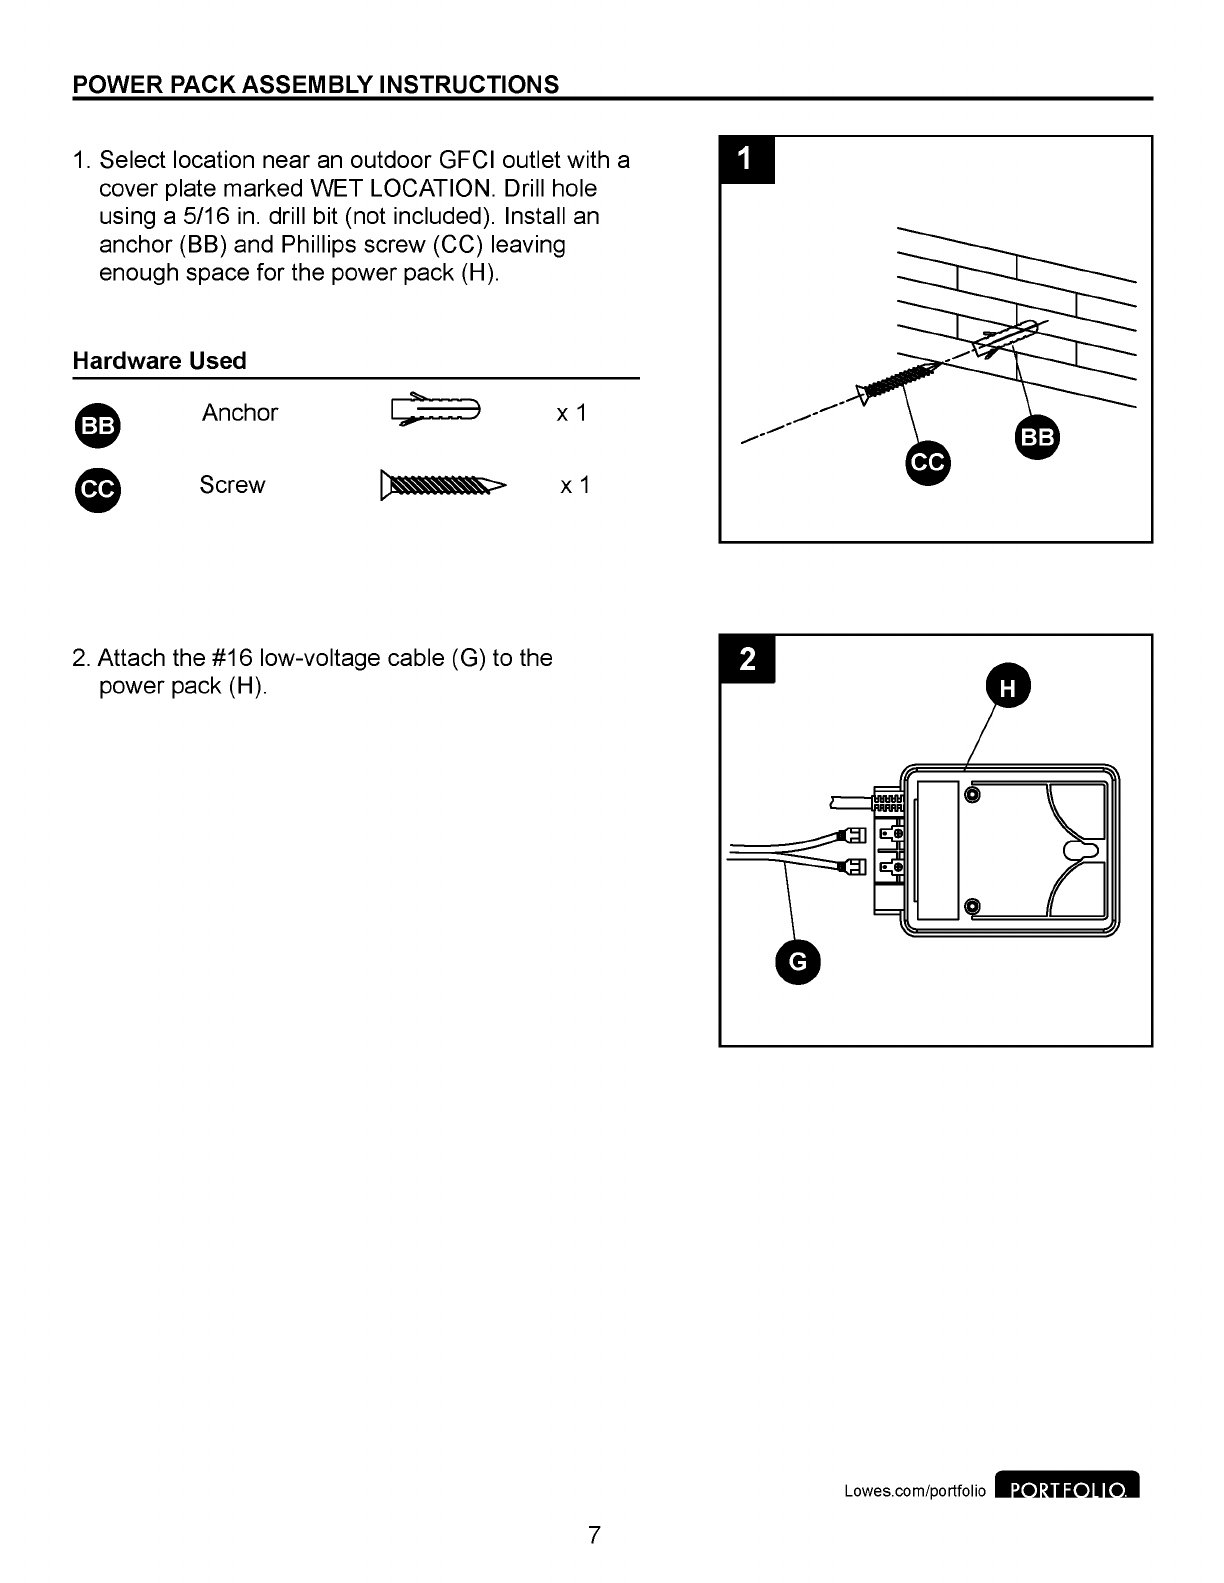
• ONLY plug the power pack cord into a covered 120-volt Class A Type GFCI (ground fault
circuit interrupter) receptacle with a hooded flush type cover plate marked "WET LOCATION."
CAUTION
•Always disconnect the power pack from the electrical outlet when working
on
the lighting system.
• The device
is
a certified component of a landscape lighting systems
in
which the suitability of the
combination shall be determined by UL or other inspection authorities having jurisdiction.
CALCULATING LIGHTING CAPACITY
The power pack has an 88-watt circuit.
To
determine the maximum number of fixtures that can be safely connected to this power pack,
add the individual wattages of each fixture. The total wattage of your fixtures must not exceed 88
watts.
PREPARATION
Before beginning assembly of product, make sure all parts are present. Compare parts with package
contents list. If any part
is
missing or damaged, do not attempt
to
assemble the product.
Estimated Assembly Time: 90 minutes
Tools required for assembly: Screwdriver, drill bit and drill (not included).
Lowes.com/portfolio
3

ASSEMBLY
INSTRUCTIONS
1.
Insert the bulb (AA) to the fixture body (D) and
attach the fixture body (D) to the plastic tier stake (F).
2.
Attach the bottom tier (C) to the
plastic~ens
(B).
o-
3.
Attach the plastic lens (B) to the fixture body (D).
Then attach the top tier cover (A) to the plastic lens
(B).
~
•
~
-I
\
0 '
~
Lowes.com/portfolio
4

ASSEMBLY INSTRUCTIONS
4.
Attach the fixture housing (K)
to
the plastic
pivot stake (L). Then rotate
it
downard.
5.
Unscrew the lens (I) from the fixture housing (K)
by turning counterclockwise. Insert the bulb (AA)
into the lens
(1).
6.
Reattach the lens (I) to the fixture housing
(K).
5
Lowes.com/portfolio

ASSEMBLY
INSTRUCTIONS
7.
Unscrew the top cover from the connector (E)
and keep
it
for later use.
8.
Insert wire from low-voltage transformer
into the connector (E) and retighten
the top cover removed
in
Step 7 until the contact
pins completely pierce the plastic shield of the
wire.
CAUTION: The wire used with the connector (E)
is
less than 8
in.,
wire type
is
SPT-2W
221
oF
18AWG*2C 300V
6
Lowes.com/portfolio

POWER PACK ASSEMBLY INSTRUCTIONS
1.
Select location near
an
outdoor GFCI outlet with a
cover plate marked WET LOCATION. Drill hole
using a 5/16
in.
drill bit (not included). Install an
anchor (BB) and Phillips screw (CC) leaving
enough space for the power pack (H).
Hardware Used
Anchor )
Screw D
2.
Attach the #16 low-voltage cable (G) to the
power pack (H).
X 1
X 1
7
--
--
--
--
Lowes.
co
m/portfol
io

OPERATING
INSTRUCTIONS
1.
Set the power pack (H) timer adjustment knob
to
your
desired setting.
Off:
Turns the power pack (H) off
Auto: When the sunlight more than 10 LUX (morning light)
contacts the photosensor, the power pack (H) will go into
standby mode. When sunlight
is
less than 10 LUX (evening
light) the photosensor will activate the power pack (H).
8H:
When sunlight
is
less than 10 LUX (evening light) the
photosensor will activate the power pack (H) for eight hours.
6H: When sunlight
is
less than 10 LUX (evening light) the
photosensor will activate the power pack (H) for six hours.
4H: When sunlight
is
less than 10 LUX (evening light) the
photosensor will activate the power pack (H) for four hours.
2.
Place the power pack (H)
in
an
area that
is
free from
plants or other obstructions that will prevent sunlight
from coming into contact with
it.
The photosensor should
not be located where street lights, exterior lights or other
light sources may shine directly upon
it.
Note: The
power pack (H) and photosensor do not operate when
the switch
is
in
the off positoion.
8
Lowes.com/portfolio

3.
If a short circuit occurs this may activate the
internal circuit
on
the power pack (H). Press the
circuit breaker to reset the power pack (H).
CARE AND MAINTENANCE
Circuit
breaker
• Before attempting to clean the fixture, disconnect the power to the fixture by turning the
breaker off and removing the fuse from the fuse box.
•
To
clean the fixture, use a dry or slightly dampened clean cloth.
• DO NOT use any cleaners with chemicals, solvents or harsh abrasives as damage to the fixture
may occur.
• Bulb replacement: (12) 4-watt, 12-volt wedge-base bulbs required (sold separately).
• DO NOT touch new bulb with bare hands as oil from skin may damage the lamp and cause short
bulb life.
TROUBLESHOOTING
PROBLEM POSSIBLE CAUSE CORRECTIVE ACTION
1.
The transformer
is
not connected
The light does not into power receptacle.
turn
on
at night.
2.
The bulb
is
broken.
3.
The contact pins of connector do
not pierce well.
9
1.
Connect the transformer into
power receptacle.
2.
Replace with new bulb.
3.
Make sure the contact pins pierce
wire well and touch the electric wire.
Lowes.
co
m/portfol
io

WARRANTY
The manufacturer warrants this lighting fixture against defects
in
materials and workmanship for a
period of one year from the date of purchase. If within this period the product
is
found to be defective
in
material or workmanship, the product must be returned, with a copy of the bill of sale as proof of
purchase, to the original place of purchase. The manufacturer will, at its option, repair, replace or
refund the purchase price to the original purchaser/consumer. This warranty does not cover light
bulbs or the fixture becoming damaged due to misuse, accidental damage, improper handling and/
or installation and specifically excludes liability for direct, incidental or consequential damages. As
some states do not allow exclusions or limitations
on
an implied warranty, the above exclusions and
limitations may not apply. This warranty gives you specific rights and you may also have other rights
that vary from state to state.
10
Printed
in
China
Portfolio
~
is
a registered trademark of
LF,
LLC. All rights reserved.
Lowes.
co
m/portfol
io

Portfolio® est une marque de commerce deposee
de
LF,
LLC.
Tous
droits reserves.
JOIGNEZ VOTRE RECU ICI
Numero de serie
___
_ Date d'achat
ARTICLE
#01
04292
'
CHEMIN D'ACCES ET KIT
SPOTLIGHT
MODELE #00848
~
Des questions, des problemes, des pieces manquantes? Avant de retourner
I'
article au
~
detaillant, appelez notre service a
Ia
clientele au 1 800 643-0067, entre 8 h et 18 h (HNE),
du lundi
au
jeudi, ou entre 8 h et 17 h (HNE)
le
vendredi.
Lowes.com/portfolio
11

CONTENU
DE
L'EMBALLAGE
• e
PIECE
DESCRIPTION
QUANTITE
A Couvercle de
Ia
partie superieure 10
B Lentille en plastique 10
c Partie inferieure 10
D Corps du luminaire 10
E Connecteur 10
F Piquet en plastique aetage 10
H Bloc d'alimentation 1
G Cable abasse tension no 16 1
I Lentille (preassemblee au boltier du luminaire) 2
J Douille (preassemblee au
lentille)
2
K Boltier du luminaire 2
L Piquet en plastique pivotant 2
Lowes.
co
m/portfol
io
12

QUINCAILLERIE INCLUSE (grandeur
n~elle
illustree)
•
~
. •
~
I~
D ?
Ampoule Ancre Vis
Qty.
12
Qty.
1
Qty.
1
ACONSIGNES DE SECURITE
Assurez-vous de lire et de comprendre l'integralite de ce manuel avant de tenter d'assembler,
d'utiliser.
AAVERTISSEMENT
• Convient uniquement aux systemes d'eclairage pour amenagement paysager abasse tension.
• Risque de choc electrique.
•Afin de reduire les risques d'incendie ou de blessure, eteignez ou debranchez le luminaire et
laissez
I'
ampoule refroidir avant de
Ia
remplacer.
• N'installez jama
is
un luminaire amains de 10
pi
d'une piscine, d'un spa ou d'une fontaine.
• L'ampoule devient chaude rapidement! Touchez seulement al'interrupteur ou a
Ia
fiche lorsque
vous allumez le luminaire.
• L'ampoule est CHAUDE quand elle est allumee. Gardez tout materiau inflammable adistance
de !'ampoule.
• Ne touchez pas a
Ia
lentille, au boltier ou au capuchon de
I'
ampoule lorsqu'ils sont chauds.
• N'utilisez pas le luminaire
si
le diffuseur ou
Ia
lentille est manquant ou endommage.
• Ne touchez pas aIa lentille, au boltier ou au capuchon de
I'
ampoule lorsqu'ils sont chauds.
• N'utilisez pas le luminaire
si
le diffuseur ou Ia lentille est manquant ou endommage.
• Ce bloc d'alimentation doit etre utilise
avec
des eclairages
pour
amenagement
paysager abasse
tension UNIQUEMENT.
• Approprie aun usage
avec
des
luminaires ou
des
pompes submersibles.
• N'installez PAS le bloc d'alimentation al'interieur ni dans un espace clos. Ne l'installez PAS
dans
des garages, des vides sanitaires ou sous des terrasses au niveau du sol.
•
UNIQUEMENT
le cordon du bloc d'alimentation
sur
une prise couverte de 120 volts de classe A
avec
disjoncteur differentiel et munie d'un couvercle coiffant portant !'indication«
WET
LOCATION
» (emplacement mouille).
MISE
EN
GARDE
• Debranchez toujours le bloc d'alimentation de
Ia
prise de courant avant de manipuler le systeme
d'eclairage.
• L'appareil est homologue en tant que constituant d'un systeme d'eclairage paysager et UL ou
d'autres organismes de contr61e jugeront de
Ia
convenance acette fin des composants combines.
CALCUL
DE
LA CAPACITE D'ECLAIRAGE
Le bloc d'alimentation de 88 watts possede des circuits. Pour determiner le nombre maximal de
luminaires qui peuvent y etre branches en toute securite, additionnez
Ia
puissance en watts de
chacun des luminaires. La puissance totale de vas luminaires ne doit pas depasser 88 watts.
PREPARATION
Avant de commencer
I'
assemblage du produit, assurez-vous d'avoir toutes les pieces. Comparez les
pieces avec
Ia
liste du contenu de l'emballage et celle de
Ia
quincaillerie ci-dessus. S'il y a des
pieces manquantes ou endommagees, ne tentez pas d'assembler le produit.
Temps d'assemblage approximatif: 90 minutes
Qutils necessaires pour !'assemblage et !'installation: Tournevis, Meche, percer (non inclus).
Lowes.com/portfolio
13

LUMIERE
INSTRUCTIONS
POUR
L'ASSEMBLAGE
1.
lnserez !'ampoule (AA) dans
le
corps du luminaire (D)
et fixez
le
corps du luminaire (D) au piquet en plastique a
etage (F).
2.
Fixez
Ia
partie inferieure (C) a
Ia
lentille en
plastique
(B).
3.
Fixez
Ia
lentille de plastique
(B)
au corps du luminaire
(D). Ensuite, fixez
le
couvercle de
Ia
partie superieure
(A) a
Ia
lentille de plastique
(B).
14
o-
~
•
~
-I
\
0 '
~
Lowes.com/portfolio

LUMIERE INSTRUCTIONS POUR L'ASSEMBLAGE
4.
Fixez
le
boltier du luminaire (K) au piquet en
plastique pivotant (L). Puis faire pivoter vers
le
bas.
5.
Devissez
Ia
lentille (I) du boltier du luminaire (K) en
Ia
tournant dans
le
sens contraire des aiguilles d'une
montre. lnserez !'ampoule (AA) dans
Ia
lentille
(1).
6.
Remettez en place
Ia
lentille (I) sur
le
boltier du
luminaire (K).
15
Lowes.com/portfolio P
RTF
Ll
.

LUMIERE INSTRUCTIONS
POUR
L'ASSEMBLAGE
7.
Devissez
le
couvercle du connecteur (E) et mettez-le
de cote.
8.
lnserez le fil provenant
du
transformateur basse
ension dans
le
connecteur (E) et resserrez
le
couvercle superieur retire a l'etape 7 jusqu'a ce que
les broches de contact transpercent completement
Ia
gaine de protection en plastique
du
fil metallique.
MISE EN GARDE :
Le
fil du connecteur (E)
mes mains de 8 po et est de
type SPT-2W
221
oF
18AWG*2c 300
V.
16
Lowes.com/portfolio

BLOC D'ALIMENTATION INSTRUCTIONS POUR L'ASSEMBLAGE
1.
Choisissez !'emplacement pres d'une prise de
courant exterieure avec disjoncteur differentiel
munie d'un couvercle portant !'indication«
WET
LOCATION » (emplacement mouille). Percez un
trou al'aide d'un foret de 5/16 po (non inclus).
lnstallez
Ia
cheville d'ancrage (BB) et
Ia
vis Phillips
(CC) en laissant suffisamment d'espace pour y
inserer le bloc d'alimentation (H).
Quincaillerie utilisee
Chevilles X 1
Vis D ? X 1
2.
Fixez le cable abasse tension no 16 (G) au bloc
d'alimentation (H).
17
--
--
--
--
Lowes.
co
m/portfol
io

MODE
D'EMPLOI
1.
Ajustez
le
bouton de reglage de
Ia
minuterie du bloc
d'alimentation (H) comme vous
le
souhaitez.
Off:
Eteint
le
bloc d'alimentation (H).
Auto : Lorsque
Ia
lumiere
du
soleil qui touche
le
capteur
optique est superieure a 10 lux (le matin),
le
bloc
d'alimentation (H) se met
en
mode veille. Lorsque
Ia
lumiere
du soleiI qui touche
le
capteur optique est inferieure a 10 lux
(le soir), le bloc d'alimentation (H) se met en marche.
8
h:
Si
Ia
lumiere du soleil qui touche
le
capteur optique
est inferieure a 10 lux (le soir),
le
bloc d'alimentation (H) se
mettra
en
marche et fonctionnera pendant huit heures.
6
h:
Si
Ia
lumiere du soleil qui touche
le
capteur optique
est inferieure a 10 lux (le soir),
le
bloc d'alimentation (H) se
mettra
en
marche et fonctionnera pendant six heures.
4
h:
Si
Ia
lumiere du soleil qui touche
le
capteur optique
est inferieure a 10 lux (le soir),
le
bloc d'alimentation (H) se
mettra
en
marche et fonctionnera pendant quatre heures.
2.
Placez
le
bloc d'alimentation (H) dans
un
endroit
decouvert qui
ne
comporte pas de plantes
ou
d'objets
qui pourraient empecher
Ia
lumiere du soleil de toucher
le
bloc d'alimentation.
Le
capteur optique doit etre place
de maniere
ace
qu'aucune lumiere artificielle provenant
d'un reverbere
ou
de toute autre source lumineuse ne
brille directement sur
lui.
Le
bloc d'alimentation (H) et
le
capteur optique ne fonctionnent pas
si
Ia
minuterie est
sur
Ia
position d'arret.
18
Lowes.com/portfolio

3.
Un
court-circuit peut activer
le
circuit interne sur
le
bloc d'alimentation (H). Appuyez sur
le
disjoncteur pour reinitialiser
le
bloc d'alimentation (H).
ENTRETIEN
·Antes
de intentar limpiar
Ia
lam
para, desconecte
Ia
alimentaci6n de
Ia
lam
para
apagando
el
interrupter de circuito o retirando
el
fusible de
Ia
caja de fusibles.
·Para
limpiar
Ia
lampara, use
un
pano limpio seco o levemente humedo.
Disjoncteur
• NO utilice limpiadores con qufmicos, solventes
ni
abrasives fuertes ya que pueden danar
Ia
lam
para.
• Changement des ampoules:
12
ampoules aculot poussoir de 4 watts et de
12
V sont necessaires
(vendues separement).
• Ne touchez
PAS
Ia
nouvelle ampoule avec les mains nues,
carle
gras de
Ia
peau pourrait
endommager !'ampoule et reduire sa duree de vie.
DEPANNAGE
PROBLEME CAUSE POSSIBLE MESURE CORRECTIVE
Le
luminaire ne
s'allume pas
Ia
nuit.
1.
Le
transformateur n'est pas branche
1.
Branchez
le
transformateur sur
sur une prise electrique. une prise electrique.
2.
L'ampoule est brisee.
2.
Remplacez !'ampoule.
3.
Les broches de contact du
connecteur ne transpercent pas.
19
3.
Assurez-vous que les broches
de contact ant bien transperce
le
filet
sont en contact avec
le
fil electrique.
Lowes.com/portfol
io

GARANTIE LIMITEE
DE
UN
Le
fabricant garantit taus ses luminaires contre les defauts de materiaux et de fabrication pour une
periode de
un
an
acompter de
Ia
date d'achat.
Si
ce produit presente des defauts de materiaux
ou
de fabrication durant cette periode, retournez-le au detaillant d'origine accompagne d'une copie
de votre regu
com
me preuve d'achat.
Le
fabricant choisira de reparer
ou
de remplacer
le
produit,
ou
de rembourser
I'
equivalent du prix d'achat. Cette garantie ne s'applique pas aux luminaires
endommages en raison d'un usage inapproprie, de dommages accidentels
ou
d'une manipulation
ou
installation inadequate, et elle exclut expressement toute responsabilite pour des dammages directs,
accessoires
ou
consecutifs. Certains Etats
ou
certaines provinces ne permettent pas !'exclusion
ou
Ia
limitation d'une garantie implicite, de sorte que les limitations et exclusions mentionnees ci-dessus
peuvent ne pas s'appliquer avous. Cette garantie vous confere des droits precis.
II
est possible que
vous disposiez egalement d'autres droits, qui varient d'un Etat au d'une province a
I'
autre.
20
lmprime en Chine
Portfolio®
est une marque de
commerce deposee
de
LF,
LLC. Tous droits reserves.
Lowes.com/portfolio
This manual suits for next models
1
Table of contents
Languages:
Other Portfolio Spotlight manuals