POSBank A8 Prime User manual

www.POSBANK.com
목차
1. Manual Information....................................................................................................................................................................3
2. Product Specification .................................................................................................................................................................3
3. Settings via Web Serveer .........................................................................................................................................................4
3-1 Static IP Setup...........................................................................................................................................................................4
3-2. DHCP (Dynamic IP) Setup...................................................................................................................................................8
4. Test through Windows Driver’s “Print Test Page” ........................................................................................................8
5. Ping Test..........................................................................................................................................................................................9
6. Check Printer Settings ............................................................................................................................................................ 10

www.POSBANK.com
1. Manual Information
This manual describes how to use the Ethernet interface.
POSBANK is continiuously improviing the function and quality of products.
As such, the specifications of the product and the contents of the manual are subject to change without prior
notice.
2. Product Specification
-TCP, UDP, ICMP, IPv4, ARP, IGMP
-10 Base-T / 100 Base-TX Ethernet PHY Embedded
-Support Auto-Negotiation (Full & Half Duplex, 10 & 100 Based)
-Un-attackable hardware network engine for preventing network attacks such as flooding, spoofing injection

www.POSBANK.com
3. Settings via Web Server
3-1 Static IP setup
1) Factory default value for the printer is “IP=192.168.10.10”.
In the Network Setting of the PC or POS equipment, specify IP=192.168.10.xxx and connect the cable directly.
2) Open the Internet Browser.
3) Enter the printer’s IP in the Internet Browser address field and click “Go”.
[Note]
If you do not know the IP address, check the currently set IP through the self-test function of the
printer.
Contact your network administrator for IP and related information.

www.POSBANK.com
4) When the window screen is displayed, specify new network setting value.
Depending on the IP change the network connection with PC or POS equipment will disconnect. Close the
Internet Browser.
[Note]
If you do not know Subnet Mask, input as below.
If first digits of the IP address is:
①1~126.xxx.xxx.xxx then use Subnet Mask: 255.0.0.0
②128.191.xxx.xxx.xxx then use Subnet Mask: 255.255.0.0
③192~253.xxx.xxx.xxx: then use Subnet Mask: 255.255.255.0
For example, if the IP address is 192.168.10.10 then use 255.255.255.0다
If you do not know the Gateway IP, input as below.
①If the network is connected to the internet (connected to a router or a server computer), refer to
the network information of the computers on the same network.
②If the network is not connected to the internet (not connected to a router or a server computer),
input 0.0.0.0.

www.POSBANK.com
[Note]
Inactivity time is when the Host (PC) connects to the printer’s TCP port and forces the printer
to terminate the connection if there is no data transmission during the specified inactivity
time. We recommend using this feature if one printer is used for multiple hosts.
(If you do not disconnect from one Host, other hosts may have limited printer usage)
Default value is 0, value can be changed to 0 ~ 32767(0x7fff). (Up to 9 hours 6 minutes 7
seconds)
If Inactivity time is specified, the Ethernet connect will be disconnected after the set time.
If set to “0”, forced disconnection function will not work.
7) When finished, press “Apply”.

www.POSBANK.com
3-2. DHCP (Dynamic IP) Setup
1) To set Static IP for printer using Internet Browser, follow steps 1 to 3 in section “3-1 Static IP Setup”
2) Select “DHCP mode”and press “Apply” button.
3) To check the IP address assigned through DHCP Server, turn off the printer and turn on the power while
holding down the FEED button.
4) Changes to the “DHCP mode”can be done through “Setting Mode”
Turning off the printer and turning on the power while pressing the FEED button will go to Self_Test
printing, the press the FEED button again for 3 seconds to enter “Setting Mode”. Press the FEED button
16 times to reach “16. DHCP Mode” and DHCP function can be turned on or off.
[Note]
When changing DHCP mode from Enable to Disable, the network related information will be changed to
the factory default value. (IP=192.168.10.10, Subnet Mask=255.255.255.0, Gateway=192.168.10.1, Local
Port=9100, Inactivity Time=0)
4. Test through Windows Driver’s “Print Test Page”
Refer to the User’s Manual of the Windows driver

www.POSBANK.com
6. Check Printer Settings
- End -
( Model : A8 PRIME )
F/W P1.09-CAP06[2019/04/24]
******************************************
[ Print Speed ] - - - - - -> Lv1 [250mm/s]
[ Print Density ] - - - - -> Lv1 [LIGHT ]
[ Characters ] - - - - - -> 42 Char/Line
[ Temperature ] - - - - - -> 28.4
[ External FONT ] - - - -> Unicode
[ Code Page ] - - - - - -> cp949
[ Error Sound ] - - - - -> No Sound
[ Auto Cut ] - - - - - - -> Install(Feed)
[ Auto Cut Mode] - - - - -> Programmable
[ Interface 1 ] - - - - - -> Serial
[ Interface 2 ] - - - - - -> Ethernet
[ Baudrate ] - - - - - - -> 9600
[ Parity-bit ] - - - - - -> None
[ Handshaking ] - - - - -> DTR/DSR
[ USB Mode ] - - - - - -> Actual USB
[ Paper Width ] - - - - -> 80mm
[ Paper Type ] - - - - - -> TF50KS-E2D
[ Black Mark Mode ] - - -> Disable
[ Auto Load Mode ] - - - -> Disable
[ Sensing Level ] - - - -> Level 7
[ Mark Range ] - - - - - -> 169mm
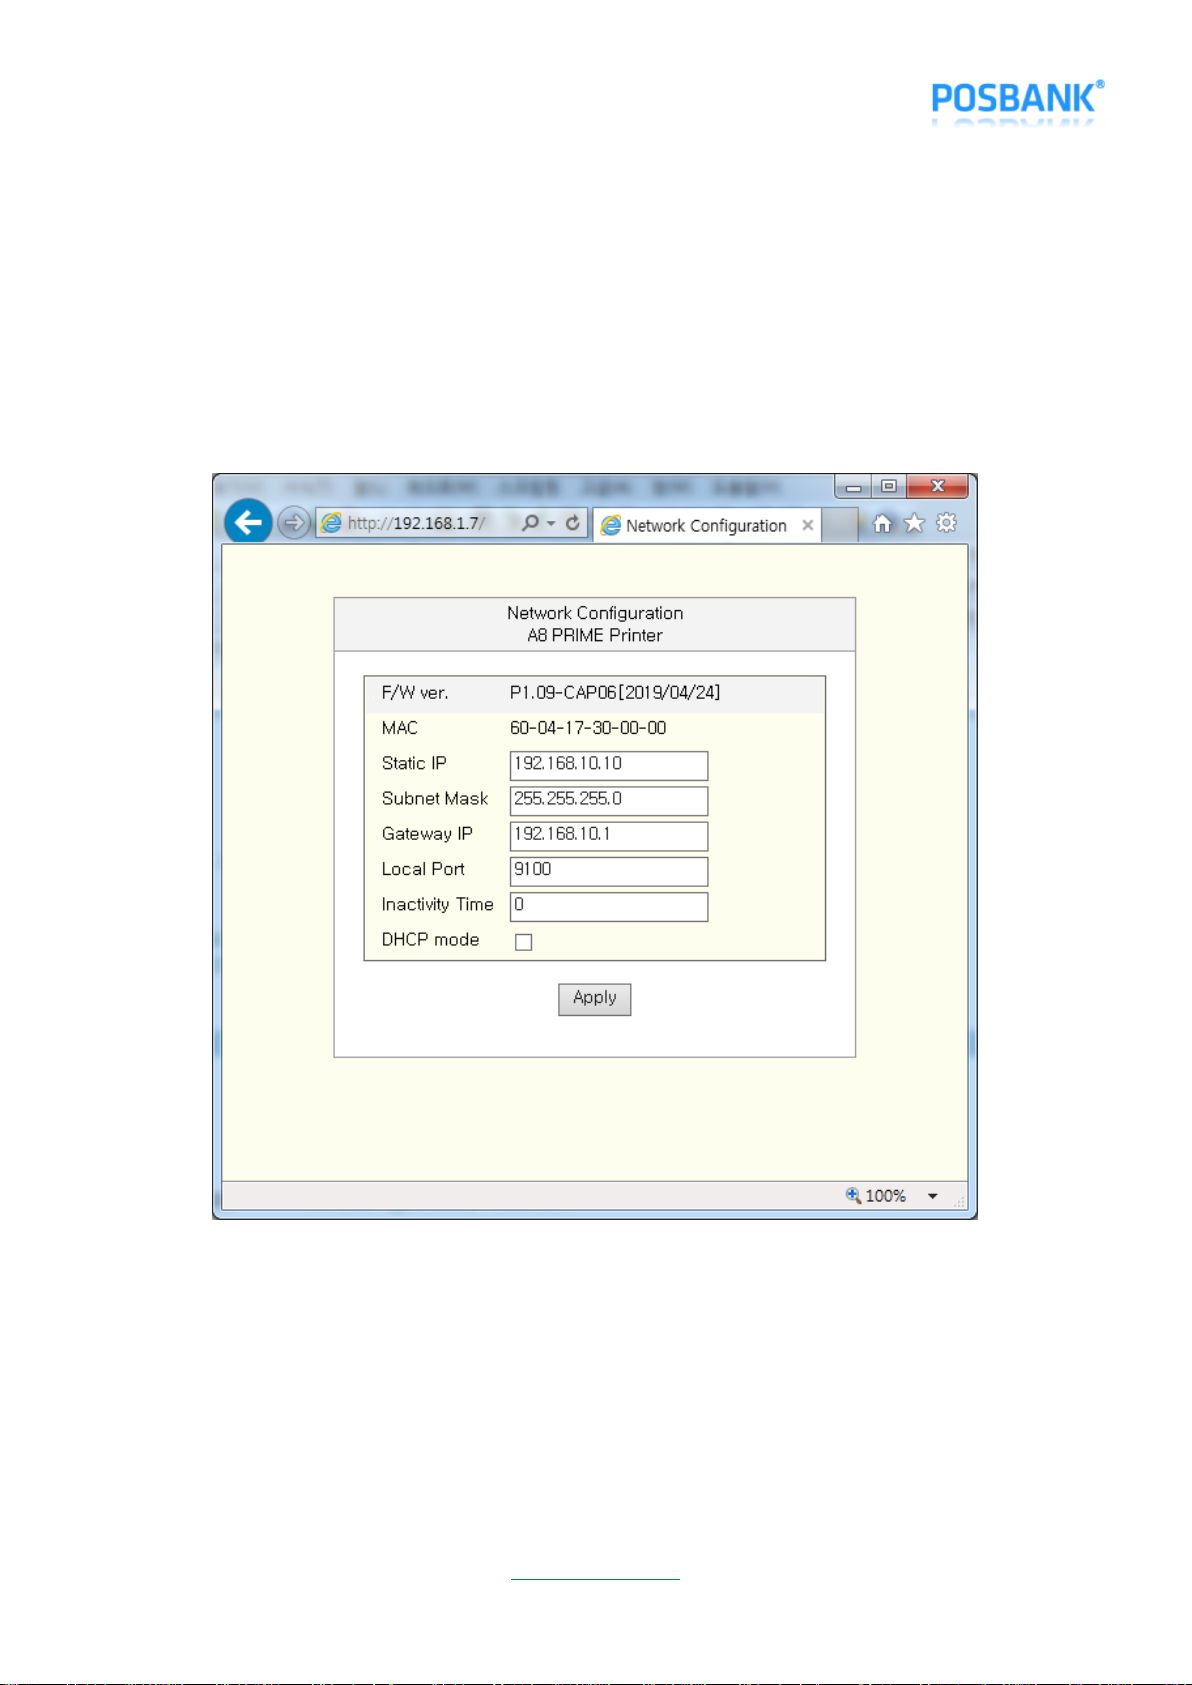
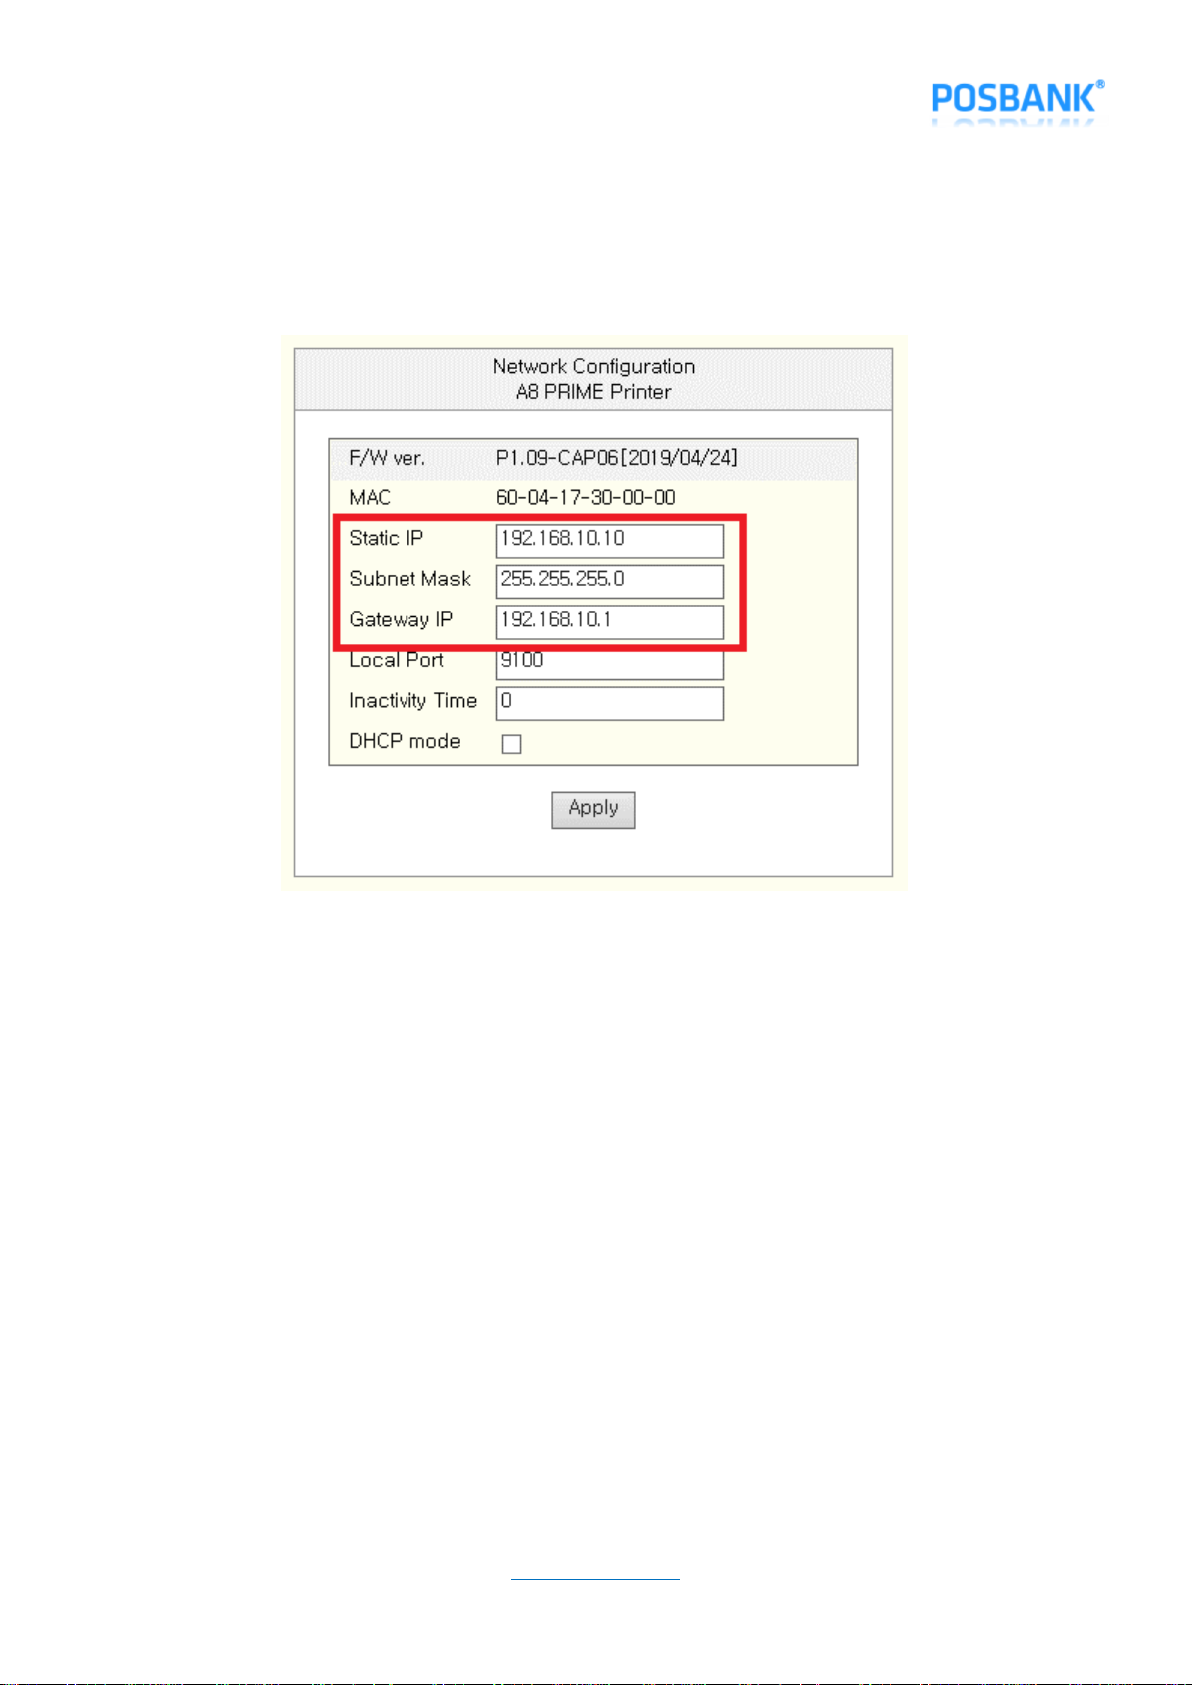
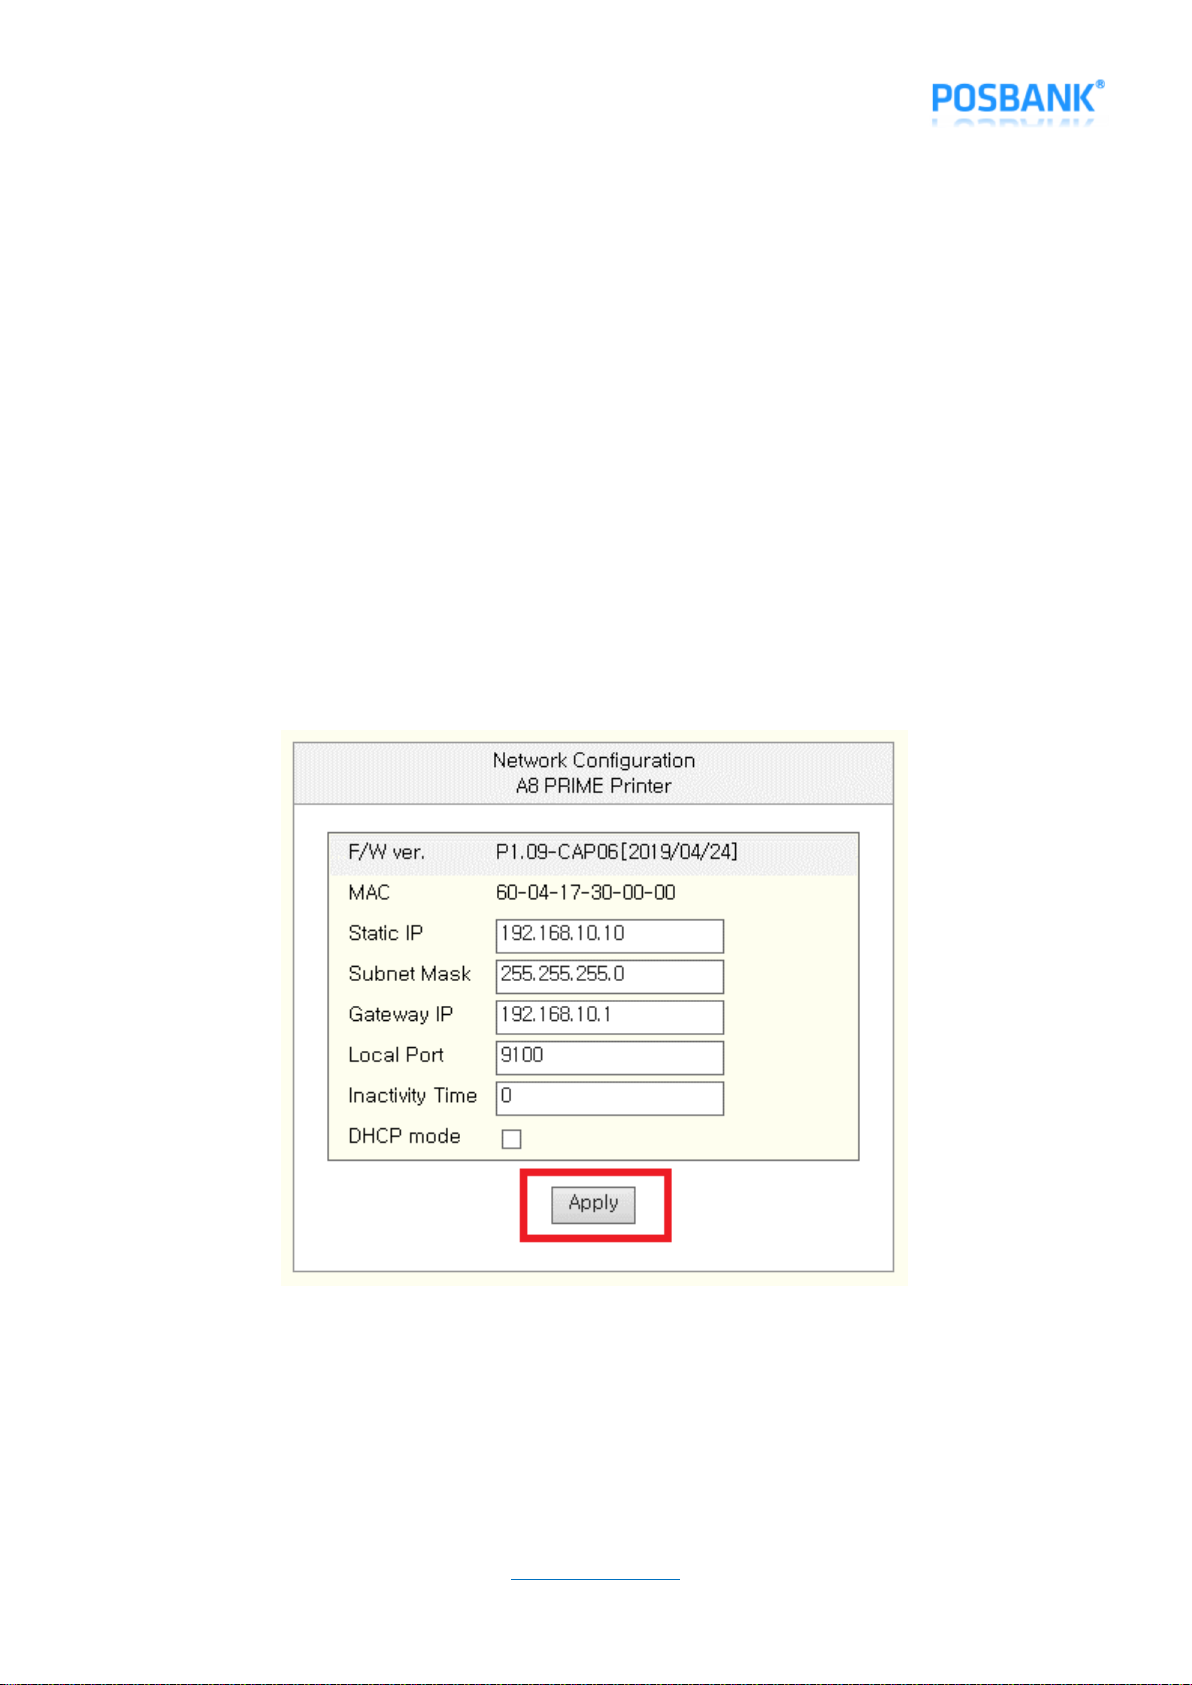
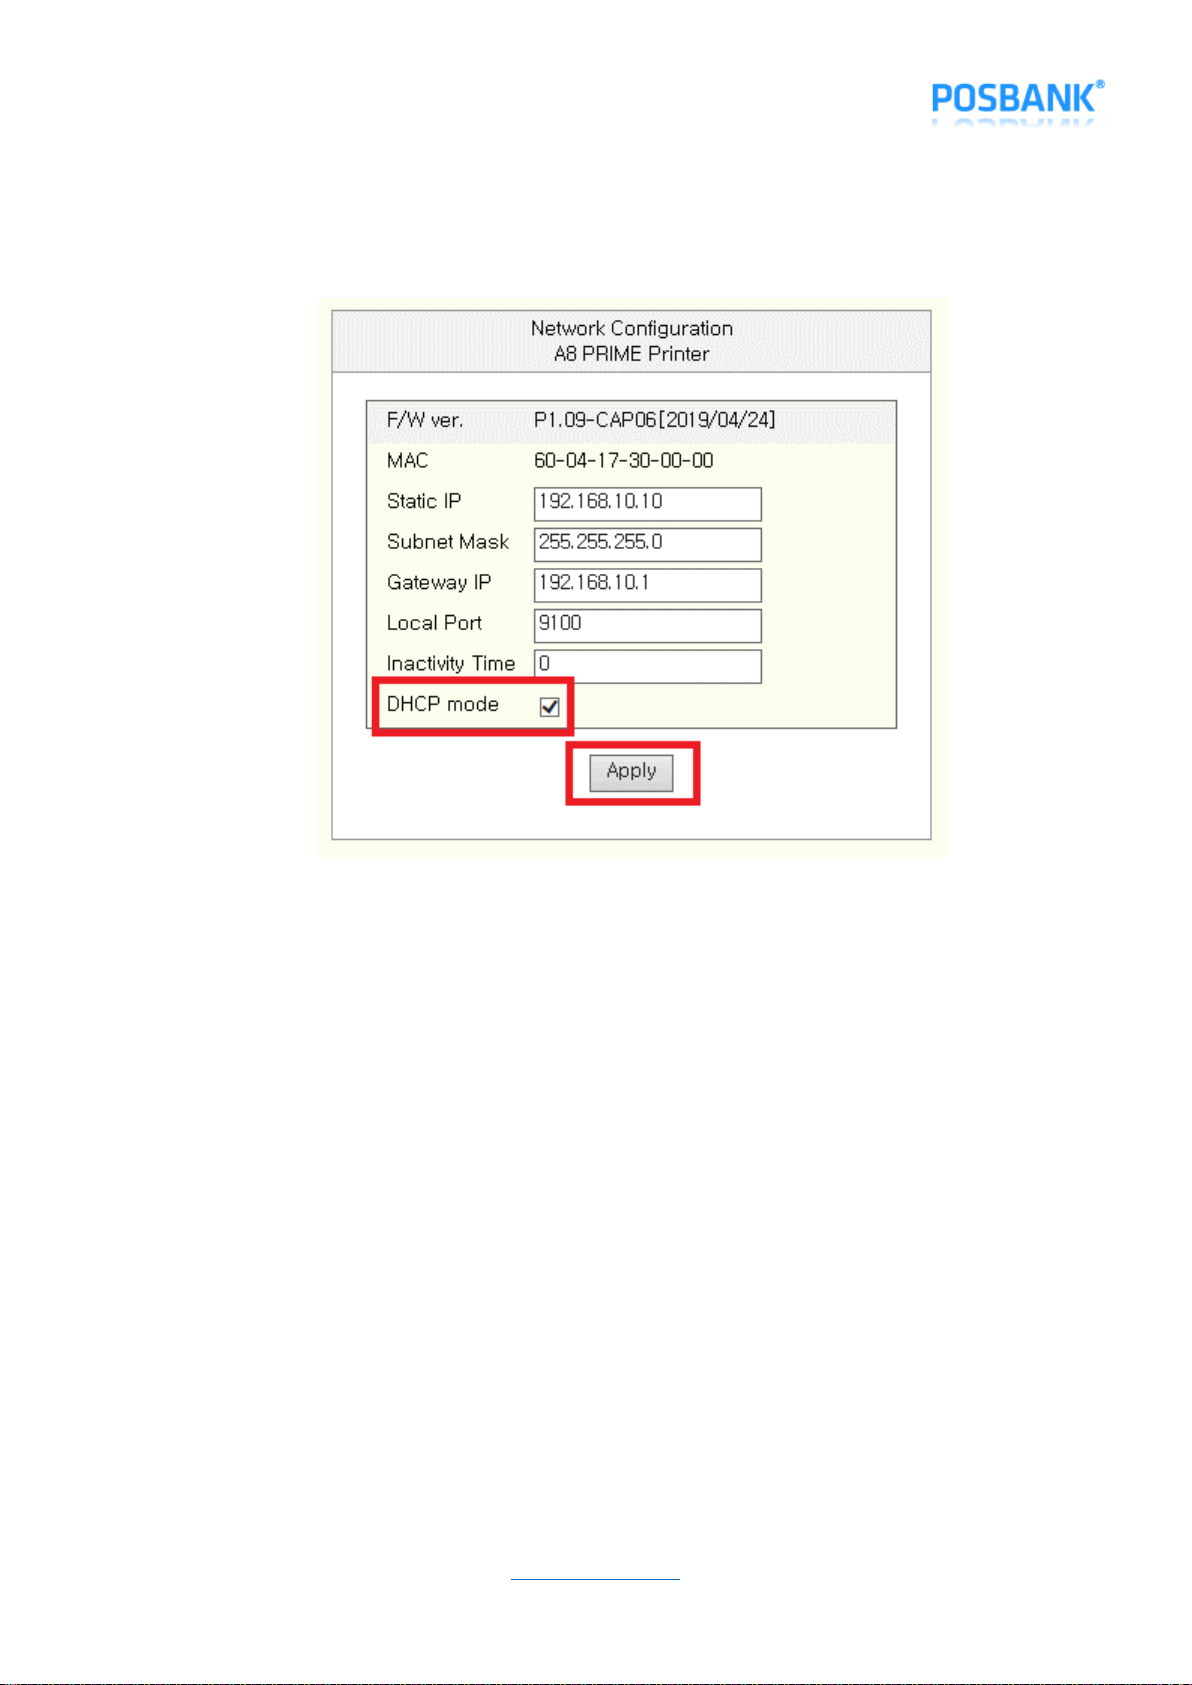
--------- Ethernet Configuration ---------
[ DHCP mode ] Disable (Static IP)
[ Static IP ] 192.168.10.10
[ Gateway IP ] 192.168.10.1
[ Subnet Mask ] 255.255.255.0
[ Local Port ] 9100
[ Inact. Time ] 0
[ MAC Address ] 60-04-17-30-00-00
******************************************
If you want to continue
Please press the FEED button
Other manuals for A8 Prime
1
Table of contents
Other POSBank Printer manuals